Migrating From Dagger to Hilt
Learn about Hilt and its API. Discover how Hilt facilitates working with Dagger by migrating the code of an existing app from Dagger to Hilt. By Massimo Carli.
Sign up/Sign in
With a free Kodeco account you can download source code, track your progress, bookmark, personalise your learner profile and more!
Create accountAlready a member of Kodeco? Sign in
Sign up/Sign in
With a free Kodeco account you can download source code, track your progress, bookmark, personalise your learner profile and more!
Create accountAlready a member of Kodeco? Sign in
Sign up/Sign in
With a free Kodeco account you can download source code, track your progress, bookmark, personalise your learner profile and more!
Create accountAlready a member of Kodeco? Sign in
Contents
Migrating From Dagger to Hilt
20 mins
- Getting Started
- Understanding Hilt Design Principles
- Using Predefined Scopes and Components
- Adding Hilt Dependencies
- Fixing ApplicationComponent
- Understanding Hilt’s Code Generation
- Removing AppComponent
- Refactoring @FeatureScope
- Understanding Entry Points
- Using @AndroidEntryPoint With Activities
- Using @AndroidEntryPoint With Fragments
- What About @Scopes?
- IDE Support for Hilt
- Where to Go From Here?
Using @AndroidEntryPoint With Fragments
Hilt supports @AndroidEntryPoint for Fragments as well. Open ui/list/NewsListFragment.kt and look at its relevant code:
class NewsListFragment : Fragment(), NewsListView {

  @Inject
  lateinit var newsListPresenter: NewsListPresenter // 1
  // ...
  override fun onAttach(context: Context) {
    (context as FeatureComponentProvider).get().inject(this) // 2
    super.onAttach(context)
    Log.i(TAG, "In NewsListFragment using NewsListPresenter $newsListPresenter")
  }
  // ...
}
In this code, you:
- Use
@Injectto get a reference toNewsListPresenter. - Get the actual injection, invoking
inject()on theFeatureComponentyou get from the containerActivity. In this case, it’sMainActivity.
The second point is what makes NewsListFragment an injection target. That’s the code Hilt writes for you when you use @AndroidEntryPoint. You just need to update NewsListFragment to the following, keeping the rest of the code unchanged:
@AndroidEntryPoint
class NewsListFragment : Fragment(), NewsListView {

  @Inject
  lateinit var newsListPresenter: NewsListPresenter // 1
  // ...
}
In this code, you:
- Annotated
NewsListFragmentwith@AndroidEntryPoint, telling Hilt that this is an entry point and, therefore, a target for injection. - Removed
onAttach(), which used to contain the code for the injection that Hilt generates for you now.
Next, open ui/detail/NewsDetailFragment.kt and apply the same changes, removing onAttach() and adding the @AndroidEntryPoint annotation. You’ll get something like the following:
@AndroidEntryPoint
class NewsDetailFragment : Fragment(), NewsDetailView {

  @Inject
  lateinit var newsDetailPresenter: NewsDetailPresenter
  // ...
}
Cool! You were able to remove quite a bit of code because Hilt now creates the @Component for you. But there’s one last step to do.
What About @Scopes?
So far, you learned that for each predefined @Component, Hilt also provides a predefined @Scope. For the objects you’re injecting into RWNEws, you created the custom @FeatureScope scope, which you can now remove.
To do this, open presenter/impl/NewsListPresenterImpl.kt and update it to replace @FeatureScope with @FragmentScoped:
@FragmentScoped // HERE
class NewsListPresenterImpl @Inject constructor(
    private val newsRepository: NewsRepository
) : BasePresenter<NewsListModel, NewsListView>(),
    NewsListPresenter {
  // ...
}
Do the same in presenter/impl/NewsDetailPresenterImpl.kt. You’ll end up with the following code:
@FragmentScoped // HERE
class NewsDetailPresenterImpl @Inject constructor(
    private val newsRepository: NewsRepository,
    private val newsStats: @JvmSuppressWildcards(true) Set<NewsStats>
) : BasePresenter<NewsModel, NewsDetailView>(),
    NewsDetailPresenter {
  // ...
}
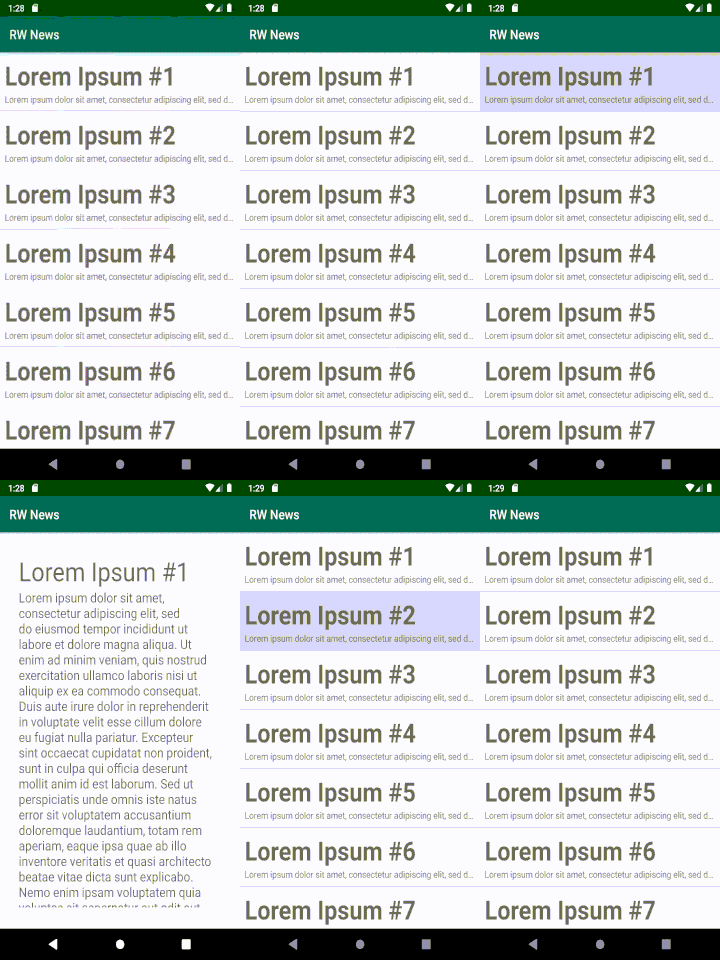
Now, you can finally build and run without a compilation error. You’ll get the same experience as you had with the original app:

Brilliant! Those were quite a few changes, but now, finally, you’ve fully migrated your app from Dagger to Hilt. :]
IDE Support for Hilt
When you work on a big project, you might use classes with many dependencies — which means you might struggle to understand where they come from. Starting with Android Studio 4.1, the IDE supports navigating the code generated with Hilt.
To try this, open ui/list/NewsListFragment.kt. You’ll see a new icon on the left of the dependency, like this:

This is the icon that Android Studio uses to represent a provided dependency. Select the icon and you’ll navigate directly to the point in the code that provides the injected object. In this example, you’ll go to FeatureModule, and more specifically, the cursor will appear next to provideNewsListPresenter.

In the screenshot above, you see the second type of icon that allows you to navigate to the point in the code where the correspondent definition is injected. Select the icon next to line 18 in the example and you’ll go back to NewsListFragment.
Now, select the icon beside the name of the module — the one marked with a circle — and Android Studio will display all the locations where the module is used:

You’ve now covered the fundamentals of Hilt and its APIs! :]
Where to Go From Here?
Download the final version of this project by using the Download Materials button at the top or bottom of this tutorial.
Great job completing the tutorial! You learned what Hilt is and how you can migrate your app to it from Dagger. You learned what the standard Hilt components and scopes are and how they simplify the code in your app.
What you saw here is just the beginning — Hilt can do much more for you. The next step is to learn how it can simplify testing your app. Stay tuned for coming tutorials on this topic!
To learn more about Hilt, check out the video course Dependency Injection with Hilt: Fundamentals.
If you have any comments or questions, feel free to join the discussion below.