Origami Studio Tutorial For Mobile Prototyping: Getting Started
In this Origami Studio tutorial, you will learn how to create amazing mobile prototypes with Origami Studio without writing code. By Tom Elliott.
This Origami Studio tutorial was written with version 84231315 and macOS High Sierra 10.13.2.
Introduction
If you want your project to stand out in the crowded App Store, a good idea isn’t good enough. The best apps have beautiful interactions in the user interface, clever navigations or subtle animations to lend polish. For most of us, getting the right level of pizazz into a project doesn’t come easily. What you need, then, is a tool to help you to build prototypes quickly and efficiently to test your ideas. Enter Origami Studio!
Getting Started
Origami Studio is a macOS desktop application written and used by Facebook. There is also a mobile app counterpart, which allows you to view your prototypes on a real device. It’s designed to help you to build and quickly test user interface interactions and flows. It’s not designed to be a drag and drop development environment, so don’t think you can build your next MVP with Origami. Rather, you might use Origami to put several prototypes of your next design idea in front of potential users to gather their opinions before spending the time to build it properly in code.
First, you’ll have to download Origami Studio. Head over to https://origami.design and hit the big blue button! While that’s downloading, you can download the rest of the materials you’ll need using the Download Materials at the top or bottom of this tutorial. Once both downloads are complete, install Origami Studio and double-click Getting Started (Start).origami to open the starter project.
Introduction to the Interface
Before you start building a prototype, take a look around the user interface of Origami Studio itself. Your window should look like the image of the starter project below. On the top left of the window, you can find a green area which looks like a phone screen with the standard macOS traffic light buttons on the left of its title bar, and three buttons on the right. This is the Viewer. It shows your prototype and allows you to interact with it. Move your mouse over the viewer and notice how the cursor changes to represent a finger tap.
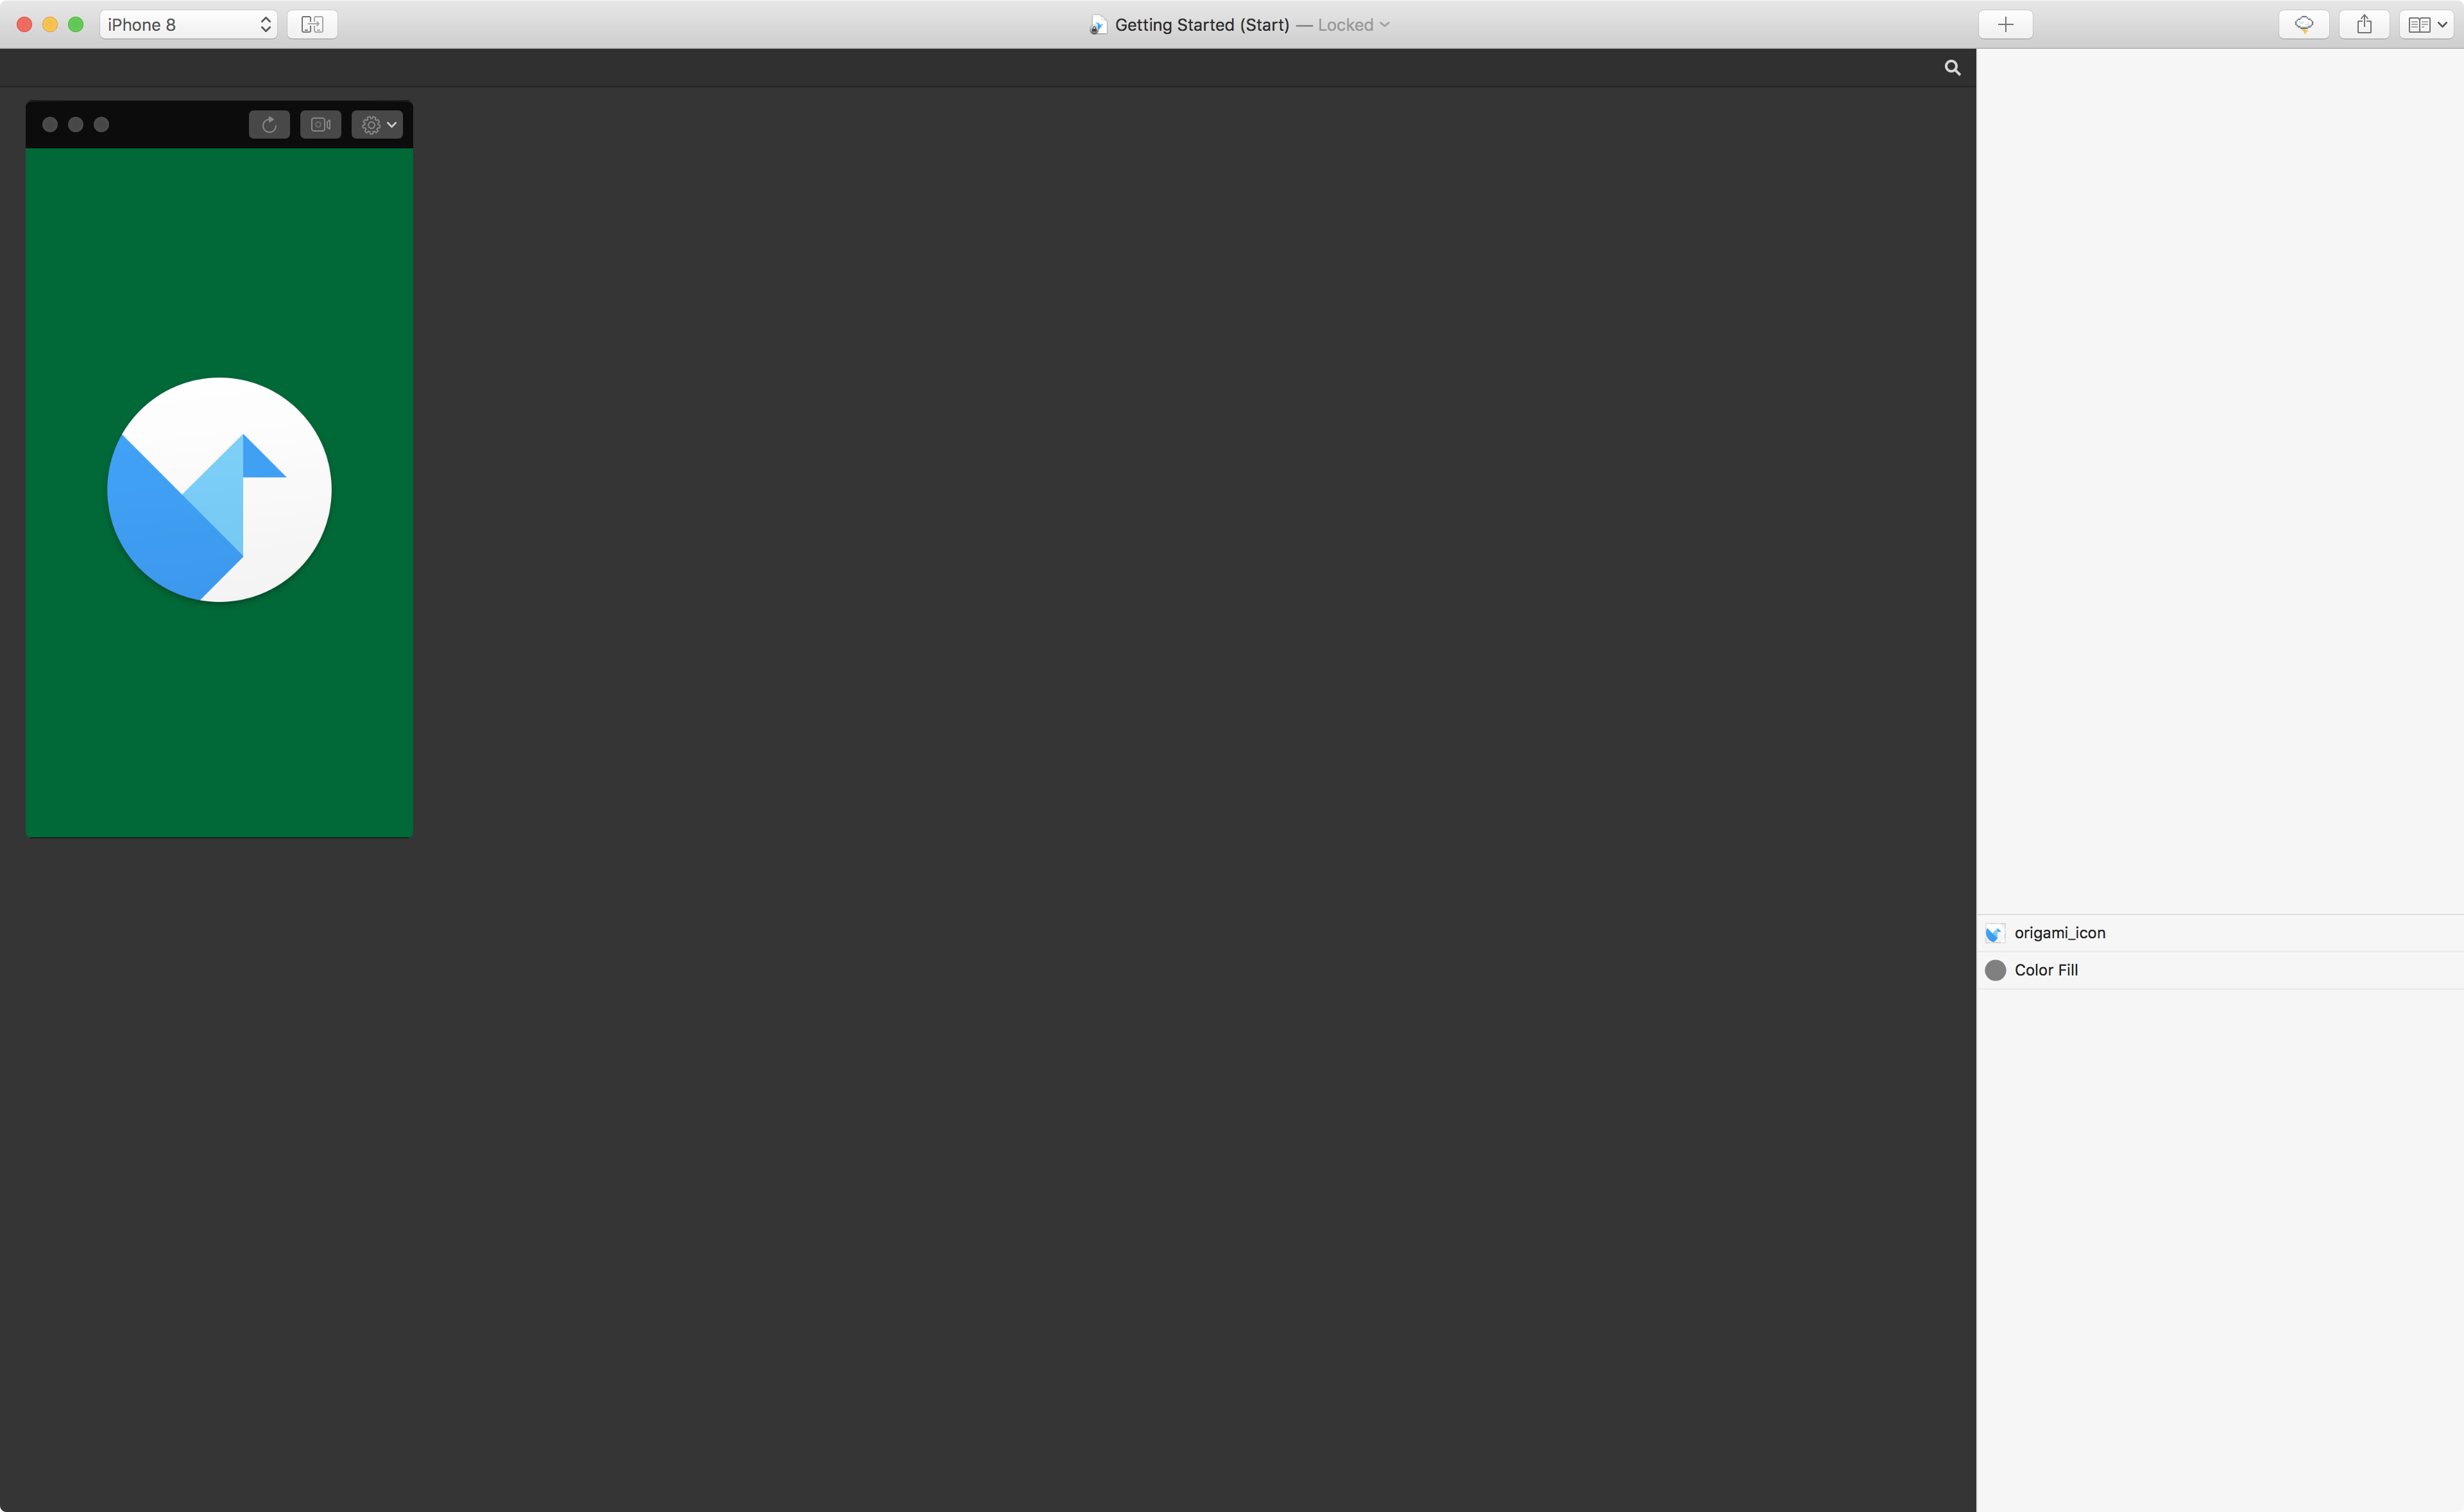
On the right of the main window, there is the Layer Inspector. If you’ve used tools like Photoshop or Sketch before, you should be comfortable with the concept of Layers. In case you haven’t, a Layer represents an area on the screen. Layers have properties — such as size, background color and opacity — and can be grouped together to form more complex components. If you’re familiar with UIKit, you can consider a Layers like CALayer or UIView.
The big dark grey area — between the Viewer and Layer Inspector — is the Patch Editor. Patches add functionalities to your prototype (like functions in code) and with this editor you can create new functionalities in your prototype.
Creating a Simple Interaction
Theory is all very well, but there’s nothing like actually creating things. It’s time to start adding some functionalities to our prototype. In this example, you’re simply going to change the background color of the prototype when you tap on the screen.
Select the Color Fill layer in the Layer Inspector. On the right hand side, click the Touch button and select Tap in the dropdown.

A purple Interaction patch appears in the Patch Editor. Patches, like functions, take inputs (on the left hand side of the patch) and convert them to outputs (on the right hand side). This Interaction patch is linked to a layer, and changes its outputs when the layer is tapped. Tap the green background. Notice how the Down checkbox on the right hand side of the Interaction patch is selected while your mouse button is pressed. Similarly, the Tap output flicks on briefly for each tap. If you’re using a trackpad that measures force, the Force output similarly changes depending on how hard you press.

Next, create a new Color Fill layer by clicking the New Layer button (the plus icon) at the top of the Layer Inspector. Select Color Fill in the pop-up dialog. The Viewer will now have turned grey, and the image will have disappeared. This is because the new Color Fill layer is on top of the green Color Fill layer and the icon image. In the Layer Inspector, move the new layer below the origami_icon layer. Select the new Color Fill layer and set its Opacity property to 0. The Viewer should look as before. Next, double-click in the Patch Editor. A pop-up dialog appears. Type Switch and hit enter. A new, grey, patch will appear.
Wiring up Your Prototype
Bring your attention back to the Interaction patch. Next to each of its inputs and outputs there is a little dot, called Port. If you click and hold on an output port and move your mouse, you’ll notice a blue line connecting the output to your cursor, very similar to connecting outlets and actions in Xcode’s Interface Builder.
Click the port for the Tap output and drag it over to the Flip input port on the Switch patch. Release and an orange line should connect the tap output from the Interaction patch to the flip output on the Switch patch. Click the green background in the Viewer a few times and notice the state stored in the Switch patch by the value of its On/Off output.

Click the On/Off port in the Switch patch and drag it over to the top Color Fill layer in the Layer Inspector. Hold briefly over the name of the layer and it will expand the list of properties. Highlight the Opacity property of the layer and release the mouse. You have just linked the tap gesture on the green layer with the opacity property of the grey layer, represented by the Color Fill patch that has appeared in the Patch Editor.

Tap the green background and watch it turning grey. Tap again to turn it back. Congratulations, your first prototype! You can find the finished prototype in the materials you downloaded earlier.