SpriteKit and Inverse Kinematics with Swift
In this tutorial, learn how to use Sprite Kit’s inverse kinematics to make a ninja punch and kick dynamically! By Jorge Jordán.
Defining Joint Constraints
While tapping at various locations, you may have noticed that inverse kinematics attempts to solve for the set of joint angles that will get your end-effector as near to the target position as possible.
In some cases, however, you may get strange-looking artifacts like the following:
That looks painful!
That looks painful!
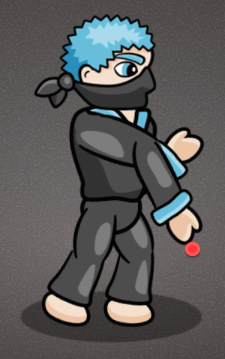
In the case above, while the joint angles indeed enable the fist to achieve the target position (illustrated by a red dot), Sprite Kit has bent the elbow joint beyond its realistic limit. Ouch!
This highlights one of the key characteristics of the inverse kinematics problem: Given a desired end-effector position, there could be more than one set of joint positions that will get the end-effector to the goal position. Imagine trying to reach out to touch a nearby object—I’m sure you can find more than one way to twist or extend your upper or lower arm and yet still touch the object!
Fortunately, you can guide the inverse kinematics engine to favor more realistic joint configurations by defining joint constraints to limit joint angles to a suitable lower and upper range.
You’ll define joint constraints for the lower arms so they don’t over-extend, but you’ll continue to allow the upper arms to rotate through the default range of 0-360 degrees.
Switch to GameScene.sks. Select the arm_lower_front node. Under IK Constraints in the SKNode Inspector on the right, keep the Min Angle‘s value 0 and set the Max Angle to 160, as shown below:

This ensures that the zRotation values of the lower arm node don’t cross the lower limit of 0 degrees (lower arm fully extended) and the upper limit of 160 degrees (lower arm fully retracted, with a gap angle of 20 degrees between the upper and lower arm).
Select the arm_lower_back node and repeat the same steps to enforce similar constraints.
You can also add an IK Constraint programmatically by creating a SKReachConstraint and setting it to the reachConstraints property of the desired node. The instructions above specified can be replaced in code by adding the following lines after the initialization of fistFront:
let rotationConstraintArm = SKReachConstraints(lowerAngleLimit: CGFloat(0), upperAngleLimit: CGFloat(160))
lowerArmFront.reachConstraints = rotationConstraintArm
Note: At the time of updating this tutorial there is a bug on the Scene Editor when editing the IK Constraints property of a node. If you modify either Min Angle or Max Angle none of these changes will be saved. If you experience this issue you can follow the programmatically workaround explained above.
Note: At the time of updating this tutorial there is a bug on the Scene Editor when editing the IK Constraints property of a node. If you modify either Min Angle or Max Angle none of these changes will be saved. If you experience this issue you can follow the programmatically workaround explained above.
Now, build and run the project. Tap on various locations to test the new constraints. No more over-extension!
Creating a Punching Motion
At this point, your ninja can reach out to any arbitrary tap position, but you know ninjas can do better than that. In this section, you’ll equip your ninja with the ability to punch at a location. Oooofff!
Start by adding the following properties to GameScene inside GameScene.swift:
let upperArmAngleDeg: CGFloat = -10
let lowerArmAngleDeg: CGFloat = 130
The upperArmAngleDeg and lowerArmAngleDeg properties hold the default rest pose angle values of the upper arm and lower arm joints, respectively. Recall that these are the same values you defined earlier when you set up a rest pose for the ninja.
Finally, replace punchAt(:) with the following implementation:
func punchAt(_ location: CGPoint) {
  // 1
  let punch = SKAction.reach(to: location, rootNode: upperArmFront, duration: 0.1)

  // 2
  let restore = SKAction.run {
    self.upperArmFront.run(SKAction.rotate(toAngle: self.upperArmAngleDeg.degreesToRadians(), duration: 0.1))
    self.lowerArmFront.run(SKAction.rotate(toAngle: self.lowerArmAngleDeg.degreesToRadians(), duration: 0.1))
  }

  // 3
  fistFront.run(SKAction.sequence([punch, restore]))
}
That’s quite a bit of code, so let’s dissect it line by line:
Within this action, you run rotateToAngle() actions concurrently on both the upper and lower arm nodes to restore them to their rest angles as defined by upperArmAngleDeg and lowerArmAngleDeg, respectively. degreesToRadians is defined in a category on CGFloat to convert values between degrees and radians. You can find the function in CGFloat+Extensions.swift, included in the SKTUtils source folder.
- The
punchaction is the same reaching action you defined before—it animates the joint hierarchy to reach out to a desired position. - The
restoreaction animates the restoration of the joint hierarchy to its rest pose. Unfortunately, inverse kinematics actions don’t have reversed actions, so here, you resort to using the traditional forward kinematics to rotate the joint angles back to their rest angles.Within this action, you run
rotateToAngle()actions concurrently on both the upper and lower arm nodes to restore them to their rest angles as defined byupperArmAngleDegandlowerArmAngleDeg, respectively.degreesToRadiansis defined in a category onCGFloatto convert values between degrees and radians. You can find the function in CGFloat+Extensions.swift, included in the SKTUtils source folder. - Finally, you concatenate the two actions,
punchandrestore, into a sequenced action, which you then run on the fist.
Build and run the project. The ninja will now punch to wherever you tap!
Punching With Both Fists
Now that your ninja can punch, wouldn’t it be cool if he could use both arms? In this section, you’ll give him the ability to alternate between his left and right fists for consecutive punches.
To do so, you’ll first need to set up the back arm the same way you did the front arm.
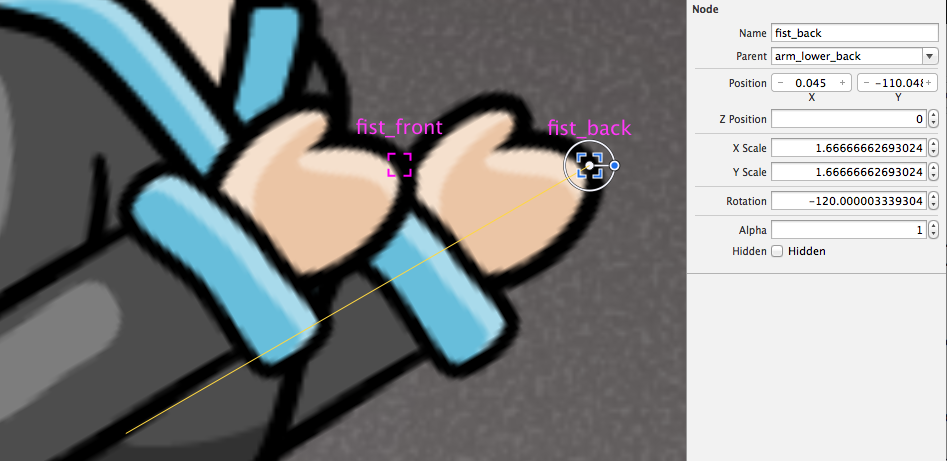
Switch to GameScene.sks and add a fist end-effector as a child to arm_lower_back.
Name the fist fist_back. If you’ve set this up properly, you should see the following:
Next, switch to GameScene.swift and add the following properties to GameScene:
var upperArmBack: SKNode!
var lowerArmBack: SKNode!
var fistBack: SKNode!
Next, add the following code at the end of didMove(to:):
upperArmBack = upperTorso.childNode(withName: "arm_upper_back")
lowerArmBack = upperArmBack.childNode(withName: "arm_low  er_back")
fistBack = lowerArmBack.childNode(withName: "fist_back")
The three properties now hold references to all the back arm nodes.
If you needed to add the reach constraints workaround from earlier, after the above code, add the reachConstraint to the lowerArmBack to avoid injuries:
lowerArmBack.reachConstraints = rotationConstraintArm
You want to alternate which fist punches, so add the following property to GameScene:
var rightPunch = true
This Boolean’s role is to keep track of whether it’s time to punch using the left or the right fist.
Finally, you’re going to do a little refactoring of punchAtLocation() into two smaller functions to neatly handle punching with either set of arm nodes.
Replace punchAt(location:) with the following code:
// 1
func punchAt(_ location: CGPoint, upperArmNode: SKNode, lowerArmNode: SKNode, fistNode: SKNode) {
  let punch = SKAction.reach(to: location, rootNode: upperArmNode, duration: 0.1)
  let restore = SKAction.run {
    upperArmNode.run(SKAction.rotate(toAngle: self.upperArmAngleDeg.degreesToRadians(), duration: 0.1))
    lowerArmNode.run(SKAction.rotate(toAngle: self.lowerArmAngleDeg.degreesToRadians(), duration: 0.1))
  }
  fistNode.run(SKAction.sequence([punch, restore]))
}

func punchAt(_ location: CGPoint) {
  // 2
  if rightPunch {
    punchAt(location, upperArmNode: upperArmFront, lowerArmNode: lowerArmFront, fistNode: fistFront)
  }
  else {
    punchAt(location, upperArmNode: upperArmBack, lowerArmNode: lowerArmBack, fistNode: fistBack)
  }
  // 3
  rightPunch = !rightPunch
}
Let’s go through the essence of what’s happening here:
- This first function is similar to the version you had previously, except that it now lets you specify the arm nodes as arguments. This enables you to use the same function for both the left and right arms.
- In the second function, you simply check if it’s time to use the left or the right arm based on the value of the
rightPunchBoolean, and execute the actions accordingly. - Finally, you toggle the
rightPunchflag such that when the function is called again on the next tap, the Boolean flag is flipped accordingly, allowing you to alternate between the two arms.
Build and run the project. Your ninja will punch with both fists!
