Docker on macOS: Getting Started
In this Docker tutorial, you’ll learn Docker vocabulary and the commands for creating, inspecting and removing containers, networks and data volumes. You’ll learn how to run Docker containers in the background or foreground, and switch between the two; how to publish ports; how to connect a database app and a web app running in separate containers; and how to share directories between containers and your Mac and among containers. By Audrey Tam.
Where’s My Database?
Think back to the CouchDB container you ran on the default bridge network — you added emoji to it. Then you stopped and removed it, and later created another CouchDB container on the emoji-net network. Starting EmojiJournalServer on this network created a new empty journal entries database. Then starting a second EmojiJournalServer on the same network used the existing database.
The CouchDB container stores its databases in /opt/couchdb/data. The CouchDB container is running in the background, but docker exec lets you open an interactive terminal session, so you can take a look. Run this command in your Docker run terminal window:
docker exec -it couchdb bash
This command lets you peek at a container’s file system: docker exec runs its options on the couchdb container that you started in the background with the --detach option. Here, the docker exec options are --interactive and --tty, shortened to -it — these create an interactive terminal session in the CouchDB container. You specify bash as the command to run — bash is a specific Unix shell that lets you run Unix commands in the container. You get a shell prompt that ends with /opt/couchdb# — you’re already in the /opt/couchdb directory. At this prompt, enter this command:
ls -l data
If you run another CouchDB container, it has no access to this CouchDB container’s databases. Removing a CouchDB container also removes its databases. But you usually want to keep the data in your databases, between stopping and starting CouchDB containers. And you might want to share one container’s databases with another container.
As you’d expect, Docker has ways to let you do this!
exit at the bash prompt. Stop and remove all the containers.
Mounting Volumes: Sharing Host & Container Files
You’ll often want to share files or directories between your host machine and containers. Data in databases shouldn’t disappear when you stop and remove a container. It’s also convenient to share databases between different versions of apps, or different containers running the same database app. You might want to supply configuration files to a database app or training data to a machine learning app, when they’re running in containers. You’ll learn how to do these things in this section.
Persisting Databases After the Container Exits
To store the database on your local host system, so it persists and can be accessed by other containers, you’ll create a volume in Docker’s storage directory when you start the CouchDB container.
In the Docker run terminal window, enter this command:
docker run --mount source=couchdbVolume,target=/opt/couchdb/data --network emoji-net -d --name couchdb couchdb
--mount value, don’t put spaces around the = signs or after the comma.
The first time you run this command, it creates couchdbVolume in Docker’s storage directory on your host system, then copies the contents of the container’s /opt/couchdb/data directory into couchdbVolume. The container then mounts and uses couchdbVolume to store its databases.
In your EmojiJournalServer terminal window, start an EmojiJournalServer container on the same network:
docker run --network emoji-net --name emojijournal -it -p 8090:8080 -v $PWD:/root/project -w /root/project emojijournal-run sh -c .build-ubuntu/release/EmojiJournalServer
Refresh or open localhost:8090/client, add emoji, then — in your Docker cleanup terminal window — stop and remove both containers:
docker rm $(docker stop $(docker ps -q))
The volume remains, even though you’ve removed the CouchDB container that created it. To see this, enter this command:
docker volume inspect couchdbVolume
The output looks like this:
[
  {
    "CreatedAt": "2018-10-26T08:00:59Z",
    "Driver": "local",
    "Labels": null,
    "Mountpoint": "/var/lib/docker/volumes/couchdbVolume/_data",
    "Name": "couchdbVolume",
    "Options": null,
    "Scope": "local"
  }
]
Use the Finder ▸ Go ▸ Go to Folder… menu item to look at the mountpoint directory … well, you can try to look at it — it’s not there! Docker’s storage directory actually lives in, and is managed by, the Docker engine. You’re not meant to access it directly on the host file system. You can only access it by mounting it in a Docker container.
Now, to demonstrate that the emoji database persisted after you removed the CouchDB container: Rerun the CouchDB command in your Docker run terminal window, and the EmojiJournalServer command in your EmojiJournalServer terminal window, then refresh localhost:8090/client — this time, you didn’t lose your emoji!
Because couchdbVolume already exists, the CouchDB container just mounted it, exposing the databases already stored there to the EmojiJournalServer container, which found and loaded the journal entries database created by the previous EmojiJournalServer container.
docker network prune
docker network prune
Sharing a Database With Another Docker Container
You created a volume for CouchDB running on the emoji-net network. You’ve stopped and removed that CouchDB container, but the volume remains. You can reuse this volume for a CouchDB container running on the default network, effectively sharing its databases with another container.
To demonstrate this, mount couchdbVolume in a CouchDB container running on the default bridge network, so EmojiJournalServer on the host can access the saved journal entries database.
Start a CouchDB container on the default bridge network, mounting couchdbVolume, and publishing its port:
docker run --mount source=couchdbVolume,target=/opt/couchdb/data -p 5984:5984 -d --name couchdb couchdb
In your EmojiJournalServer terminal window, run EmojiJournalServer on your host system:
.build/debug/EmojiJournalServer
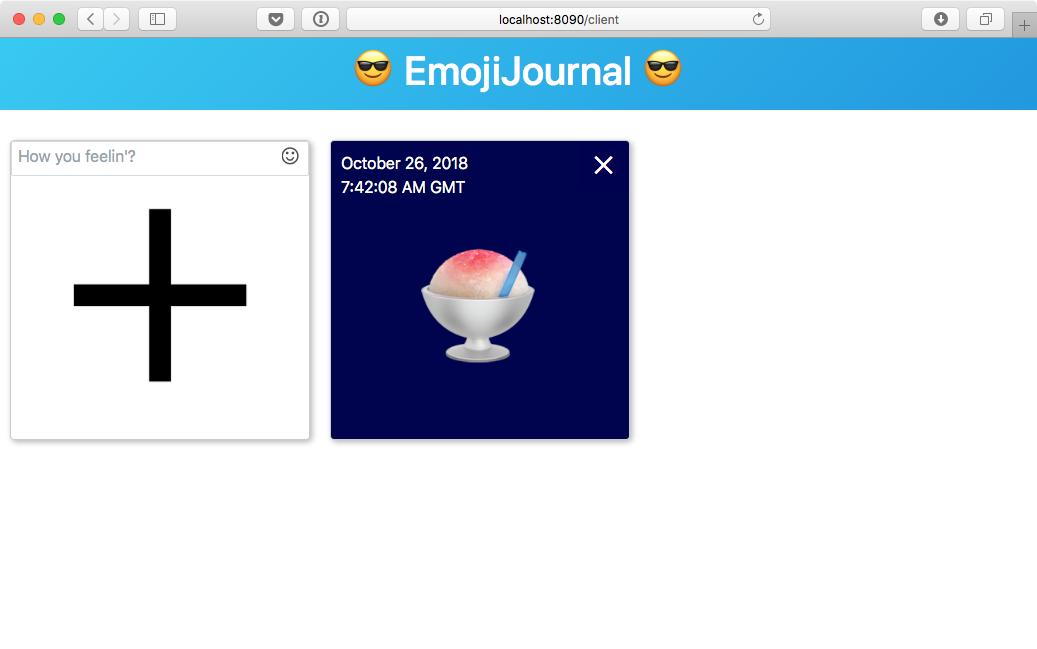
EmojiJournalServer, running on your host system, finds and loads the journal entries database in couchdbVolume, so when you load localhost:8080/client, you see the emoji from the EmojiJournalServer container:

In your EmojiJournalServer terminal window, press Control-C to stop this EmojiJournalServer. Close the browser window.
Stop and remove the CouchDB container, then enter this command to remove all unused volumes:
docker volume prune
Providing Local Files to a Docker Container
The command that runs EmojiJournalServer in a container has a -v $PWD:/root/project option that mounts the EmojiJournalServer directory as /root/project in the container. This section demonstrates that changes to the host files affect the container’s files, and vice versa.
In your EmojiJournalServer terminal window, start an EmojiJournalServer container in the background:
docker run --name emojijournal -itd -p 8090:8080 -v $PWD:/root/project -w /root/project emojijournal-run sh -c .build-ubuntu/release/EmojiJournalServer
Then enter this command:
docker exec -it emojijournal bash
This command creates an interactive terminal session running the bash Unix shell. You get a command line prompt that ends with ~/project#. At this prompt, enter this command to take a look at the container’s project directory:
ls -l
The output lists the same files as the EmojiJournalServer folder in Finder:

Use your favorite text editor to create a new file in this folder — for example, kilroy.txt containing the text “I was here.” At the ~/project# prompt, enter ls -l again, to see your new file in the container. Enter this command at the ~/project# prompt:
rm kilroy.txt
In Finder, the file disappears. That’s how easy it is to connect a local directory to a container — changes in one place affect the other!