IBM Watson Services for Core ML Tutorial
In this tutorial, you’ll set up an IBM Watson account, then train a custom visual recognition Watson service model, and set up an iOS app to use the exported Core ML model. By Audrey Tam.
Creating a Custom Object Classifier
OK, back to the GitHub page: Training the model. You’ll be following these instructions, more or less, and I’ll show you what you should be seeing, help you find everything, and provide a high-level summary of what you’re doing.
Here’s the first high-level summary. The steps to integrate a custom Watson object classifier into IBM’s sample app are:
- Create a new project.
- Upload and add training data to the project.
- Train the model.
- Copy the model’s classifierId and apiKey to
Stringproperties in the sample app. - In the Core ML Vision Custom directory, use Carthage to download and build the Watson Swift SDK.
- Select the Core ML Vision Custom scheme, build, run and test.
1. Creating a New Watson Project
Like most IDEs, you start by creating a project. This one uses the Visual Recognition tool and the watson_vision_combined-dsx service. The “dsx” stands for Data Science Experience, the old name for Watson Studio. Like NS for NextStep. ;]
Click Create Model, and wait a very short time to load the New project page. Enter Custom Core ML for the Name, and click Create.
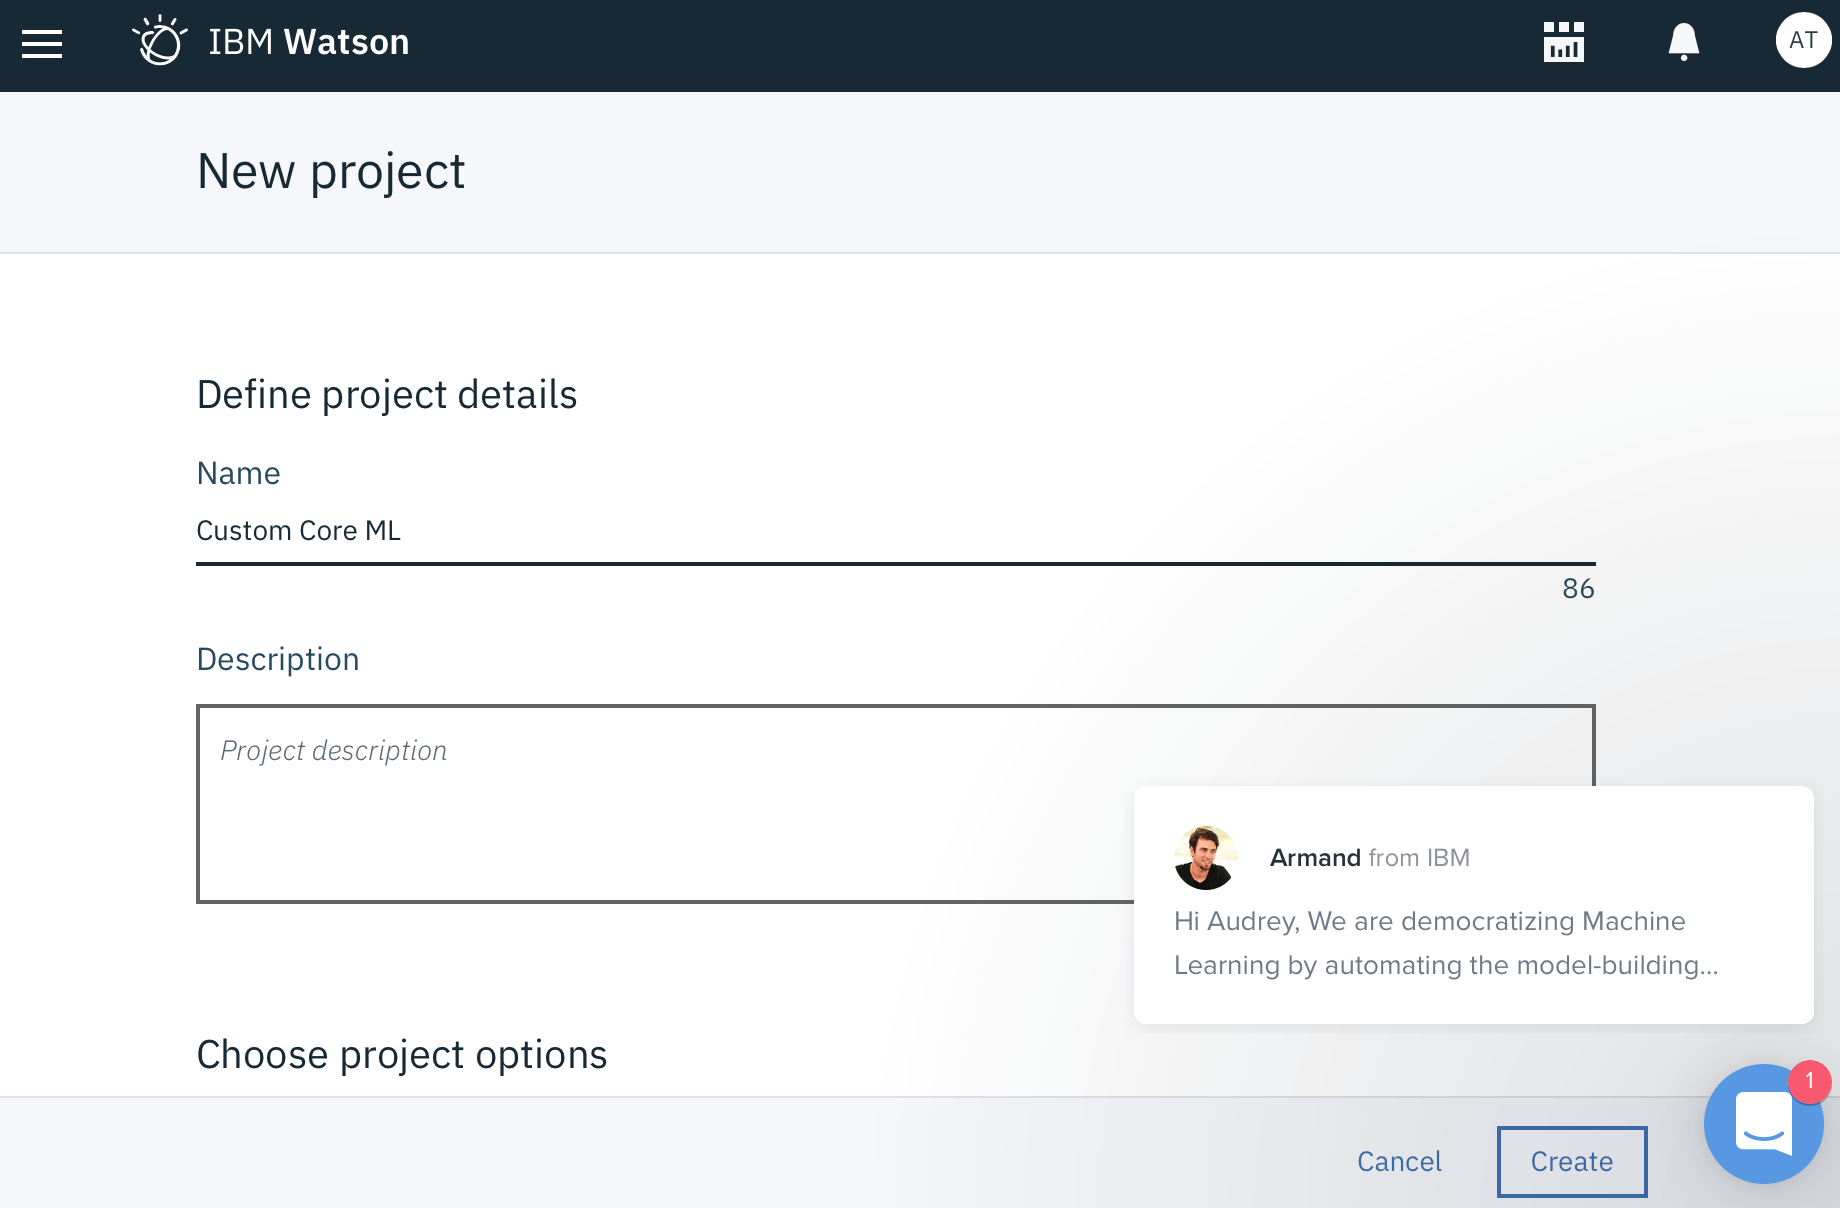
After a while, you’ll see this:

2. Adding Training Data
The Watson visual recognition model is pre-trained to recognize tools and plants. You can upload your own training data to create a model that classifies objects that matter to your app. IBM’s sample project trains a model with photos of cables, to classify new images as HDMI, Thunderbolt, VGA or USB.
Note: To upload your own training images, instead of cable images, organize your images into folders: the names of the images don’t matter, but the name of each folder should be the label of the class represented by the images in it. There’s a link to IBM’s guidelines for image data in the Resources section at the end of this tutorial. If you want your model to recognize your objects in different lighting, or from different angles, then supply several samples of each variation. Then zip up the folders, and upload them instead of the sample zipfiles.
Note: To upload your own training images, instead of cable images, organize your images into folders: the names of the images don’t matter, but the name of each folder should be the label of the class represented by the images in it. There’s a link to IBM’s guidelines for image data in the Resources section at the end of this tutorial. If you want your model to recognize your objects in different lighting, or from different angles, then supply several samples of each variation. Then zip up the folders, and upload them instead of the sample zipfiles.
Click the binary data icon to open a sidebar where you can add zipfiles of training images:

Click Browse, and navigate to the Training Images folder in the visual-recognition-coreml-master folder you downloaded from GitHub:
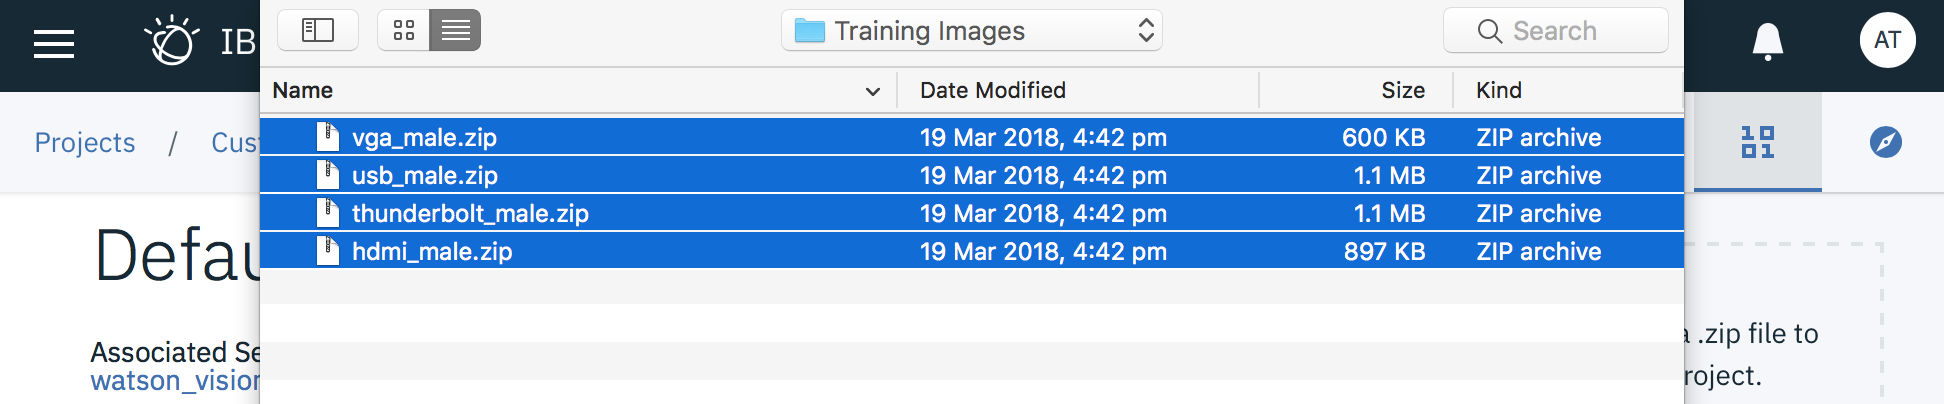
Select all four zipfiles, and click Choose, then wait for the files to upload.
Check all four checkboxes, then click the refined hamburger menu icon to see the Add selected to model option.

Select that, then watch and wait while the images get added to the model.
Note: When you upload your own training images, you can also upload images to the negative class: these would be images that don’t match any of the classes you want the model to recognize. Ideally, they would have features in common with your positive classes, for example, an iTunes card when you’re training a model to recognize iPods.
Note: When you upload your own training images, you can also upload images to the negative class: these would be images that don’t match any of the classes you want the model to recognize. Ideally, they would have features in common with your positive classes, for example, an iTunes card when you’re training a model to recognize iPods.
3. Training the Model
The model is ready for training whenever you add data. Training uses the same machine learning model that created the basic tools and plants classifier, but adds your new classes to what it’s able to recognize. Training a model of this size on your Mac would take a very long time.
Close the sidebar, and click Train Model
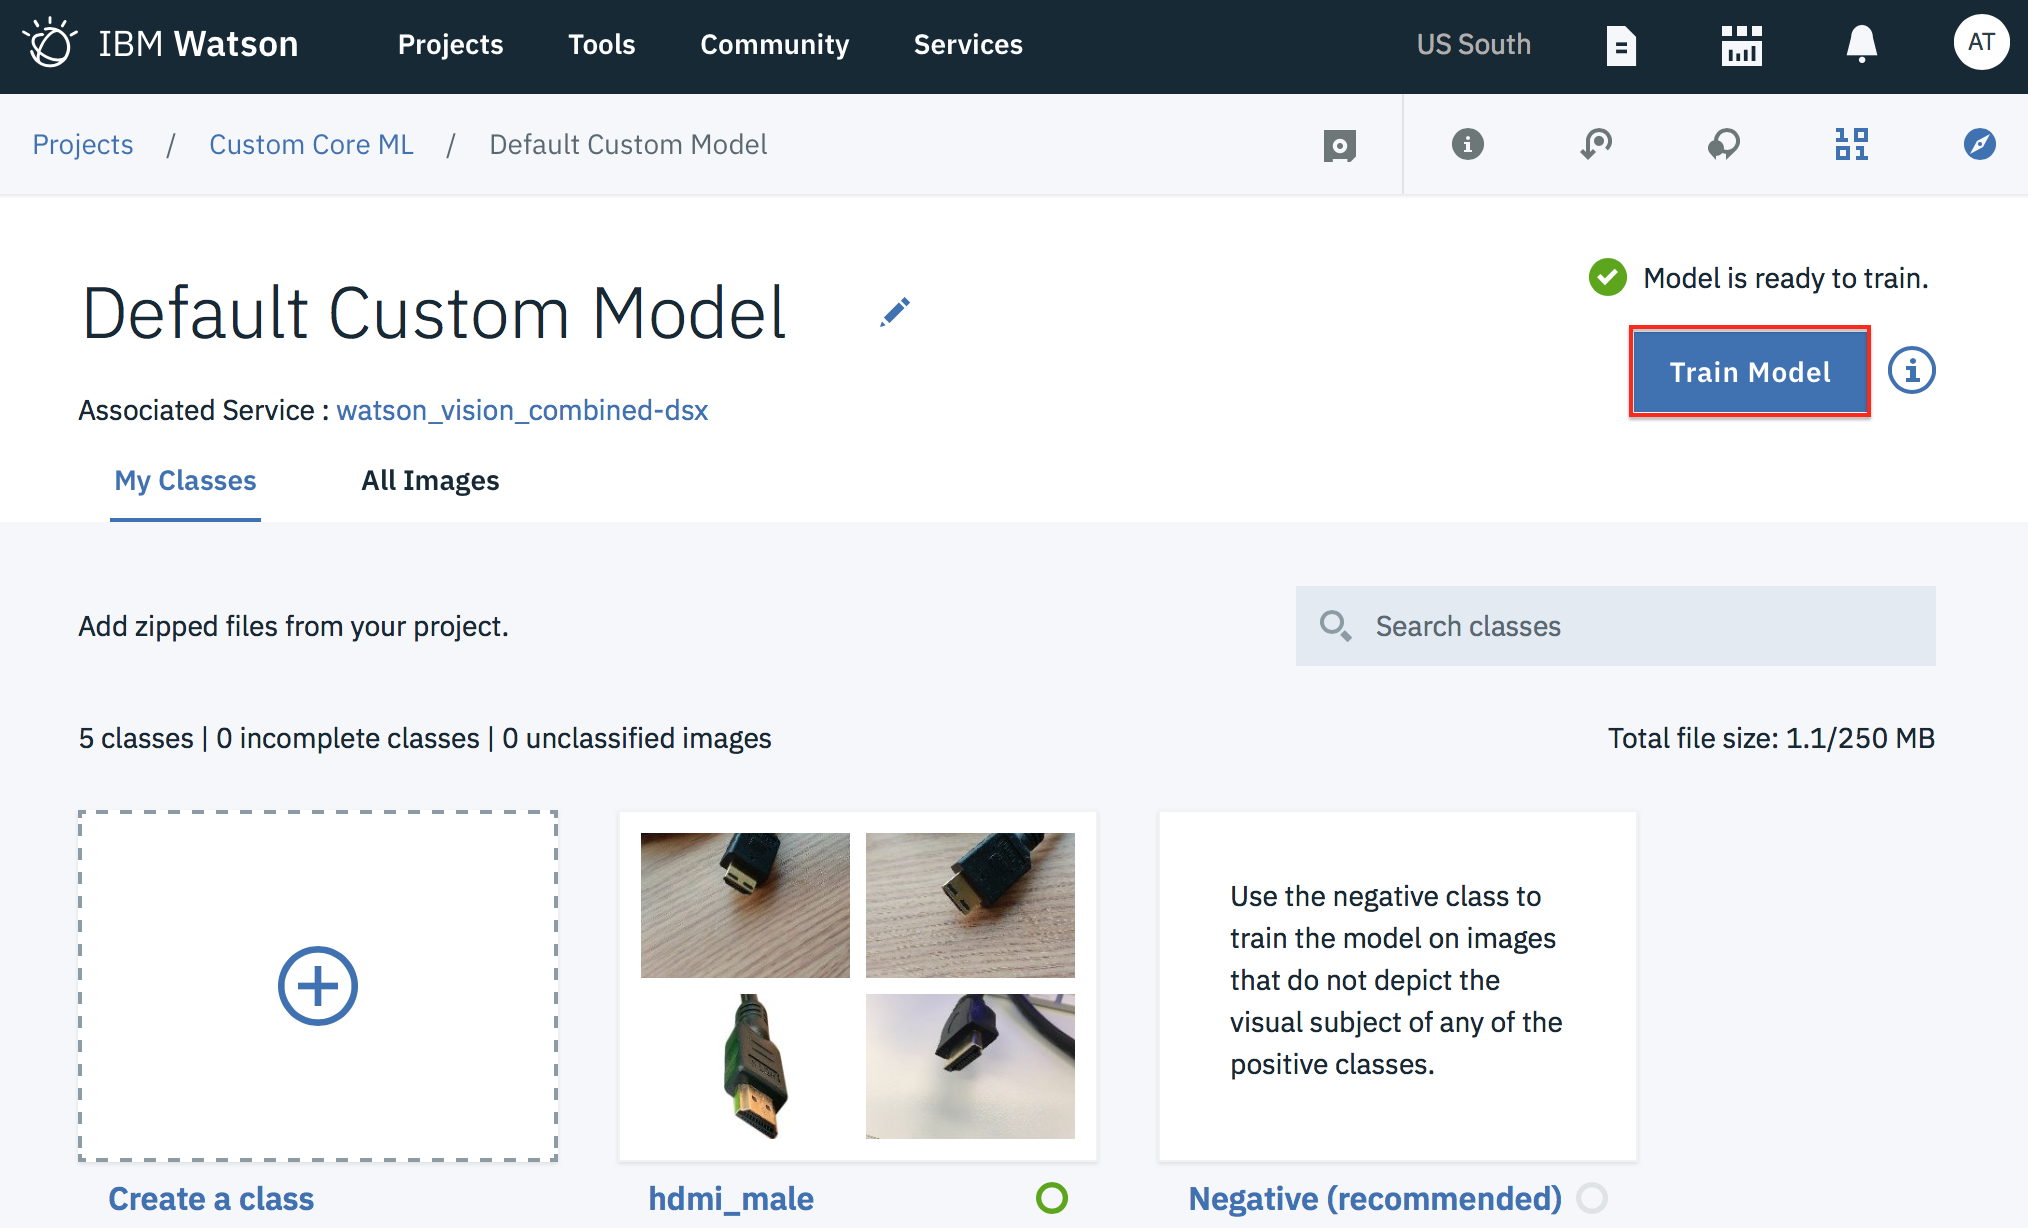
Go get a drink and maybe a snack — this will probably take at least 5 minutes, maybe 10:
![]()
Success looks like this:

4. Adding the Model to Your App
The sample app already has all the VisionRecognition code to download, compile and use your new model. All you have to do is edit the apiKey and classifierId properties, so the app creates a VisionRecognition object from your model. Finding these values requires several clicks.
Note: For this step and the next, I think it’s easier if you just follow my instructions, and don’t look at the GitHub page.
Note: For this step and the next, I think it’s easier if you just follow my instructions, and don’t look at the GitHub page.
Click the here link to see what the GitHub page calls the custom model overview page:

Click the Associated Service link (the GitHub page calls this your Visual Recognition instance name): you’re back at Services / Watson Services / watson_vision_combined-dsx! But scroll down to the bottom:

That’s the model you just trained!
Note: The GitHub page calls this the Visual Recognition instance overview page in Watson Studio.
Note: The GitHub page calls this the Visual Recognition instance overview page in Watson Studio.
Back to Xcode — remember Xcode? — open Core ML Vision Custom/ImageClassificationViewController.swift, and locate the classifierID property, below the outlets.
On the Watson page, click the Copy model ID link, then paste this value between the classifierID quotation marks, something like this, but your value will be different:
let classifierId = "DefaultCustomModel_1752360114"
Scroll up to the top of the Watson page, and select the Credentials tab:

Copy and paste the api_key value into the apiKey property, above classifierId:
let apiKey = "85e5c50b26b16d1e4ba6e5e3930c328ce0ad90cb"
Your value will be different.
These two values connect your app to the Watson model you just trained. The sample app contains code to update the model when the user taps the reload button.
One last edit: change version to today’s date in YYYY-MM-DD format:
let version = "2018-03-28"
The GitHub page doesn’t mention this, but the Watson Swift SDK GitHub repository README recommends it.