ViewPager2 in Android: Getting Started
In this tutorial for Android, you’ll learn to use the new ViewPager2 widget. Along the way you will build an app to show celebrity doppelganger animals. By Rajdeep Singh.
Under the Hood of FragmentStateAdapter
Did you decide to give it a read? Good! This will be quick and worth your time.
In the last section, you created DoppelgangerAdapter which extended FragmentStateAdapter. In this section, you’ll see what goes on inside FragmentStateAdapter by diving into specific parts of its code.
Open DoppelgangerAdapter and navigate to the declaration of FragmentStateAdapter by clicking ⌘ + Click on macOS or Ctrl + Click on Windows. You’ll see the class declaration like this:
public abstract class FragmentStateAdapter extends
  RecyclerView.Adapter<FragmentViewHolder> implements StatefulAdapter {
}
After looking at the code above, you know that ViewPager2 uses RecyclerView.Adapter with some changes to show views. This means you can extend your adapter directly from this base class in case you want to show instances of View class like you do for any other RecyclerView.
So why extend FragmentStateAdapter at all? It comes with a lot of code to handle Fragment-related stuff for you. Remember the Activity instance you passed in to its constructor? This is how that instance is used:
public FragmentStateAdapter(@NonNull FragmentActivity fragmentActivity) {
  this(fragmentActivity.getSupportFragmentManager(),
    fragmentActivity.getLifecycle());
}
The adapter stores the FragmentManager and Lifecycle of the Activity and uses them to handle adding Fragments in the ViewHolder and managing them during lifecycle events.
If you’ve used a RecyclerView Adapter before, then you know the two most important methods you have to override: onCreateViewHolder and onBindViewHolder.
Overriding onCreateViewHolder
Take a look at onCreateViewHolder in FragmentStateAdapter:
@NonNull
@Override
public final FragmentViewHolder onCreateViewHolder(@NonNull ViewGroup parent, int viewType) {
  return FragmentViewHolder.create(parent);
}
It calls create() on FragmentViewHolder which is simply a ViewHolder. Take a look at create() in FragmentViewHolder:
@NonNull static FragmentViewHolder create(@NonNull ViewGroup parent) {
  FrameLayout container = new FrameLayout(parent.getContext());
  container.setLayoutParams(
    new ViewGroup.LayoutParams(ViewGroup.LayoutParams.MATCH_PARENT,
      ViewGroup.LayoutParams.MATCH_PARENT));
  container.setId(ViewCompat.generateViewId());
  container.setSaveEnabled(false);
  return new FragmentViewHolder(container);
}
It returns a FragmentViewHolder instance with a FrameLayout added as the itemView.
Overriding onBindViewHolder
The other main part of Adapter is onBindViewHolder. Below is a extremely simplified version of it:
@Override
public final void onBindViewHolder(final @NonNull FragmentViewHolder holder, int position) {
  ...
  ensureFragment(position);
  ...
  gcFragments();
}
This methods performs some sanity checks and then calls ensureFragment(position). This method checks if the Fragment exists and, if it doesn’t, it calls the createFragment(position) you’ve over-riden in your custom adapter.
It then has some code to adapt to layout changes. Next comes another interesting part, where it calls gcFragments(). It removes the Fragments which are no longer part of the data set or fall in the category of stale Fragments, for which it has checks. This ensures that ViewPager2 is memory efficient with Fragments.
This is a brief look at this adapter, as its many features are beyond the scope of this article. Feel free to explore them on your own and ask questions in the forum if you have any doubts.
Listening for Page Changes
While using ViewPager2, you may want to know when the screen state changes from scrolling to idle or when the user selects a new page on the screen.
If you’ve used ViewPager, you used the OnPageChangeListener interface. With OnPageChangeListener, you have to override all the methods in the interface, whether you want to use them or not.
ViewPager2 provides a similar API to listen to page changes. But, instead of using an interface, it uses an abstract class, OnPageChangeCallback, which provides an empty implementation for its three methods. This way, you only need to override the methods you need!
Add the following import statements in MainActivity:
import android.widget.Toast
import androidx.viewpager2.widget.ViewPager2
Next, add the following code below TODO:4 in MainActivity:
var doppelgangerPageChangeCallback = object : ViewPager2.OnPageChangeCallback() {
  override fun onPageSelected(position: Int) {
    Toast.makeText(this@MainActivity, "Selected position: ${position}",
      Toast.LENGTH_SHORT).show()
  }
}
This code uses Kotlin’s object expression to anonymously implement ViewPager2.OnPageChangeCallback and overrides only onPageSelected(position: Int). It then shows a Toast every time a new page is selected.
OnPageChangeCallback has three methods:
- onPageScrolled(int position, float positionOffset, @Px int positionOffsetPixels): ViewPager2 invokes this method when the currently selected page starts scrolling.
- onPageSelected(int position): When a new page is selected, ViewPager 2 invokes this method.
- onPageScrollStateChanged(@ScrollState int state): ViewPager 2 invokes this when the scroll state of the current page changes.
Now you need to wire your doppelgangerViewPager with the doppelgangerPageChangeCallback so it can start to get the callbacks. In MainActivity, find TODO:5 and add the following:
doppelgangerViewPager.registerOnPageChangeCallback(doppelgangerPageChangeCallback)
You need to unregister the callback when you no longer want to listen to the changes. In onDestroy(), add the following code below TODO:6:
doppelgangerViewPager.unregisterOnPageChangeCallback(doppelgangerPageChangeCallback)
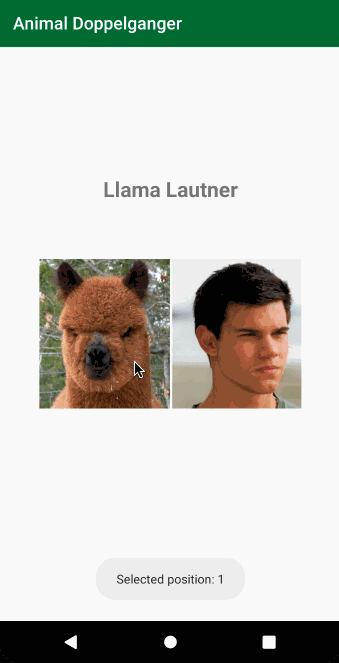
Build and run the app. You’ll see a Toast message whenever you swipe the page.
Trying the Vertical Swipe
ViewPager2 comes with an option to switch orientation easily, which was tough to do using the original ViewPager. This is now easy because ViewPager 2 uses a RecyclerView which in turn uses a LayoutManager to manage the positioning of views inside it.
Paste the following code under TODO:7 in MainActivity.kt:
doppelgangerViewPager.orientation = ViewPager2.ORIENTATION_VERTICAL
This orientation property will change which way the pages swipe. It’s that easy!
Build and run the app. Try to swipe vertically this time.

Look at the implementation of the orientation keyword by selecting ⌘ + Click on macOS or Ctrl + Click on Windows. Android Studio takes you to the ViewPager2 class where you see the following:
/**
* Sets the orientation of the ViewPager2.
*
* @param orientation {@link #ORIENTATION_HORIZONTAL} or {@link #ORIENTATION_VERTICAL}
*/
public void setOrientation(@Orientation int orientation) {
  mLayoutManager.setOrientation(orientation);
  mAccessibilityProvider.onSetOrientation();
}
Now you know for sure this method does nothing but call setOrientation on the underlying LinearLayoutManager.
Thank you, RecyclerView! :]
Connecting a TabLayout With ViewPager2
Showing tabs whenever you use swipeable screens is a good way to let the users know there’s more to see by swiping. The process of adding tabs has changed a bit with ViewPager2.
Android provides TabLayout, a widget to show tabs. Earlier it came with the support library but since the migration to AndroidX, it’s part of the com.google.android.material package.
Open the app level build.gradle again and paste the following code under TODO:8:
implementation 'com.google.android.material:material:1.2.0-alpha04'
Sync the project with Gradle files. With that in place, you can now use TabLayout in your project.
Open activity_main.xml and paste the following code under TODO:9:
<com.google.android.material.tabs.TabLayout
  android:id="@+id/tabLayout"
  android:layout_width="match_parent"
  android:layout_height="wrap_content"
  android:background="@color/colorPrimary"
  app:tabMode="scrollable"
  app:tabTextColor="@android:color/white" />
Your xml shows a namespace error for app, which you can fix by adding this line in the parent LinearLayout. A quick fix should also show up for this. To apply it, select ⌥ + Enter on macOS or Alt + Enter on Windows.
xmlns:app="http://schemas.android.com/apk/res-auto"
Here’s a breakdown of the TabLayout widget code you added:
- The
android:id="@+id/tabLayout"attribute sets the ID of theTabLayout. You’ll use this later in Kotlin to refer to this view. -
layout_widthis set tomatch_parentandlayout_heightis set towrap_content. So the tabs cover the full width of the screen and take only as much height as they need. -
android:background="@color/colorPrimary"sets the background color of the tabs to match the primary color of the app. -
app:tabMode="scrollable"makes the tabs scrollable in case the number of items in the TabLayout requires more space than available on the screen. Other possible values areautoandfixed. Try these on your own later! -
app:tabTextColor="@android:color/white"sets the text color on the tabs to white.