How To Make An App Like Pokemon Go
In this tutorial, you’ll learn how to make an app like Pokemon Go. You’ll learn how to use augmented reality and location services to get gamers outdoors! By Jean-Pierre Distler.
In this tutorial on how to make an app like Pokemon Go, you will create your own augmented reality monster-hunting game. The game has a map to show both your location and your enemies’ locations, a 3D SceneKit view to show a live preview of the back camera, and 3D models of enemies.
If you’re new to working with augmented reality, take the time to read through our introductory location-based augmented reality tutorial before you start. It’s not a full pre-requisite to this tutorial to show you how to make an app like Pokemon Go, but it contains lots of valuable information about math and augmented reality that won’t be covered here.
Getting Started
Download the starter project for this tutorial on how to make an app like Pokemon Go. The project contains two view controllers along with the folder art.scnassets, which contains all the 3D models and textures you’ll need.
ViewController.swift contains a UIViewController subclass you’ll use to show the AR part of the app. MapViewController will be used to show a map with your current location and some enemies around you. Basic things like constraints and outlets are already done for you, so you can concentrate on the important parts of this tutorial on how to make an app like Pokemon Go.
Adding Enemies To The Map
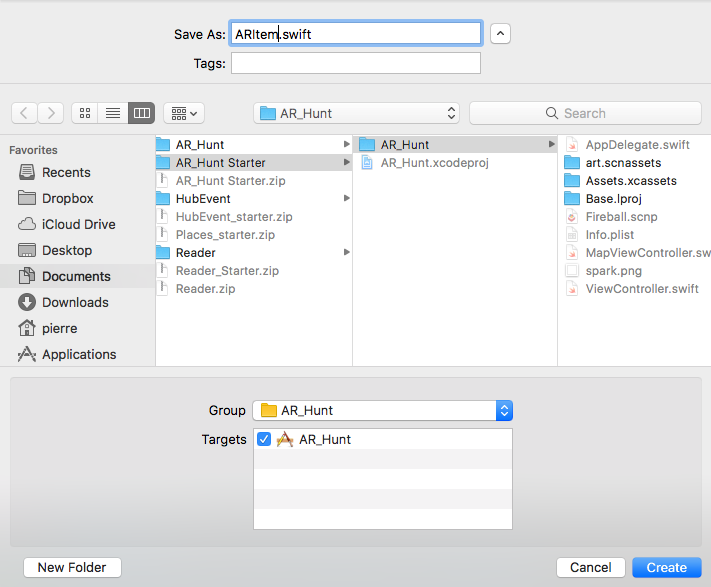
Before you can go out and fight enemies, you’ll need to know where they are. Create a new Swift file and name it ARItem.swift.
Add the following code after the import Foundation line in ARItem.swift:
import CoreLocation

struct ARItem {
  let itemDescription: String
  let location: CLLocation
}
An ARItem has a description and a location so you know the kind of enemy — and where it’s lying in wait for you.
Open MapViewController.swift and add an import for CoreLocation along with a property to store your targets:
var targets = [ARItem]()
Now add the following method:
func setupLocations() {
  let firstTarget = ARItem(itemDescription: "wolf", location: CLLocation(latitude: 0, longitude: 0))
  targets.append(firstTarget)

  let secondTarget = ARItem(itemDescription: "wolf", location: CLLocation(latitude: 0, longitude: 0))
  targets.append(secondTarget)

  let thirdTarget = ARItem(itemDescription: "dragon", location: CLLocation(latitude: 0, longitude: 0))
  targets.append(thirdTarget)
}
Here you create three enemies with hard-coded locations and descriptions. You’ll have to replace the (0, 0) coordinates with something closer to your physical location.
There are many ways to find some locations. For example, you could create some random locations around your current position, use the PlacesLoader from our original Augmented Reality tutorial, or even use Xcode to fake your current position. However, you don’t want your random locations to be in your neighbor’s living room. Awkward.
To make things simple, you can use Google Maps. Open https://www.google.com/maps/ and search your current location. If you click on the map, a marker appears along with a small popup at the bottom.
Inside this popup you’ll see values for both latitude and longitude. I suggest that you create some hard-coded locations near you or on your the street, so you don’t have to call your neighbor telling him that you want to fight a dragon in his bedroom.
Choose three locations and replace the zeros from the code above with the values you found.

Pin Enemies On The Map
Now that you have locations for your enemies, it’s time to show them on a MapView. Add a new Swift file and save it as MapAnnotation.swift. Inside the file add the following code:
import MapKit

class MapAnnotation: NSObject, MKAnnotation {
  //1
  let coordinate: CLLocationCoordinate2D
  let title: String?
  //2
  let item: ARItem
  //3
  init(location: CLLocationCoordinate2D, item: ARItem) {
    self.coordinate = location
    self.item = item
    self.title = item.itemDescription

    super.init()
  }
}
This creates a class MapAnnotation that implements the MKAnnotation protocol. In more detail:
- The protocol requires a variable
coordinateand an optionaltitle. - Here you store the
ARItemthat belongs to the annotation. - With the init method you can populate all variables.
Now head back to MapViewController.swift. Add the following to the bottom of setupLocations():
for item in targets {
  let annotation = MapAnnotation(location: item.location.coordinate, item: item)
  self.mapView.addAnnotation(annotation)
}
In this loop you iterate through all items inside the targets array and add an annotation for each target.
Now, at the end of viewDidLoad(), call setupLocations():
override func viewDidLoad() {
  super.viewDidLoad()

  mapView.userTrackingMode = MKUserTrackingMode.followWithHeading
  setupLocations()
}
Before you can use the location, you’ll have to ask for permission. Add the following new property to MapViewController:
let locationManager = CLLocationManager()
At the end of viewDidLoad(), add the code to ask for permissions if needed:
if CLLocationManager.authorizationStatus() == .notDetermined {
  locationManager.requestWhenInUseAuthorization()
}
Note: If you forget to add this permission request, the map view will fail to locate the user. Unfortunately there is no error message to tell your this. Therefore every time you work with location services and you can’t get the location, this will be a good starting point for searching for the source of the error.
Note: If you forget to add this permission request, the map view will fail to locate the user. Unfortunately there is no error message to tell your this. Therefore every time you work with location services and you can’t get the location, this will be a good starting point for searching for the source of the error.
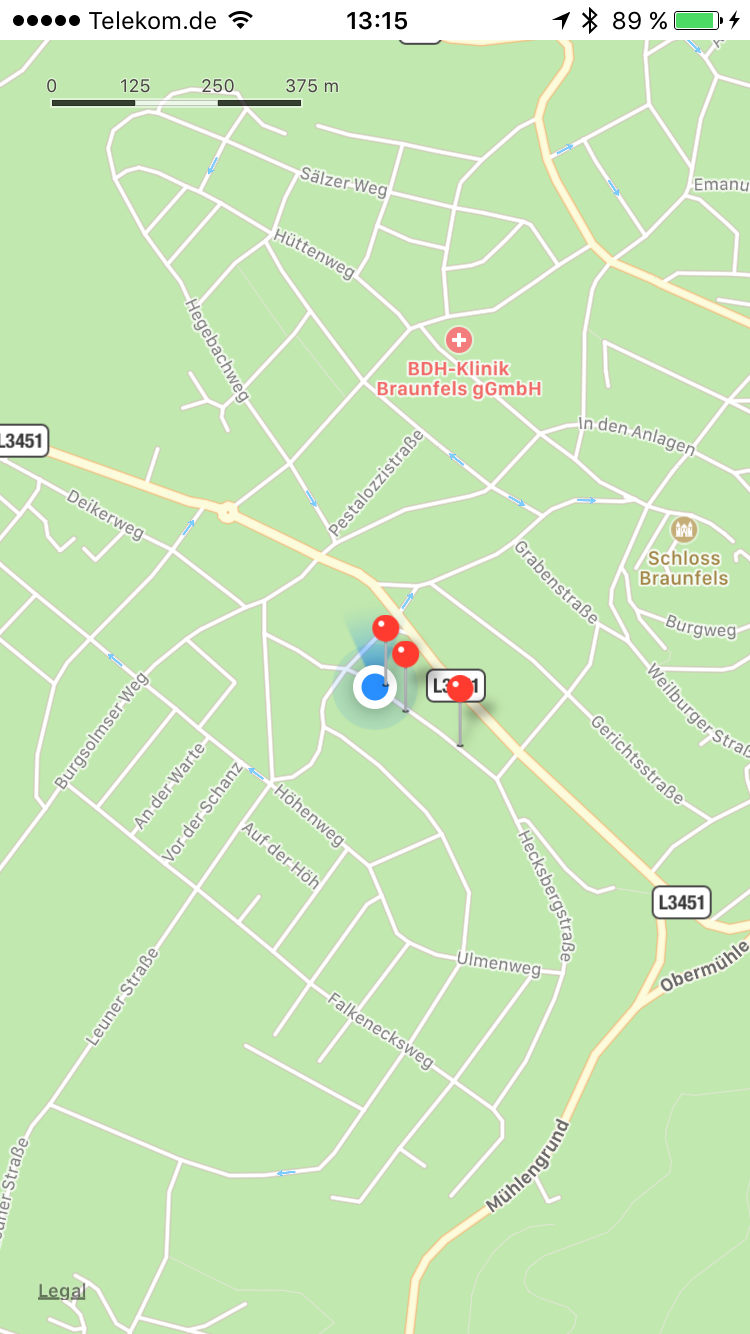
Build and run your project; after a short time the map will zoom to your current position and show some red markers at your enemies’ locations.
Adding Augmented Reality
Right now you have a nice app, but you still need to add the augmented reality bits. In the next few sections, you’ll add a live preview of the camera and add a simple cube as a placeholder for an enemy.
First you need to track the user location. Add the following property to MapViewController:
var userLocation: CLLocation?
Then add the following extension at the bottom:
extension MapViewController: MKMapViewDelegate {
  func mapView(_ mapView: MKMapView, didUpdate userLocation: MKUserLocation) {
    self.userLocation = userLocation.location
  }
}
You call this method each time MapView updates the location of the device; you simply store the location to use in another method.
Add the following delegate method to the extension:
func mapView(_ mapView: MKMapView, didSelect view: MKAnnotationView) {
  //1
  let coordinate = view.annotation!.coordinate
  //2
  if let userCoordinate = userLocation {
    //3
    if userCoordinate.distance(from: CLLocation(latitude: coordinate.latitude, longitude: coordinate.longitude)) < 50 {
      //4
      let storyboard = UIStoryboard(name: "Main", bundle: nil)

      if let viewController = storyboard.instantiateViewController(withIdentifier: "ARViewController") as? ViewController {
        // more code later
        //5
        if let mapAnnotation = view.annotation as? MapAnnotation {
          //6
          self.present(viewController, animated: true, completion: nil)
        }
      }
    }
  }
}
If a user taps an enemy that’s less than 50 meters away you'll show the camera preview as follows:
- Here you get the coordinate of the selected annotation.
- Make sure the optional
userLocationis populated. - Make sure the tapped item is within range of the users location.
- Instantiate an instance of
ARViewControllerfrom the storyboard. - This line checks if the tapped annotation is a
MapAnnotation. - Finally, you present
viewController.
Build and run the project and tap an annotation near your current location. You'll see a white view appear:
