iOS Accessibility in SwiftUI Tutorial Part 3: Adapting
In this accessibility tutorial, you’ll improve the accessibility of a SwiftUI app by making it responsive to some common user accessibility settings. By Audrey Tam.
Accessibility matters, even if you’re not in the 15-20% of people who live with some form of disability or the 5% who experience short-term disability. Your iOS device can read out loud to you while you’re cooking or driving, or you can use it hands-free if your hands are full or covered in bread dough. Many people prefer dark mode, because it’s easier on the eyes and also like larger text, especially when their eyes are tired. And there are growing concerns about smartphone addiction. A popular tip is to set your iPhone to grayscale!
If you want more people using your app more often, explore all the ways they can adapt their iOS devices to their own needs and preferences, then think about how you might adapt your app to these situations.
In Part 1 of this tutorial, you fixed the accessibility of a simple master-detail SwiftUI app by creating informative labels for various types of images. In Part 2, you fixed the accessibility of a more interactive app by restructuring its accessibility tree. In this third and final part, you’ll move beyond VoiceOver and make the app responsive to some common user accessibility settings.
In Part 3 of this tutorial, you’ll learn how to:
- Use the speech synthesizer to read out text in your app.
- Adapt your app to user accessibility settings, especially Dark Mode, Smart Invert and larger sizes of Dynamic Type.
Apple wants to help you improve the accessibility of your apps. With SwiftUI, it’s easier than ever before. The future is accessible, and you can help make it happen!
Getting Started
Get started by downloading the materials for this article; you can find the link at the top or bottom of this article. The begin folder contains the PublicArt project from Part 1 and the ContrastPicker project from Part 2.
Reading Text Out Loud Without VoiceOver
Some of your users might not use VoiceOver, but would still prefer to hear text instead of reading it. Or your app could make announcements when the user isn’t looking at the device, for example, during a workout.
Apple has made big improvements to its text-to-speech technology, using machine learning models to generate speech that sounds remarkably natural. It does a pretty good job of turning an e-book into an audiobook.
Hearing is believing! On your iOS device, open Settings▸Accessibility▸Spoken Content, and turn on Speak Screen.

Next, open a book in the Books app or this article in Safari, then swipe down with two fingers from the top of the screen. Even long sentences sound pretty good! To turn off speech, reopen the control window and tap X.
Now, it’s time to learn how to use the AVSpeechSynthesizer class to read out text in your app.
Open the PublicArt project in the begin folder, then open DetailView.swift. Down in struct DetailView_Previews, edit the DetailView initializer:
DetailView(artwork: artData[1])
You’re setting the preview to use the second list item. Start Live Preview:

The description of the Makahiki Festival Mauka Mural is quite long, so it’s a convenient example for trying out AVSpeechSynthesizer.
Scroll back up in DetailView.swift, and add this import statement:
import AVFoundation
AVSpeechSynthesizer is in the AVFoundation framework.
Next, add these two properties to DetailView:
let speaker = AVSpeechSynthesizer()
var utterance: AVSpeechUtterance {
  AVSpeechUtterance(string: artwork.description)
}
You’re creating a speech synthesizer to speak an utterance. The utterance is the artwork’s description. You can set properties of utterance, including voice, rate and volume.
Now, scroll down to the ScrollView, and add this code before its Text element:
HStack {
  Button("Speak") {
    if self.speaker.isPaused {
      self.speaker.continueSpeaking()
    } else {
      self.speaker.speak(self.utterance)
    }
  }
  Button("Pause") {
    if self.speaker.isSpeaking {
      self.speaker.pauseSpeaking(at: .word)
    }
  }
  Button("Stop") {
    self.speaker.stopSpeaking(at: .word)
  }
}
These are basic, no-frills buttons to speak, pause and stop the speech synthesizer, arranged in a row above the artwork description text. Pausing and stopping should happen at the end of a word.
Here, you’re checking the synthesizer’s isSpeaking and isPaused properties, but you can implement AVSpeechSynthesizerDelegate for closer monitoring. One way to do this in a SwiftUI app is to create a SpeechSynthesizing class that conforms to AVSpeechSynthesizerDelegate and ObservableObject. A delegate gives you greater control: For example, it could implement speechSynthesizer(_:willSpeakRangeOfSpeechString:utterance:) to highlight each word as it’s spoken.
Refresh the Live Preview (Option-Command-P):

Now, tap the Speak button to start the speech, then tap Pause to pause. Tap Speak to resume, then tap Stop to stop — a few words are spoken, then it stops. Tap Speak to start the speech from the beginning. Tapping Stop after Pause also resets the speech to the beginning.
And that’s all there is to synthesizing speech. Next, you’ll learn about some iOS accessibility settings.
Stop Live Preview, but leave the PublicArt project open.
Adapting to User Settings
Open the ContrastPicker project in the begin folder. Build and run in a simulator, then open Accessibility Inspector and set its target to your simulator:

Your users can access a multitude of options for customizing their iOS devices. Take a look: On your iOS device, open Settings▸Accessibility▸Display & Text Size.
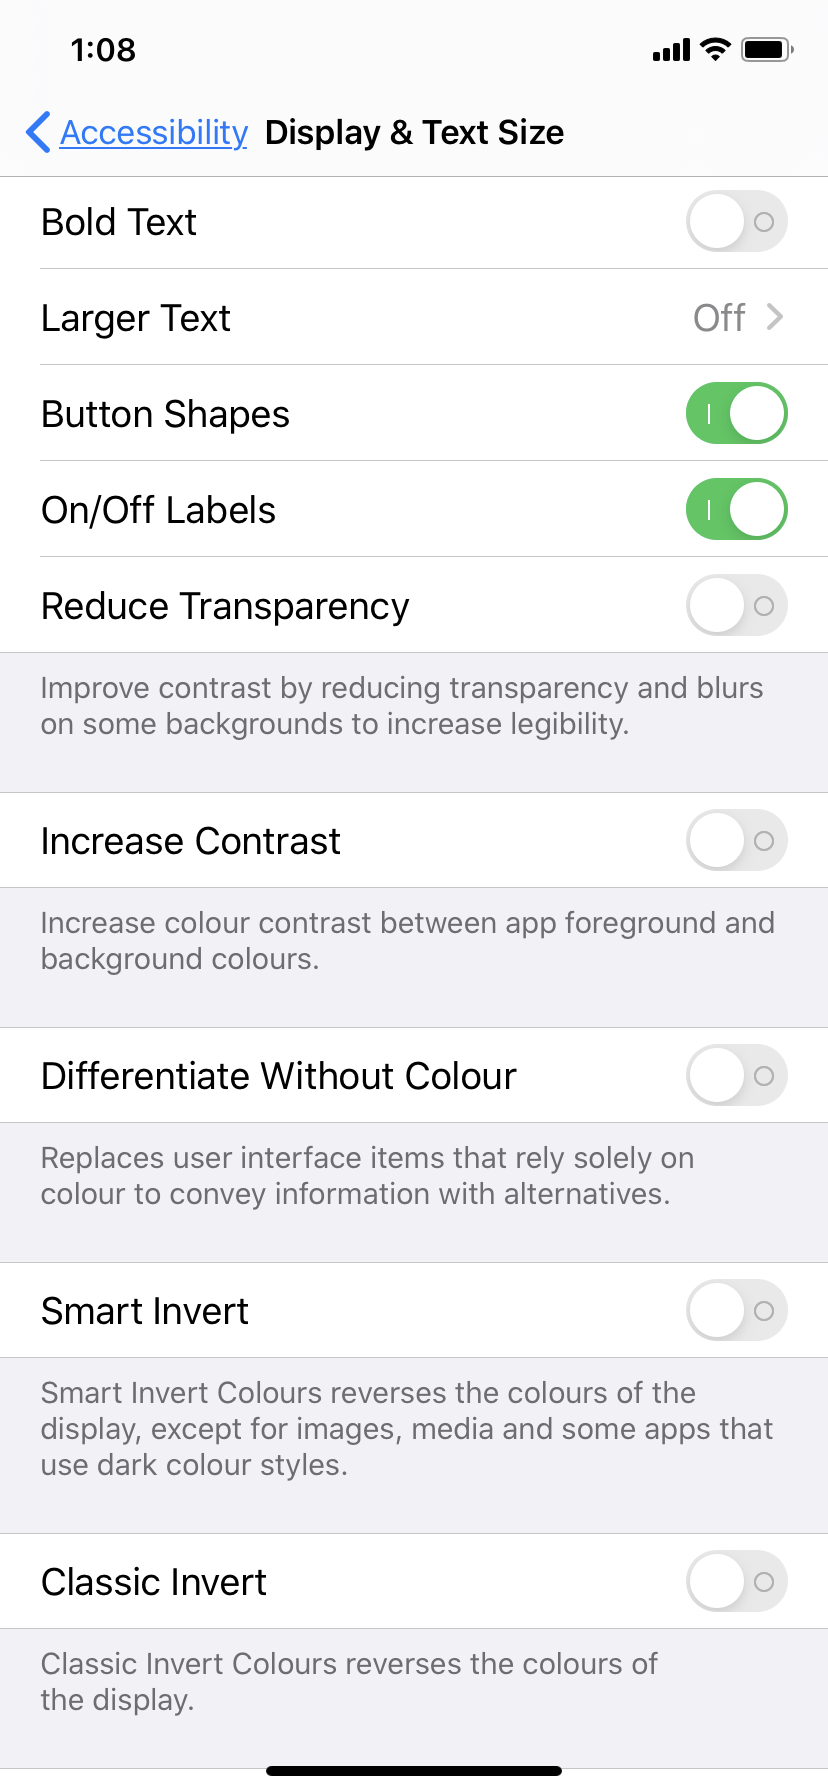
For some of these options, your app can check if it’s enabled, then adapt itself. But for some options, there isn’t (yet?) an @Environment or UIAccessibility variable, so you might have to tweak your design to work for all your users.
To see how these accessibility settings affect your app, you could turn them on or off, in different combinations, directly in your device’s Settings. Oh joy. Fortunately, Xcode provides two ways for you to quickly see the effect of many of these settings: in Accessibility Inspector and in Debug Preview. It’s much quicker and easier than going through the Settings app on your device, so you’re more likely to check, and therefore more likely to fix any problems sooner.
Accessibility Inspector and Debug Preview are most useful for checking how your app looks in dark mode or inverted colors, or with different font sizes of dynamic type elements. Some options only work on a device, and some don’t work at all (yet?).