Unit Testing With Flutter: Getting Started
In this Unit Testing with Flutter tutorial, you’ll improve your programming skills by learning how to add unit tests to your apps. By Lawrence Tan 🇸🇬.
Project Architecture Summary
Here’s a quick recap of how the app is architected.
The product list feature is split into a Model, View, and ViewModel as follows:
- Model: Products
- View: ProductList View
- ViewModel ProductList Model
And the cart feature is split like so:
- Model: Products
- View: Cart View
- ViewModel Cart Model
All unit tests will be performed on the ViewModel. Being able to test the ViewModel is one of the main benefits of using the MVVM architecture.
Now that you’ve explored the starter package, you can setup your own instance of Firebase and then get testing!
Setting up Firebase
In order to have products for your users to buy, you need to use a database for ShopNBuy. In this case, you’ll use the Firebase Realtime Database, which allows you to seamlessly upload data using JSON files.

If you’re already familiar with setting up a Firebase Realtime Database, you can jump right into the next section, Importing JSON Files.
Creating a Firebase Project
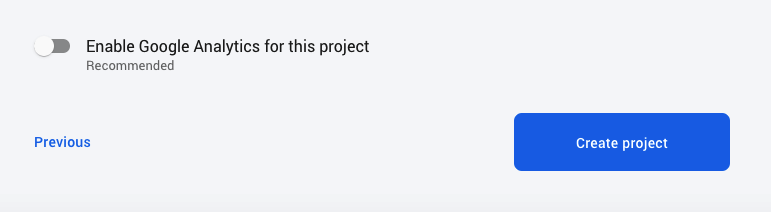
Head to the Firebase Console and log in with your Gmail account. Click Add Project and name the project ShopNBuy, then click Continue.

Disable Google Analytics; you won’t need them for this tutorial. Click Create Project, wait for the setup to finish, and continue to the Firebase Dashboard.
From the left menu, click Database.
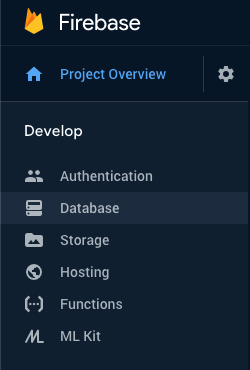
Next, scroll down and click on Create Database under Realtime Database. Then check Test Mode and click Enable.

Importing JSON Files
Now that you have your database set up, it’s time to import some products.
In the Data section, click on the Menu icon, which looks like three vertical dots, then choose Import JSON. Then click Browse, navigate to the Download Materials root folder and look for products_list.json. Finally, click Import to upload all the data you need for this tutorial.

Copy the URL from the top of the card. In constants.dart, replace [YOUR OWN FIREBASE URL] with that Firebase URL. For example, https://shopnbuy-12345.firebaseio.com/products.json.
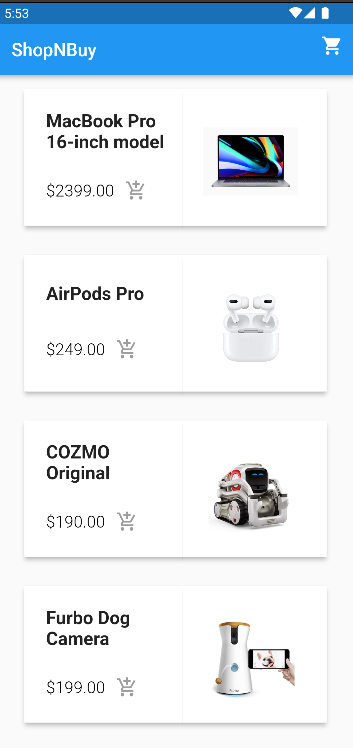
Build and run the app. You should now see a list of products in your app.
Now that you have Firebase ready, it’s time to start unit testing the app!
Unit Testing the Product List Feature
Your next step is to add tests to make sure that the product list feature works properly. Before you can add the tests, you need to know the feature’s requirements:
Before you start writing the tests, take a moment to learn about an important concept in testing: mocking.
Mocking

Mocking is a way of simulating parts of your app that are outside the scope of the test so that they behave in a specific way. Using mocking in your unit tests prevents tests from failing for reasons other than a flaw in your code, like an unstable network. It allows you to conveniently assert and validate outcomes and gives you the ability to control input and output.
Unit testing means you test individual units of code without external dependencies to keep the integrity of each function or method pure. By mocking your data models and classes, you remove dependencies from your tests.
If you made real network calls in your unit tests, your test suite could fail due to an internet problem. To avoid this, you’ll mock API so you can dictate its response.
Add this code at TODO 2 in product_list_test.dart:
import 'package:shopnbuy/core/models/product.dart';
import 'package:shopnbuy/core/services/api.dart';

class MockAPI extends API {
@override
Future<List<Product>> getProducts() {
  return Future.value([
      Product(id: 1, name: 'MacBook Pro 16-inch model', price: 2399,
          imageUrl: 'imageUrl'),
      Product(id: 2, name: 'AirPods Pro', price: 249, imageUrl: 'imageUrl'),
    ]);
  }
}
You just created a new MockAPI class that extends the real API. You override getProducts() and hardcode two products. This makes the function return the hard-coded data instead of downloading live data from Firebase, which would make your test slow and unpredictable.
This is one of the main benefits of mocking: You can override a method to dictate its value as the test suite runs.
In the main() body, add the following code after TODO 3:
// 1
setupDependencyAssembler();
// 2
final productListViewModel = dependencyAssembler<ProductListModel>();
// 3
productListViewModel.api = MockAPI();
Step-by-step, here’s what’s happening:
- The test suite runs separately from
main()inmain.dart, so you need to callsetupDependencyAssembler()to inject your dependencies. - You create an instance of
ProductListModelusing GetIt. - You create and assign an instance of the
MockAPIclass you defined above.
Make sure to import the product list model and the dependency assembler at the top of the file:
import 'package:shopnbuy/core/viewmodels/product_list_model.dart';
import 'package:shopnbuy/helpers/dependency_assembly.dart';
Now, it’s time to write your first few test cases!
Writing Test Cases
Start by adding this code after TODO 4:
group('Given Product List Page Loads', () {
  test('Page should load a list of products from firebase', () async {
    // 1
    await productListViewModel.getProducts();
    // 2
    expect(productListViewModel.products.length, 2);
    // 3
    expect(productListViewModel.products[0].name, 'MacBook Pro 16-inch model');
    expect(productListViewModel.products[0].price, 2399);
    expect(productListViewModel.products[1].name, 'AirPods Pro');
    expect(productListViewModel.products[1].price, 249);
  });
});
Welcome to unit testing in Flutter! Flutter uses the common group and test paradigm for writing unit tests. You can think of a group as a way to organize different unit tests around a specific theme. It’s often helpful to think of these testing blocks as sentences – the group function is an event that happened, and the test function is the result that you want to ensure. You can have as many test blocks within a group closure as you want.
Here, you took your requirement statement and broke it into test statements. You’re testing that when a user enters the product page, they see a list of products.
Here are some more details about what the code does:
- Since the function passed to the
testmethod is marked as async, each line in the closure runs synchronously, so you start by callinggetProducts(). - You then assert the length of the list based on the mock data you supplied in the
MockAPI. - Finally, you assert each product’s name and price.
To have access to the test and group methods, you’ll need to import the test package.
import 'package:flutter_test/flutter_test.dart';
With these test cases written, you’re ready to run your tests. If you’re still running your app, stop it using Control-C and run flutter test in the terminal. After a few seconds, you’ll see:
00:02 +1: All tests passed!
Hurray! You’ve successfully written your first Flutter test – and it passed.
If you’re using Visual Studio Code, you can also run your tests by going to Debug ▸ Start Debugging with product_list_test.dart open. In the left navigator panel, you’ll see green checks to the left of each statement signifying that the tests have all passed!
In Android Studio click the green Play button to the left of the test header to run your tests.