View Binding Tutorial for Android: Getting Started
In this View Binding tutorial for Android, you’ll learn how to use View Binding to find and configure your views and how to migrate from other alternatives. By Fernando Sproviero.
Using ViewBinding
Add the following to your app’s build.gradle to enable the View Binding feature:
android {
  ...
  viewBinding {
    enabled = true
  }
}
This enables View Binding only for the app module. In a multi-module project, you need to add this in every module, or in a project level build.gradle file. After that, you can use View Binding in all modules.
Sync and build the project. Everything should still be working. Now that you’ve enabled View Binding, you can migrate from the findViewById.
Migrating From findViewById
Open ProfileActivity.kt. Notice that this file is using findViewById(). So, to migrate to ViewBinding, remove the following:
private lateinit var editTextBirthdate: EditText
private lateinit var editTextHeight: EditText
private lateinit var fab: View
And add this instead:
private lateinit var binding: ActivityProfileBinding
It’ll prompt you to import the following:
import com.raywenderlich.android.bmicalc.databinding.ActivityProfileBinding
Now, replace setContentView() with the following:
binding = ActivityProfileBinding.inflate(layoutInflater)

setContentView(binding.root)
Remove all the findViewById() calls:
editTextBirthdate = findViewById(R.id.editText_birthdate)
editTextHeight = findViewById(R.id.editText_height)
fab = findViewById(R.id.fab)
Replace editTextBirthdate with binding.editTextBirthdate. Then add the binding. prefix to the rest of the views marked in red by the IDE.
Build and run the app to see that everything is still working. Next, you’ll migrate from Kotlin Synthetic properties.
Migrating From Kotlin Synthetic Properties
Open PersonAdapter.kt. Notice it uses Kotlin synthetic properties. To start migrating them, replace the contents of onCreateViewHolder() with the following:
val binding = ItemBinding.inflate(
    LayoutInflater.from(parent.context),
    parent,
    false)
return WeightViewHolder(binding)
It’ll prompt you to import the following:
import com.raywenderlich.android.bmicalc.databinding.ItemBinding
Notice it’ll mark in red the parameter you’re passing to the constructor. So, change the WeightViewHolder constructor to the following:
inner class WeightViewHolder(binding: ItemBinding) :
    RecyclerView.ViewHolder(binding.root) {
Finally, stop using Kotlin synthetic properties by replacing the following way to fetch the Views:
private val weightView = itemView.textView_weight
private val bmiTextView = itemView.textView_bmi
private val bmiView = itemView.view_bmi
private val dateView = itemView.textView_date
With the following:
private val weightView = binding.textViewWeight
private val bmiTextView = binding.textViewBmi
private val bmiView = binding.viewBmi
private val dateView = binding.textViewDate
Build and run the app. Make sure it still works as expected. Finally, you’ll migrate from DataBinding to View Binding.
Migrating From Databinding
Open MainActivity.kt and activity_main.xml.

Observe that the XML file has a layout tag. That means it’s using Data Binding. To migrate to View Binding, remove the opening and closing layout tags.

Build and run the app to make sure this screen is still working.
Now, open LogActivity.kt and activity_log.xml.

The XML file has a layout tag. So, it’s also using Data Binding. But, it also has a data tag, associating the views to the LogViewModel. You can see some of the viewModel data bindings in the XML:
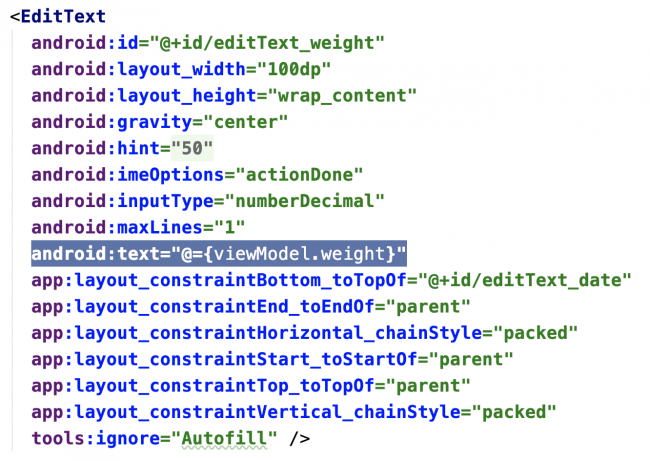
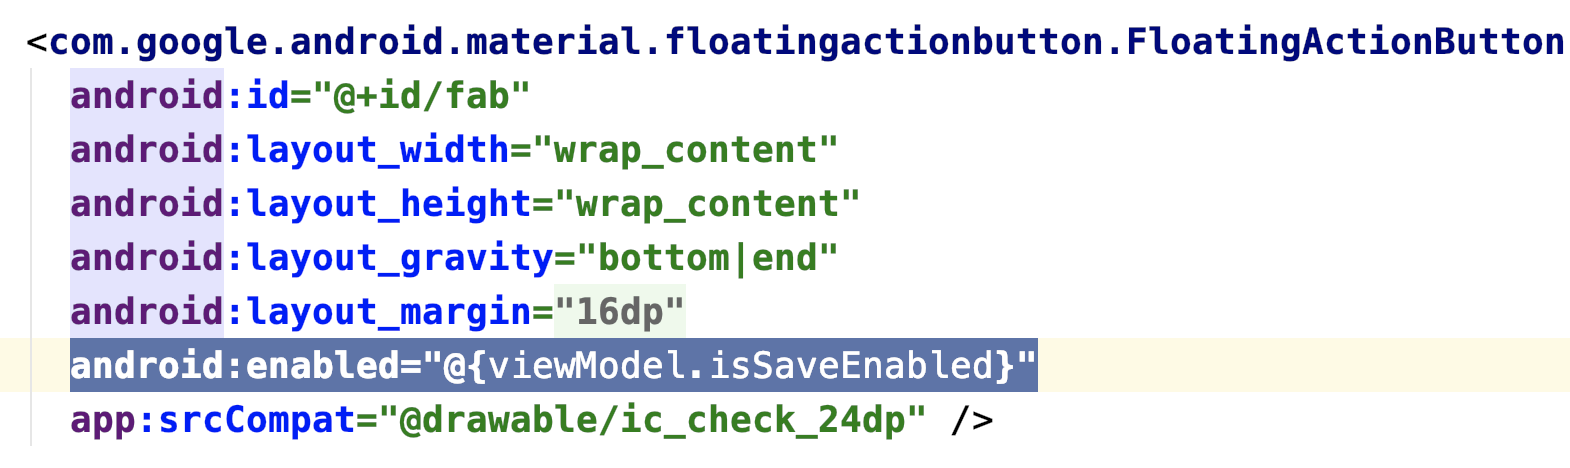
You can see that sometimes Data Binding does more than find views. It can also bind the EditTexts and Button to a viewModel, automatically inserting pieces of data into them. This is why it’s called DataBinding.
In this case, migrating to View Binding wouldn’t be a good choice. Without the bindings Data Binding provides, you could lose important behavior. You’d have to refactor your Activity and ViewModel to maintain the expected behavior, so leaving DataBinding here might be a better approach, if you don’t have the time or resources to refactor everything.
View Binding Internals
You enabled View Binding in your app’s build.gradle and built the project. By doing so, the View Binding compiler generated a Java class file for each XML file you have in the project. These files help with bindings of Views, as you saw in the tutorial. Classes like ActivityLogBinding.java connect all the views internally, and all you have to do is create an instance of the class, setting its content in setContentView().
Switch to the Project view.

Open the file located at app ‣ build ‣ generated ‣ data_binding_base_class_source_out ‣ debug ‣ out ‣ com ‣ raywenderlich ‣ android ‣ bmicalc ‣ databinding ‣ ActivityMainBinding.java.

Note: The view binder complier created the name of this file. It took the XML filename, converted it to camel-case, removed the underscores and appended the Binding suffix. So, if you had a file called my_super_activity_example.xml, the generated class would be MySuperActivityExampleBinding.java.
Check its contents:
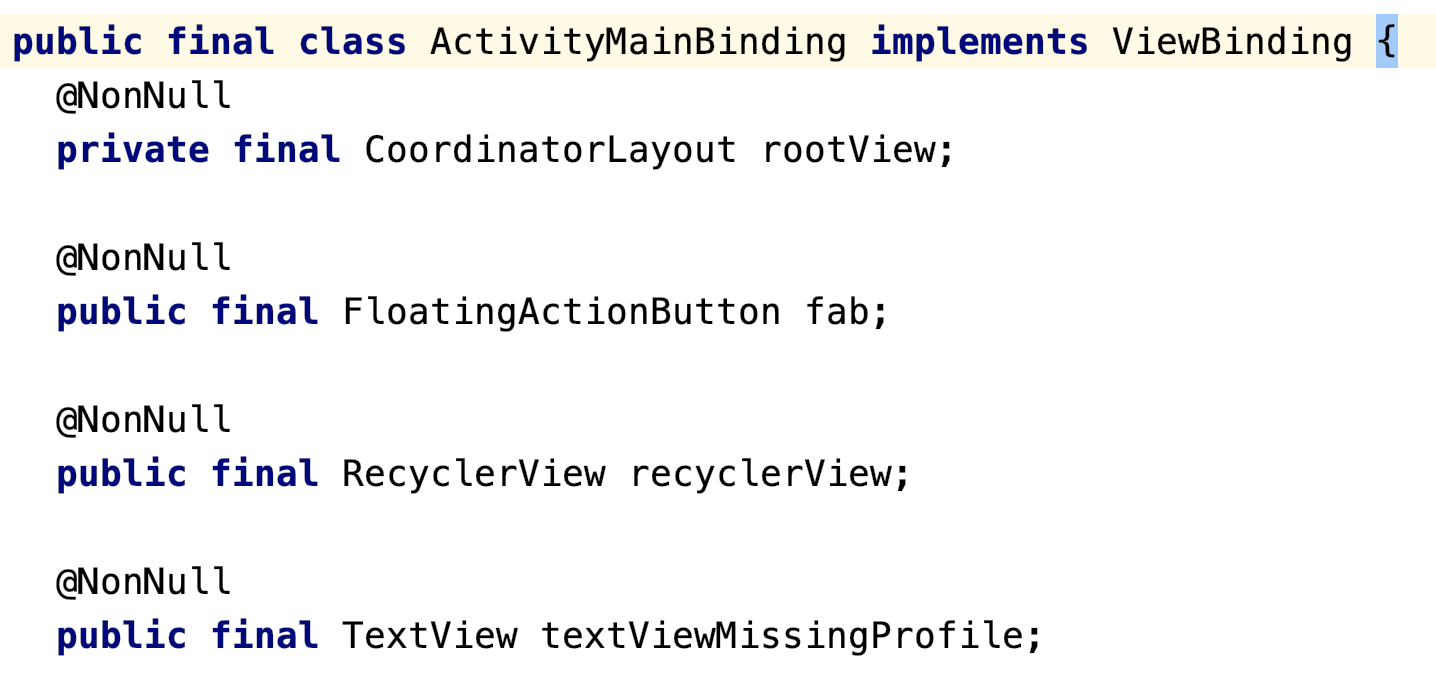
Notice it has a comment stating the view binder compiler generated this file. Also, noticed that it implements an interface called ViewBinding. Moreover, if you continue investigating the file, you’ll see a lot of View properties. These properties correspond to the ids of the views in activity_main.xml. Notice they’re annotated as @NonNull.
Furthermore, suppose you had another activity_main.xml file, for example, one for landscape, and you didn’t have one of the views. In that case, the compiler would annotate it with @Nullable instead. This provides your code with null-safety. So, you’d have to use the Kotlin ? operator.
Continue reading the file. Find inflate() you call from the MainActivity:
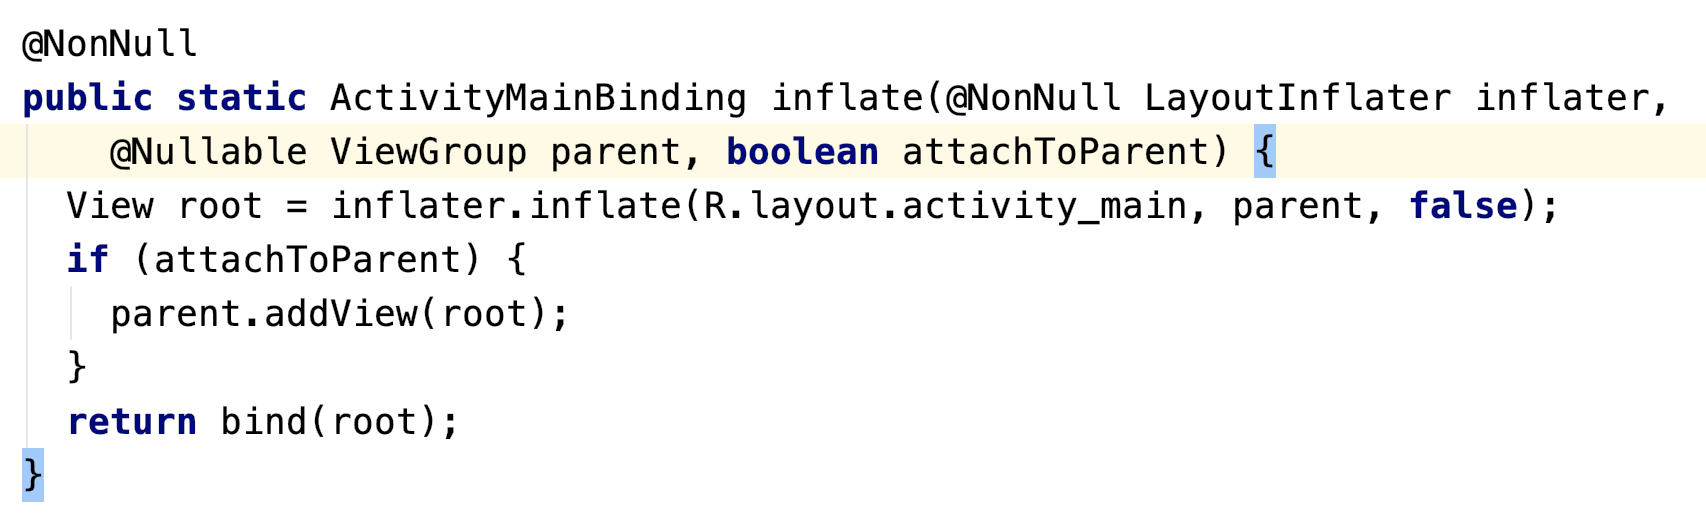
As you can see, it inflates the corresponding XML file. Finally, scroll a little more and you will find the following:
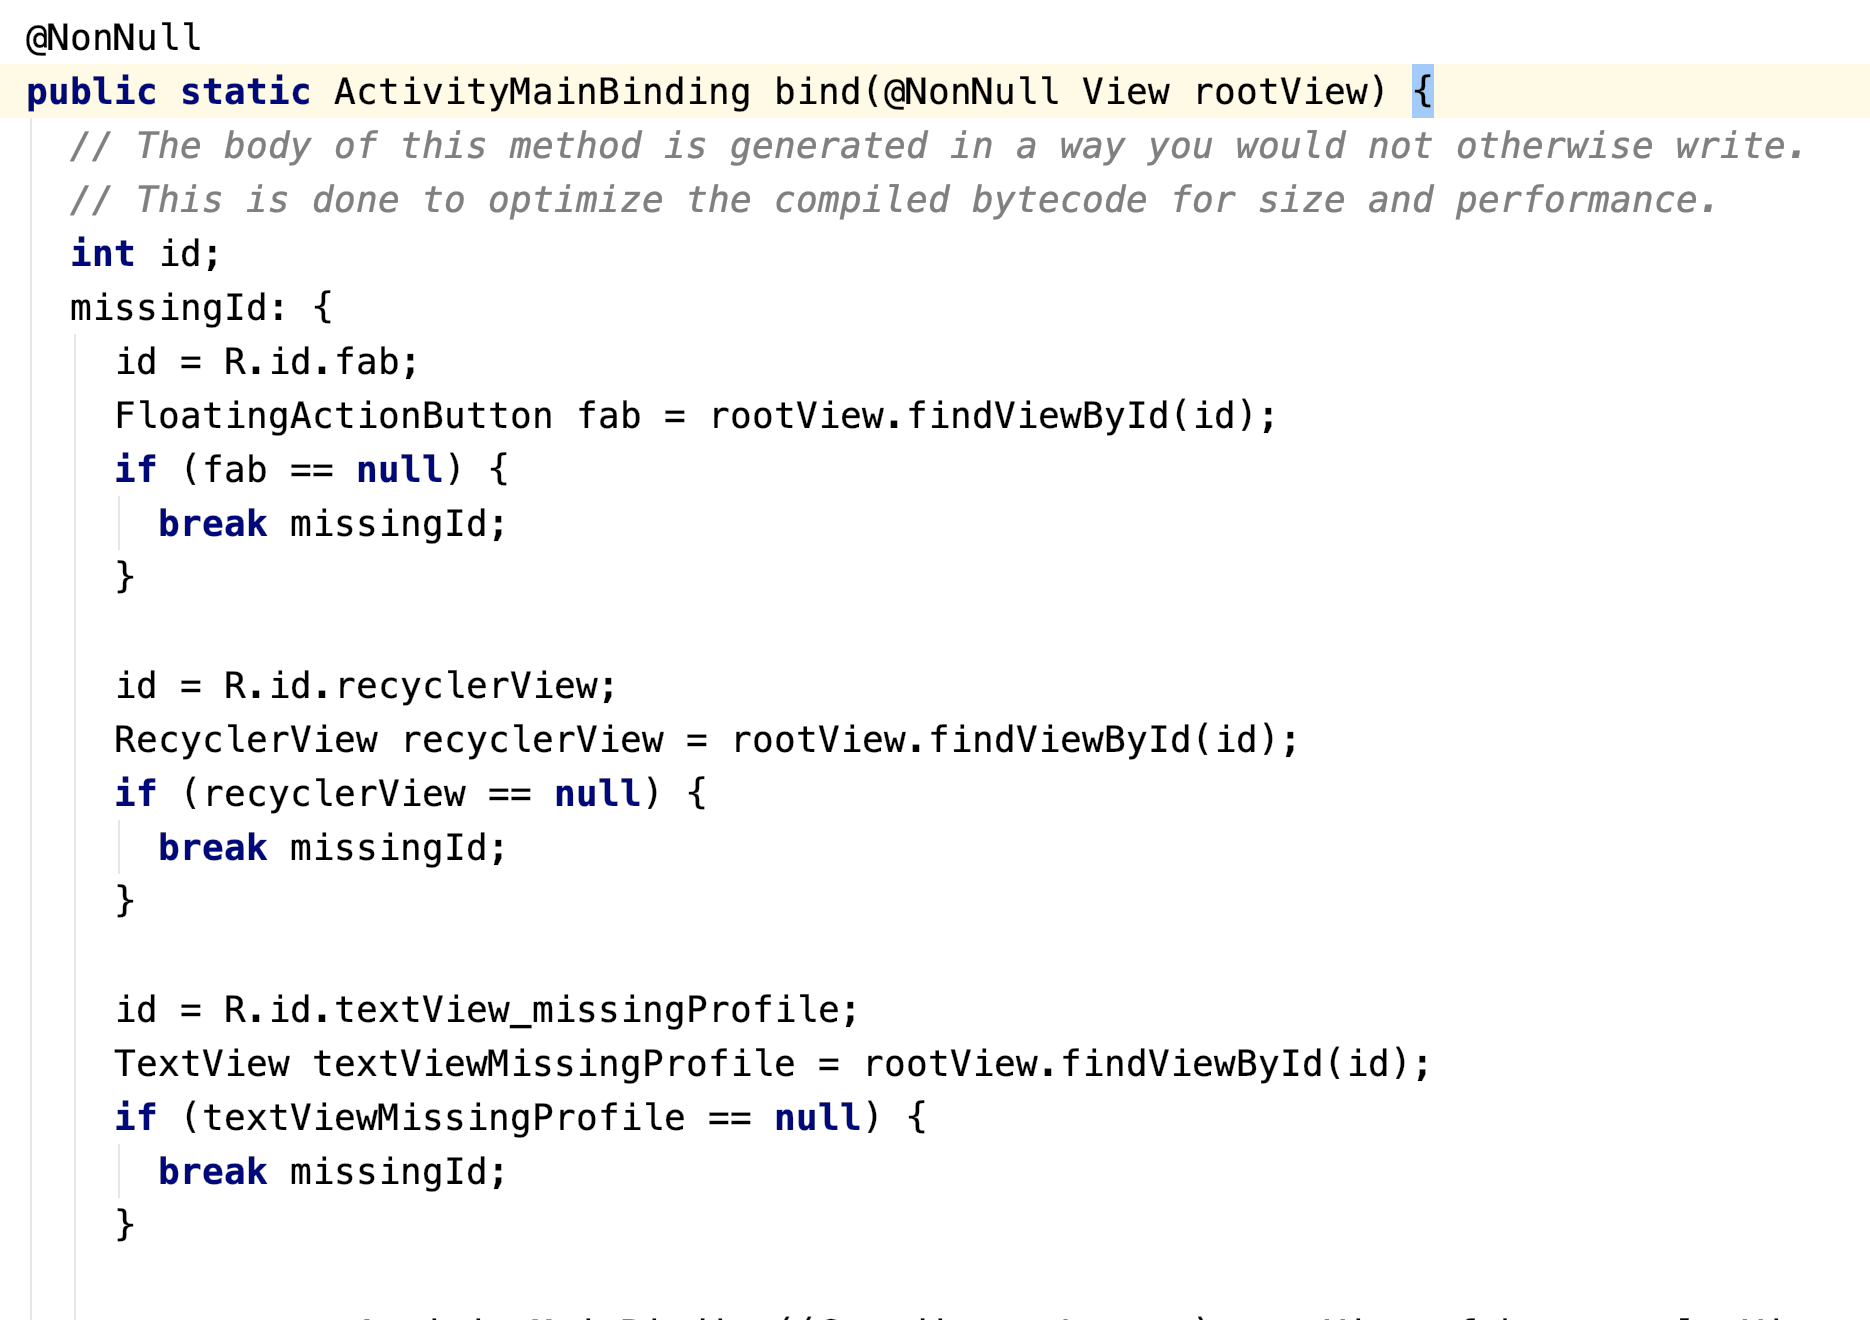
These are the good old findViewByIds() calls, which you now don’t have to write yourself! :]
Disabling View Binding
If for any reason you want to disable View Binding on a specific layout, you can open it up and add the following statement:
<LinearLayout
  ...
  tools:viewBindingIgnore="true" >
  ...
</LinearLayout>
This prevents the view binder compiler from generating the associated binding class.
View Binding Coexisting With Data Binding
As you’ve seen, there’s no reason you can’t use both Data Binding and View Binding on the same project. By default, the view binder compiler generates a binding class for each XML file. But, if you want to use Data Binding instead, you have to add the layout tag, as root, to the XML file.
Remember that you didn’t change activity_log.xml, which was using Data Binding. You can find the generated files from the data binding compiler in the following packages, within the project structure:

Where to Go From Here?
Congratulations! You now know how to use View Binding! :]
You can download the begin and end projects by using the Download Materials button at the top or bottom of the tutorial, if you haven’t already, and explore both the projects.
Furthermore, if you want to learn more about the subject, please check the following references:
I hope you enjoyed this introduction to View Binding in Android tutorial. If you have any questions, comments or awesome modifications to this project app, please join the forum discussion below! Happy binding! :]