Saliency Analysis in iOS using Vision
In this tutorial, you’ll learn how to use the Vision framework in iOS to perform saliency analysis and use it to create an effect on a live video feed. By Yono Mittlefehldt.
Improving the Heat Map
While the heat map you have is pretty cool, there are two problems with it:
- The brightest spots can be quite dim if the algorithm isn’t very confident in its results.
- It looks pixelated.
The good news is that both issues are fixable.
Normalizing the Heat Map
You’ll solve the first problem by normalizing the heat map.
In CVPixelBufferExtension.swift, add the following normalizing method to the existing CVPixelBuffer extension:
func normalize() {
  // 1
  let bytesPerRow = CVPixelBufferGetBytesPerRow(self)
  let totalBytes = CVPixelBufferGetDataSize(self)

  let width = bytesPerRow / MemoryLayout<Float>.size
  let height = totalBytes / bytesPerRow

  // 2
  CVPixelBufferLockBaseAddress(self, CVPixelBufferLockFlags(rawValue: 0))

  // 3
  let floatBuffer = unsafeBitCast(
    CVPixelBufferGetBaseAddress(self),
    to: UnsafeMutablePointer<Float>.self)

  // 4
  var minPixel: Float = 1.0
  var maxPixel: Float = 0.0

  // 5
  for i in 0 ..< width * height {
    let pixel = floatBuffer[i]
    minPixel = min(pixel, minPixel)
    maxPixel = max(pixel, maxPixel)
  }

  // 6
  let range = maxPixel - minPixel

  // 7
  for i in 0 ..< width * height {
    let pixel = floatBuffer[i]
    floatBuffer[i] = (pixel - minPixel) / range
  }

  // 8
  CVPixelBufferUnlockBaseAddress(self, CVPixelBufferLockFlags(rawValue: 0))
}
Phew! That was a lot of code. Here you:
- Extract the width and height of the
CVPixelBuffer. You could do this by usingCVPixelBufferGetWidthandCVPixelBufferGetHeight. However, since you're going to iterate over the actual data, it's actually better to use bytes-per-row and total-data-size so that you know you're operating within the bounds of the assigned memory. - Lock the base address of the pixel buffer. This is required before accessing pixel data with the CPU.
- Cast the base address of the
CVPixelBuffertoFloatpointer, since you know that the heat map data is floating point data. - Initialize some variables to keep track of the minimum and maximum pixel values found.
- Loop through each pixel in the
CVPixelBufferand save the smallest and largest values. As theCVPixelBufferdata is mapped linearly in memory, you can just loop over the number of pixels in the buffer. - Calculate the range of the pixel values.
- Loop through each pixel again and normalize their values to fall between 0.0 and 1.0.
- Unlock the base address of the pixel buffer.
Before you try this out, you need to call normalize from your Vision request pipeline.
Open CameraViewController.swift, and find handleSaliency(request:error:) again. Just above the line where you declare and initialize ciImage, add this line:
result.pixelBuffer.normalize()
As normalize updates the CVPixelBuffer in place, make sure to call it before using result.pixelBuffer elsewhere.
Build and run the app again to see your more prominent heat map.

Not bad, right?
Blurring the Heat Map
Now, it's time to tackle the second problem: Pixelation. The pixelation happens because the heat map is 80 x 68 and you're scaling it up to the resolution of the video feed.
To fix this, apply a Gaussian blur to the heat map after scaling it up. Open CameraViewController.swift and find handleSaliency(request:error:) again. Then replace the following lines:
ciImage = ciImage
  .transformed(by: CGAffineTransform(scaleX: scaleX, y: scaleY))
With:
ciImage = ciImage
  .transformed(by: CGAffineTransform(scaleX: scaleX, y: scaleY))
  .applyingGaussianBlur(sigma: 20.0)
  .cropped(to: targetExtent)
You're applying a Gaussian blur directly after scaling the heat map and using a blur radius of 20.0. Since the blur will cause the image to grow by the blur radius on each side, crop it to the original image extent.
Build and run again and see your new and improved heat map!

Object-Based Heat Maps
Now that you're an expert in attention-based heat maps, it's time for you to experiment with object-based ones.
The object-based heat maps will attempt to segment entire objects that are deemed interesting. The Vision framework will try to conform the heat map to the shape of an object.
Additionally, you'll write the code in a way that will allow you to flip quickly between attention-based and object-based saliency. Doing so will allow you to see the difference between the two saliency methods easily.
Open CameraViewController.swift again. Go to captureOutput(_:didOutput:from:) and find the line where you create the VNGenerateAttentionBasedSaliencyImageRequest.
Replace that line with the following code:
// 1
let req: VNImageBasedRequest

// 2
var selectedSegmentIndex = 0

// 3
DispatchQueue.main.sync {
  selectedSegmentIndex = saliencyControl.selectedSegmentIndex
}

// 4
switch selectedSegmentIndex {
case 0:
  req =
    VNGenerateAttentionBasedSaliencyImageRequest(completionHandler: handleSaliency)
case 1:
  req =
    VNGenerateObjectnessBasedSaliencyImageRequest(completionHandler: handleSaliency)
default:
      fatalError("Unhandled segment index!")
}
With this code change, you:
- Declare a constant
VNImageBasedRequest. Both types of saliency analysis requests inherit from this class, so you can use this constant to store either. Additionally, you can make it a constant instead of a variable as you guarantee to only assign it once. - Initialize a variable to store the index of the selected segment from a
UISegmentedControl. You have to initialize it in addition to declaring it. Otherwise, you would get an error that it was not initialized before being captured by the subsequent closure. - Read the
selectedSegmentIndexproperty of the predefinedUISegmentedControlon the main thread to avoid accessing UI elements on a background thread. - Create either a
VNGenerateAttentionBasedSaliencyImageRequestor aVNGenerateObjectnessBasedSaliencyImageRequestbased on which segment was selected.
Before you can build and run, make the UISegmentedControl visible at the appropriate time.
Find handleTap(_:) and add the following line at the top of the method:
saliencyControl.isHidden = false
Then, under the .heatMap case, add this line:
saliencyControl.isHidden = true
The complete method should look like this:
@IBAction func handleTap(_ sender: UITapGestureRecognizer) {
  saliencyControl.isHidden = false

  switch mode {
  case .original:
    mode = .heatMap
  case .heatMap:
    mode = .original
    saliencyControl.isHidden = true
  }

  modeLabel.text = mode.rawValue
}
You're making the default state of the saliencyControl visible, unless you're going to transition to the .original state, at which point you want to hide it.
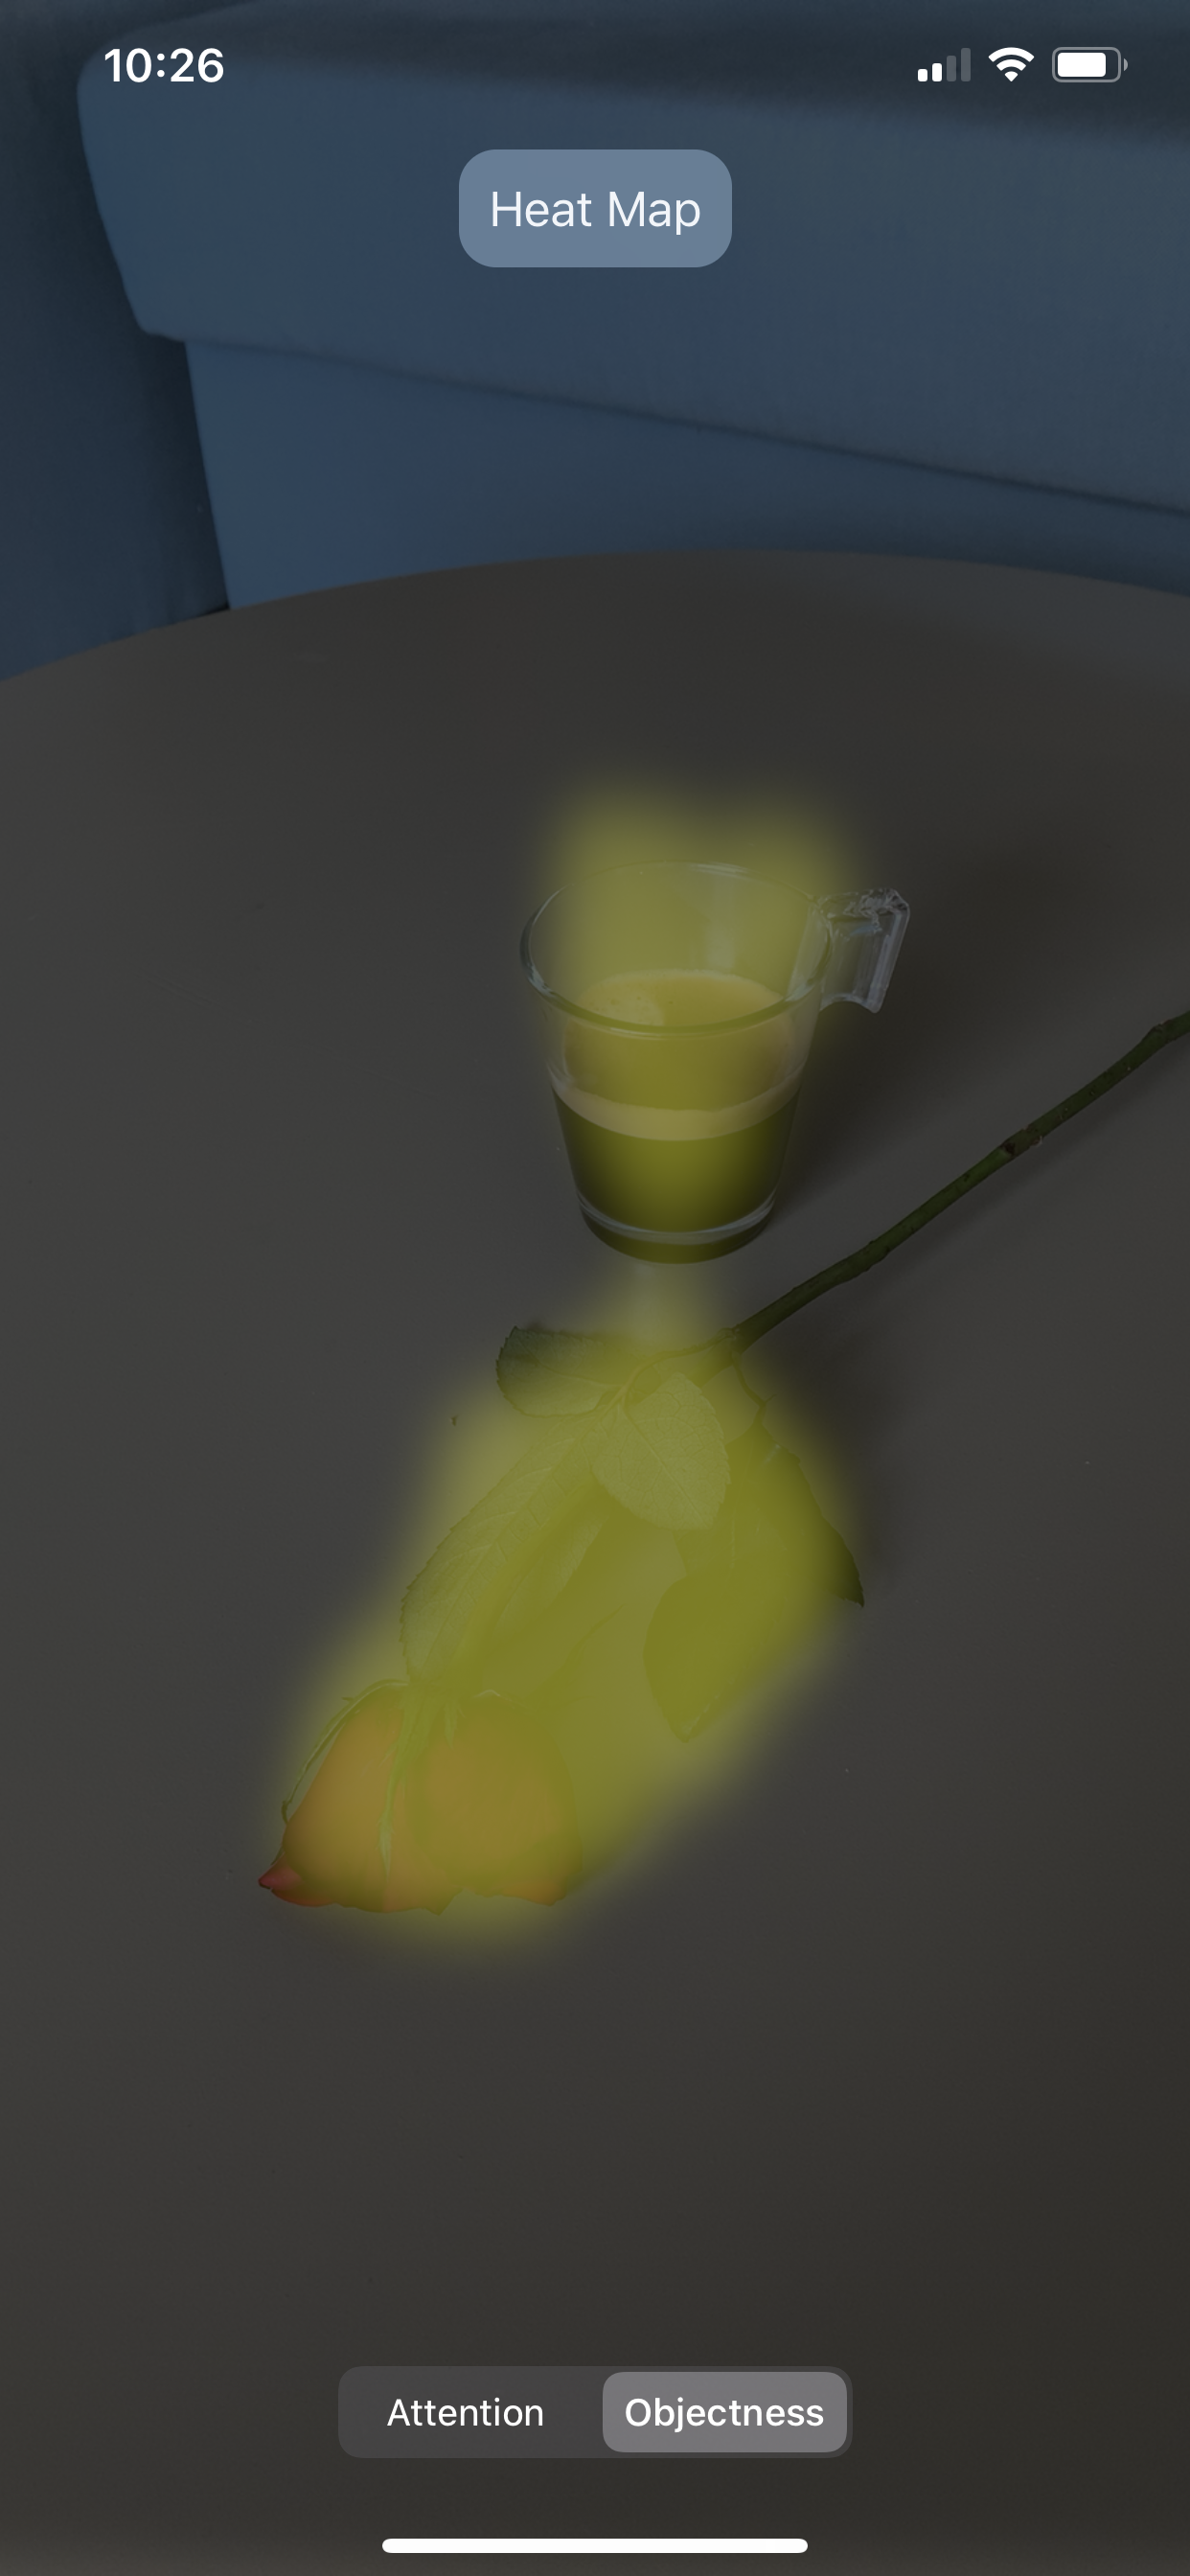
Build and run. Switch to heat map mode. You should see a segmented control at the bottom of the screen, which allows you to change between attention-based and object-based saliency.
Spotlight Effect Using the Saliency Heat Maps
One use for saliency analysis is to create effects based on the heat maps to apply to images or video feeds. You're going to create one that highlights the salient areas and darkens everything else.
Still in CameraViewController.swift, just below showHeatMap(with:), add the following method:
func showFlashlight(with heatMap: CIImage) {
  // 1
  guard let frame = currentFrame else {
    return
  }

  // 2
  let mask = heatMap
    .applyingFilter("CIColorMatrix", parameters:
      ["inputAVector": CIVector(x: 0, y: 0, z: 0, w: 2)])

  // 3
  let spotlight = frame
    .applyingFilter("CIBlendWithMask", parameters: ["inputMaskImage": mask])

  // 4
  display(frame: spotlight)
}
In this method, you:
- Unwrap the current frame, which is a
CIImage. - Use a Core Image filter to multiply the alpha channel of the heat map by 2, thereby producing a brighter and slightly larger heated area in the heat map.
- Apply another Core Image filter to mask out any pixels from the frame where the heat map is black.
- Display the filtered image.
This method will be your special effects workhorse. To enable it, add a new case to the ViewMode enum at the top of the file:
case flashlight = "Spotlight"
Xcode should now be complaining. Replace the switch statement in handleTap with the following:
switch mode {
case .original:
  mode = .heatMap
case .heatMap:
  mode = .flashlight
case .flashlight:
  mode = .original
  saliencyControl.isHidden = true
}
This adds the new .flashlight case and adds it as the new mode after .heatMap.
Finally, at the bottom of handleSaliency(request:error:), replace the call to showHeatMap(with:), with the following code:
switch mode {
case .heatMap:
  showHeatMap(with: ciImage)
case .flashlight:
  showFlashlight(with: ciImage)
default:
  break
}
Here you choose the appropriate display method depending on the mode the app is in.
Build and run your app and check out the spotlight effect using both attention-based and object-based saliency!

