Saving Data with an ObjectBox Database on Android

In this tutorial, you’ll learn about saving data with an ObjectBox database on Android. You’ll also learn about the different types of databases. By Subhrajyoti Sen.

Leave a rating/review
Download materials
Save for later
Share

In this tutorial, you’ll learn about saving data with an ObjectBox database on Android. You’ll also learn about the different types of databases, the pros and cons of each type and how to implement them.

A local database is a file that allows your app to store a collection of data on a device. It’s useful when you want your app to persist data even if the user closes and reopens the app.

Local databases become especially important when you want to store a list of things. For example, you might want to store a list of the webpages the user has bookmarked on a browser.

To do this, you’ll create an app that lets you store a list of items that people have borrowed from you. You can change the borrowed item, the borrower and the date the person borrowed the item. The app also lets you search for items and filter based on the name of the item or date borrowed.

Before you get started, it’s time to review some background information.

When to Use a Local Database

While local databases can be very useful, they aren’t necessary for every situation.

You should use a local database when you want to persist app data across app sessions. They’re also helpful if you want to store a large volume of data that should be easy to access and manipulate. You can also use local databases to store a collection of data, such as a list of borrowed items.

Local databases aren’t meant for storing a few primitive values. You also wouldn’t use them to store user preferences.

Next, you’ll review two basic types of databases.

Types of Databases

You can classify databases by how they store data. By this method, there are two types of databases: relational databases and document-oriented databases.

Relational databases store data in tables. Each column of the table represents a data property. Each row in the table represents a data entry.

You define the column names and the type of data they can contain. Together, they are the schema. You do this using a language specified by the database.

SQLite is an example of a relational database.

In document-oriented databases, you store data as a collection of documents. Each document corresponds to one data entry. You can think of them as a series of files in a file cabinet.

Couchbase and Realm are both document-based databases.

Choosing the Right Type of Database

The kind of database you should use depends on what you need it to do.

If you want your database to be consistent, and the structure of your data is unlikely to change, you should consider a relational database. For example, a relational database would work well for an app that stores only user contact information.

If you want to store data that doesn’t have a fixed structure and is variable, you should consider a document-oriented database. It lets you store documents without mentioning the document structure beforehand. An app that stores responses received from a server that are likely to change often would benefit from using a document-based database.

Now that you’ve reviewed when to use databases and what types exist, you’ll take a look at the operations commonly used in them.

CRUD Operations

CRUD stands for Create Read Update Delete. These are the basic operations performed on every database.

Consider the app you’re going to make. It stores a list of borrowed items. Here’s the details of each operation:

  1. Create: This operation creates a new record in the database. If someone borrows a PlayStation game from you and you want to add it to the database, you’ll create a new record.
  2. Read: This operation reads an existing record in the database. If you want to find out who borrowed the game and when, you’ll perform a read operation to get the details.
  3. Update: This operation updates an existing record in the database. If you want to change the date when your game was borrowed, you’ll perform an update operation.
  4. Delete: This operation deletes an existing record from the database. If your friend returns the game and you no longer want to keep a log of that, you’ll perform a delete operation.

You’re now ready to start building the app!

Getting Started

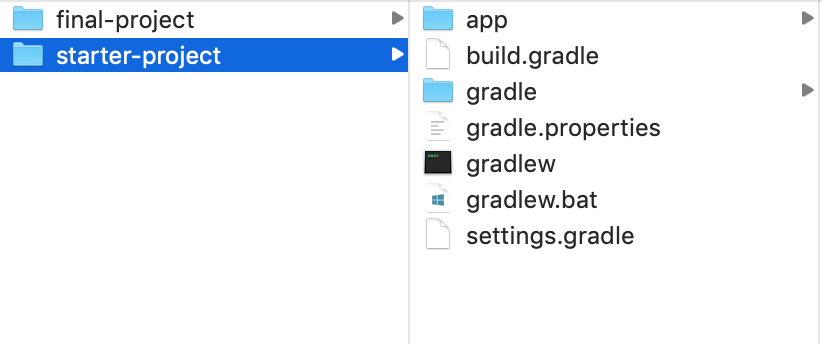
Download the materials using the Download Materials button at the top or bottom of this tutorial. Inside the materials, you’ll find a starter project and a final project. Open Android Studio and select the Open an existing Android Studio project option.

Open an existing Android Studio project

Select the starter project from the download materials folder.

Select the starter project from the download materials folder

Once imported, build and run the app. You should get a screen like this:

starter project initial screen

Right now the menu items don’t do anything. You’ll modify them later in the tutorial.

Click the FloatingActionButton in the lower right corner of the app. It should take you to a new Activity which looks like this:
starter project detail screen

For now, the FloatingActionButton on this Activity doesn’t perform any action.

The starter project consists of the following that you should know about:

  • A MainActivity that contains a RecyclerView and a FloatingActionButton.
  • A BorrowRecyclerViewAdapter with an ItemDecoration, to make the list look nicer.
  • A DateHelper class used to format the dates.
  • A BorrowedItemModel class which represents each borrowed item’s details.

Integrating a Relational Database

SQLite is the default relational database available for Android. Every version of Android ships with a specific version of SQLite. Thus, you can expect your database to function consistently across devices.

While the SQLite APIs provided by Android are very powerful, it’s generally not recommended you use them directly. There are several reasons for this caution:

  • The APIs require you to write your database queries using Structured Query Language, or SQL. If you don’t already know SQL, this becomes an additional thing to learn.
  • You don’t have compile-time verification for the query. So, if you’ve written an invalid query, the app will build fine but raise an exception at run time. That’s not good.
  • You need to write a lot of boilerplate code to set up the database.
  • You need to write a lot of code to convert the results of your SQL queries to Kotlin objects.

To solve these issues, use an Object Relational Mapper, or ORM. An ORM is a library that lets you write queries on your database using the object-oriented approach of another language, such as Kotlin.

Room is a popular ORM for Android that is built on top of SQLite. To learn more about Room, you can refer to this tutorial.

This tutorial covers the setup and use of ObjectBox, a popular document-oriented database.

Adding ObjectBox to Your Project

First, you will need to add the dependency for ObjectBox to your project.
Open the project level build.gradle and add the following dependency inside the dependencies block:

classpath 'io.objectbox:objectbox-gradle-plugin:2.3.4'

Open the app level build.gradle and add the following line right before the android tag:

apply plugin: 'io.objectbox'

Be sure to sync your gradle files with the project.

Creating the Database Entry Structure

Since you want to store a list of borrowed items’ details, you first need to define the fields you want to store. This is the Entity and provides the database with the structure used to store data.

Open BorrowedItemModel.kt from the project. You can see a Kotlin data class:

data class BorrowedItemModel(
  var id: Long = 0,
  val itemName: String,
  val borrowerName: String,
  val borrowDate: String
)

Notice that only the id field is a var while the others are val. You’ll get back to that in a moment.

To tell ObjectBox that BorrowedItemModel is the Entity you want to store, you have to annotate it with @Entity as below:

@Entity
data class BorrowedItemModel(
    // declared fields
)

After you add the @Entity annotation, you can alt + enter on the annotation to get Android Studio to automatically add the necessary import statement for you.

ObjectBox needs a way to uniquely identify each Entity. This identifier needs to be a field of type Long. This is what the id field in BorrowedItemModel is for.

To make ObjectBox use id as the identifier, you need to annotate it with @Id as follows:

@Entity
data class BorrowedItemModel(
    @Id
    var id: Long = 0,
    // other declared fields
)

Build and run the app. While you won’t notice any difference, ObjectBox creates a file called BorrowedItemModel_.java that it’ll use internally.

Creating the BoxStore

To perform operations on the database, first you’ll need a BoxStore instance. You can think of it as a box where you store all the entities.

Create a file called ObjectBox.kt and add the following code to it:

object ObjectBox {

  lateinit var boxStore: BoxStore
    private set

  fun init(context: Context) {
    boxStore = MyObjectBox.builder()
      .androidContext(context.applicationContext)
      .build()
  }

}

This class creates and stores a single instance of BoxStore that’s accessible across the app. These types of classes are known as Singletons.

You have to initialize BoxStore once the app starts, which you can do with an Application class. The project already contains an Application class, BorrowApp.kt. Open it and add the following code at the end of the onCreate function:

ObjectBox.init(this)

This uses the Application Context to initialize BoxStore. BoxStore is tied to the entire app, not a single Activity. This is why you use an Application Context instead of an Activity Context.

Add Entities to the Database

Since you want to store entities from the new Activity, you’ll need a BoxStore instance. Open BorrowedItemActivity.kt and declare the following variable before onCreate:

private val borrowBox = ObjectBox.boxStore.boxFor(BorrowedItemModel::class.java)

This uses the BoxState singleton and gives access to a Box created specifically for storing BorrowedItemModel instances.

Now that everything is set, you have to extract the values from the input fields and add them to the database.

Add the following code inside fab.setOnClickListener lambda inside BorrwedItemActivity:

// 1
if (borrowed_item_name_edittext.text.isNullOrBlank() ||
  borrower_name_edittext.text.isNullOrBlank() ||
  borrow_date_textview.text.isNullOrBlank()) {
    Toast.makeText(this, "Please enter all the required fields", 
      Toast.LENGTH_SHORT).show()
} else {
  // 2
  val borrowedItem = BorrowedItemModel(
    itemName =  borrowed_item_name_edittext.text.toString(),
    borrowerName = borrower_name_edittext.text.toString(),
    borrowDate = borrow_date_textview.text.toString()
  )
  // 3
  borrowBox.put(borrowedItem)
  finish()
}

This code does a couple of things:

  1. First, the code verifies all the required fields.
  2. Then it creates a BorrowedItemModel instance with the entered values.
  3. Finally, it saves the item and finishes the Activity.

Remember how the id field was a var? It’s because you don’t manually set it.

ObjectBox internally generates an id and assigns it to the id field when an entity inserts into the database. borrowBox.put() puts an entity in the database.

Build and run the project. Notice that even though you’re storing the entity in the database, you can’t see it anywhere. That’s because there’s no write query yet.

Add entities to the database

Reading From the Database

Now MainActivity will need a Box for BorrowedItemModel. Add the following variable to MainActivity, as you did for BorrowedItemActivity:

private val borrowBox = ObjectBox.boxStore.boxFor(BorrowedItemModel::class.java)

Next, you need to create a Query instance so you can create a query. Add the following code right below borrowBox. When using alt + enter to automatically create the import, be sure to choose import io.objectbox.query.Query:

private lateinit var borrowQuery: Query<BorrowedItemModel>

This declares an instance of Query that’s performed on a Box for BorrowedItemModel.

Add the following code inside onCreate:

borrowQuery = borrowBox.query()
  .build()

This creates a query that fetches all the entities in the order of insertion. This is the read query.

Now that the query is ready, it needs to run every time anything changes in the database. Normally, this would be a messy task.

Luckily, each Query in ObjectBox is reactive. Reactive means it’s automatically called if anything in the database changes.

You need to subscribe to the query to get an updated list of entities. To do that, you first need to declare a DataSubscription instance. Add the following code before onCreate:

private lateinit var subscription: DataSubscription

Then, inside onCreate, below the other code you interted, add:

subscription = borrowQuery
  .subscribe()
  .on(AndroidScheduler.mainThread())
  .observer {notes -> borrowRecyclerViewAdapter.setBorrowedItemList(notes) }

AndroidScheduler.mainThread() specifies that the subscription happens on the Android main thread. This is because you can’t update the UI from a background thread.

Now every time the list of entities changes, the RecyclerViewAdapter is also updated.

When dealing with a subscription, always remember to cancel it when you no longer need it. This prevents memory leaks. To do this, add the cancellation logic in onDestroy:

subscription.cancel()

Build and run the project. You’ll notice that the item you previously added now shows up in the list.

the item you previously added now shows up in the list

Editing an Entity

To edit an Entity, you need access to its id. So, the id needs to be passed to the editing Activity. To do this, modify the body of startBorrowItemActivity to be the following:

val intent = Intent(this, BorrowedItemActivity::class.java)
if (id != null) {
  intent.putExtra(INTENT_EXTRA_KEY, id)
}
startActivity(intent)

Here, it passes the selected entity’s id to the next BorrowedItemActivity.

Now the next Activity needs to read this id and populate the input field with the values of the Entity. To do this, first create a variable to store the entity to be edited, as follows inside BorrowedItemActivity:

private var borrowItemToBeEdited: BorrowedItemModel? = null

Now, add the following block inside onCreate() right below setContentView():

val borrowId = intent.extras?.getLong(MainActivity.INTENT_EXTRA_KEY)
if (borrowId != null) {
  borrowItemToBeEdited = borrowBox.get(borrowId)
  borrowed_item_name_edittext.setText(borrowItemToBeEdited?.itemName)
  borrower_name_edittext.setText(borrowItemToBeEdited?.borrowerName)
  borrow_date_textview.text= borrowItemToBeEdited?.borrowDate
}

borrowBox.get(borrowId) reads the entity id from the intent and then reads the correct entity from the database using the id. It then uses the item’s values and assigns them to the inputs.

There’s one step left. You need to update the existing entity and not create another entity in the Box. To do this, add the following block right before adding the entity to the box using borrowBox.put(borrowedItem):

if (borrowItemToBeEdited != null) {
  borrowedItem.id = borrowItemToBeEdited!!.id
}

This sets the entity’s id to the one passed to the Activity and thus, updates the entity.

Build and run the project. Click on any row in the list, update any field and click the FloatingActionButton. You’ll see the row was updated with the new values.

the row corresponding to your entity is edited

Deleting an Entity

Deleting an entity in ObjectBox is pretty straightforward. You need the entity id. The syntax for removing an entity is the following. Don’t worry about adding it until the next step:

objectBox.remove(entityId)

Open BorrowedItemActivity and add the following code inside deleteBorrowedItem():

if (borrowItemToBeEdited != null) {
      // force unwrap (not-null assertion) here is fine since id can't become
      // null once set.
      borrowBox.remove(borrowItemToBeEdited!!)
      Toast.makeText(this,  "Removed note with title " +
              borrowItemToBeEdited?.itemName, Toast.LENGTH_LONG).show()
      finish()
    }

First, this checks if you’re editing an existing entity. Then it removes the entity from the Box using the entity’s id.

Build and run the project. Click any row in the list and then click the Delete icon on the toolbar. You’ll notice that the row corresponding to your entity is removed.

the row corresponding to your entity is edited

Sorting the Entities

You might want to sort the list of entities by the date added or the name of the borrowed item. Remember the toolbar menu items that didn’t do anything? You’ll make them functional in this section.

But first, take a look at how you’d sort the entities from the database.

You need to use order() while building the query. To make the query return items sorted by the name of the borrowed item, you need a query like this:

borrowBox.query()
  .order(BorrowedItemModel_.itemName)
  .build()

Remember that BorrowedItemModel_ is the class generated by ObjectBox for your entity.

Open MainActivity.kt. By default, your original query sorts the entities by the order in which they were added. So right-click on the declaration for borrowQuery and from the context menu choose Refactor ‣ Rename and rename it to borrowDateSortQuery.
rename it borrowDateSortQuery

Next, add a field to store a query to sort by name just below:

private lateinit var borrowNameSortQuery: Query<BorrowedItemModel>

Then in onCreate(), add the query to sort the items based on name as shown below:

borrowDateSortQuery = borrowBox.query()
      .order(BorrowedItemModel_.borrowDate)
      .build()

After that, add the following to sort by name:

borrowNameSortQuery = borrowBox.query()
      .order(BorrowedItemModel_.itemName)
      .build()

Now all you need to do is switch your query based on the selected option in the menu. To do this, modify the block inside onOptionsItemSelected() as below:

   // Handle item selection
    when (item.itemId) {
      R.id.sort_by_name -> {
        subscription.cancel()
        subscription = borrowNameSortQuery.subscribe()
          .on(AndroidScheduler.mainThread())
          .observer { notes -> 
            borrowRecyclerViewAdapter.setBorrowedItemList(notes) 
          }
      }
      R.id.sort_by_date_added -> {
        subscription.cancel()
        subscription = borrowDateSortQuery.subscribe()
          .on(AndroidScheduler.mainThread())
          .observer { notes -> 
            borrowRecyclerViewAdapter.setBorrowedItemList(notes) 
          }
      }
    }
    item.isChecked = true
    return super.onOptionsItemSelected(item)

Whenever you select a new menu item, the previous subscription cancels. It also starts a new subscription based on the menu selection.

Build and run the project. Click the Sort icon and select the Name option. You’ll notice the list of items is sorted by item name and that it also updates. Make sure to have multiple list items so you can see the difference.

the list of items is sorted by item name

Searching for Entities

If many people borrow items from you, it might become difficult for you to look them up. Time to add search functionality! With it, the user can search based on the name of the borrowed item.

Replace queryForText() with the following:

  private fun queryForText(query: String) {
    val items = borrowBox.query()
      .contains(BorrowedItemModel_.itemName, query)
      .build()
      .find()

    borrowRecyclerViewAdapter.setBorrowedItemList(items)
  }

contains() checks if a certain field in the database contains a given string value. In this case, the name of the item should contain the string you searched for.

find() gets a non-reactive result from the query. You use this when you want the results only once and don’t want to subscribe to them.

Build and run the project. Click the Search icon and search for a string. You’ll notice that the list only shows rows that match the string.

the list only shows rows that match the string

Integrating a Document-Oriented Database

There are many document-oriented databases available for Android. Couchbase-lite is one of the most popular. Couchbase is a server-side database and Couchbase-lite is its mobile counterpart.

To learn more about Couchbase-lite and how to integrate it into your app, refer to this tutorial on Couchbase for Android.

Where to Go From Here?

You can download the final project using the Download materials button at the top or bottom of this tutorial.

You’ve created an app that integrates an ORM. It also performs CRUD operations on the database. You’ve also learned how to cancel your subscriptions.

As a further enhancement, try adding a batch delete option, which will allow the user to delete multiple entries at the same time. The user can long-press on a list item and then select multiple other items. Then, they can click on a toolbar item to delete all the selected rows.

As a UI enhancement, try allowing the user to delete a list item by swiping it left or right.

You can learn more about ObjectBox on the ObjectBox website.

Finally, for a much deeper dive into this topic, check out the Saving Data on Android book.

I hope you’ve enjoyed this tutorial! If you have any questions or ideas to share, please join the forum below.