White Labeling Android Apps: Getting Started
In this tutorial, you’ll learn step by step how to white label your Android apps by using Android flavors and build variants. By Aaqib Hussain.
Restructuring Directories
One way to control what the app looks like for each flavor is to use directories. Switch to Project view in Android Studio. Your project structure should look like this:
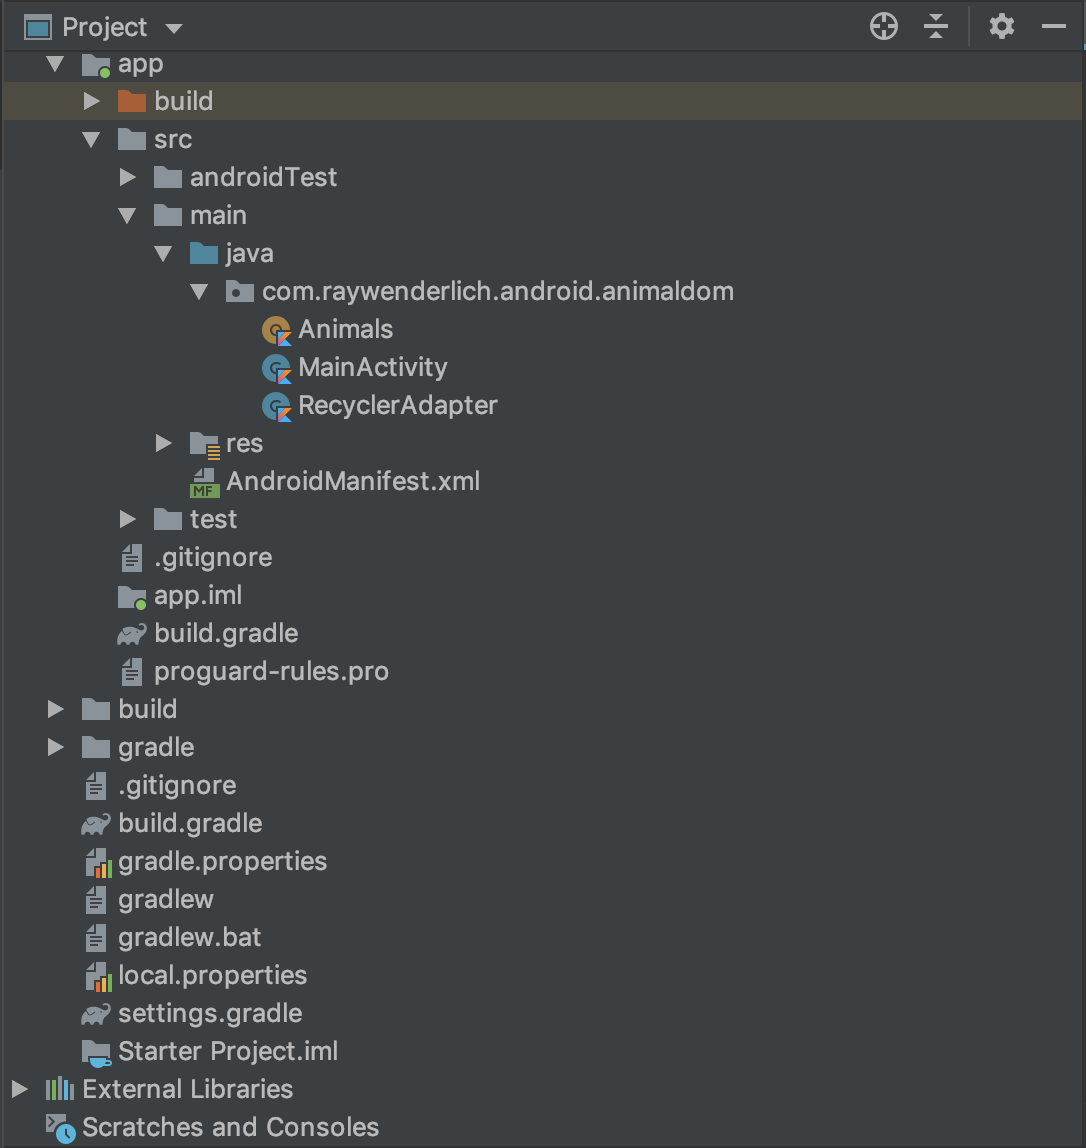
Your next task is to restructure your project. However, before you do, you should understand the code.
You can see there are three initial classes:
-
MainActivty: A simple activity with a
RecyclerView. -
RecyclerAdapter: An adapter for the
RecyclerView. - Animals: Returns the list of animal pictures from the resource.
The datasource of the app is in Animals.kt. This datasource is specific to Animaldom, so you’ll move this directory soon. You’ll create a separate Animals.kt file for Cats Planet, and then the structure will look something like:
- src/main/java: Will contain the MainActivity.kt and RecyclerAdapter.kt files.
- src/animaldom/java: Will hold the Animals.kt file and the res directory will contain the assets.
- src/catsPlanet/java This will contain a new Animals.kt file. Its res directory will contain the new assets.
So now it’s time to make some new directories.
Setting Up a Java Directory
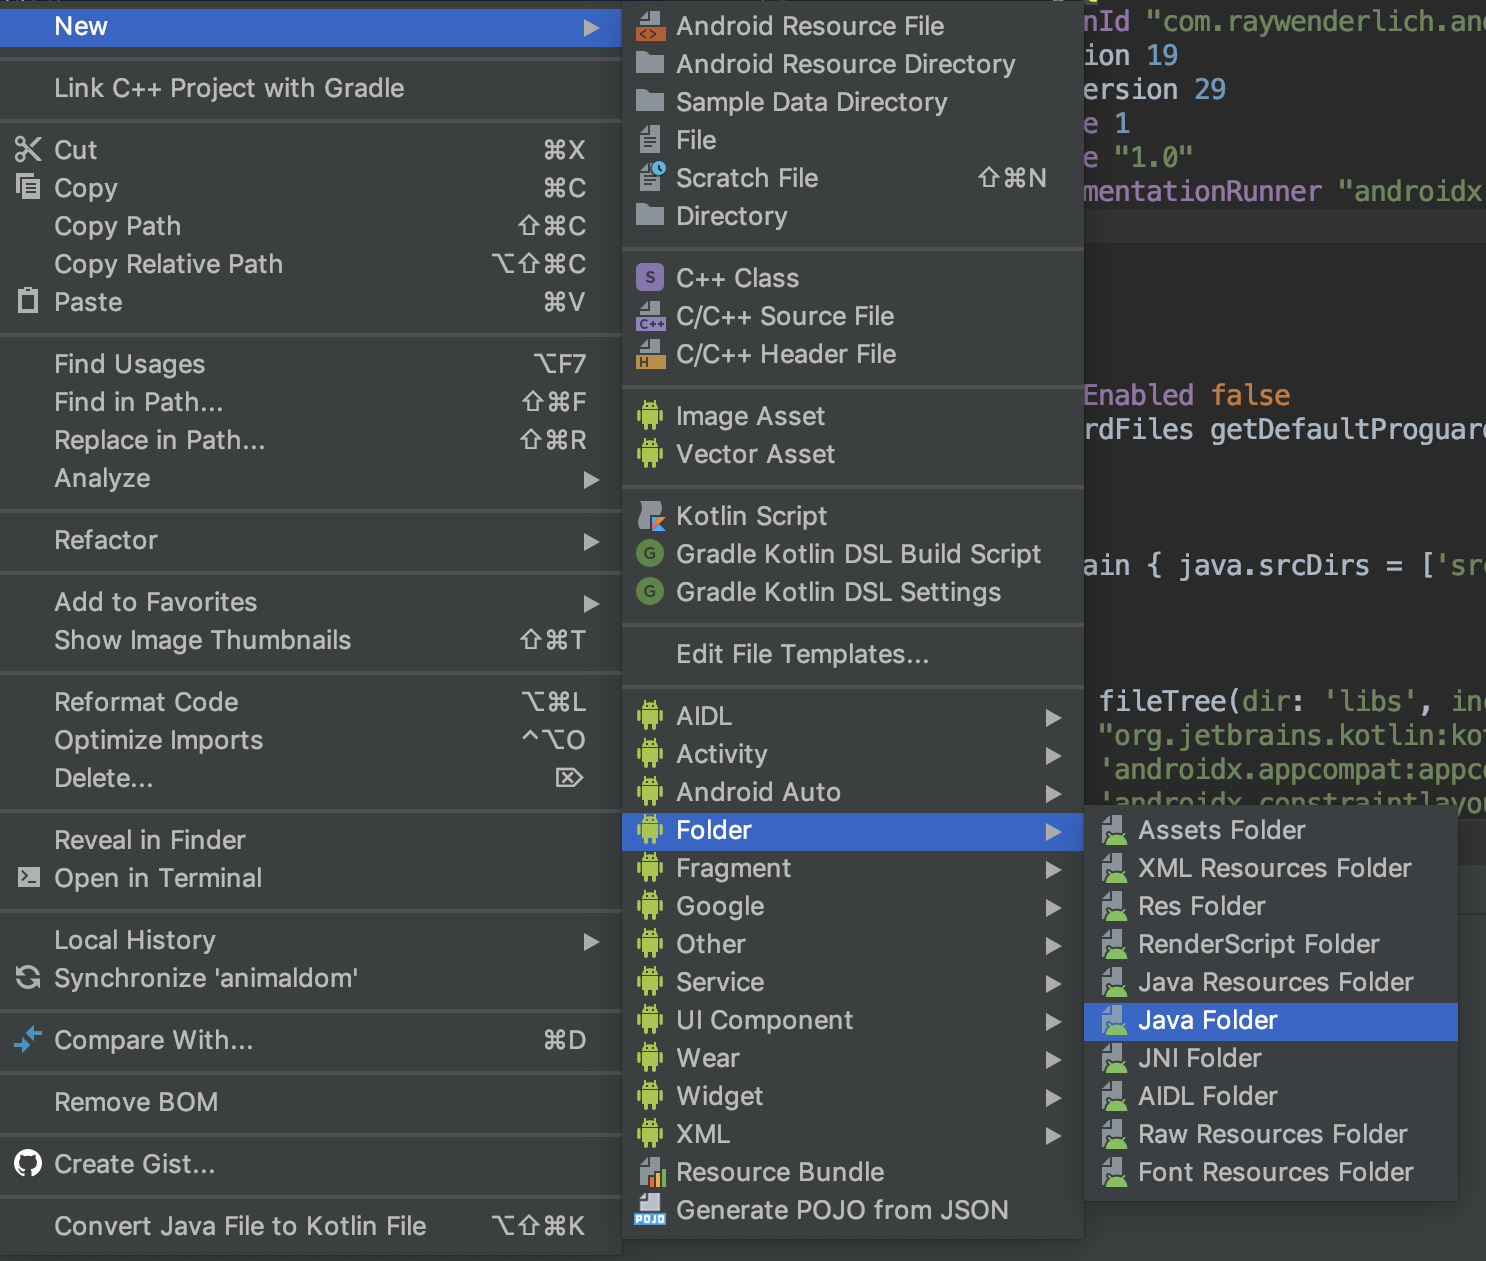
For your first step, go to Project View, right-click on src and select New ▸ Directory. Name the directory animaldom then click OK. This will create a directory with the name animaldom. After that, right-click on the animaldom directory and then select New ▸ Folder ▸ Java Folder.
You’ll see the following dialog:
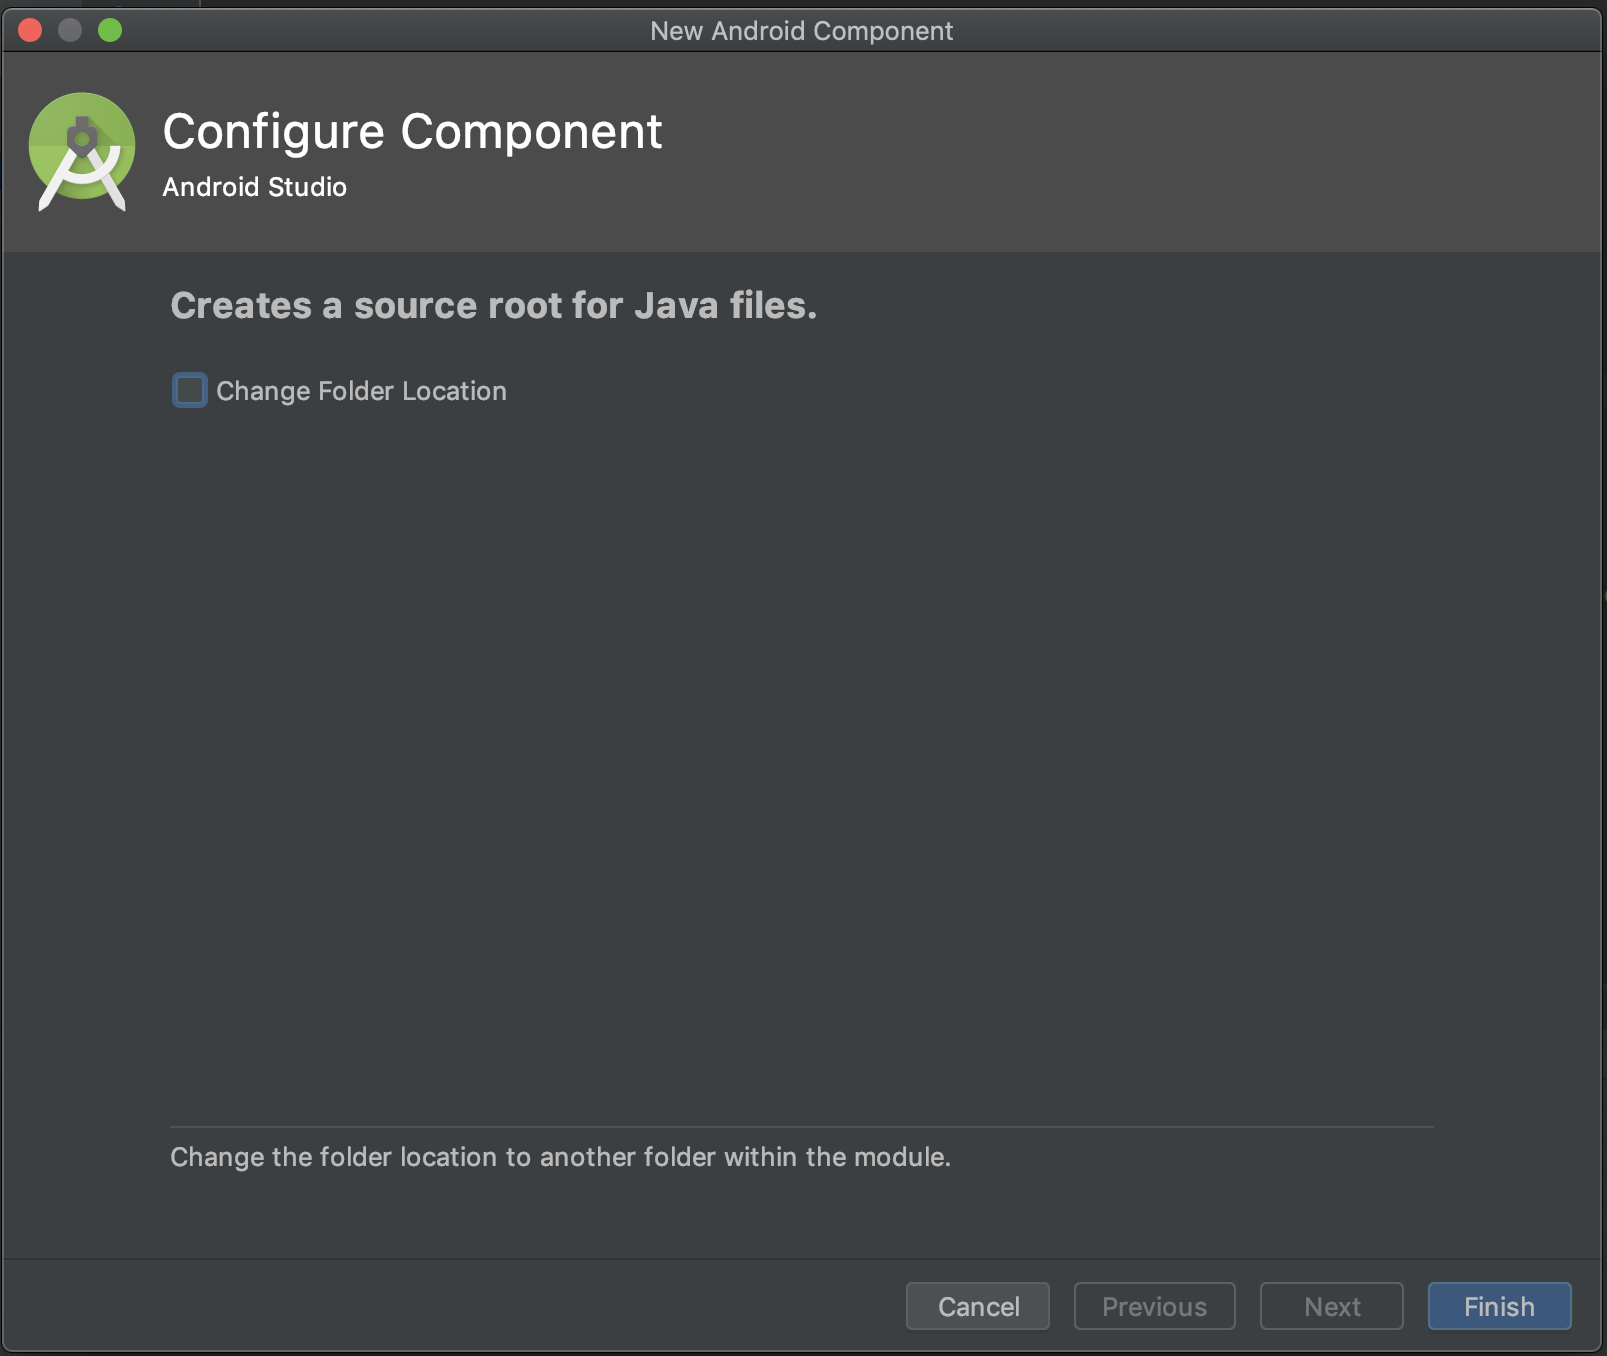
Check the box titled Change Folder Location.

In New Folder Location, enter src/animaldom/java then click Finish.
Now, your directory structure should look like this:

Setting Up the Animaldom Directory
Inside your newly created java directory, create a package by right-clicking on java. Then navigate to New ▸ Package and type com.raywenderlich.android.animaldom. Finally, click OK to confirm.
Next, create a res directory by right-clicking on animaldom and selecting New ▸ Folder ▸ Res Folder.
Your directory structure should now look like this:

Next, move Animals.kt from main to your newly-created package inside animaldom/java/com.raywenderlich.android.animaldom. Make sure you move it, not copy it. If you copy Animals.kt to the Animaldom package, you’ll need to delete it from the main package.
Finally, copy the mipmap-* and values directories from res of main to the res of animaldom. Also delete the files inside of the mipmap-xhdpi folder in the main resource directory.
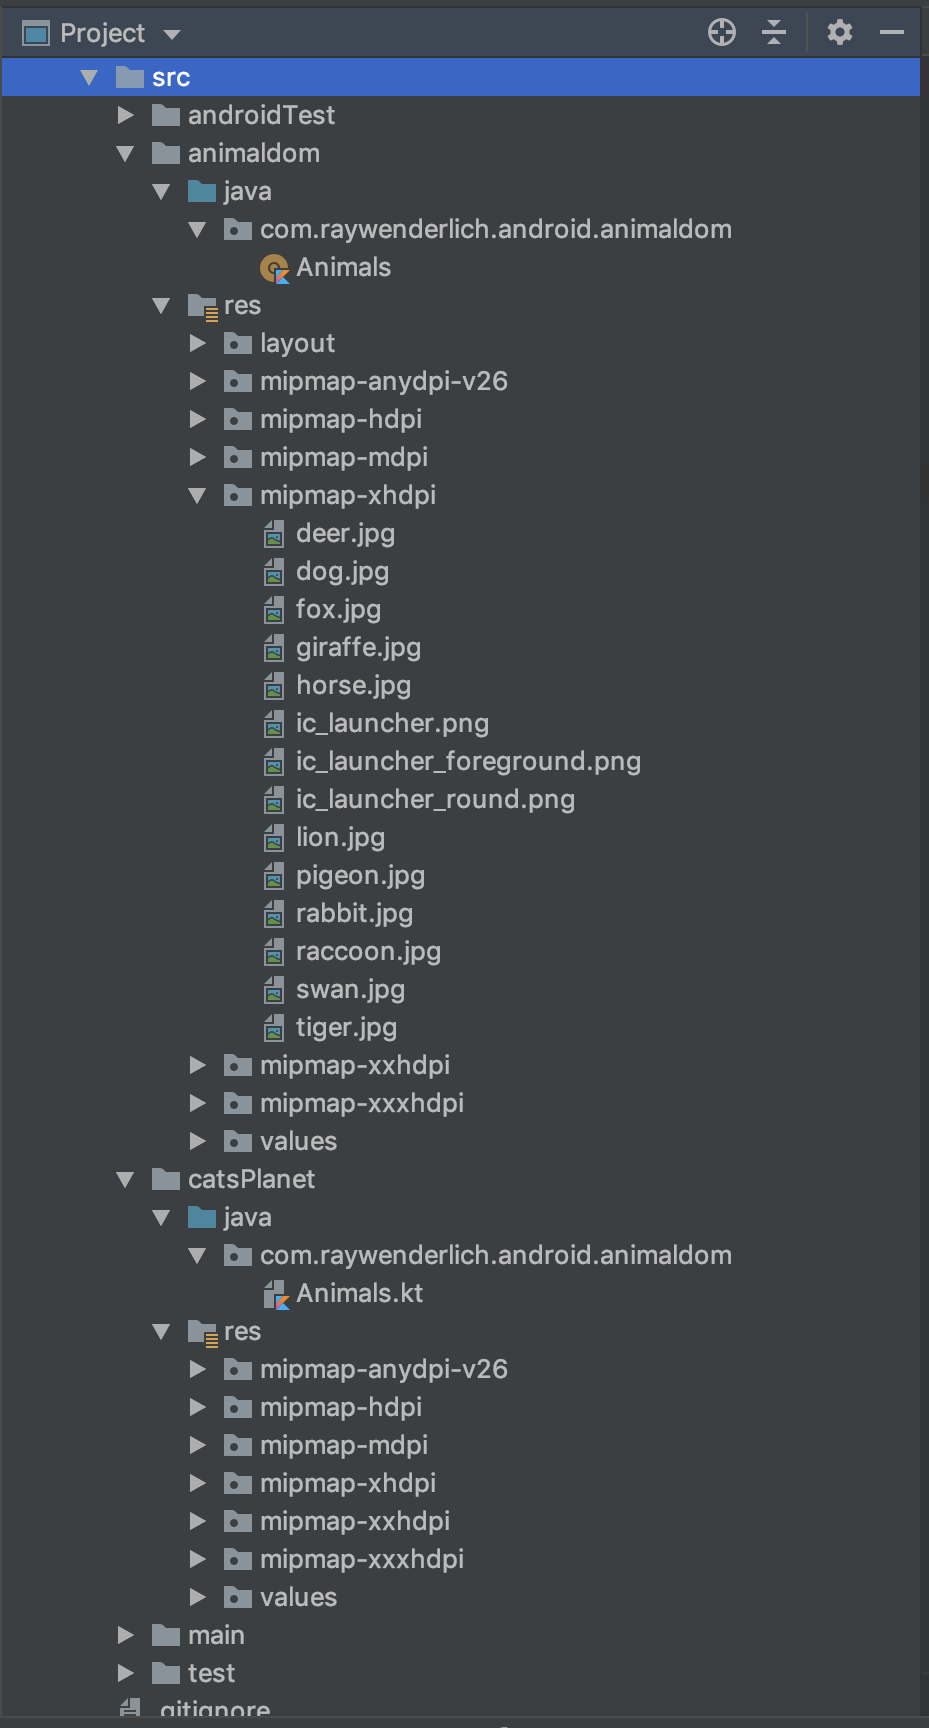
At the end of all this, your structure should look like this:
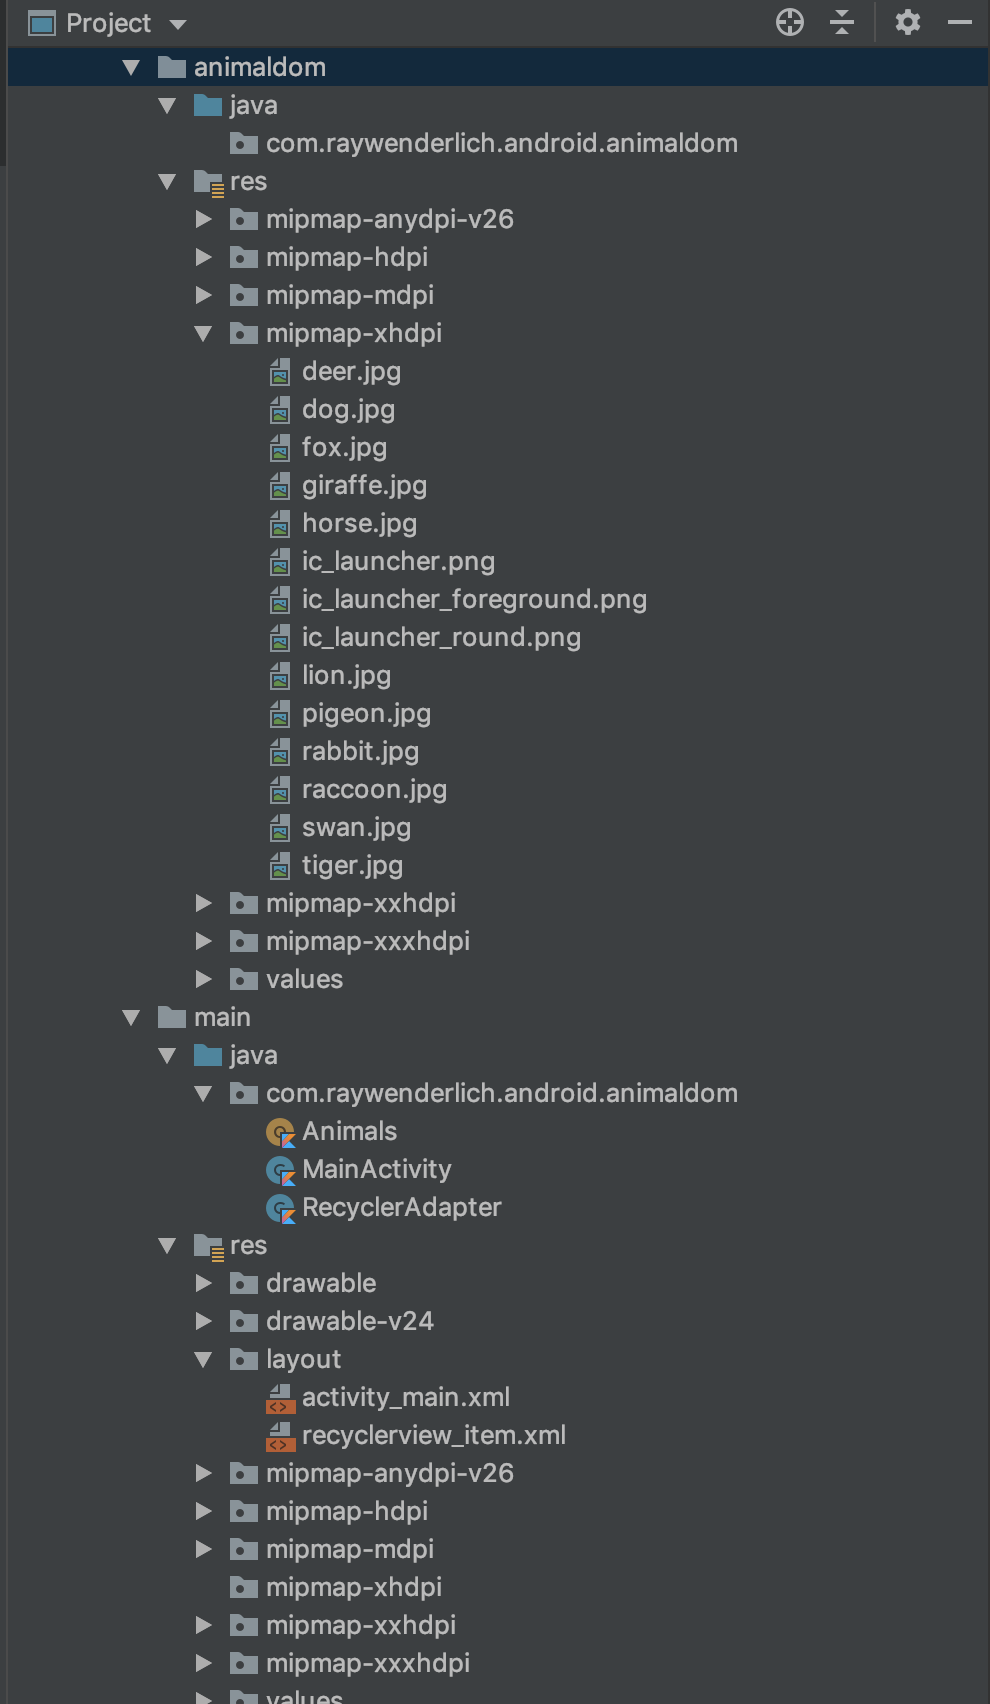
Build and run your app. It should work just fine and you should be able to see the list of animals, just like before.
Now that you have the directories set up for Animaldom, it’s time to configure catsPlanet’s directory.
Configuring the CatsPlanet Directory
Start by going to your Project view again, right-clicking on src and selecting New ▸ Directory. Name the directory catsPlanet and select OK.
The, right-click on your catsPlanet directory to create a java folder, same as before but with the catsPlanet path instead.
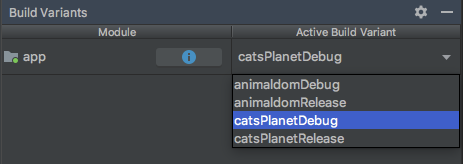
Then, switch from Project view to Android view. In the Build Variants pane, select the catsPlanetDebug variant:
Next, right-click on the Java folder and create a new package: com.raywenderlich.android.animaldom. If prompted to choose a destination directory, choose app ▸ src ▸ catsPlanet ▸ java.

If you’re wondering why you need to create two packages with the same identifier, it’s to be sure that the main app can access Animals.kt, regardless of the flavor you’re currently using.
To give catsPlanet access to the animals files, create a res directory for it by selecting New ▸ Folder ▸ Res Folder. Then, inside your package, create a new Kotlin file and name it Animals.kt.
Now, switch back to the Project view. Copy all the contents of the mipmap-* and values directories from the main resource package to the catsPlanet’s resource package.
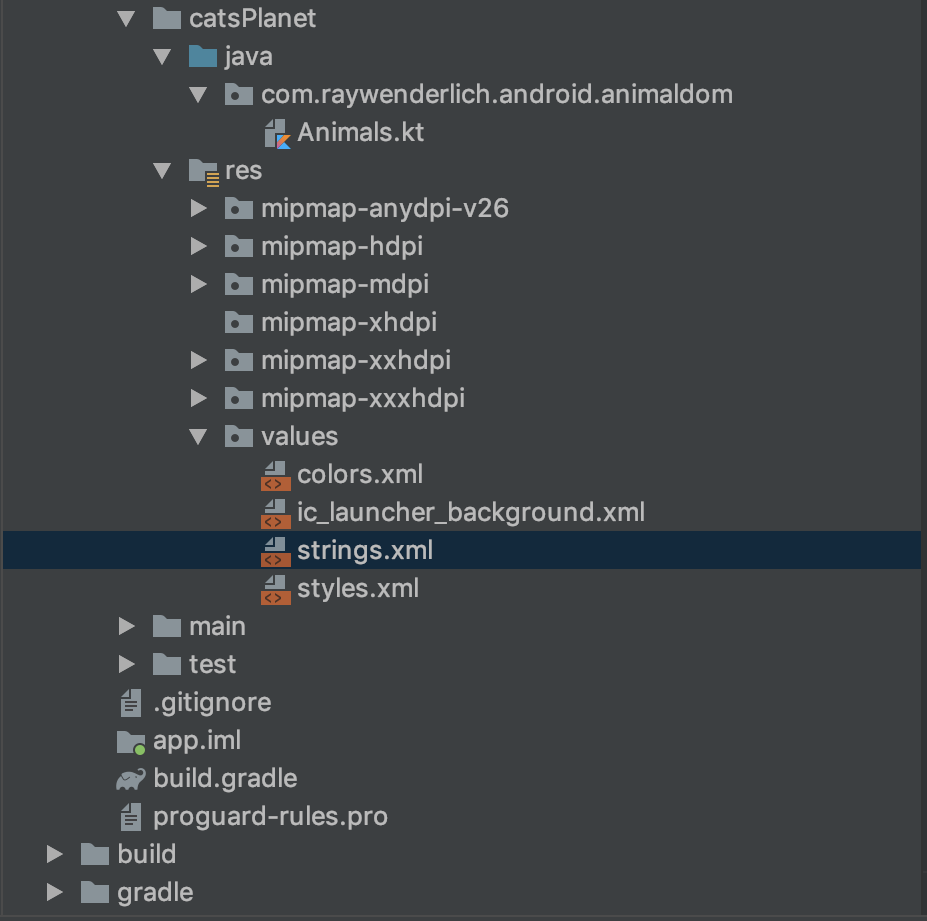
The structure should now look like this.
Change the app_name to Cats Planet inside of strings.xml, which you’ll find in the resource directory of catsPlanet.
Adding Some Kitty Assets
In the Download Materials folder, there’s a folder named Cats Assets. Copy all the assets with the name cat_*.jpg into the mipmap-xhdpi of catsPlanet folder. If they’re there, you can delete the other animal photos that are in the folder. Your directory structure for catsPlanet will look like this:

Then, open the Animals.kt file you made under catsPlanet and add the following code:
object Animals {
  fun getAnimals(): ArrayList<Int> {
    return arrayListOf(
        R.mipmap.cat_one, R.mipmap.cat_two, R.mipmap.cat_three,
        R.mipmap.cat_four, R.mipmap.cat_five, R.mipmap.cat_six,
        R.mipmap.cat_seven, R.mipmap.cat_eight,
        R.mipmap.cat_nine, R.mipmap.cat_ten
    )
  }
}
This function simply returns a list of the IDs of the cats’ assets, just like the one in Animaldom.
Finally, select the catsPlanetDebug build variant in the Build Variants tab, then build and run. You should see the following:

Separate Logo for Cats Planet
Now, it’s time to give Cats Planet a separate logo. In the Cats Assets folder, there’s a launcher icon. Use the launcher icon generator to create launcher icons in any resolution. Once you’re done, replace all the icons in catsPlanet’s res folder with the ones you just created. Then build and run the app.

And that’s it. You have successfully added a different flavor to your existing app.

Pat yourself on the back!
Where to Go From Here?
After reading this tutorial, you should have a better understanding of white labeling and product flavors. You can download the final project by using the Download Materials button at the top or bottom of this tutorial.
This tutorial showed you one way to use flavors to white label your app, but it’s not the only way. For example, instead of creating separate folders for each flavor, you can make use of BuildConfig.
BuildConfig is an auto-generated class. It has a const FLAVOR, which changes according to the build variant you select. For more information, see the official documentation.
The tutorial above is just one example of how you can use flavors, but there are many more. For example, you can also use them to make free and paid versions of apps.
If you want to learn more, have a look at the links below:
- Configuring Build Variants
- Gradle Tips and Tricks for Android
- Gradle Tutorial for Android: Getting Started
Feel free to share your feedback or ask any questions in the comments section below or the forums.