CloudKit Tutorial: Getting Started
In this CloudKit tutorial, you’ll learn how to add and query data in iCloud from your app, as well as how to manage that data using the CloudKit dashboard. By Andy Pereira.
Sign up/Sign in
With a free Kodeco account you can download source code, track your progress, bookmark, personalise your learner profile and more!
Create accountAlready a member of Kodeco? Sign in
Sign up/Sign in
With a free Kodeco account you can download source code, track your progress, bookmark, personalise your learner profile and more!
Create accountAlready a member of Kodeco? Sign in
Sign up/Sign in
With a free Kodeco account you can download source code, track your progress, bookmark, personalise your learner profile and more!
Create accountAlready a member of Kodeco? Sign in
Contents
CloudKit Tutorial: Getting Started
30 mins
- Why CloudKit?
- Simplicity
- Trust
- Cost
- Introducing BabiFüd
- Getting Started
- Entitlements and Containers
- Troubleshooting iCloud Setup in Xcode
- Introducing the CloudKit Dashboard
- Adding the Establishment Record Type
- Querying Establishment Records
- Working With Binary Assets
- Relationships
- Troubleshooting Queries
- Where to Go From Here?
CloudKit is Apple’s remote data storage service. Based on iCloud, it provides a low-cost option to store and share app data using your users’ iCloud accounts as a back-end storage service.
There are two main components to CloudKit:
- A web dashboard to manage record types and any public data.
- A set of APIs to transfer data between iCloud and the device.
With CloudKit, users’ private data is completely protected because developers can only access their own private databases and aren’t able to look at any user’s private data.
CloudKit is a good option for iOS-only apps that use a lot of data but don’t require a great deal of server-side logic. In addition, you can use CloudKit for web and server apps.
In this CloudKit tutorial, you’ll get hands-on experience using CloudKit by creating a restaurant rating app with a twist, called BabiFüd.
Why CloudKit?
You might wonder why you should choose CloudKit over other commercial BaaS (Backend as a Service) offerings, or even rolling your own server.
There are three reasons: Simplicity, trust and cost.
Simplicity
Unlike other back-end solutions, CloudKit requires little setup. You don’t have to choose, configure or install servers. Apple handles security and scaling as well.
Simply registering for the iOS Developer Program makes you eligible to use CloudKit. You don’t have to register for additional services or create new accounts. When you enable CloudKit capabilities in your app, all necessary server setup magic happens automatically.
There’s no need to download additional libraries and configure them; you import CloudKit like any other iOS framework. The CloudKit framework itself also provides a level of simplicity by offering convenient APIs for common operations.
It’s also easy for users. Since CloudKit uses the iCloud credentials that users enter when they set up their devices (or that they enter after setup via the Settings app), there’s no need to build complicated login screens. As long as they are logged in, users can use your app seamlessly. That should put you on Cloud 9!
Trust
Another benefit of CloudKit is that users can trust the privacy and security of their data by relying on Apple rather than app developers. CloudKit insulates user data from you, the developer.
While this lack of access can be frustrating while debugging, it’s a net plus since you don’t have to worry about security or convince users their data is secure. If an app user trusts iCloud, then they can also trust you.
Cost
Finally, the cost of running a service is a huge deal for any developer. Even the least-expensive server hosts can’t offer low-cost solutions for small, free or cheap apps. So there will always be a cost associated with running an app.
With CloudKit, you get a reasonable amount of storage and data transfer of public data for free. There’s a handy calculator on Apple’s CloudKit site.
These strengths make the CloudKit service a low-hassle solution for Mac and iOS apps.
Introducing BabiFüd
The sample app for this CloudKit tutorial, BabiFüd, is the freshest take on the standard “rate a restaurant” app. Instead of reviewing restaurants based upon food quality, speed of service or price, users rate child-friendliness. This includes the availability of changing facilities, booster seats and healthy food options.
The app contains two tabs: A list of nearby restaurants and user-generated notes. You can get a glimpse of the app in action below.
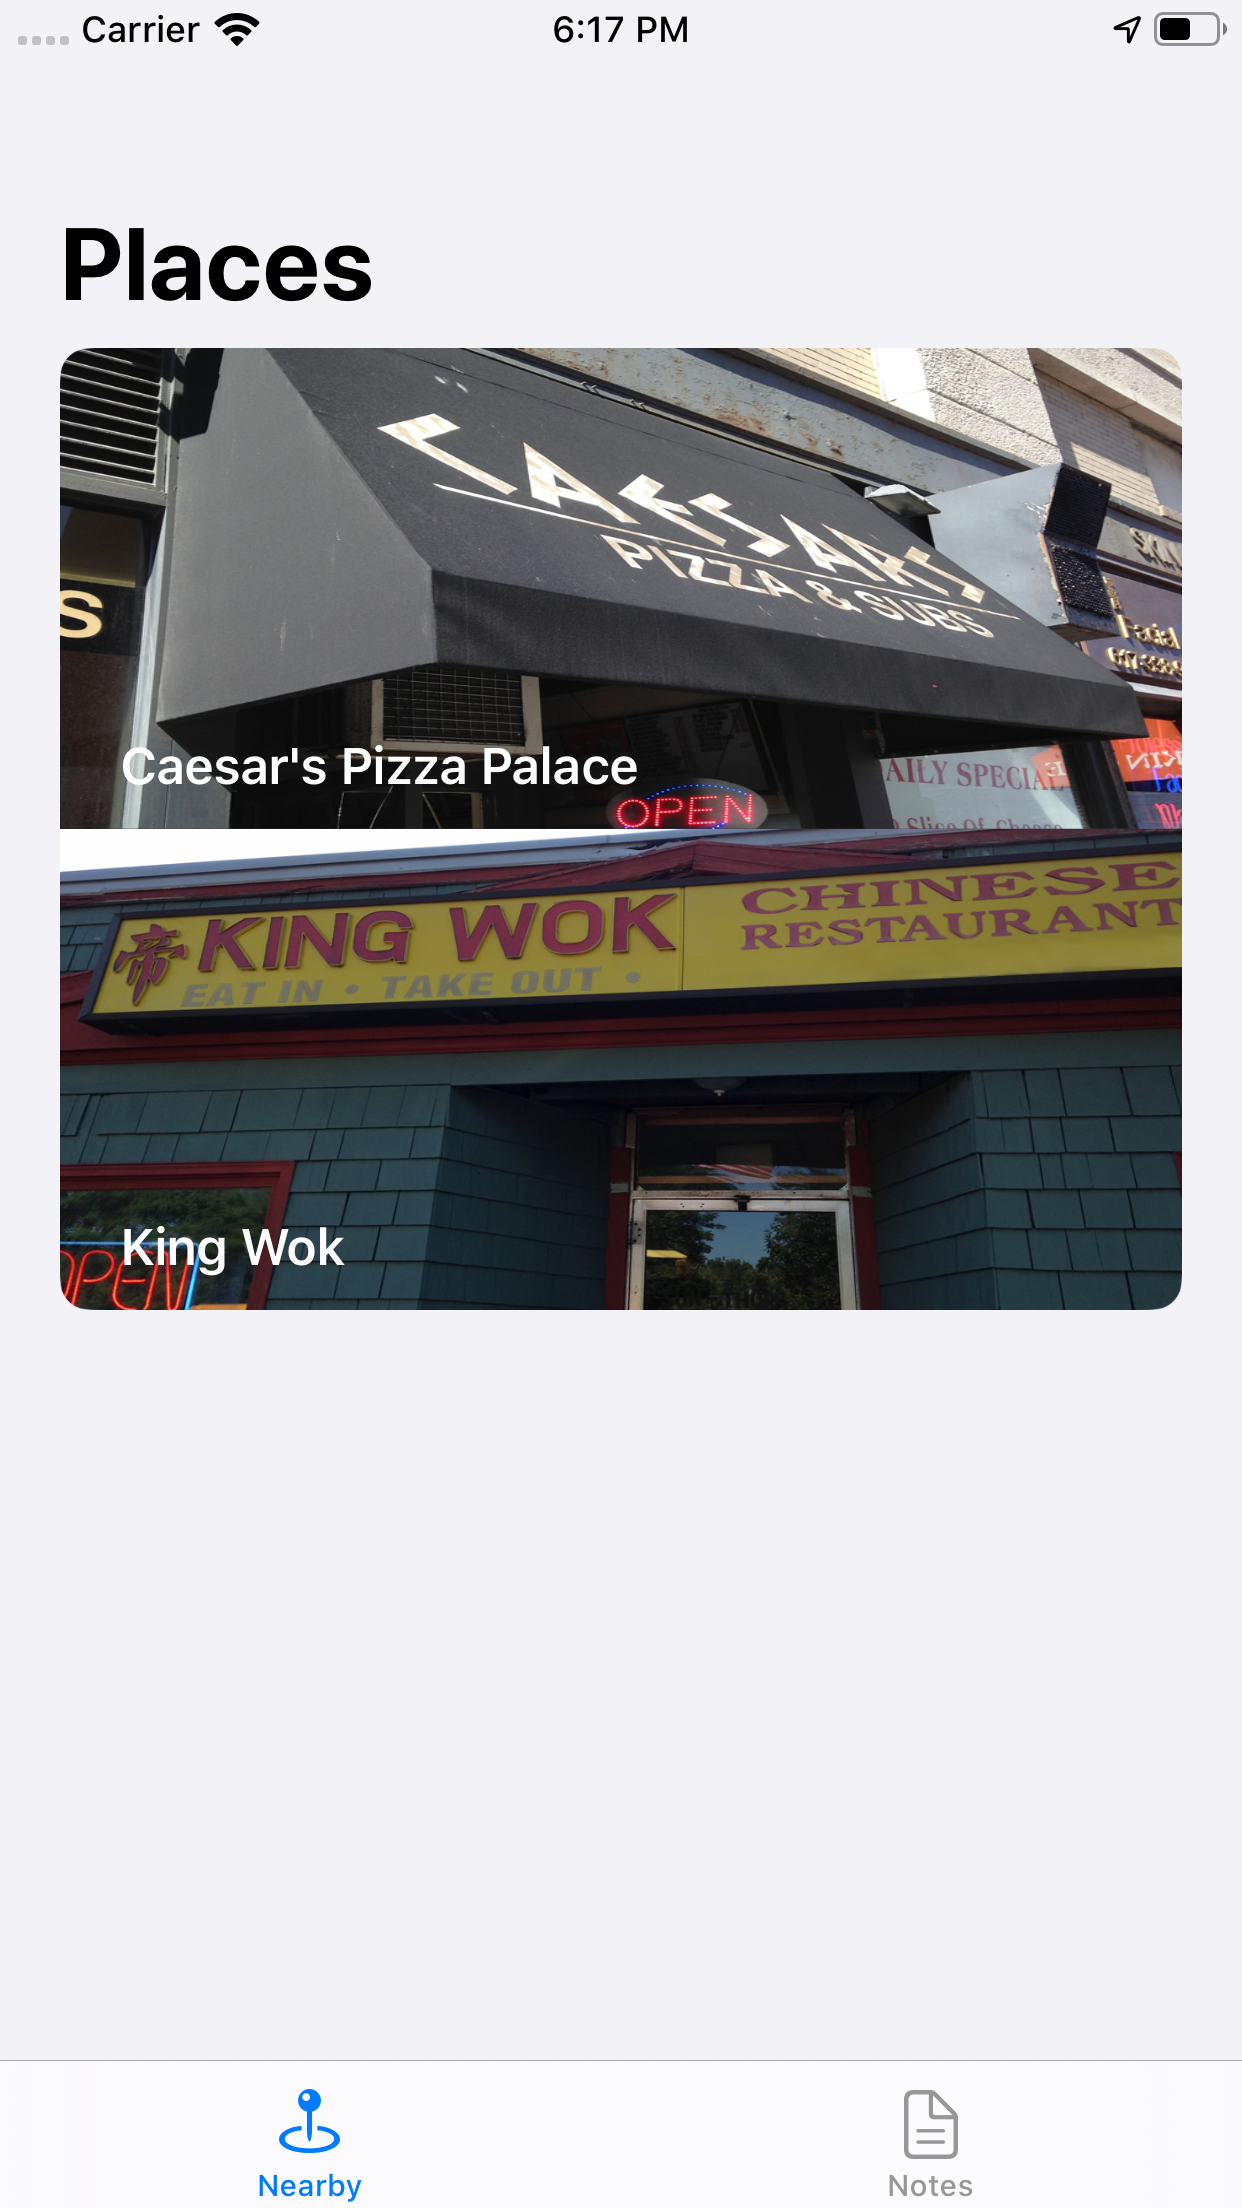
A model class backs these views and wraps the calls to CloudKit. CloudKit objects are called records. The main record type in your model is an Establishment, which represents the various restaurants in your app.
Getting Started
Use the Download Materials button at the top or bottom of this tutorial to download the starter project.
You’ll have to change the Bundle Identifier and Team of your app before you can start coding. You need to set the team to get the necessary entitlements from Apple, while having a unique bundle identifier makes the process a whole lot easier.
Open BabiFud.xcodeproj in Xcode. Select the BabiFud project in the Project navigator, then select the BabiFud target. With the General tab selected, replace the Bundle Identifier with something unique. Standard practice is to use reverse domain name notation and include the project name.
That takes care of the Bundle Identifier. Now, you’ll need to get your app set up for CloudKit and create some containers to hold your data.
Entitlements and Containers
You’ll need a container to hold the app’s records before you can add any data via your app. A container is the term for the conceptual location of all the app’s data on the server. It’s a group of public and private databases.
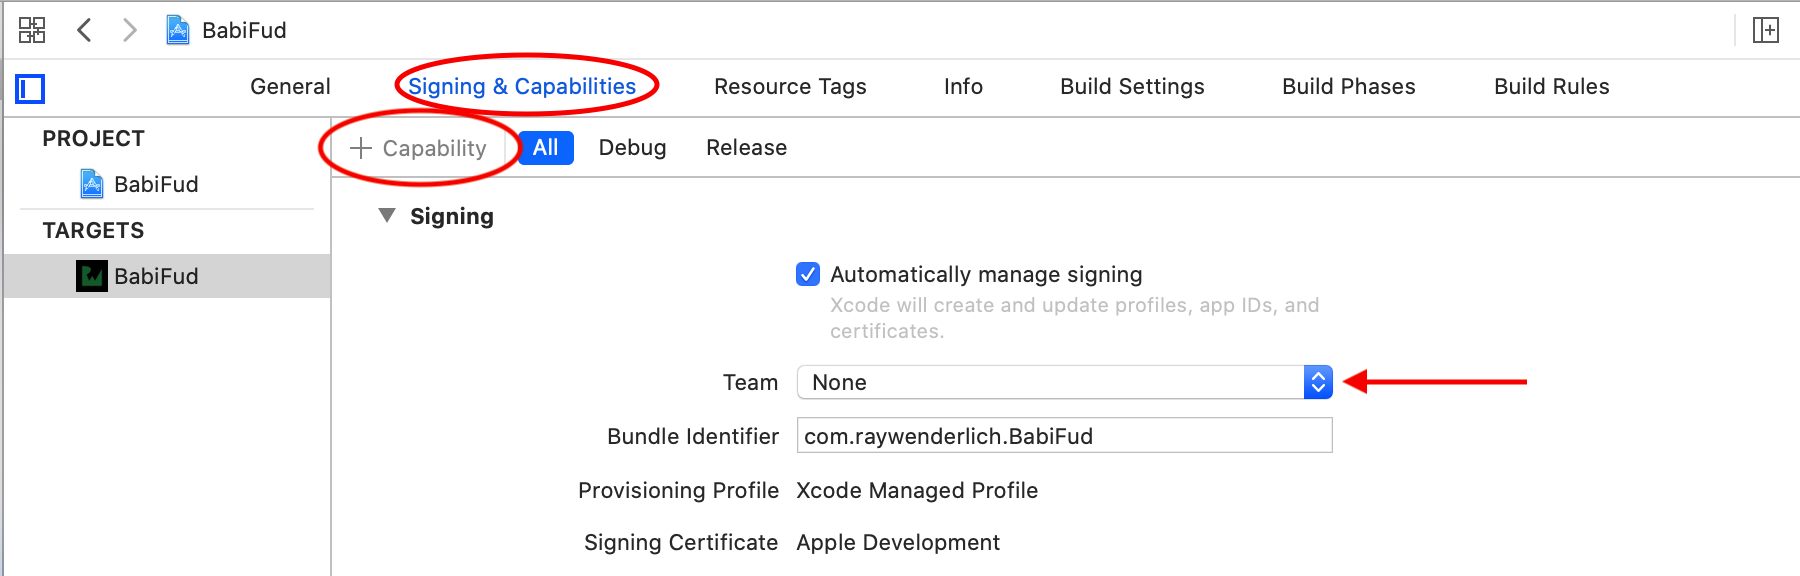
To create a container, you first need to enable the iCloud entitlements for your app:
- Select the Signing & Capabilities tab in the target editor.
- Click on + Capability.
- Choose iCloud.
- Select your Team from the drop-down.
At this point, Xcode might prompt you to enter the Apple ID associated with your iOS developer account. If so, then type it in as requested.
Next, enable CloudKit by checking the CloudKit checkbox in the Services group.
Finally, click on + under Containers to add a new container, if CloudKit didn’t automatically create one for you.
In the pop-up, add your bundle identifier.
This creates a default container named iCloud.<your app’s bundle ID>.
Troubleshooting iCloud Setup in Xcode
If you see any warnings or errors related to the container ID when creating entitlements, building the project or running the app, here are some troubleshooting tips:
- If there are any warnings or errors shown in the Steps group in the iCloud section, try pressing the Fix Issue button. You might need to do this a few times.
- The app’s bundle ID and iCloud containers must match and they must exist in the developer account. For example, if the bundle identifier is
com.<your domain>.BabiFud
, then the iCloud container name should beiCloud.
plus the bundle bundle id:iCloud.com.<your domain>.BabiFud
. - The iCloud container name must be unique because this is the global identifier used by CloudKit to access the data. Since the iCloud container name contains the bundle ID, the bundle ID must also be unique. This is why you cannot use
com.raywenderlich.BabiFud
and you had to change it earlier. - For the entitlements to work, the app/bundle ID has to appear in the App IDs portion of the Certificates, Identifiers and Profiles portal. This means the certificate used to sign the app has to be from the set team ID and has to list the app ID, which also implies the iCloud container ID.
Normally, Xcode does all of this automatically if you are signed in to a valid developer account. Unfortunately, this sometimes gets out of sync.
It can help to start with a fresh ID and, using the iCloud capabilities pane, change the CloudKit container ID to match. Otherwise, you may have to edit the Info.plist or BabiFud.entitlements files to make sure the ID values there reflect what you set for the bundle ID.
Introducing the CloudKit Dashboard
Your next step is to create some record types that define the data that your app will use. You can do this using the CloudKit dashboard. Click CloudKit Dashboard, which you can find in the target’s Signing & Capabilities pane, under iCloud or by opening https://icloud.developer.apple.com/dashboard/ in your browser.
Here’s what the dashboard looks like:
The CloudKit dashboard consists of six sections:
- Data
- Schema
- Telemetry
- Usage
- Logs
- API Access
The Schema section represents the high-level objects of a CloudKit container: Record Types, Indexes, Security Roles and Subscription Types. You’ll only deal with Record Types in this tutorial.
A Record Type is a set of fields that defines individual records. In terms of object-oriented programming, a Record Type is like a class. You can think of a record as an instance of a particular Record Type. It represents structured data in the container, much like a typical row in a database, and encapsulates a series of key/value pairs.
Under Data, the Private Database and Public Database sections let you add data to, or search for, data in the databases you have access to. Remember, as a developer you can access all public data, but only your own private data.
The User Records store data, such as name and email, about the current iCloud user.
You use a Record Zone, noted here as the Default Zone, to provide a logical organization to a private database by grouping records together.
Custom zones support atomic transactions by allowing you to save multiple records at the same time before processing other operations. Custom zones are outside the scope of this tutorial.
The API Access section provides the ability to configure the dashboard permissions for your team members. If you have multiple development team members, you can restrict their ability to edit data here. This, too, is out of scope for this tutorial.
Adding the Establishment Record Type
Think about the design of your app for a moment. The establishments you track each have lots of data: Name, location and availability of child-friendly options. Record types use fields to define the various pieces of data each record contains.
Under Schema, select Record Types and then New Type to add a new record type.
Name your new record type Establishment, then press Enter.
You’ll see a row of system fields, automatically created for every record type. Each one has a Field Name, a Field Type and an Index.
Of course, you can add your own fields. Start by selecting Add Field, call it name, and set the Field Type to String. Repeat until you have added all these fields:
Click Save at the bottom of the page to save your new record type.
Next, click Edit Indexes. You’re going to add two indexes so that you can query your records:
1. recordName with the index type of QUERYABLE.
2. name with the index type of QUERYABLE.
You need to make recordName queryable by default. You set name to queryable so you can query records based on a specific name.
Click Save Changes at the bottom of the page to save your indexes.
When you’re done, your list of fields should look like this:
You’re now ready to add some sample establishment records to your database. To do this, switch to Data in the drop-down at the top of the dashboard:
Select _defaultZone under the Public Database section in the navigation pane on the left. This zone will contain the public records for your app.
Select the Establishment record type from the drop-down list in the center pane, if it’s not already selected. Then click the New Record button in the bottom detail pane, as shown in the screenshot below:
This will create a new, empty Establishment record.
At this point, you’re ready to enter some test data for your app.
The following sample establishment data is fictional. The establishments are located near Apple’s headquarters, so they’re easy to find in the simulator.
Enter each record as described below:
You’ll find the images in the materials file containing the starter project, which you downloaded earlier. Look for the Images folder.
Once you’ve saved all the records, the dashboard should look like this. You might need to click the Query Records button to make the records appear:
For each record, the entered values are the database representation of the data.
On the app side, the data types are different. For example, ChangingTable
is an enum. So the specified Int
value for changingTable
might correspond to a changing table being available in the men’s or women’s room.
For healthyOption
and kidsMenu
, the Int
values represent Boolean types: A 0
means that establishment doesn’t have that option and a 1
means that it does.
To run the app, you need to have an iCloud account that you can use for development. You’ll find instructions here: Creating an iCloud Account for Development.
You’ll also need to enter the iCloud credentials associated with this account into the iOS Simulator: Enter iCloud Credentials Before Running Your App
Return to Xcode. It’s time to start integrating this data into your app!
Querying Establishment Records
To select records from a database, you’ll use CKQuery
. A CKQuery
describes how to find all records of a specific type that match certain criteria. These criteria can be something like “all records with a Name field that starts with ‘M’”, “all records that have booster seats” or “all records within 3 km”.
iOS uses NSPredicate
to handle these kinds of expressions. NSPredicate
evaluates objects to see if they match the criteria. Predicates are also used in Core Data; they’re a natural fit for CloudKit because the definition of a predicate is simply a comparison on a field.
CloudKit supports only a subset of available NSPredicate
functions. These include mathematical comparisons, some string and set operations such as “field matches one of the items in a list”, and a special distance function. The CKQuery Class Reference contains a detailed list of the functions that CloudKit supports as well as descriptions of how to use them.
In Xcode, open Model.swift. Replace refresh(_:)
with the following implementation:
@objc func refresh(_ completion: @escaping (Error?) -> Void) {
// 1.
let predicate = NSPredicate(value: true)
// 2.
let query = CKQuery(recordType: "Establishment", predicate: predicate)
establishments(forQuery: query, completion)
}
Here’s what you’ve added:
- You create a predicate with the value
true
.NSPredicate
determines how you fetch or filter data; in this case, you’re specifying that a value should just exist. - You add a query to specify which type of record you want and a predicate.
Next, replace establishments(forQuery:_:)
with the following:
private func establishments(forQuery query: CKQuery,
_ completion: @escaping (Error?) -> Void) {
publicDB.perform(query,
inZoneWith: CKRecordZone.default().zoneID) { [weak self] results, error in
guard let self = self else { return }
if let error = error {
DispatchQueue.main.async {
completion(error)
}
return
}
guard let results = results else { return }
self.establishments = results.compactMap {
Establishment(record: $0, database: self.publicDB)
}
DispatchQueue.main.async {
completion(nil)
}
}
}
Since you’re passing the CKQuery
object here, your public database, publicDB
, can perform the query. If you think back to when you created the two Establishment objects in the CloudKit dashboard, you put them in the public database, in the default container. That’s exactly what inZoneWith
’s parameter is specifying here. Now, the database will query any Establishment records that exist in the public database.
Build and run. You should see a list of nearby establishments.
Things don’t look quite right. You have two items in the table, and if you select one, most of the details are properly loaded.
However, the details screen is missing an image. That’s because the images you uploaded are CKAsset
s. These require a bit of special handling.
Working With Binary Assets
An asset is binary data, such as an image, that you associate with a record. In your case, your app’s assets are the establishment photos shown in NearbyTableViewController
’s table view.
In this section, you’ll add the logic to load the assets that you downloaded when you retrieved the establishment records.
Open Establishment.swift and replace loadCoverPhoto(_:)
with the following code:
func loadCoverPhoto(completion: @escaping (_ photo: UIImage?) -> ()) {
// 1.
DispatchQueue.global(qos: .utility).async {
var image: UIImage?
// 5.
defer {
DispatchQueue.main.async {
completion(image)
}
}
// 2.
guard
let coverPhoto = self.coverPhoto,
let fileURL = coverPhoto.fileURL
else {
return
}
let imageData: Data
do {
// 3.
imageData = try Data(contentsOf: fileURL)
} catch {
return
}
// 4.
image = UIImage(data: imageData)
}
}
This method loads the image from the asset attribute as follows:
- Although you download the asset at the same time you retrieve the rest of the record, you want to load the image asynchronously. So wrap everything in a
DispatchQueue.async
block. - Check to make sure the asset
coverPhoto
exists and has afileURL
. - Download the image’s binary data.
- Use the image data to create an instance of
UIImage
. - Execute the completion callback with the retrieved image. Note that the
defer
block gets executed regardless of whichreturn
is executed. For example, if there is no image asset, thenimage
never gets set upon the return and no image appears for the restaurant.
Build and run. The establishment images should now appear. Great job!
There are two gotchas with CloudKit assets:
- Assets can only exist in CloudKit as attributes on records; you can’t store them on their own. Deleting a record will also delete any associated assets.
- Retrieving assets can negatively impact performance because you download the assets at the same time as the rest of the record data. If your app makes heavy use of assets, then you should store a reference to a different type of record that holds just the asset.
Relationships
It’s important to understand how you can create a relationship between different record types in CloudKit. To do this, you’re going to add a new record type, Note, and create private records that are not in the public database. These records will belong to an Establishment.
Back in the CloudKit dashboard, add the Note type by going to Schema and selecting New Type. Add the following fields and then save:
Click Edit Indexes and then click Add Index to make recordName queryable.
Next, add a new field to Establishment:
By creating the field notes on Establishment, and establishment on Note, you now have a one-to-many relationship. This means an Establishment can have many notes, but a Note can only belong to one Establishment.
Before you continue, you need to get the Name value of an Establishment record. In the CloudKit dashboard, go back to Data, select Public Database and the type Establishment from the drop-down. Next, click on Query Records. Make a note of the first item’s Name, like below:
Next, create a Note record in the CloudKit dashboard, just like you did for the two Establishment records. Still in the Data section of the dashboard, select Note from the Type drop-down. However, change Public Database to Private Database and then select New Record. Now, your record will only be available in your CloudKit database. Then change the following values:
- For Establishment, enter the value found in the name field.
- Enter anything you’d like for text.
Before you save, copy the value found in the new note’s Name field to make things easier for the next step.
Your new record should look like this:
Select Save. Next, query your public Establishments and edit the record whose Name you used for the note. Select the + button, enter the note’s name that you saved from the previous step, then Save. It should look like this:
You now have a public Establishment record that has a relationship to a private Note record! To load the notes, open Note.swift, and replace fetchNotes(_:)
with the following:
static func fetchNotes(_ completion: @escaping (Result<[Note], Error>) -> Void) {
let query = CKQuery(recordType: "Note",
predicate: NSPredicate(value: true))
let container = CKContainer.default()
container.privateCloudDatabase
.perform(query, inZoneWith: nil) { results, error in
}
}
This looks similar to how you query and download establishments. However, note that the information is now loading from the privateCloudDatabase
instead of the public database. It’s that simple to specify whether you want user-specific or public data in your app.
Next, add the following inside the closure to get the record’s data, like you did earlier for Establishment:
if let error = error {
DispatchQueue.main.async {
completion(.failure(error))
}
return
}
guard let results = results else {
DispatchQueue.main.async {
let error = NSError(
domain: "com.babifud", code: -1,
userInfo: [NSLocalizedDescriptionKey: "Could not download notes"])
completion(.failure(error))
}
return
}
let notes = results.map(Note.init)
DispatchQueue.main.async {
completion(.success(notes))
}
This code, however, will only work to get all of the user’s notes loaded. To load a note with a relationship to an establishment, open Establishment.swift, and add the following to the end of init?(record:database:)
:
if let noteRecords = record["notes"] as? [CKRecord.Reference] {
Note.fetchNotes(for: noteRecords) { notes in
self.notes = notes
}
}
This will check to see if your establishment has an array of references, and then load only those specific records. Open Note.swift and add the following method:
static func fetchNotes(for references: [CKRecord.Reference],
_ completion: @escaping ([Note]) -> Void) {
let recordIDs = references.map { $0.recordID }
let operation = CKFetchRecordsOperation(recordIDs: recordIDs)
operation.qualityOfService = .utility
operation.fetchRecordsCompletionBlock = { records, error in
let notes = records?.values.map(Note.init) ?? []
DispatchQueue.main.async {
completion(notes)
}
}
Model.currentModel.privateDB.add(operation)
}
Use CKFetchRecordsOperation
to easily load multiple records at once. You create it with a list of IDs and set its quality of service to make sure it runs in the background. Then, set the completion block to pass the fetched notes or an empty array if there’s an error. To run the operation, call add
on the private database.
Build and run, then go to the Notes tab. You should see that your note has loaded.
Also, go to the establishment where you set the note and select Notes. You can see that the other establishment does not load the note.
Troubleshooting Queries
If the data isn’t appearing properly – or isn’t appearing at all – inspect the sample data using the CloudKit dashboard. Make sure all of the records are present, that you’ve added them to the default zone and that they have the correct values.
If you need to re-enter the data, you can delete records by clicking the trash icon.
Debugging CloudKit errors can be tricky. CloudKit error messages often don’t contain a tremendous amount of information.
To determine the cause of the error, you can look at the error code in conjunction with the particular database operation you’re attempting. Using the numerical error code, look up the matching CKErrorCode
enum. The name and description in the documentation will help narrow down the cause of the issue.
Where to Go From Here?
You can download the final version of the project using the Download Materials button at the top or bottom of this CloudKit tutorial.
You can enhance the app in several ways:
- Allow the user to add their own pictures and notes.
- Let the user create new Establishment records that only they can see.
- Provide caching and synchronization so the app remains responsive offline and keeps the content up to date when it reconnects to a network.
For more information, watch Brian Moakley’s Video Tutorial Series on CloudKit.
You can also check out Apple’s documentation on CloudKit.
With CloudKit, you can take your apps to the next level and beyond with this great Apple-provided back-end API. We can’t wait to see what you make.
If you have any questions or comments about this tutorial, please join the forum discussion below!
All videos. All books.
One low price.
A Kodeco subscription is the best way to learn and master mobile development — plans start at just $19.99/month! Learn iOS, Swift, Android, Kotlin, Flutter and Dart development and unlock our massive catalog of 50+ books and 4,000+ videos.
Learn more