Using Streaming Assets in Unity
Learn how to make a moddable game in Unity by utilizing streaming assets to dynamically load custom game assets at run-time. By Mark Placzek.
Beat the game to your own Beats!
There’s a soundtrack.ogg bundled with the resources for your use, but if you think you can find something even more epic, use that instead.
Drag your audio file into the Project Window StreamingAssets folder and rename the file soundtrack.
Note: There are many different audio file types out there. If you have trouble, convert the file to .ogg as it is a well supported format in Unity. Have a look here for free online conversion tools, but be warned: DRM-protected files will not convert.
Add a new public variable to the GameManager:
public AudioSource musicPlayer;
With the GameManager selected in the Hierarchy Window, connect this new variable to the AudioSource on the scene’s Main Camera by dragging the whole Main Camera over the variable in the Inspector.
The Main Camera is a child of your Player’s Tank model, so it obediently follows you around. Remember, you can use the hierarchy’s search box to find any Game Object quickly in the scene.

Head back to the GameManager Start() function and add a new conditional underneath the other one to pass the soundtrack file to a new Coroutine:
else if (file.Name.Contains("soundtrack"))
{
    StartCoroutine("LoadBackgroundMusic", file);
}
Under the LoadPlayerUI Coroutine, add a new Coroutine titled LoadBackgroundMusic.
IEnumerator LoadBackgroundMusic (FileInfo musicFile)
{
    if (musicFile.Name.Contains("meta"))
    {
        yield break;
    }
    else
    {
        string musicFilePath = musicFile.FullName.ToString();
   	string url = string.Format("file://{0}", musicFilePath);
   	WWW www = new WWW(url);
   	yield return www;
   	musicPlayer.clip = www.GetAudioClip(false, false);
        musicPlayer.Play();
    }
}
This code should look pretty familiar. Loading an audio file is very similar to loading a texture. You use the URL to load the file and then apply audio to musicPlayer's clip property.
Finally, you call Play() on musicPlayer to get the soundtrack thumping.
Click play and hit that first level even harder than would have been possible before!
Player Model Customization
Now to customize the tank model. You’ll be walked through two different approaches for customizing the tank model. The first will use simple color swatches to let the user apply their favorite colors to the tank. The second will be a complete re-skin, similar to Minecraft skin mods.
Find the small 20 x 10 pixel playercolor image in the TankArenaAllAssets resources folder that came with the starter project download.
Drag the file into the Project Window StreamingAssets folder as you’ve done before.
You thought this was going to be hard?

Add the following new variables to the Game Manager, all under the new Header tag Tank Customisation:
[Header("Tank Customisation")]
public Texture2D tankTexture;
public Texture2D tankTreads;
public Renderer tankRenderer;
private Texture2D newTankTexture;
private Vector3 defaultTankPrimary = new Vector3(580, 722, 467);
private Vector3 defaultTankSecondary = new Vector3(718, 149, 0);
The Game Manager will need to reference the tank models’ textures and the renderers so that changes can be made and the model reassembled. Additionally, you save the military green primary and red accent secondary color values as integers in a Vector3 for the upcoming conditional statements. You’re using Vector3 as opposed to Color, since comparing one Color to another is very unreliable.
This is the tanks Texture file as output by the 3D modeling program.

Jump back into Start() and add another conditional:
else if (file.Name.Contains("playercolor"))
{
    StartCoroutine("LoadPlayerColor", file);
}
Under the LoadBackgroundMusic() Coroutine, add the following;
IEnumerator LoadPlayerColor(FileInfo colorFile)
{
    //1
    if (colorFile.Name.Contains("meta"))
    {
        yield break;
    }
    else
    {
        string wwwColorPath = "file://" + colorFile.FullName.ToString();
        WWW www = new WWW(wwwColorPath);
        yield return www;
        Texture2D playerColorTexture = www.texture;
        //2
        Color primaryColor = playerColorTexture.GetPixel(5, 5);
        Color secondaryColor = playerColorTexture.GetPixel(15, 5);
        //3
        Color[] currentPixelColors = tankTexture.GetPixels();
        Color[] newPixelColors = new Color[currentPixelColors.Length];
        //4
        float percentageDifferenceAllowed = 0.05f;
        int i = 0;
        foreach (Color color in currentPixelColors)
        {
            Vector3 colorToTest = new Vector3((Mathf.RoundToInt(color.r * 1000)), (Mathf.RoundToInt(color.g * 1000)), (Mathf.RoundToInt(color.b * 1000)));
            if ((colorToTest - defaultTankPrimary).sqrMagnitude <= (colorToTest * percentageDifferenceAllowed).sqrMagnitude)
            {
                newPixelColors.SetValue(primaryColor, i);
            }
            else if ((colorToTest - defaultTankSecondary).sqrMagnitude <= (colorToTest * percentageDifferenceAllowed).sqrMagnitude)
            {
                newPixelColors.SetValue(secondaryColor, i);
            }
            else
            {
                newPixelColors.SetValue(color, i);
            }
            i++;
        }
        //5
        newTankTexture = new Texture2D(tankTexture.width, tankTexture.height);
        newTankTexture.SetPixels(newPixelColors);
        newTankTexture.Apply();
        //6
        ApplyTextureToTank(tankRenderer, newTankTexture);
    }
}
- There's the good old meta check.
- You save the color data of a pixel on the left side and the right side of the color swatch in these two variables.
- You then create two Color arrays. The first,
currentPixelColorscontains all of the color information from the tank's default texture. The second,newPixelColorswill be populated with same color information — but only once the custom color scheme has been applied. That's why you can instantiate it with the size of the first array. - The
foreachloop takes each pixel from the currentPixelColors and tests it.
If the color matches thedefaultTankPrimaryyou hard coded, the newprimaryColorvalue is saved in its place to the newPixelColor array. If the color matches thedefaultTankSecondary, save the newsecondaryColor; if the color matches neither, simply save the same color back. - Once the newPixelColors array is populated, you create a new
texture2Dand callApply()to save all pixel changes. - What is this strange method? Fear not, you'll write that next.
Add the following method under the one you just created:
public void ApplyTextureToTank(Renderer tankRenderer, Texture2D textureToApply)
{
    Renderer[] childRenderers = tankRenderer.gameObject.GetComponentsInChildren<Renderer>();
    foreach (Renderer renderer in childRenderers)
    {
        renderer.material.mainTexture = textureToApply;
    }
    tankRenderer.materials[1].mainTexture = textureToApply;
    tankRenderer.materials[0].mainTexture = tankTreads;
}
ApplyTextureToTank() takes two arguments: the tank Renderer and the new Texture2D that you want to apply. You use GetComponentsInChildren to fetch all of the renderers in the tank model and apply the new modified texture.
With the primary and secondary colors replaced. The texture is applied to the tank.

GetComponentsInChildren, rather counter-intuitively, fetches the requested component in the parent GameObject. In this particular model, the tank treads have their own texture. You have to reapply this, otherwise your tank will have "tank" tank treads, and that's just weird!
You also place this part of the tank customization in it's own public method as you'll need identical functionality to this later.
The final step is to connect up the new public Game Manager variables in the Inspector.
Ensure Game Manager is selected in the Hierarchy Window. In the Project Window, look in the Assets\Tank Model directory. You will find the two default texture files used to skin the tank model. Drag the LowPolyTank to the Tank Texture and NewThreads to the Tank Treads variable. Back in the Hierarchy Window, drag Player\Tank to Tank Renderer.

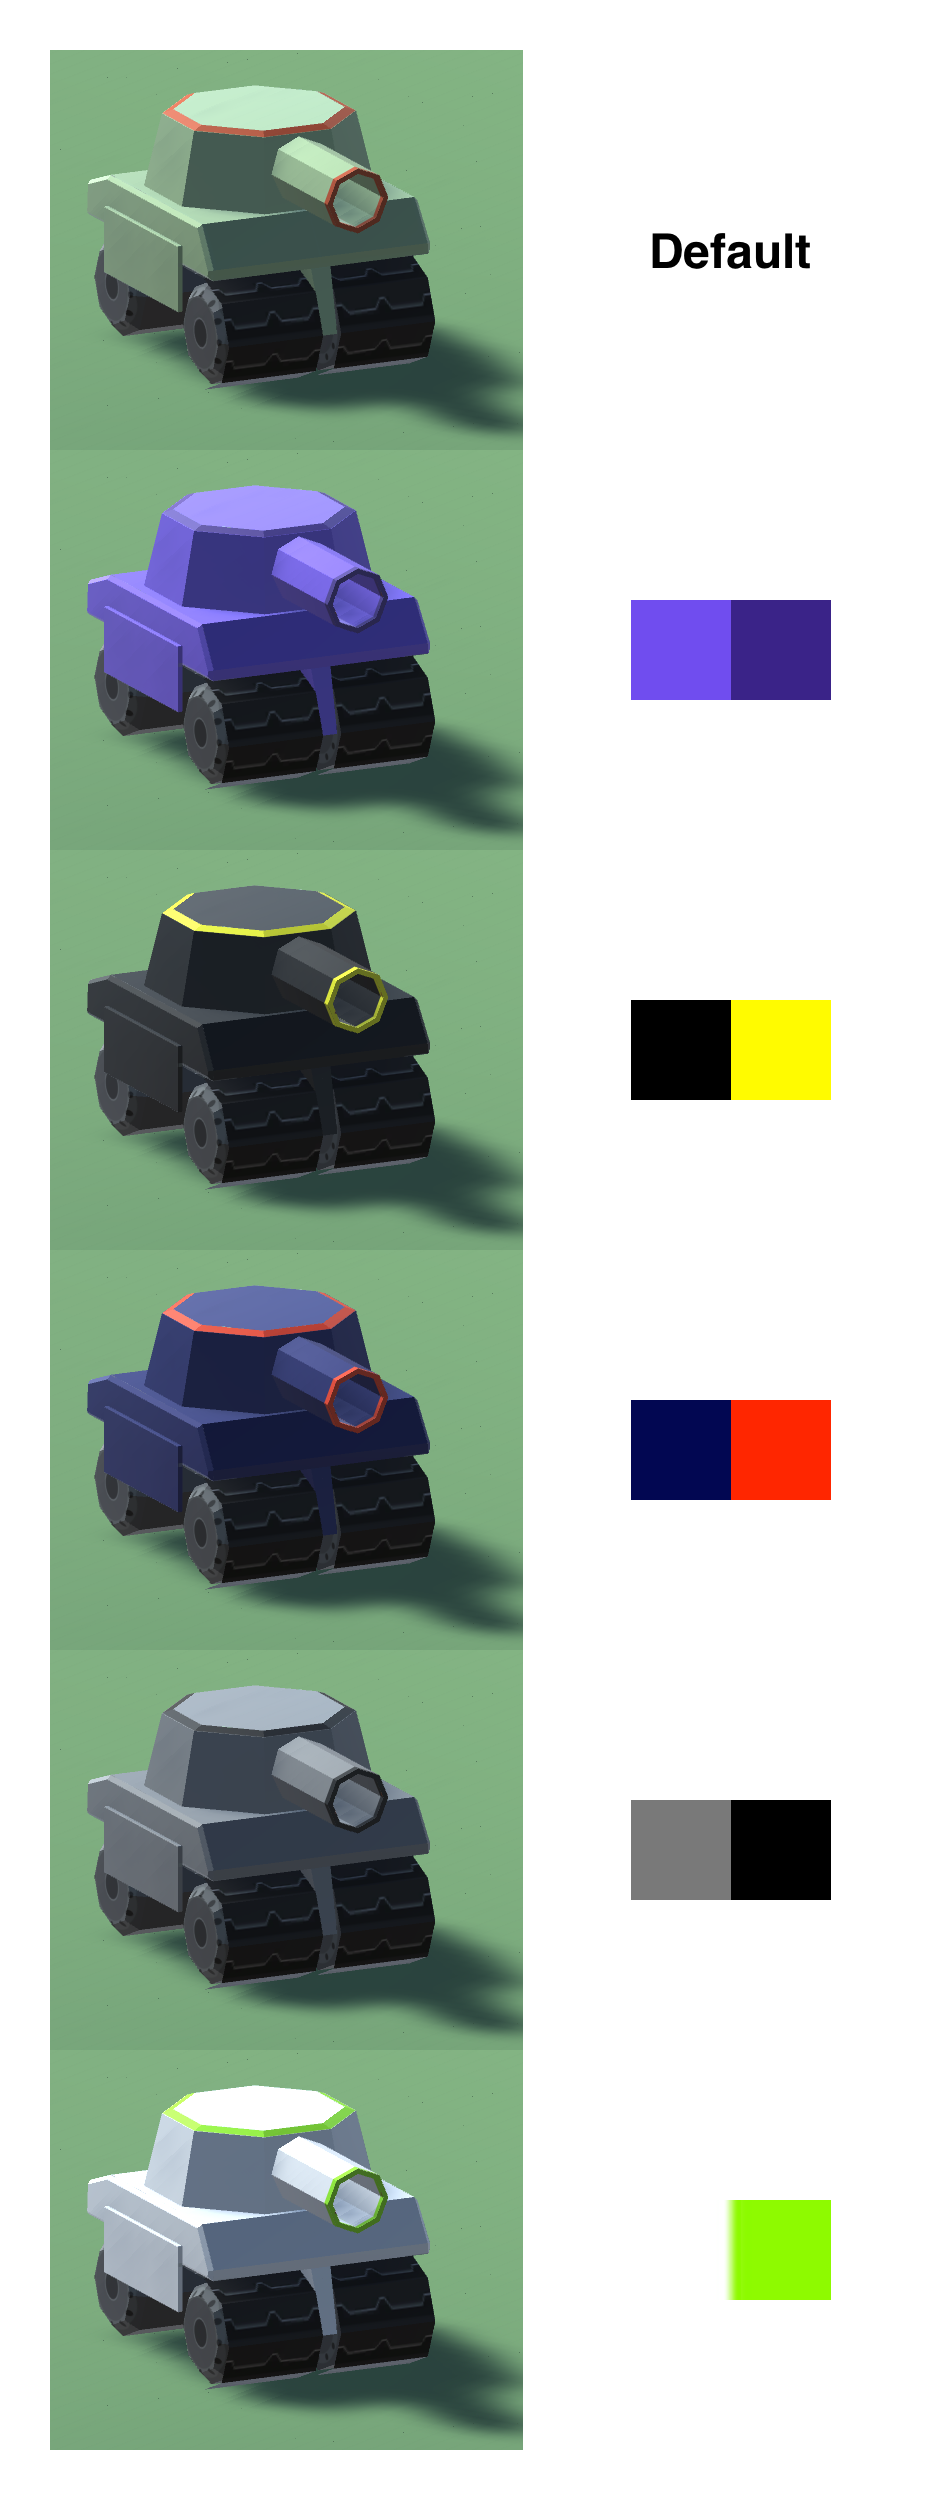
Click play and check out your sharp new Tank:
Here are a few other examples I created earlier.