Design Patterns in iOS Using Swift – Part 2/2
In the second part of this two-part tutorial on design patterns in Swift, you’ll learn more about adapter, observer, and memento patterns and how to apply them to your own apps. By Lorenzo Boaro.
Welcome back to part two of this introductory tutorial on design patterns on iOS! In the first part, you learned about some fundamental patterns in Cocoa such as MVC, singletons, and decorator.
In this final part, you’ll learn about the other basic design patterns that come up a lot in iOS and OS X development: adapter, observer, and memento. Let’s get right into it!
Getting Started
You can download the project source from the end of part 1 to get started.
Here’s where you left off the sample music library app at the end of the first part:

The original plan for the app included a horizontal scroller at the top of the screen to switch between albums. Instead of coding a single-purpose horizontal scroller, why not make it reusable for any view?
To make this view reusable, all decisions about its content should be left to other two objects: a data source and a delegate. The horizontal scroller should declare methods that its data source and delegate implement in order to work with the scroller, similar to how the UITableView delegate methods work. You’ll implement this when we discuss the next design pattern.
The Adapter Pattern
An Adapter allows classes with incompatible interfaces to work together. It wraps itself around an object and exposes a standard interface to interact with that object.
If you’re familiar with the Adapter pattern then you’ll notice that Apple implements it in a slightly different manner – Apple uses protocols to do the job. You may be familiar with protocols like UITableViewDelegate, UIScrollViewDelegate, NSCoding and NSCopying. As an example, with the NSCopying protocol, any class can provide a standard copy method.
How to Use the Adapter Pattern
The horizontal scroller mentioned before will look like this:

To begin implementing it, right click on the View group in the Project Navigator, select New File… and select, iOS > Cocoa Touch class and then click Next. Set the class name to HorizontalScrollerView and make it a subclass of UIView.
Open HorizontalScrollerView.swift and insert the following code above the class HorizontalScroller line:
protocol HorizontalScrollerViewDataSource: class {
  // Ask the data source how many views it wants to present inside the horizontal scroller
  func numberOfViews(in horizontalScrollerView: HorizontalScrollerView) -> Int
  // Ask the data source to return the view that should appear at <index>
  func horizontalScrollerView(_ horizontalScrollerView: HorizontalScrollerView, viewAt index: Int) -> UIView
}
This defines a protocol named HorizontalScrollerViewDataSource that performs two operations: it asks for the number of views to display inside the horizontal scroller and the view that should appear for a specific index.
Just below this protocol definition add another protocol named HorizontalScrollerViewDelegate.
protocol HorizontalScrollerViewDelegate: class {
  // inform the delegate that the view at <index> has been selected
  func horizontalScrollerView(_ horizontalScrollerView: HorizontalScrollerView, didSelectViewAt index: Int)
}
This will let the horizontal scroller inform some other object that a view has been selected.
@objc marker to declare optional methods.In HorizontalScrollerView.swift, add the following code to the HorizontalScrollerView class definition:
weak var dataSource: HorizontalScrollerViewDataSource?
weak var delegate: HorizontalScrollerViewDelegate?
The delegate and data source are optionals, so you don’t have to provide them, but any object that you do set here must conform to the appropriate protocol.
Add some more code to the class:
// 1
private enum ViewConstants {
  static let Padding: CGFloat = 10
  static let Dimensions: CGFloat = 100
  static let Offset: CGFloat = 100
}

// 2
private let scroller = UIScrollView()

// 3
private var contentViews = [UIView]()
Taking each comment block in turn:
- Define a private
enumto make it easy to modify the layout at design time. The view’s dimensions inside the scroller will be 100 x 100 with a 10 point margin from its enclosing rectangle. - Create the scroll view containing the views.
- Create an array that holds all the album covers.
Next you need to implement the initializers. Add the following methods:
override init(frame: CGRect) {
  super.init(frame: frame)
  initializeScrollView()
}

required init?(coder aDecoder: NSCoder) {
  super.init(coder: aDecoder)
  initializeScrollView()
}

func initializeScrollView() {
  //1
  addSubview(scroller)

  //2
  scroller.translatesAutoresizingMaskIntoConstraints = false

  //3
  NSLayoutConstraint.activate([
    scroller.leadingAnchor.constraint(equalTo: self.leadingAnchor),
    scroller.trailingAnchor.constraint(equalTo: self.trailingAnchor),
    scroller.topAnchor.constraint(equalTo: self.topAnchor),
    scroller.bottomAnchor.constraint(equalTo: self.bottomAnchor)
  ])

  //4
  let tapRecognizer = UITapGestureRecognizer(target: self, action: #selector(scrollerTapped(gesture:)))
  scroller.addGestureRecognizer(tapRecognizer)
}
The work is done in initializeScrollView(). Here’s what’s going on in that method:
- Adds the
UIScrollViewinstance to the parent view. - Turn off autoresizing masks. This is so you can apply your own constraints
- Apply constraints to the scrollview. You want the scroll view to completely fill the
HorizontalScrollerView - Create a tap gesture recognizer. The tap gesture recognizer detects touches on the scroll view and checks if an album cover has been tapped. If so, it will notify the
HorizontalScrollerViewdelegate. You’ll have a compiler error here because the tap method isn’t implemented yet, you’ll be doing that shortly.
Now add this method:
func scrollToView(at index: Int, animated: Bool = true) {
  let centralView = contentViews[index]
  let targetCenter = centralView.center
  let targetOffsetX = targetCenter.x - (scroller.bounds.width / 2)
  scroller.setContentOffset(CGPoint(x: targetOffsetX, y: 0), animated: animated)
}
This method retrieves the view for a specific index and centers it. It is used by the following method (add this to the class as well):
@objc func scrollerTapped(gesture: UITapGestureRecognizer) {
  let location = gesture.location(in: scroller)
  guard
    let index = contentViews.index(where: { $0.frame.contains(location)})
    else { return }

  delegate?.horizontalScrollerView(self, didSelectViewAt: index)
  scrollToView(at: index)
}
This method finds the location of the tap in the scroll view, then the index of the first content view that contains that location, if any.
If a content view was hit, the delegate is informed and the view is scrolled to the center.
Next add the following to access an album cover from the scroller:
func view(at index :Int) -> UIView {
  return contentViews[index]
}
view(at:) simply returns the view at a particular index. You will be using this method later to highlight the album cover you have tapped on.
Now add the following code to reload the scroller:
func reload() {
  // 1 - Check if there is a data source, if not there is nothing to load.
  guard let dataSource = dataSource else {
    return
  }

  //2 - Remove the old content views
  contentViews.forEach { $0.removeFromSuperview() }

  // 3 - xValue is the starting point of each view inside the scroller
  var xValue = ViewConstants.Offset
  // 4 - Fetch and add the new views
  contentViews = (0..<dataSource.numberOfViews(in: self)).map {
    index in
    // 5 - add a view at the right position
    xValue += ViewConstants.Padding
    let view = dataSource.horizontalScrollerView(self, viewAt: index)
    view.frame = CGRect(x: CGFloat(xValue), y: ViewConstants.Padding, width: ViewConstants.Dimensions, height: ViewConstants.Dimensions)
    scroller.addSubview(view)
    xValue += ViewConstants.Dimensions + ViewConstants.Padding
    return view
  }
  // 6
  scroller.contentSize = CGSize(width: CGFloat(xValue + ViewConstants.Offset), height: frame.size.height)
}
The reload method is modeled after reloadData in UITableView; it reloads all the data used to construct the horizontal scroller.
Stepping through the code comment-by-comment:
- Checks to see if there is a data source before we perform any reload.
- Since you're clearing the album covers, you also need to remove any existing views.
- All the views are positioned starting from the given offset. Currently it's 100, but it can be easily tweaked by changing the constant
ViewConstants.Offsetat the top of the file. - You ask the data source for the number of views and then use this to create the new content views array.
- The
HorizontalScrollerViewasks its data source for the views one at a time and it lays them next to each another horizontally with the previously defined padding. - Once all the views are in place, set the content offset for the scroll view to allow the user to scroll through all the albums covers.
You execute reload when your data has changed.
The last piece of the HorizontalScrollerView puzzle is to make sure the album you're viewing is always centered inside the scroll view. To do this, you'll need to perform some calculations when the user drags the scroll view with their finger.
Add the following method:
private func centerCurrentView() {
  let centerRect = CGRect(
    origin: CGPoint(x: scroller.bounds.midX - ViewConstants.Padding, y: 0),
    size: CGSize(width: ViewConstants.Padding, height: bounds.height)
  )

  guard let selectedIndex = contentViews.index(where: { $0.frame.intersects(centerRect) })
    else { return }
  let centralView = contentViews[selectedIndex]
  let targetCenter = centralView.center
  let targetOffsetX = targetCenter.x - (scroller.bounds.width / 2)

  scroller.setContentOffset(CGPoint(x: targetOffsetX, y: 0), animated: true)
  delegate?.horizontalScrollerView(self, didSelectViewAt: selectedIndex)
}
The above code takes into account the current offset of the scroll view and the dimensions and the padding of the views in order to calculate the distance of the current view from the center. The last line is important: once the view is centered, you then inform the delegate that the selected view has changed.
To detect that the user finished dragging inside the scroll view, you'll need to implement some UIScrollViewDelegate methods. Add the following class extension to the bottom of the file; remember, this must be added after the curly braces of the main class declaration!
extension HorizontalScrollerView: UIScrollViewDelegate {
  func scrollViewDidEndDragging(_ scrollView: UIScrollView, willDecelerate decelerate: Bool) {
    if !decelerate {
      centerCurrentView()
    }
  }

  func scrollViewDidEndDecelerating(_ scrollView: UIScrollView) {
    centerCurrentView()
  }
}
scrollViewDidEndDragging(_:willDecelerate:) informs the delegate when the user finishes dragging. The decelerate parameter is true if the scroll view hasn't come to a complete stop yet. When the scroll action ends, the the system calls scrollViewDidEndDecelerating(_:). In both cases you should call the new method to center the current view since the current view probably has changed after the user dragged the scroll view.
Lastly don't forget to set the delegate. Add the following line to the very beginning of initializeScrollView():
scroller.delegate = self
Your HorizontalScrollerView is ready for use! Browse through the code you've just written; you'll see there's not one single mention of the Album or AlbumView classes. That's excellent, because this means that the new scroller is truly independent and reusable.
Build your project to make sure everything compiles properly.
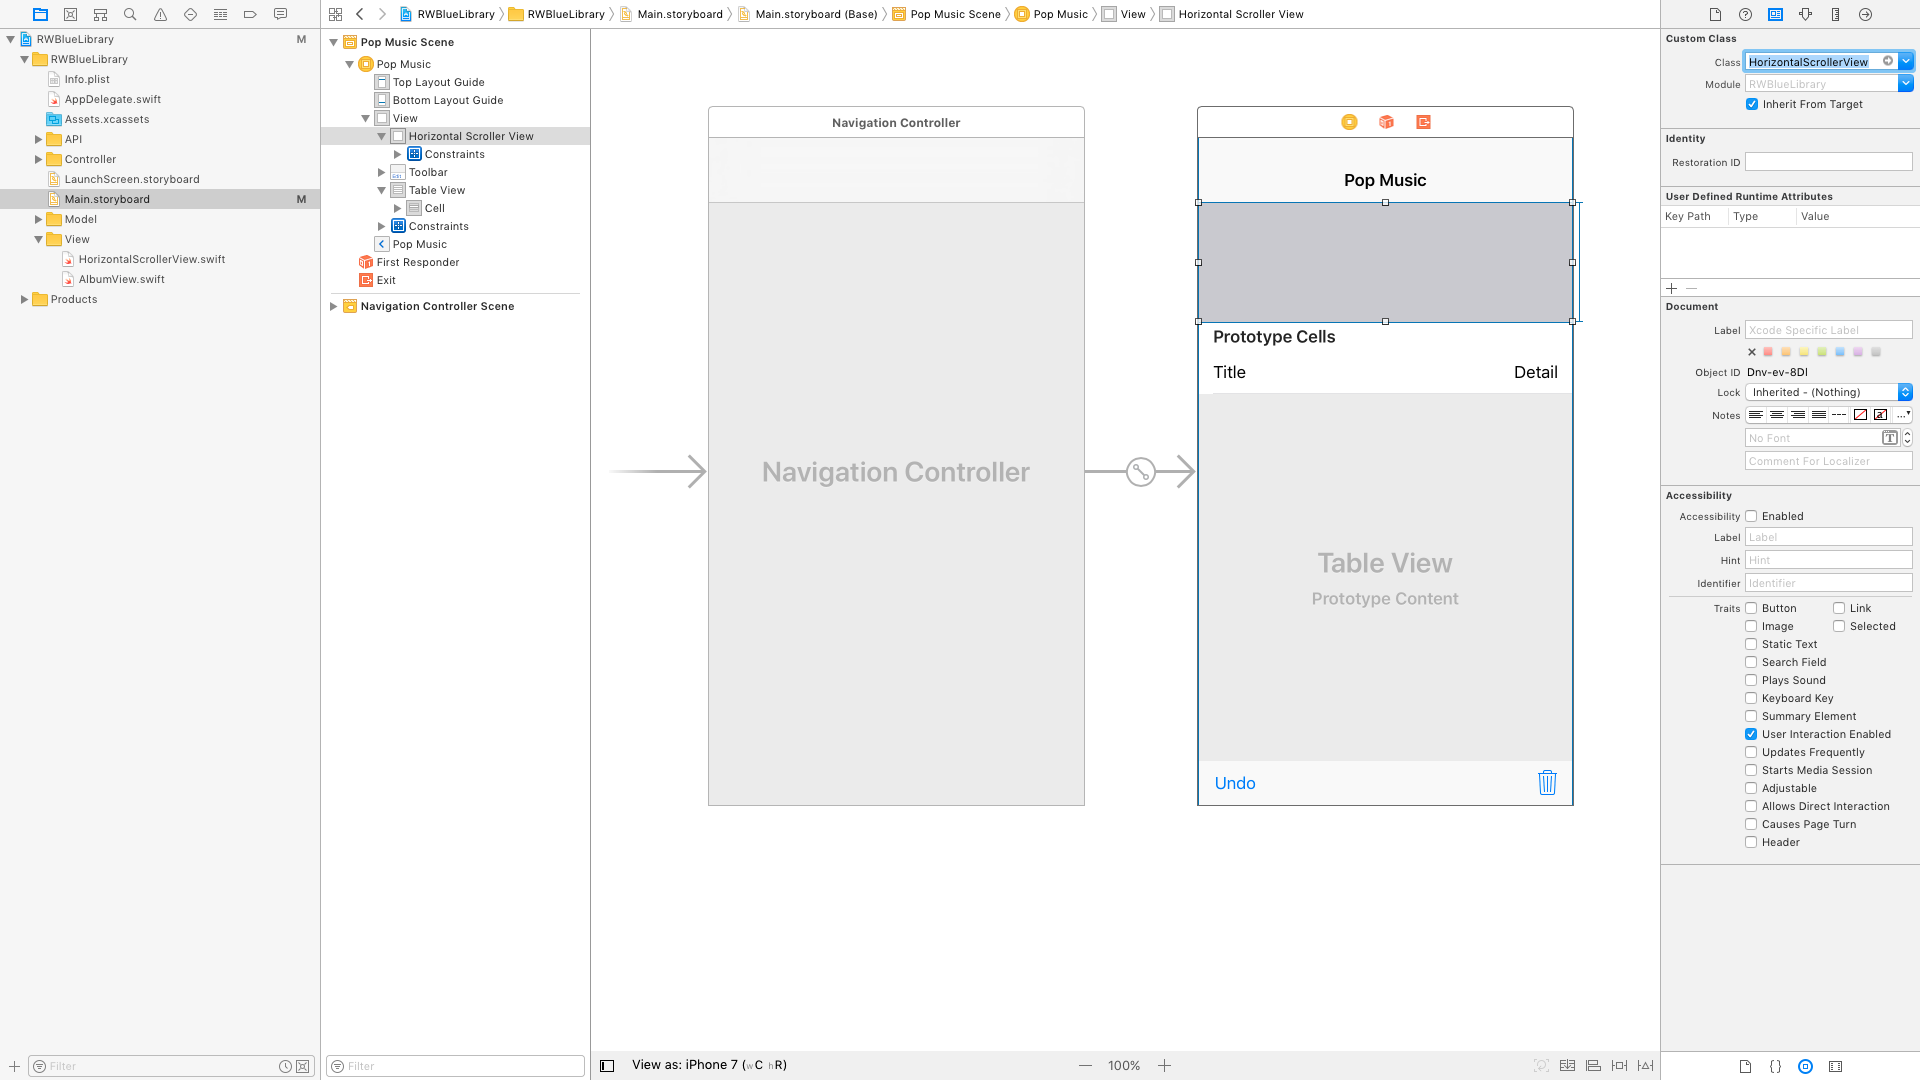
Now that HorizontalScrollerView is complete, it's time to use it in your app. First, open Main.storyboard. Click on the top gray rectangular view and click on the Identity Inspector. Change the class name to HorizontalScrollerView as shown below:
Next, open the Assistant Editor and control drag from the gray rectangular view to ViewController.swift to create an outlet. Name the name the outlet horizontalScrollerView, as shown below:

Next, open ViewController.swift. It's time to start implementing some of the HorizontalScrollerViewDelegate methods!
Add the following extension to the bottom of the file:
extension ViewController: HorizontalScrollerViewDelegate {
  func horizontalScrollerView(_ horizontalScrollerView: HorizontalScrollerView, didSelectViewAt index: Int) {
    //1
    let previousAlbumView = horizontalScrollerView.view(at: currentAlbumIndex) as! AlbumView
    previousAlbumView.highlightAlbum(false)
    //2
    currentAlbumIndex = index
    //3
    let albumView = horizontalScrollerView.view(at: currentAlbumIndex) as! AlbumView
    albumView.highlightAlbum(true)
    //4
    showDataForAlbum(at: index)
  }
}
This is what happens when this delegate method is invoked:
- First you grab the previously selected album, and deselect the album cover.
- Store the current album cover index you just clicked
- Grab the album cover that is currently selected and highlight the selection.
- Display the data for the new album within the table view.
Next, it's time to implement HorizontalScrollerViewDataSource. Add the following code at the end of file:
extension ViewController: HorizontalScrollerViewDataSource {
  func numberOfViews(in horizontalScrollerView: HorizontalScrollerView) -> Int {
    return allAlbums.count
  }

  func horizontalScrollerView(_ horizontalScrollerView: HorizontalScrollerView, viewAt index: Int) -> UIView {
    let album = allAlbums[index]
    let albumView = AlbumView(frame: CGRect(x: 0, y: 0, width: 100, height: 100), coverUrl: album.coverUrl)
    if currentAlbumIndex == index {
      albumView.highlightAlbum(true)
    } else {
      albumView.highlightAlbum(false)
    }
    return albumView
  }
}
numberOfViews(in:), as you'll recognize, is the protocol method returning the number of views for the scroll view. Since the scroll view will display covers for all the album data, the count is the number of album records. In horizontalScrollerView(_:viewAt:) you create a new AlbumView, highlight it if it's the selected album, then pass it to the HorizontalScrollerView.
That's it! Only three short methods to display a nice looking horizontal scroller. You now need to connect up the datasource and delegate. Add the following code before showDataForAlbum(at:) in viewDidLoad:
horizontalScrollerView.dataSource = self
horizontalScrollerView.delegate = self
horizontalScrollerView.reload()
Build and run your project and take a look at your awesome new horizontal scroller:

Uh, wait. The horizontal scroller is in place, but where are the covers?
Ah, that's right — you didn't implement the code to download the covers yet. To do that, you'll need to add a way to download images. Since all your access to services goes through LibraryAPI, that's where this new method would have to go. However, there are a few things to consider first:
-
AlbumViewshouldn't work directly withLibraryAPI. You don't want to mix view logic with communication logic. - For the same reason,
LibraryAPIshouldn't know aboutAlbumView. -
LibraryAPIneeds to informAlbumViewonce the covers are downloaded since theAlbumViewhas to display the covers.
Sounds like a conundrum? Don't despair, you'll learn how to do this using the Observer pattern! :]