Menus and Popovers in Menu Bar Apps for macOS
In this Menu Bar App tutorial you will learn how to present a menu and a popover that shows quotes from famous people. By Warren Burton.
Adding a Popover to the Status Item
You’ve seen how easy it is to set up a menu from code, but showing the quote in the Xcode console won’t cut it for most of your end users. The next step is to replace the menu with a simple view controller to show a quote right in place.
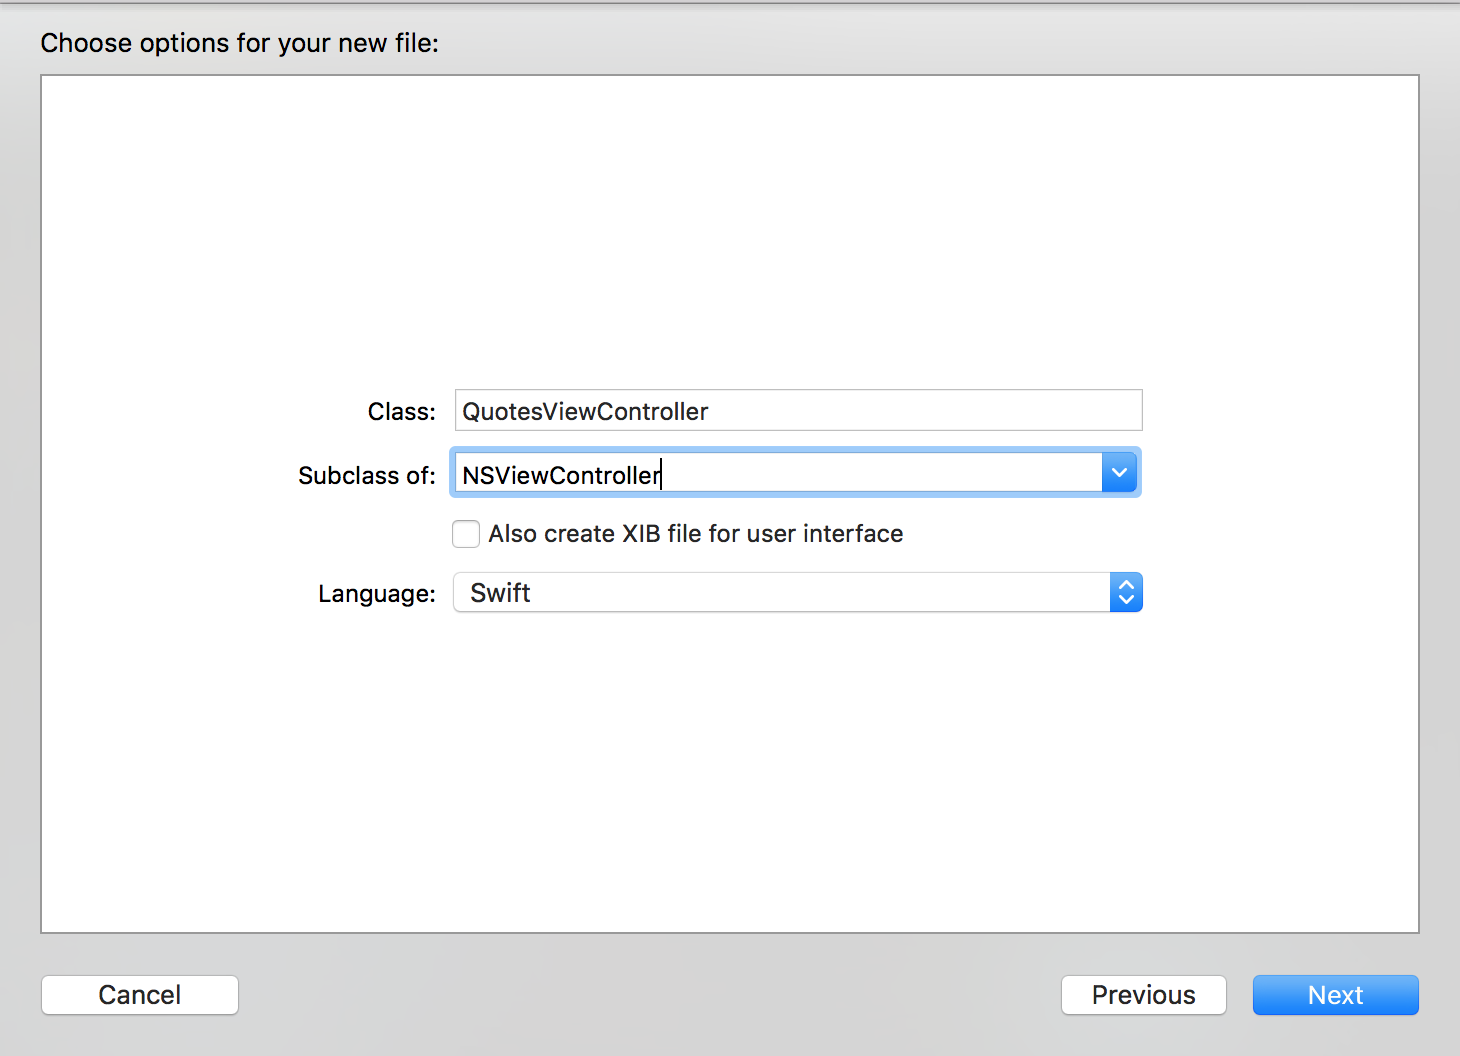
Go to File/New/File…, select the macOS/Source/Cocoa Class template and click Next.
- Name the class
QuotesViewController. - Make it a subclass of
NSViewController. - Ensure that Also create XIB file for user interface is not checked.
- Set the language to Swift.
Finally, click Next again, choose a place to save the file (In the Quotes subfolder of the project folder is a good place) and click Create.
Now open Main.storyboard. Expand the View Controller Scene and select the View Controller instance.

First select the Identity Inspector and change the Class to QuotesViewController, next set the Storyboard ID to QuotesViewController
Next add the following code to the end of QuotesViewController.swift
extension QuotesViewController {
  // MARK: Storyboard instantiation
  static func freshController() -> QuotesViewController {
    //1.
    let storyboard = NSStoryboard(name: NSStoryboard.Name(rawValue: "Main"), bundle: nil)
    //2.
    let identifier = NSStoryboard.SceneIdentifier(rawValue: "QuotesViewController")
    //3.
    guard let viewcontroller = storyboard.instantiateController(withIdentifier: identifier) as? QuotesViewController else {
      fatalError("Why cant i find QuotesViewController? - Check Main.storyboard")
    }
    return viewcontroller
  }
}
What happens here is…
- Get a reference to Main.storyboard.
- Create a Scene identifier that matches the one you set just before.
- Instantiate QuotesViewController and return it.
You create this method so that anything thats using QuotesViewController doesn’t need to know how to instantiate it. It just works :]
Notice the fatalError inside the guard statement. Its often good to use this or assertionFailure to let yourself or other team members know when you have messed up during development.
Now go back to AppDelegate.swift. Start by adding a new property declaration to the class:
let popover = NSPopover()
Next, replace applicationDidFinishLaunching(_:) with the following:
func applicationDidFinishLaunching(_ aNotification: Notification) {
  if let button = statusItem.button {
    button.image = NSImage(named:NSImage.Name("StatusBarButtonImage"))
    button.action = #selector(togglePopover(_:))
  }
  popover.contentViewController = QuotesViewController.freshController()
}
You’ve changed the button action to togglePopover(_:) which you’ll implement next. Also, rather than set up a menu, you’re setting up the popover to show whatever’s in QuotesViewController.
Add the following three methods to AppDelegate
@objc func togglePopover(_ sender: Any?) {
  if popover.isShown {
    closePopover(sender: sender)
  } else {
    showPopover(sender: sender)
  }
}

func showPopover(sender: Any?) {
  if let button = statusItem.button {
    popover.show(relativeTo: button.bounds, of: button, preferredEdge: NSRectEdge.minY)
  }
}

func closePopover(sender: Any?) {
  popover.performClose(sender)
}
showPopover() displays the popover to the user. You just need to supply a source rect and macOS will position the popover and arrow so it looks like it’s coming out of the menu bar icon.
closePopover() simply closes the popover, and togglePopover() is the action method that will either open or close the popover depending on its current state.
Build and run, and then click on the menu bar icon to check that it shows and then hides an empty popover.

Your popover works great, but where’s all the inspiration? All you see is an empty view and no quotes. Guess what you’ll do next?
Implementing the Quote View Controller
First, you need a model to store the quotes and attributions. Go to File/New/File… and select the macOS/Source/Swift File template, then click Next. Name the file Quote and click Create.
Open Quote.swift and add the following code to the file:
struct Quote {
  let text: String
  let author: String

  static let all: [Quote] =  [
    Quote(text: "Never put off until tomorrow what you can do the day after tomorrow.", author: "Mark Twain"),
    Quote(text: "Efficiency is doing better what is already being done.", author: "Peter Drucker"),
    Quote(text: "To infinity and beyond!", author: "Buzz Lightyear"),
    Quote(text: "May the Force be with you.", author: "Han Solo"),
    Quote(text: "Simplicity is the ultimate sophistication", author: "Leonardo da Vinci"),
    Quote(text: "It’s not just what it looks like and feels like. Design is how it works.", author: "Steve Jobs")
  ]
}

extension Quote: CustomStringConvertible {
  var description: String {
    return "\"\(text)\" — \(author)"
  }
}
This defines a simple quote structure and a static property that returns all the quotes. Since you also make Quote conform to CustomStringConvertible, you can easily get a nice formatted string.
You’re making progress, but you now need some function in the UI to display all these famous quotes.
Setting up the View Controller UI
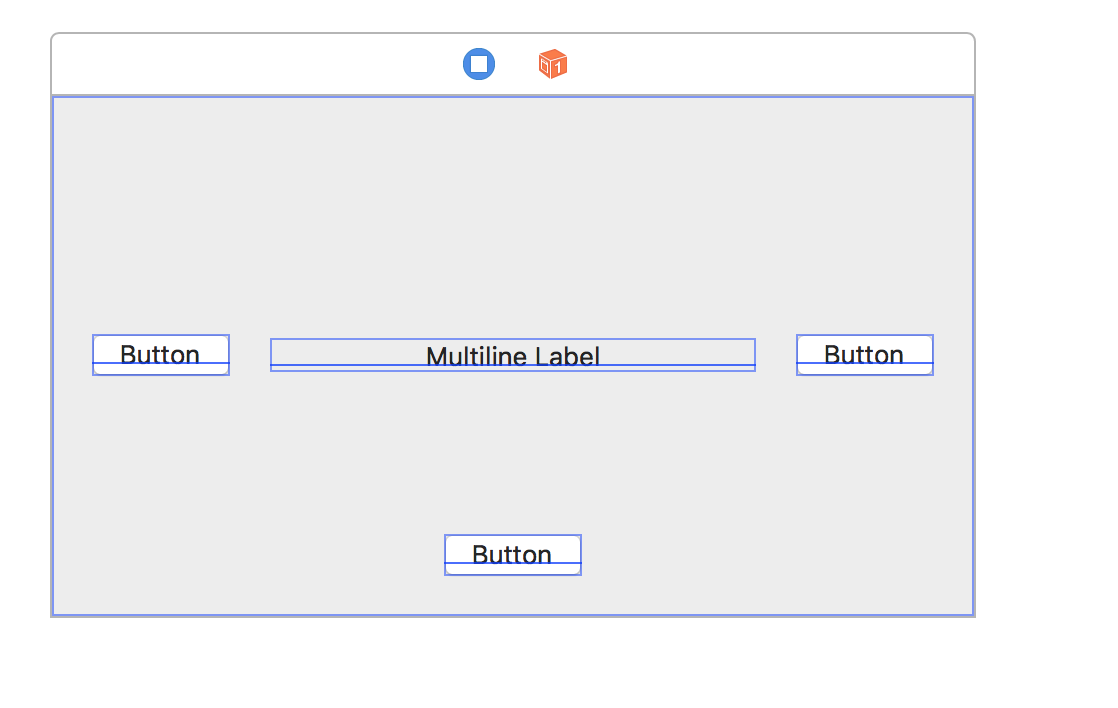
Open Main.storyboard and drag 3 Push Button instances, and a Multiline Label into the view controller.
Drag the buttons and label into place until they look like this layout. The dotted blue layout guides that appear will help you get the items into place:
Can you add the auto layout constraints to make the user interface match? Give it a few good attempts before you open the spoiler below. If you get it right, skip the spoiler and give yourself a gold star.
[spoiler]
Here are the auto layout constraints you need to get the correct layout:
- Pin the left button to the left edge with a gap of 20 and vertically center.
- Pin the right button to the right edge with a gap of 20 and vertically center.
- Pin the lower button to the bottom edge with a gap of 20 and horizontally center.
- Pin the label left & right to the buttons with a gap of 20 and vertically center.

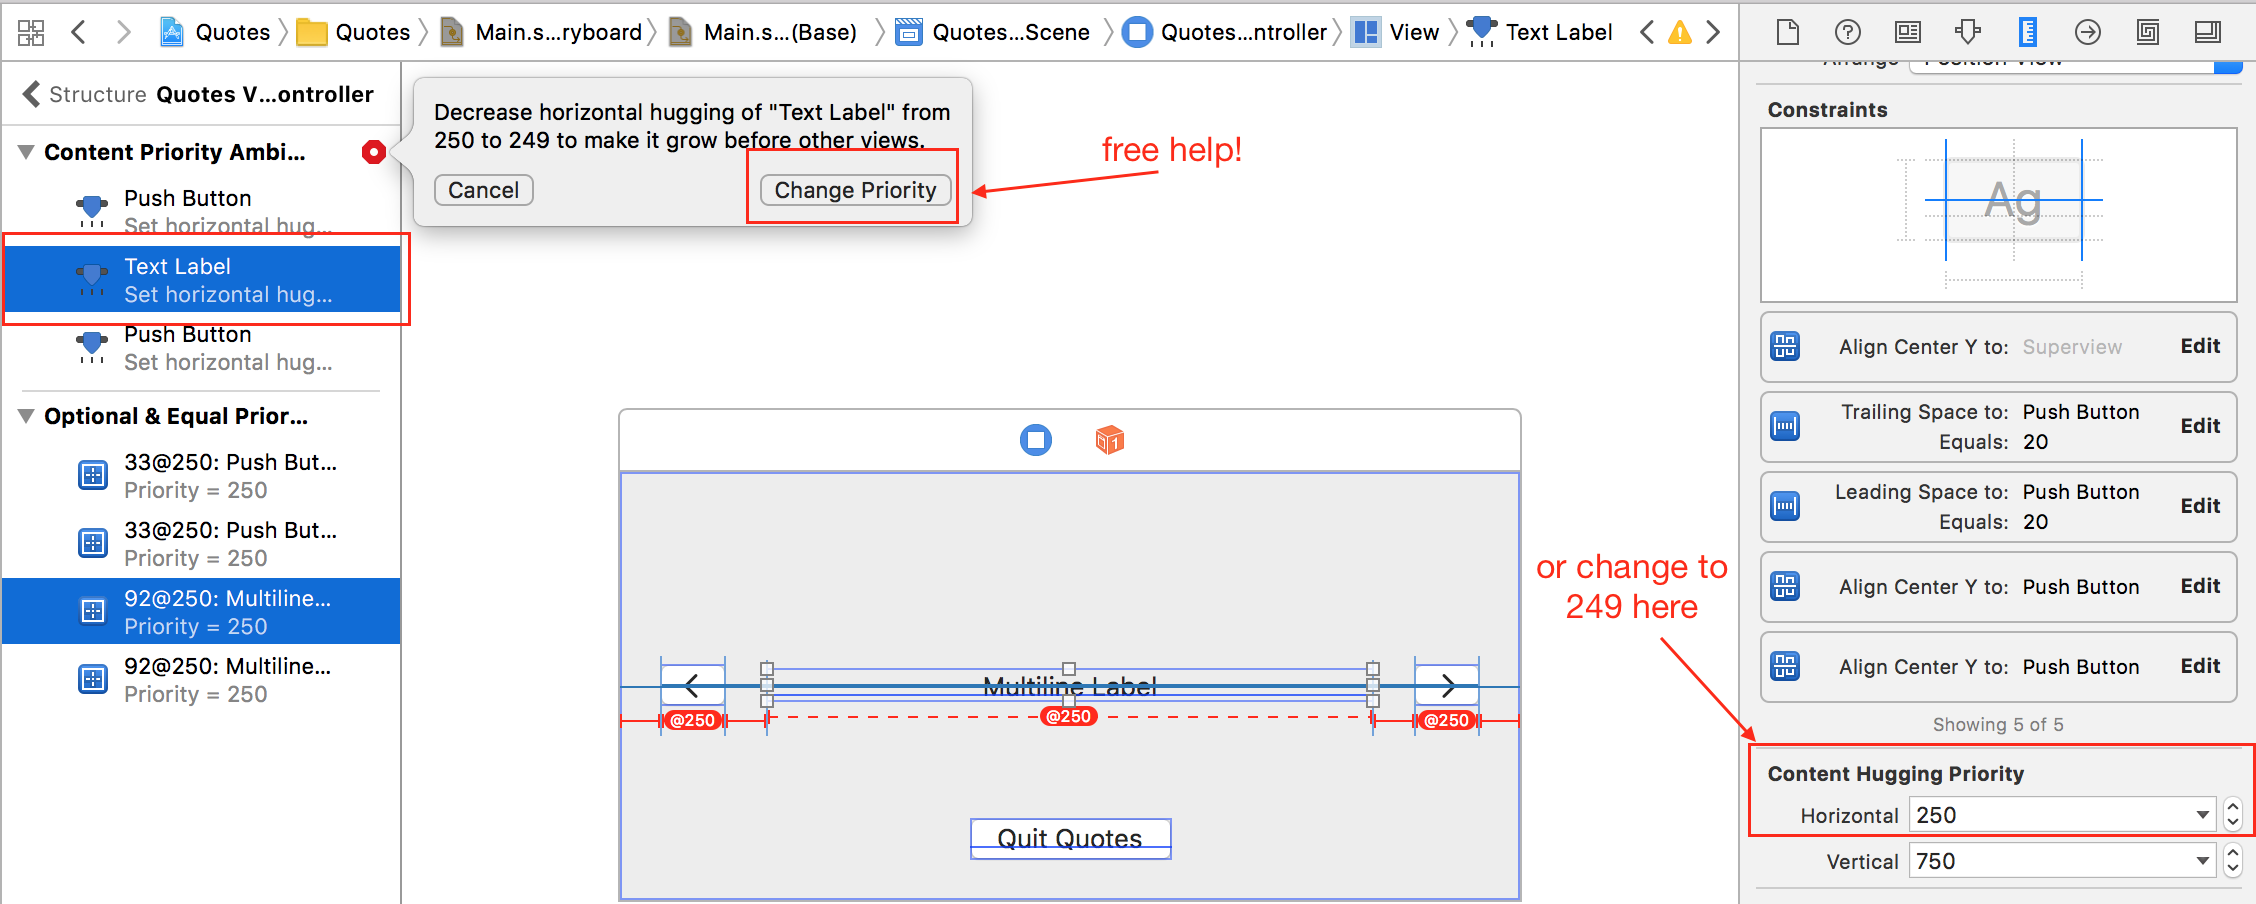
You are going to see a set of layout errors as there isn’t enough information for auto layout to figure things out yet.
Set the Horizontal Content Hugging Priority of the label to 249 to allow the label to grow properly.
[/spoiler]
Once you have the layout setup to your satisfaction set up the elements like this:
- Set the left button’s image to
NSGoLeftTemplateand delete the title. - Set the right button’s image to
NSGoRightTemplateand delete the title. - Set the title of the lower push button to Quit Quotes.
- Set the label’s text alignment to center.
- Check that Line Break for the label is set to Word Wrap.
Now open QuotesViewController.swift and add the the following code to the class implementation of QuotesViewController:
@IBOutlet var textLabel: NSTextField!
Add this extension after the class implementation. You will now have two extensions in QuotesViewController.swift.
// MARK: Actions

extension QuotesViewController {
  @IBAction func previous(_ sender: NSButton) {
  }

  @IBAction func next(_ sender: NSButton) {
  }

  @IBAction func quit(_ sender: NSButton) {
  }
}
You have just added an outlet for the text label, which you’ll use to display the inspirational quote and 3 stub actions which you will connect to the 3 buttons.