Menus and Popovers in Menu Bar Apps for macOS
In this Menu Bar App tutorial you will learn how to present a menu and a popover that shows quotes from famous people. By Warren Burton.
Update note: This Menus and Popovers in Menu Bar Apps for macOS tutorial has been updated to Xcode 9 and Swift 4 by Warren Burton. The original tutorial was written by Mikael Konutgan.
Update note: This Menus and Popovers in Menu Bar Apps for macOS tutorial has been updated to Xcode 9 and Swift 4 by Warren Burton. The original tutorial was written by Mikael Konutgan.
Menu bar apps have been staple of macOS for a long time. Many apps like 1Password and Day One have companion menu bar apps. Others like Fantastical live exclusively in macOS’s menu bar.
In this menu bar app tutorial, you’ll build a menu bar app that shows inspirational quotes in a popover. While you do this, you’ll learn:
- How to create a menu bar icon
- How to make the app live exclusively in the menu bar
- How to add a menu for the user
- How to make a popover that shows on demand and hides when the user moves on — aka Event Monitoring
Getting Started
Fire up Xcode. Go to File/New/Project… then select the macOS/Application/Cocoa App template and click Next.
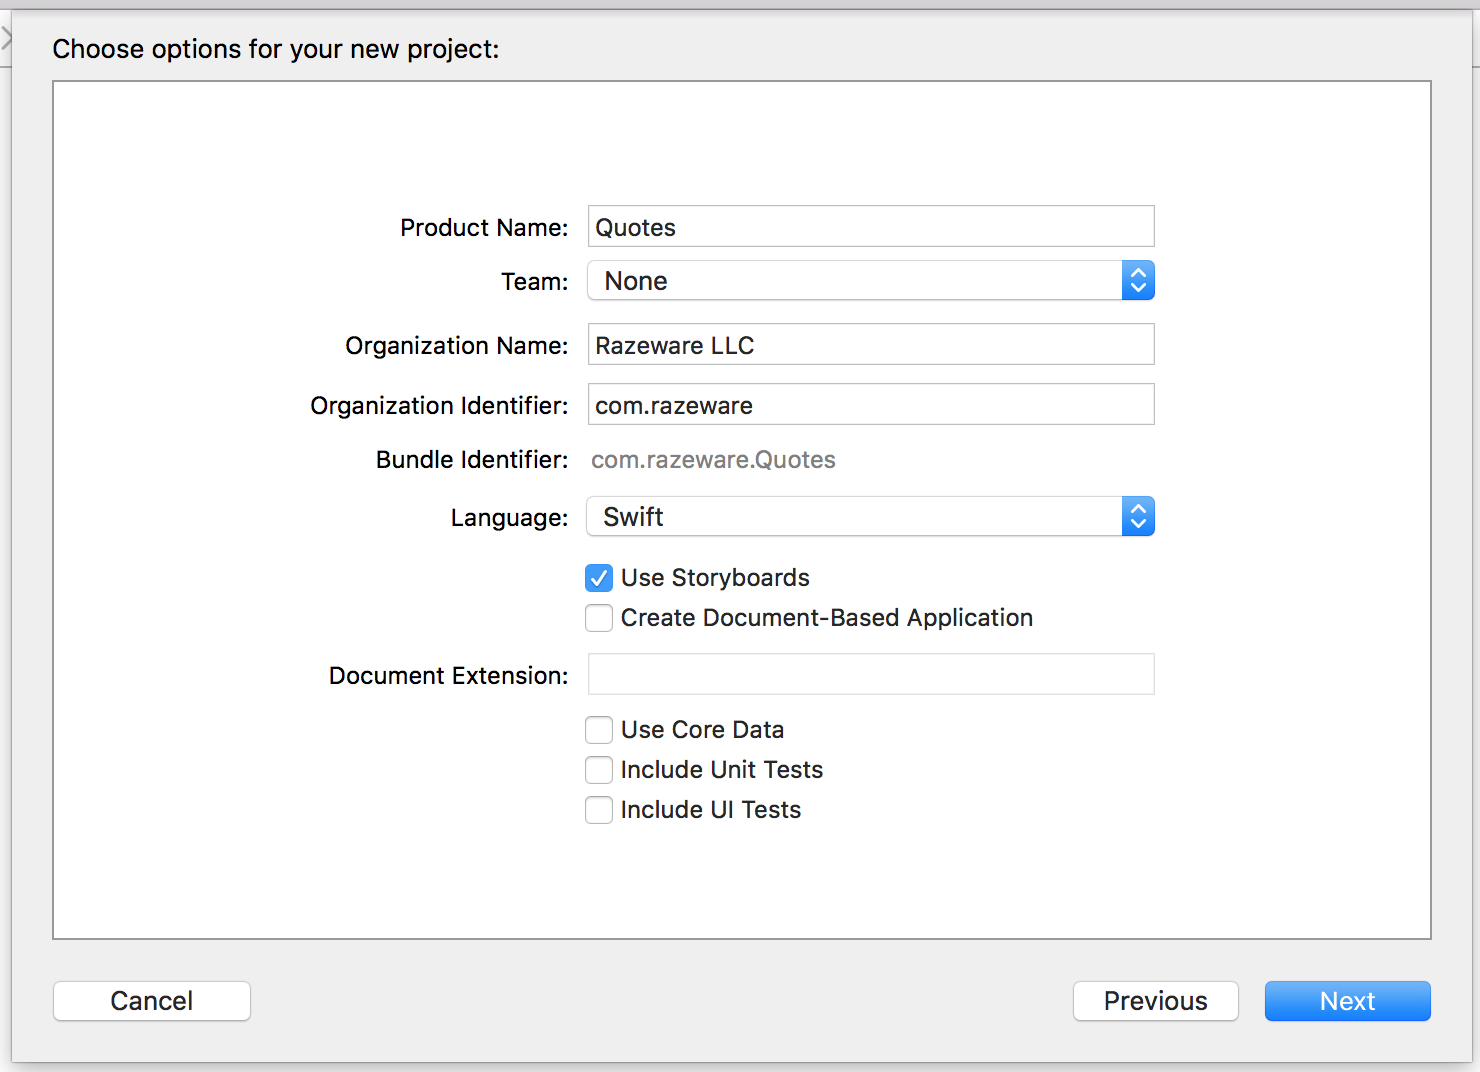
On the next screen, enter Quotes as the Product Name, choose your desired Organization Name and Organization Identifier. Then make sure that Swift is selected as the language, and that Use Storyboards is checked. Uncheck Create Document-Based Application, Use Core Data, Include Unit tests and Include UI Tests.
Finally, click Next again, choose a place to save the project and click Create.
Once the new project is set up, open AppDelegate.swift and add the following property to the class:
let statusItem = NSStatusBar.system.statusItem(withLength:NSStatusItem.squareLength)
This creates a Status Item — aka application icon — in the menu bar with a fixed length that the user will see and use.
Next, you’ll need to associate an image to the status item to make your app recognizable in the menu bar.
Go to Assets.xcassets in the project navigator, download this image StatusBarButtonImage@2x.png and drag it into the asset catalog.
Select the image and open the attributes inspector. Change the Render As option to Template Image.

If you use your own custom image, make sure that the image is black and white and configured as a template image so the Status Item looks great against both light and dark menu bars.
Back in AppDelegate.swift, add the following code to applicationDidFinishLaunching(_:)
if let button = statusItem.button {
  button.image = NSImage(named:NSImage.Name("StatusBarButtonImage"))
  button.action = #selector(printQuote(_:))
}
This will configure the status item with an icon of the image you just added, and an action for when you click on the item. This will create an error but you’ll fix that now.
Add the following method to the class:
@objc func printQuote(_ sender: Any?) {
  let quoteText = "Never put off until tomorrow what you can do the day after tomorrow."
  let quoteAuthor = "Mark Twain"

  print("\(quoteText) — \(quoteAuthor)")
}
This method will simply log out the quote text to the console.
Take note of the @objc directive in the signature. This exposes the method to the Objective-C runtime to allow the button to use it as an action.
Build and run the app, and you should see a new menu bar app available. You did it!
![]()
![]()
Note: If you have too many menu bar apps, you might not be able to see your button. Switch to an app with fewer menus than Xcode (like Finder) and you should be able to see it.
Note: If you have too many menu bar apps, you might not be able to see your button. Switch to an app with fewer menus than Xcode (like Finder) and you should be able to see it.
Every time you click on the menu bar icon, you’ll see the quote printed out in the Xcode console.
Hiding the Dock Icon and Main Window
There are still two small things to do before you have a functional menu bar app.
- Disable the dock icon.
- Remove the main window.
To disable the dock icon, open Info.plist. Add a new key Application is agent (UIElement) and set its value to YES.

LSUIElement.
Now it’s time to handle the main window.
- Open
Main.storyboard - Select the Window Controller scene and delete it.
- Leave the View Controller scene alone as you are going to use it soon.

Build and run. You’ll see the app has no main window, no pesky dock icon and only a tidy status item in the menu bar. High five yourself :]
Adding a Menu to the Status Item
Usually, a measly single action on click is not enough for a menu bar app. The easiest way to add more functionality to your app is to add a menu. Add the following function to the end of AppDelegate.
func constructMenu() {
  let menu = NSMenu()

  menu.addItem(NSMenuItem(title: "Print Quote", action: #selector(AppDelegate.printQuote(_:)), keyEquivalent: "P"))
  menu.addItem(NSMenuItem.separator())
  menu.addItem(NSMenuItem(title: "Quit Quotes", action: #selector(NSApplication.terminate(_:)), keyEquivalent: "q"))

  statusItem.menu = menu
}
and then add this call to the end of applicationDidFinishLaunching(_:)
constructMenu()
Here you create an NSMenu, add 3 instances of NSMenuItem to it, and then set the status item’s menu to that new menu.
A few things to note here:
- The title of a menu item is the text that appears in the menu. This is a good point for localization if needed.
- The action, like the action of a button or any control, is the method that gets called when you click the menu item.
- The
keyEquivalentis a keyboard shortcut that you can use to activate the menu item. A lowercase letter uses Cmd as the modifier key and an uppercase letter uses Cmd+Shift. This keyboard shortcut only works if the application is front-most and active. So, in this case, the menu or any other window needs to be visible, since the app has no dock icon. - A
separatorItemis a stock inactive menu item that appears as a simple gray line between other menu items. Use it to group functionality in the menu. - The
printQuote:action is the method you already defined inAppDelegatewhileterminate:is an action method defined byNSApplication.
Build and run, and you should see a menu when clicking on the status item. Progress!

Try out your options – selecting Print Quote will display the quote in the Xcode console, while Quit Quotes will quit the app.