Creating Local Notifications in Flutter
Learn how to create cross-platform local notifications in Flutter using the flutter_local_notifications package. By Ken Lee.
Building the Local Notification Helper Library
You’ll use a helper library to send local notifications instead of sending them in the PomodoroTimer widget. This means you’ll put all notification logic in the helper library, including initializing, scheduling and canceling notifications.
That’ll make the code more readable, easier to maintain and reusable.
Setting up the Notification Service
You’ll build the notification helper library in lib/local_notice_service.dart. Open the file and import the following at the top:
import 'package:flutter_local_notifications/flutter_local_notifications.dart';
import 'package:timezone/timezone.dart' as tz;
import 'package:timezone/data/latest.dart' as tzData;
You imported the flutter_local_notifications and timezone packages. You’ll use the first to set up and send the local notifications and the last one to create the time object based on the user’s time zone, which the notification package uses.
Next, define a new _localNotificationsPlugin member variable to initialize the local notification plugin in LocalNoticeService:
final _localNotificationsPlugin = FlutterLocalNotificationsPlugin();
You’ll use _localNotificationsPlugin throughout the library to control the native notification system.
Moving forward, add a setup() method to initialize the plugin for each platform:
Future<void> setup() async {
  // #1
  const androidSetting = AndroidInitializationSettings('@mipmap/ic_launcher');
  const iosSetting = IOSInitializationSettings();

  // #2
  const initSettings =
      InitializationSettings(android: androidSetting, iOS: iosSetting);

  // #3
  await _localNotificationsPlugin.initialize(initSettings).then((_) {
    debugPrint('setupPlugin: setup success');
  }).catchError((Object error) {
    debugPrint('Error: $error');
  });
}
Here’s the explanation of the code above:
- Define the platform-specific notification settings for Android and iOS.
- Construct a platform-agnostic setting using the initialization settings from the two platforms.
- Initialize the notification plugin with the general setting.
To test how far you’ve gone, invoke setup() between WidgetsFlutterBinding.ensureInitialized(); and runApp(const PomodoroApp()); in lib/main.dart:
await LocalNoticeService().setup();
That initializes the helper library. Remember to import lib/local_notice_service.dart:
import 'local_notice_service.dart';
Build and run or restart the app, and you should see a new “Permission” dialog on iOS:
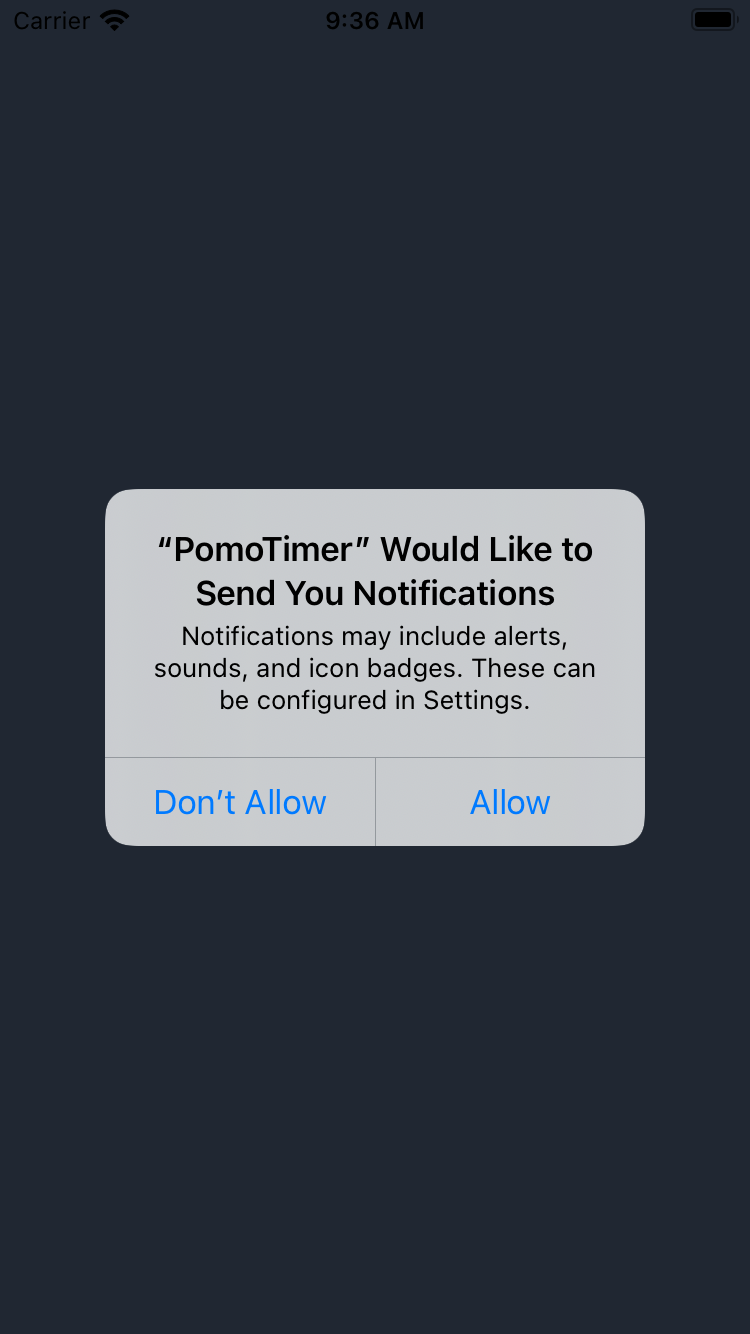
Tap Allow to grant the permission to show the notifications. This applies only to iOS.
Making Your First Local Notification
After setting up the logic to initialize local notifications, go back to lib/local_notice_service.dart and replace the body of addNotification with the following:
// #1
tzData.initializeTimeZones();
final scheduleTime =
  tz.TZDateTime.fromMillisecondsSinceEpoch(tz.local, endTime);

// #2
final androidDetail = AndroidNotificationDetails(
  channel, // channel Id
  channel  // channel Name
);

final iosDetail = IOSNotificationDetails();

final noticeDetail = NotificationDetails(
  iOS: iosDetail,
  android: androidDetail,
);

// #3
final id = 0;

// #4
await _localNotificationsPlugin.zonedSchedule(
  id,
  title,
  body,
  scheduleTime,
  noticeDetail,
  uiLocalNotificationDateInterpretation:
     UILocalNotificationDateInterpretation.absoluteTime,
  androidAllowWhileIdle: true,
);
In the code above, you’ve done the following:
- Initialized the timezone data and defined the time to wake the notification up. Since the plugin uses
tz.TZDateTimeas input for time, you need to convert theendTimevalue totz.TZDateTime. - Defined the details of the notification. The detail contains the setting of the notification for each platform(
androidDetailandiosDetail), such as enabling/disabling the sound and badge. Notice that you need to define a channel ID and name of the notification for Android. Channels are used to distinguish between different notifications. - Defined the ID of the notification. It’s useful when you want to cancel a particular notification. In this tutorial, you don’t need to cancel any particular notification. Therefore, you can use 0 for all notifications.
- Scheduled the notification based on the user’s time zone.
Now, you need to modify PomodoroTimer to call the library. Open lib/widget/pomodoro_timer.dart and import the helper library at the beginning of the file:
import '../local_notice_service.dart';
Next, add the following code to enterAtWork() just before the call to _startTimer();:
LocalNoticeService().addNotification(
  'Notification Title',
  'Notification Body',
  DateTime.now().millisecondsSinceEpoch + 1000,
  channel: 'testing',
);
The code above will schedule the notification for the next second when you tap START WORK.
Run the app. You should receive a notification after tapping START WORK.
This is the result on iOS:

…and on Android:

Notification Channels
In the addNotification() method, you may have noticed there’s a field named channel.
This is a feature offered by Android to distinguish different notifications made by the app. The value is ignored on iOS.
Different channels can have their preferences, such as sound and notification availability. For example, you can enable the ‘work completed’ notification and disable the ‘rest ended’ notification.
Here’s an example setting of different channels in Android.

Congratulations on coming this far! It’s time to notify users of concrete Pomodoro events. :]
Scheduling the Pomodoro Timer Notification Alerts
Your local notifications helper library is ready to send notifications. All you now need to do is modify the settings according to the Pomodoro session type.
Adding the Pomodoro Work Completed Notification
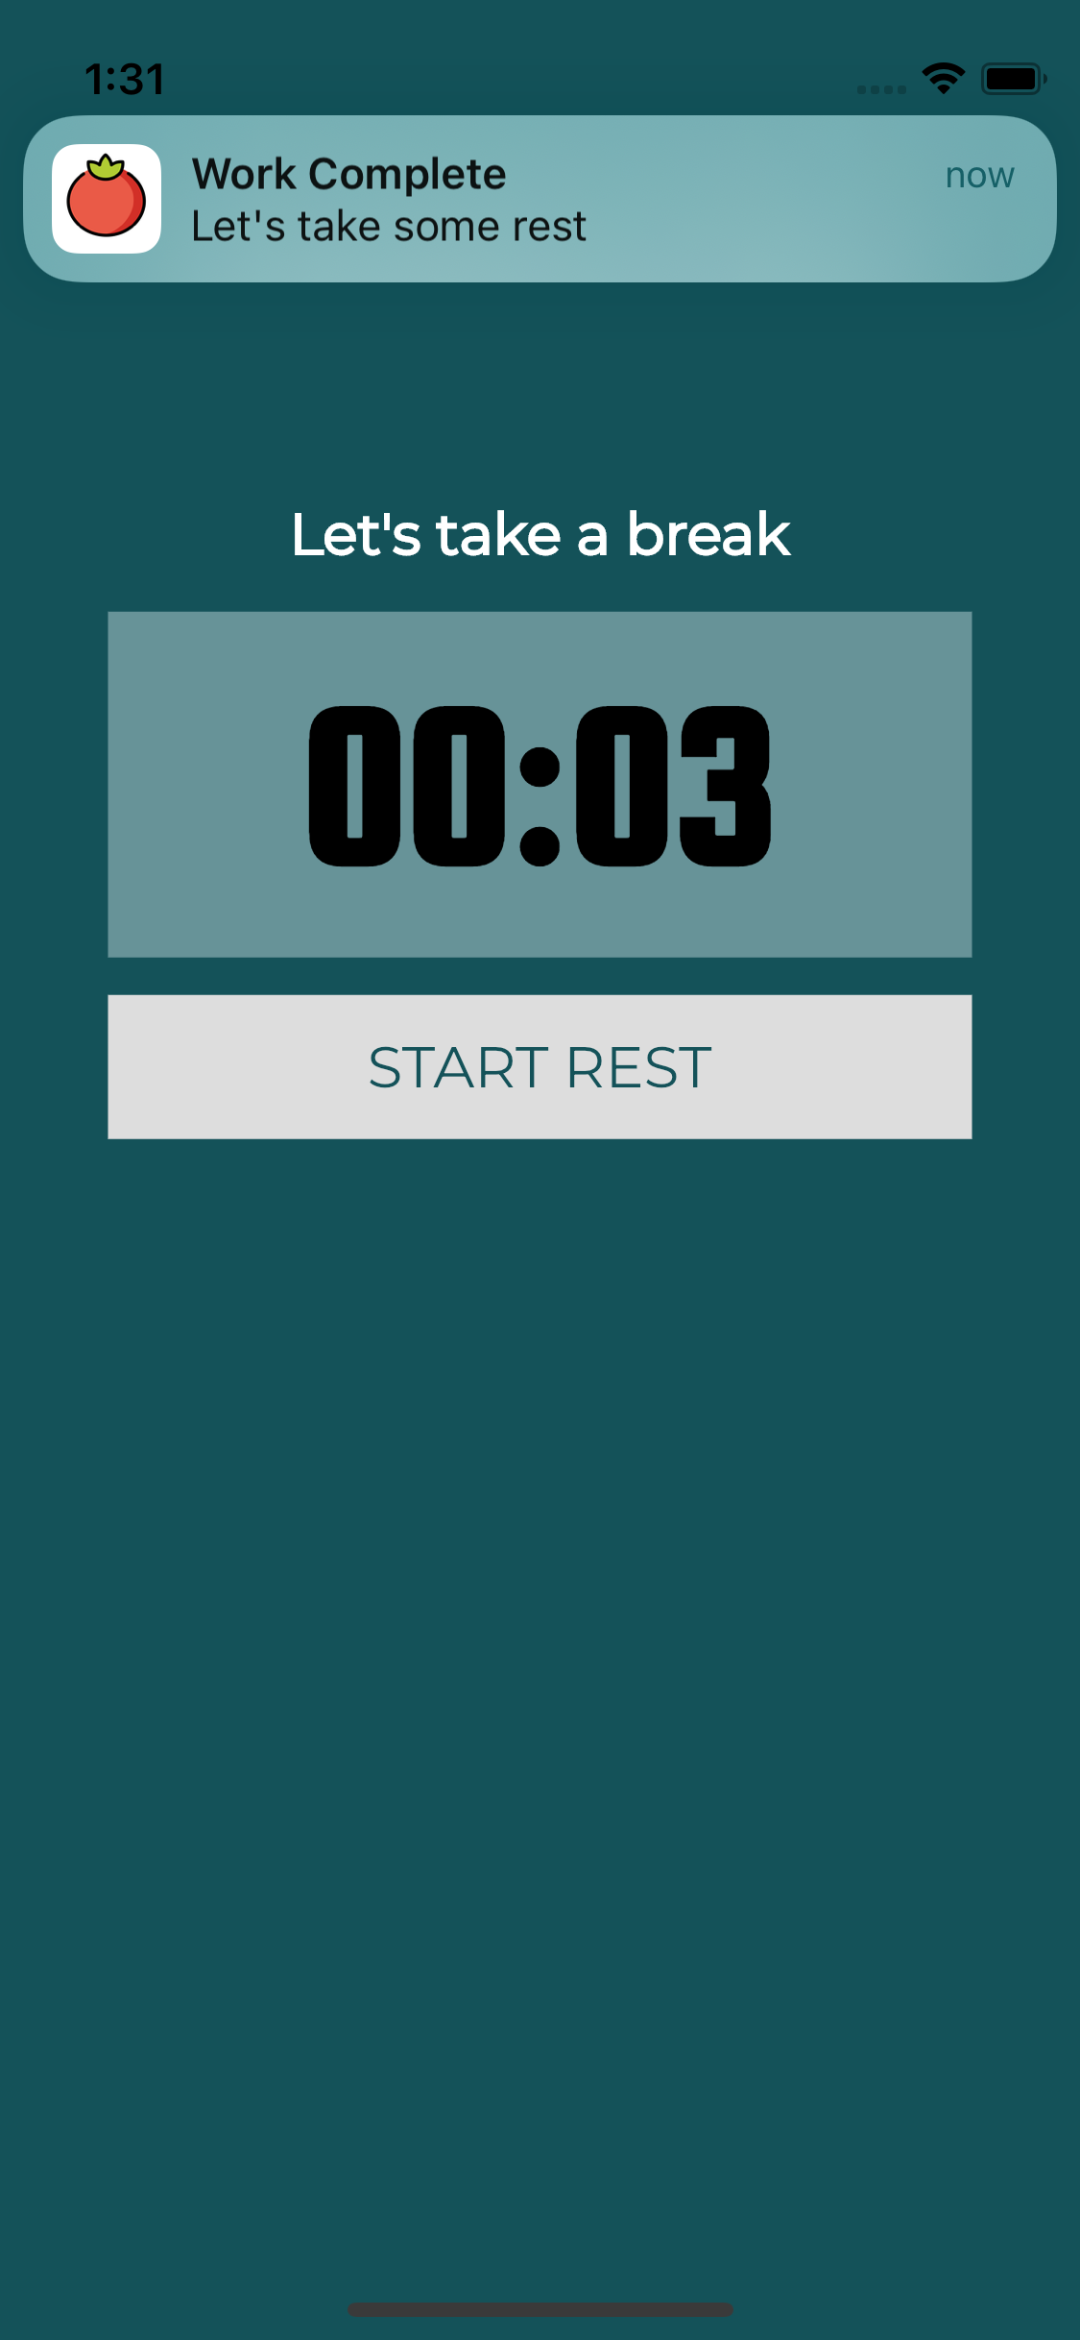
You want to notify the user when a Pomodoro work session completes whether the app is in the foreground or not. To do so, open lib/widget/pomodoro_timer.dart and modify the code you added to enterAtWork() in the previous section to this:
LocalNoticeService().addNotification(
  'Work Complete',
  "Let's take some rest",
  _endTime,
  channel: 'work-end',
);
Tapping START WORK will invoke enterAtWork(). _endTime defines the time the notification will fire in miliseconds. Since you have the end time, you invoke addNotification to notify the user that a work session has ended.
Hot reload the app and tap START WORK. You should receive a notification after the work session timer runs out:
Adding the Pomodoro Rest Ended Notification
To notify the user when a rest session ends, you’ll add the ‘rest ended’ notification. While still in lib/widget/pomodoro_timer.dart, look for enterAtRest(). Then add the following code before _startTimer():
LocalNoticeService().addNotification(
  'Rest Complete',
  'Let start to work',
  _endTime,
  channel: 'rest-end',
);
The code above is similar to the ‘work completion’ one. The user invokes enterAtWork() when they tap START REST to enter a rest session.
Hot reload the app, tap START WORK and wait for the work session to complete. Then tap START REST to see the notification message at the end of the rest session:

Canceling a Scheduled Notification
PomodoroTimer allows the user to discard the notification during the Pomodoro work or rest session. Currently, the notification sent to the operating system isn’t removed when you discard the session. Thus, there is an issue where the notification is still showing up after users discard the session. Therefore, you need to tell the system to cancel the notification when the users discard the session.
First, add a cancelAllNotification() method to LocalNoticeService. Open lib/local_notice_service.dart and add the following:
void cancelAllNotification() {
  _localNotificationsPlugin.cancelAll();
}
_localNotificationsPlugin.cancelAll() is a function provided by flutter_local_notifications to cancel all notifications.
The package also provides a method to cancel the notification by ID:
_localNotificationsPlugin.cancel(notificationId);
The notificationId is a value you provide when creating the notification. Currently, the project uses 0 for all notifications.
Since the PomoTimer only has one notification at a time, it’s fine to use cancelAllNotification() for the discard action.