Bloc 8.0 Tutorial for Flutter: Getting Started
Learn how to build a Wordle clone app in Flutter using one of the most robust state management libraries: Bloc 8.0. By Alejandro Ulate Fallas.
Sign up/Sign in
With a free Kodeco account you can download source code, track your progress, bookmark, personalise your learner profile and more!
Create accountAlready a member of Kodeco? Sign in
Sign up/Sign in
With a free Kodeco account you can download source code, track your progress, bookmark, personalise your learner profile and more!
Create accountAlready a member of Kodeco? Sign in
Contents
Bloc 8.0 Tutorial for Flutter: Getting Started
25 mins
Adding a New Cubit
You’re almost done building Plingo, but a couple of things are still missing. Remember the negative numbers shown when opening StatsDialog? You’ll fix this next.
Open lib/presentation/cubit/stats_cubit.dart and add the following functions to StatsCubit:
/// Fetches the current stats of the game.
Future<void> fetchStats() async {
  final stats = await _statsRepository.fetchStats();

  emit(state.copyWith(stats: stats));
}

/// Resets the stats stored.
Future<void> resetStats() async {
  await _statsRepository.resetStats();

  await fetchStats();
}
These functions are how StatsCubit changes the state. First, fetchStats retrieves the stats from local storage and emits a change with the updated stats. Next, resetStats resets the stats stored locally and then fetches the stats to update the state.
Now, you need to call those functions from StatsDialog. Open lib/presentation/widgets/plingo_appbar.dart and call fetchStats with cascade notation on line 63. Here’s what the StatsCubit definition should look like:
IconButton(
  onPressed: () => showDialog<void>(
    context: context,
    builder: (dContext) => BlocProvider(
      create: (bContext) => StatsCubit(
        context.read<GameStatsRepository>(),
      )..fetchStats(),
      child: const GameStatsDialog(),
    ),
  ),
  icon: const Icon(Icons.leaderboard_rounded),
)
Now, open lib/presentation/dialogs/stats_dialog.dart and change the line below // TODO: Reset stats here! to this:
onPressed: () => context.read<StatsCubit>().resetStats(),
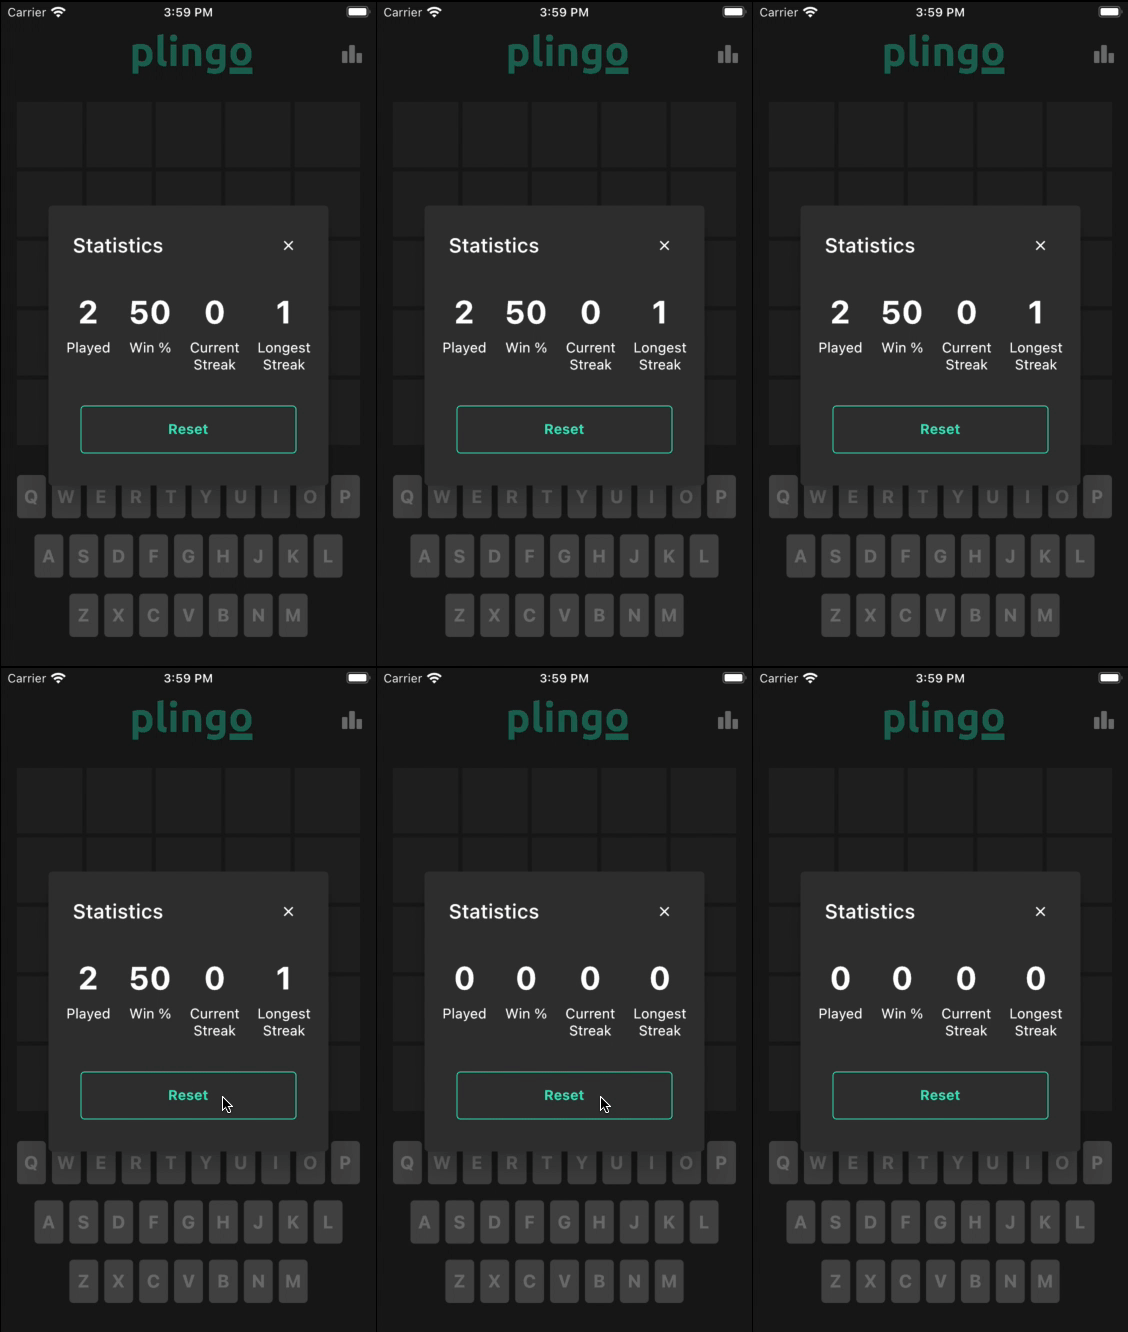
Build and run the app, then tap the stats icon in the top-right corner of the screen to see the stats dialog. You’ll see the actual game statistics in the dialog like this:
Then, tap Reset, and you should see the stats reset back to zero:
Monitoring a Bloc
Now that the game is functional, you need to start thinking about monitoring your app. A good way of doing this is to pay attention to all the different state changes throughout your app. bloc also provides a great way for you to do this with the new BlocOverrides API. It allows you to have many BlocObserver or EventTransformer implementations scoped to different parts of the app so you can track changes on a specific feature or the whole app.
Open lib/monitoring/bloc_monitor.dart and place the following code into it:
import 'package:bloc/bloc.dart';
import 'package:flutter/foundation.dart' as foundation;

/// [BlocObserver] for the application which
/// observes all state changes.
class BlocMonitor extends BlocObserver {
  @override
  void onChange(BlocBase bloc, Change change) {
    super.onChange(bloc, change);
    foundation.debugPrint('${bloc.runtimeType} $change');
  }
}
BlocMonitor is a custom BlocObserver that overrides onChange. This helps you track all the different state changes and prints them to the console via debugPrint. Using this function from foundation allows you to only print to the console when the app has been run in debug mode and also makes state changes available via the flutter logs command later on.
You could track a variety of different Bloc hooks as well:
-
onCreate: Called whenever you instantiate
Bloc. Often, a cubit may be lazily instantiated andonCreatecan observe exactly when the cubit instance is created. -
onEvent: Happens whenever you add an event to any
Bloc. -
onChange: Called whenever you emit a new state in any
Bloc.onChangegets called before a bloc’s state has updates. -
onTransition: Occurs whenever a transition occurs in any
Bloc. A transition occurs when you add a new event and then emit a new state from a correspondingEventHandler.onTransitiongets called before aBloc‘s state updates. -
onError: Whenever any
BlocorCubitthrows an error. -
onClose: Called whenever a
Bloccloses. It gets called before theBloccloses and indicates that the particular instance will no longer emit new states.
Alright, continue by opening main.dart and replace the contents with the following:
import 'package:flutter/material.dart';
import 'package:flutter_bloc/flutter_bloc.dart';

import 'app/app.dart';
import 'data.dart';
import 'monitoring/bloc_monitor.dart';

void main() {
  BlocOverrides.runZoned(
    () => runApp(
      RepositoryProvider(
        create: (context) => GameStatsRepository(GameStatsSharedPrefProvider()),
        child: const PlingoApp(),
      ),
    ),
    blocObserver: BlocMonitor(),
  );
}
With this, you’re creating a new BlocMonitor and tracking all Blocs that run in the zoned override. This means that both GameBloc and StatsCubit report changes to your BlocMonitor.
Build and run your app, and check your debug console. After typing a few words, you should see logs like the following:
Where to Go From Here?
You can download the completed project files by clicking the Download Materials button at the top or bottom of the tutorial.
Are you wondering where to go next? Take a good look at bloc‘s documentation — it’s a great place to go when you have any questions. You can also refer to the library’s release notes too, since they’re full of details and guides for migrating apps from previous versions.
Want to learn more about bloc and concurrency? Check out this article about How to use Bloc with streams and concurrency written by Joanna May from VeryGoodVentures.
You can also hop onto the Flutter desktop hype train with Flutter Desktop Apps: Getting Started, a great video course by Kevin Moore.
We hope you enjoyed this tutorial. If you have any questions or comments, please join the forum discussion below!


