Custom UIViewController Transitions: Getting Started
This tutorial will teach you to create custom UIViewController transitions for presenting and dismissing, and how to make them interactive! By Richard Critz.
Sign up/Sign in
With a free Kodeco account you can download source code, track your progress, bookmark, personalise your learner profile and more!
Create accountAlready a member of Kodeco? Sign in
Contents
Custom UIViewController Transitions: Getting Started
25 mins
iOS delivers some nice view controller transitions — push, pop, cover vertically — for free but it’s great fun to make your own. Custom UIViewController
transitions can significantly enhance your users’ experiences and set your app apart from the rest of the pack. If you’ve avoided making your own custom transitions because the process seems too daunting, you’ll find that it’s not nearly as difficult as you might expect.
In this tutorial, you’ll add some custom UIViewController
transitions to a small guessing game app. By the time you’ve finished, you’ll have learned:
- How the transitioning API is structured.
- How to present and dismiss view controllers using custom transitions.
- How to build interactive transitions.
UIView
animations, so you’ll need a basic working knowledge of them. If you need help, check out our tutorial on iOS Animation for a quick introduction to the topic.
Getting Started
Download the starter project. Build and run the project; you’ll see the following guessing game:
The app presents several cards in a page view controller. Each card shows a description of a pet and tapping a card reveals which pet it describes.
Your job is to guess the pet! Is it a cat, dog or fish? Play with the app and see how well you do.
The navigation logic is already in place but the app currently feels quite bland. You’re going to spice it up with custom transitions.
Exploring the Transitioning API
The transitioning API is a collection of protocols. This allows you to make the best implementation choice for your app: use existing objects or create purpose-built objects to manage your transitions. By the end of this section, you’ll understand the responsibilities of each protocol and the connections between them. The diagram below shows you the main components of the API:
The Pieces of the Puzzle
Although the diagram looks complex, it will feel quite straightforward once you understand how the various parts work together.
Transitioning Delegate
Every view controller can have a transitioningDelegate
, an object that conforms to UIViewControllerTransitioningDelegate
.
Whenever you present or dismiss a view controller, UIKit asks its transitioning delegate for an animation controller to use. To replace a default animation with your own custom animation, you must implement a transitioning delegate and have it return the appropriate animation controller.
Animation Controller
The animation controller returned by the transitioning delegate is an object that implements UIViewControllerAnimatedTransitioning
. It does the “heavy lifting” of implementing the animated transition.
Transitioning Context
The transitioning context object implements UIViewControllerContextTransitioning
and plays a vital role in the transitioning process: it encapsulates information about the views and view controllers involved in the transition.
As you can see in the diagram, you don’t implement this protocol yourself. UIKit creates and configures the transitioning context for you and passes it to your animation controller each time a transition occurs.
The Transitioning Process
Here are the steps involved in a presentation transition:
- You trigger the transition, either programmatically or via a segue.
- UIKit asks the “to” view controller (the view controller to be shown) for its transitioning delegate. If it doesn’t have one, UIKIt uses the standard, built-in transition.
- UIKit then asks the transitioning delegate for an animation controller via
animationController(forPresented:presenting:source:)
. If this returnsnil
, the transition will use the default animation. - UIKit constructs the transitioning context.
- UIKit asks the animation controller for the duration of its animation by calling
transitionDuration(using:)
. - UIKit invokes
animateTransition(using:)
on the the animation controller to perform the animation for the transition. - Finally, the animation controller calls
completeTransition(_:)
on the transitioning context to indicate that the animation is complete.
The steps for a dismissing transition are nearly identical. In this case, UIKit asks the “from” view controller (the one being dismissed) for its transitioning delegate. The transitioning delegate vends the appropriate animation controller via animationController(forDismissed:)
.
Creating a Custom Presentation Transition
Time to put your new-found knowledge into practice! Your goal is to implement the following animation:
- When the user taps a card, it flips to reveal the second view scaled down to the size of the card.
- Following the flip, the view scales to fill the whole screen.
Creating the Animator
You’ll start by creating the animation controller.
From the menu, select File\New\File…, choose iOS\Source\Cocoa Touch Class, and click Next. Name the file FlipPresentAnimationController, make it a subclass of NSObject and set the language to Swift. Click Next and set the Group to Animation Controllers. Click Create.
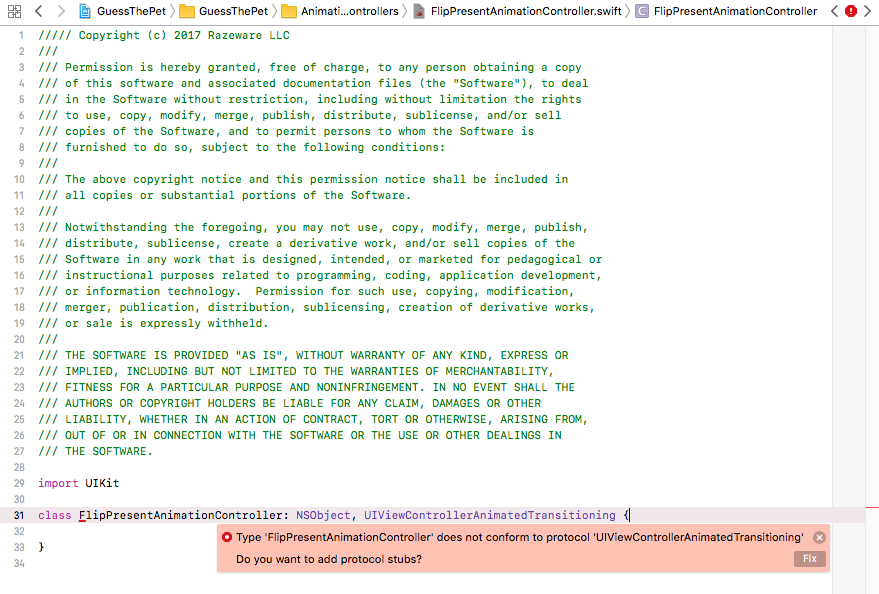
Animation controllers must conform to UIViewControllerAnimatedTransitioning
. Open FlipPresentAnimationController.swift and update the class declaration accordingly.
class FlipPresentAnimationController: NSObject, UIViewControllerAnimatedTransitioning {
}
Xcode will raise an error complaining that FlipPresentAnimationController
does not conform to UIViewControllerAnimatedTransitioning
. Click Fix to add the necessary stub routines.
You’re going to use the frame of the tapped card as a starting point for the animation. Inside the body of the class, add the following code to store this information.
private let originFrame: CGRect
init(originFrame: CGRect) {
self.originFrame = originFrame
}
Next, you must fill in the code for the two stubs you added. Update transitionDuration(using:)
as follows:
func transitionDuration(using transitionContext: UIViewControllerContextTransitioning?) -> TimeInterval {
return 2.0
}
As the name suggests, this method specifies the duration of your transition. Setting it to two seconds will prove useful during development as it leaves enough time to observe the animation.
Add the following to animateTransition(using:)
:
// 1
guard let fromVC = transitionContext.viewController(forKey: .from),
let toVC = transitionContext.viewController(forKey: .to),
let snapshot = toVC.view.snapshotView(afterScreenUpdates: true)
else {
return
}
// 2
let containerView = transitionContext.containerView
let finalFrame = transitionContext.finalFrame(for: toVC)
// 3
snapshot.frame = originFrame
snapshot.layer.cornerRadius = CardViewController.cardCornerRadius
snapshot.layer.masksToBounds = true
Here’s what this does:
- Extract a reference to both the view controller being replaced and the one being presented. Make a snapshot of what the screen will look like after the transition.
- UIKit encapsulates the entire transition inside a container view to simplify managing both the view hierarchy and the animations. Get a reference to the container view and determine what the final frame of the new view will be.
- Configure the snapshot’s frame and drawing so that it exactly matches and covers the card in the “from” view.
Continue adding to the body of animateTransition(using:)
.
// 1
containerView.addSubview(toVC.view)
containerView.addSubview(snapshot)
toVC.view.isHidden = true
// 2
AnimationHelper.perspectiveTransform(for: containerView)
snapshot.layer.transform = AnimationHelper.yRotation(.pi / 2)
// 3
let duration = transitionDuration(using: transitionContext)
The container view, as created by UIKit, contains only the “from” view. You must add any other views that will participate in the transition. It’s important to remember that addSubview(_:)
puts the new view in front of all others in the view hierarchy so the order in which you add subviews matters.
- Add the new “to” view to the view hierarchy and hide it. Place the snapshot in front of it.
- Set up the beginning state of the animation by rotating the snapshot 90˚ around its y-axis. This causes it to be edge-on to the viewer and, therefore, not visible when the animation begins.
- Get the duration of the animation.
AnimationHelper
is a small utility class responsible for adding perspective and rotation transforms to your views. Feel free to have a look at the implementation. If you’re curious about the magic of perspectiveTransform(for:)
, try commenting out the call after you finish the tutorial.
You now have everything set up; time to animate! Complete the method by adding the following.
// 1
UIView.animateKeyframes(
withDuration: duration,
delay: 0,
options: .calculationModeCubic,
animations: {
// 2
UIView.addKeyframe(withRelativeStartTime: 0.0, relativeDuration: 1/3) {
fromVC.view.layer.transform = AnimationHelper.yRotation(-.pi / 2)
}
// 3
UIView.addKeyframe(withRelativeStartTime: 1/3, relativeDuration: 1/3) {
snapshot.layer.transform = AnimationHelper.yRotation(0.0)
}
// 4
UIView.addKeyframe(withRelativeStartTime: 2/3, relativeDuration: 1/3) {
snapshot.frame = finalFrame
snapshot.layer.cornerRadius = 0
}
},
// 5
completion: { _ in
toVC.view.isHidden = false
snapshot.removeFromSuperview()
fromVC.view.layer.transform = CATransform3DIdentity
transitionContext.completeTransition(!transitionContext.transitionWasCancelled)
})
Here’s the play-by-play of your animation:
- You use a standard UIView keyframe animation. The duration of the animation must exactly match the length of the transition.
- Start by rotating the “from” view 90˚ around its y-axis to hide it from view.
- Next, reveal the snapshot by rotating it back from its edge-on state that you set up above.
- Set the frame of the snapshot to fill the screen.
- The snapshot now exactly matches the “to” view so it’s finally safe to reveal the real “to” view. Remove the snapshot from the view hierarchy since it’s no longer needed. Next, restore the “from” view to its original state; otherwise, it would be hidden when transitioning back. Calling
completeTransition(_:)
informs UIKit that the animation is complete. It will ensure the final state is consistent and remove the “from” view from the container.
Your animation controller is now ready to use!
Wiring Up the Animator
UIKit expects a transitioning delegate to vend the animation controller for a transition. To do this, you must first provide an object which conforms to UIViewControllerTransitioningDelegate
. In this example, CardViewController
will act as the transitioning delegate.
Open CardViewController.swift and add the following extension at the bottom of the file.
extension CardViewController: UIViewControllerTransitioningDelegate {
func animationController(forPresented presented: UIViewController,
presenting: UIViewController,
source: UIViewController)
-> UIViewControllerAnimatedTransitioning? {
return FlipPresentAnimationController(originFrame: cardView.frame)
}
}
Here you return an instance of your custom animation controller, initialized with the frame of the current card.
The final step is to mark CardViewController
as the transitioning delegate. View controllers have a transitioningDelegate
property, which UIKit will query to see if it should use a custom transition.
Add the following to the end of prepare(for:sender:)
just below the card assignment:
destinationViewController.transitioningDelegate = self
It’s important to note that it is the view controller being presented that is asked for a transitioning delegate, not the view controller doing the presenting!
Build and run your project. Tap on a card and you should see the following:
And there you have it — your first custom transition!
Dismissing the View Controller
You have a great presentation transition but that’s only half the job. You’re still using the default dismissal transition. Time to fix that!
From the menu, select File\New\File…, choose iOS\Source\Cocoa Touch Class, and click Next. Name the file FlipDismissAnimationController, make it a subclass of NSObject and set the language to Swift. Click Next and set the Group to Animation Controllers. Click Create.
Replace the class definition with the following.
class FlipDismissAnimationController: NSObject, UIViewControllerAnimatedTransitioning {
private let destinationFrame: CGRect
init(destinationFrame: CGRect) {
self.destinationFrame = destinationFrame
}
func transitionDuration(using transitionContext: UIViewControllerContextTransitioning?) -> TimeInterval {
return 0.6
}
func animateTransition(using transitionContext: UIViewControllerContextTransitioning) {
}
}
This animation controller’s job is to reverse the presenting animation so that the UI feels symmetric. To do this it must:
- Shrink the displayed view to the size of the card;
destinationFrame
holds this value. - Flip the view around to reveal the original card.
Add the following lines to animateTransition(using:)
.
// 1
guard let fromVC = transitionContext.viewController(forKey: .from),
let toVC = transitionContext.viewController(forKey: .to),
let snapshot = fromVC.view.snapshotView(afterScreenUpdates: false)
else {
return
}
snapshot.layer.cornerRadius = CardViewController.cardCornerRadius
snapshot.layer.masksToBounds = true
// 2
let containerView = transitionContext.containerView
containerView.insertSubview(toVC.view, at: 0)
containerView.addSubview(snapshot)
fromVC.view.isHidden = true
// 3
AnimationHelper.perspectiveTransform(for: containerView)
toVC.view.layer.transform = AnimationHelper.yRotation(-.pi / 2)
let duration = transitionDuration(using: transitionContext)
This should all look familiar. Here are the important differences:
- This time it’s the “from” view you must manipulate so you take a snapshot of that.
- Again, the ordering of layers is important. From back to front, they must be in the order: “to” view, “from” view, snapshot view. While it may not seem important in this particular transition, it is vital in others, particularly if the transition can be cancelled.
- Rotate the “to” view to be edge-on so that it isn’t immediately revealed when you rotate the snapshot.
All that’s needed now is the actual animation itself. Add the following code to the end of animateTransition(using:)
.
UIView.animateKeyframes(
withDuration: duration,
delay: 0,
options: .calculationModeCubic,
animations: {
// 1
UIView.addKeyframe(withRelativeStartTime: 0.0, relativeDuration: 1/3) {
snapshot.frame = self.destinationFrame
}
UIView.addKeyframe(withRelativeStartTime: 1/3, relativeDuration: 1/3) {
snapshot.layer.transform = AnimationHelper.yRotation(.pi / 2)
}
UIView.addKeyframe(withRelativeStartTime: 2/3, relativeDuration: 1/3) {
toVC.view.layer.transform = AnimationHelper.yRotation(0.0)
}
},
// 2
completion: { _ in
fromVC.view.isHidden = false
snapshot.removeFromSuperview()
if transitionContext.transitionWasCancelled {
toVC.view.removeFromSuperview()
}
transitionContext.completeTransition(!transitionContext.transitionWasCancelled)
})
This is exactly the inverse of the presenting animation.
- First, scale the snapshot view down, then hide it by rotating it 90˚. Next, reveal the “to” view by rotating it back from its edge-on position.
- Clean up your changes to the view hierarchy by removing the snapshot and restoring the state of the “from” view. If the transition was cancelled — it isn’t yet possible for this transition, but you will make it possible shortly — it’s important to remove everything you added to the view hierarchy before declaring the transition complete.
Remember that it’s up to the transitioning delegate to vend this animation controller when the pet picture is dismissed. Open CardViewController.swift and add the following method to the UIViewControllerTransitioningDelegate
extension.
func animationController(forDismissed dismissed: UIViewController)
-> UIViewControllerAnimatedTransitioning? {
guard let _ = dismissed as? RevealViewController else {
return nil
}
return FlipDismissAnimationController(destinationFrame: cardView.frame)
}
This ensures that the view controller being dismissed is of the expected type and then creates the animation controller giving it the correct frame for the card it will reveal.
It’s no longer necessary to have the presentation animation run slowly. Open FlipPresentAnimationController.swift and change the duration from 2.0
to 0.6
so that it matches your new dismissal animation.
func transitionDuration(using transitionContext: UIViewControllerContextTransitioning?) -> TimeInterval {
return 0.6
}
Build and run. Play with the app to see your fancy new animated transitions.
Making It Interactive
Your custom animations look really sharp. But, you can improve your app even further by adding user interaction to the dismissal transition. The Settings app in iOS has a great example of an interactive transition animation:
Your task in this section is to navigate back to the card’s face-down state with a swipe from the left edge of the screen. The progress of the transition will follow the user’s finger.
How Interactive Transitions Work
An interaction controller responds either to touch events or programmatic input by speeding up, slowing down, or even reversing the progress of a transition. In order to enable interactive transitions, the transitioning delegate must provide an interaction controller. This can be any object that implements UIViewControllerInteractiveTransitioning
.
You’ve already made the transition animation. The interaction controller will manage this animation in response to gestures rather than letting it play like a video. Apple provides the ready-made UIPercentDrivenInteractiveTransition
class, which is a concrete interaction controller implementation. You’ll use this class to make your transition interactive.
From the menu, select File\New\File…, choose iOS\Source\Cocoa Touch Class, and click Next. Name the file SwipeInteractionController, make it a subclass of UIPercentDrivenInteractiveTransition and set the language to Swift. Click Next and set the Group to Interaction Controllers. Click Create.
Add the following to the class.
var interactionInProgress = false
private var shouldCompleteTransition = false
private weak var viewController: UIViewController!
init(viewController: UIViewController) {
super.init()
self.viewController = viewController
prepareGestureRecognizer(in: viewController.view)
}
These declarations are fairly straightforward.
-
interactionInProgress
, as the name suggests, indicates whether an interaction is already happening. -
shouldCompleteTransition
will be used internally to control the transition. You’ll see how shortly. -
viewController
is a reference to the view controller to which this interaction controller is attached.
Next, set up the gesture recognizer by adding the following method to the class.
private func prepareGestureRecognizer(in view: UIView) {
let gesture = UIScreenEdgePanGestureRecognizer(target: self,
action: #selector(handleGesture(_:)))
gesture.edges = .left
view.addGestureRecognizer(gesture)
}
The gesture recognizer is configured to trigger when the user swipes from the left edge of the screen and is added to the view.
The final piece of the interaction controller is handleGesture(_:)
. Add that to the class now.
@objc func handleGesture(_ gestureRecognizer: UIScreenEdgePanGestureRecognizer) {
// 1
let translation = gestureRecognizer.translation(in: gestureRecognizer.view!.superview!)
var progress = (translation.x / 200)
progress = CGFloat(fminf(fmaxf(Float(progress), 0.0), 1.0))
switch gestureRecognizer.state {
// 2
case .began:
interactionInProgress = true
viewController.dismiss(animated: true, completion: nil)
// 3
case .changed:
shouldCompleteTransition = progress > 0.5
update(progress)
// 4
case .cancelled:
interactionInProgress = false
cancel()
// 5
case .ended:
interactionInProgress = false
if shouldCompleteTransition {
finish()
} else {
cancel()
}
default:
break
}
}
Here’s the play-by-play:
- You start by declaring local variables to track the progress of the swipe. You fetch the
translation
in the view and calculate theprogress
. A swipe of 200 or more points will be considered enough to complete the transition. - When the gesture starts, you set
interactionInProgress
totrue
and trigger the dismissal of the view controller. - While the gesture is moving, you continuously call
update(_:)
. This is a method onUIPercentDrivenInteractiveTransition
which moves the transition along by the percentage amount you pass in. - If the gesture is cancelled, you update
interactionInProgress
and roll back the transition. - Once the gesture has ended, you use the current progress of the transition to decide whether to
cancel()
it orfinish()
it for the user.
Now, you must add the plumbing to actually create your SwipeInteractionController
. Open RevealViewController.swift and add the following property.
var swipeInteractionController: SwipeInteractionController?
Next, add the following to the end of viewDidLoad()
.
swipeInteractionController = SwipeInteractionController(viewController: self)
When the picture view of the pet card is displayed, an interaction controller is created and connected to it.
Open FlipDismissAnimationController.swift and add the following property after the declaration for destinationFrame
.
let interactionController: SwipeInteractionController?
Replace init(destinationFrame:)
with:
init(destinationFrame: CGRect, interactionController: SwipeInteractionController?) {
self.destinationFrame = destinationFrame
self.interactionController = interactionController
}
The animation controller needs a reference to the interaction controller so it can partner with it.
Open CardViewController.swift and replace animationController(forDismissed:)
with:
func animationController(forDismissed dismissed: UIViewController)
-> UIViewControllerAnimatedTransitioning? {
guard let revealVC = dismissed as? RevealViewController else {
return nil
}
return FlipDismissAnimationController(destinationFrame: cardView.frame,
interactionController: revealVC.swipeInteractionController)
}
This simply updates the creation of FlipDismissAnimationController
to match the new initializer.
Finally, UIKit queries the transitioning delegate for an interaction controller by calling interactionControllerForDismissal(using:)
. Add the following method at the end of the UIViewControllerTransitioningDelegate
extension.
func interactionControllerForDismissal(using animator: UIViewControllerAnimatedTransitioning)
-> UIViewControllerInteractiveTransitioning? {
guard let animator = animator as? FlipDismissAnimationController,
let interactionController = animator.interactionController,
interactionController.interactionInProgress
else {
return nil
}
return interactionController
}
This checks first that the animation controller involved is a FlipDismissAnimationController
. If so, it gets a reference to the associated interaction controller and verifies that a user interaction is in progress. If any of these conditions are not met, it returns nil
so that the transition will proceed without interactivity. Otherwise, it hands the interaction controller back to UIKit so that it can manage the transition.
Build and run. Tap a card, then swipe from the left edge of the screen to see the final result.
Congratulations! You’ve created a interesting and engaging interactive transition!
Where to Go From Here?
You can download the completed project for this tutorial here.
To learn more about the kinds of animations you can do, check out Chapter 17, “Presentation Controller & Orientation Animations” in iOS Animations by Tutorials.
This tutorial focuses on modal presentation and dismissal transitions. It’s important to point out that custom UIViewController transitions can also be used when using container view controllers:
- When using a navigation controller, vending the animation controllers is the responsibility of its delegate, which is an object conforming to
UINavigationControllerDelegate
. The delegate can provide an animation controller innavigationController(_:animationControllerFor:from:to:)
. - A tab bar controller relies on an object implementing
UITabBarControllerDelegate
to return the animation controller intabBarController(_:animationControllerForTransitionFrom:to:)
.
I hope you enjoyed this tutorial. If you have any questions or comments, please join the forum discussion below!