Pulse SDK Integration Tutorial for iOS: Network Logger
Learn how to set up network logger for your app using Pulse SDK. Pulse framework provides you a UI to display the logs in your debug app and also persist the logs that can be exported anytime. By Mark Struzinski.
Update NetworkService with URLSessionTaskDelegate
While in NetworkService.swift, update NetworkService to make it a class instead of a struct and have it inherit from NSObject.
Update the declaration as follows:
class NetworkService: NSObject {
  ...
}
This change is required so that the class can become a URLSession delegate.
Add an extension to NetworkService and declare conformance to URLSessionTaskDelegate and URLSessionDataDelegate and add the first delegate method by adding the following code at the bottom of the file:
extension NetworkService: URLSessionTaskDelegate, URLSessionDataDelegate {
  func urlSession(
    _ session: URLSession,
    dataTask: URLSessionDataTask,
    didReceive response: URLResponse,
    completionHandler: @escaping (URLSession.ResponseDisposition) -> Void
  ) {
    // 1
    logger.logDataTask(dataTask, didReceive: response)
    // 2
    if let response = response as? HTTPURLResponse,
      response.statusCode != 200 {
      searchCompletion?(.failure(.invalidResponseType))
    }

    // 3
    completionHandler(.allow)
  }
}
This delegate function fires when urlSession receives a response. Here’s a code breakdown:
- This is your first Pulse network logging statement! It tells Pulse to log that the data task received a response.
- If the response isn’t a 200 status code, or success, you call
searchCompletionwith a failure result. - However if the request was successful, you call the delegate call’s completion handler to allow the data task to continue.
Next, add two more delegate methods:
// 1
func urlSession(
  _ session: URLSession,
  task: URLSessionTask,
  didCompleteWithError error: Error?
) {
  logger.logTask(task, didCompleteWithError: error)
}

// 2
func urlSession(
  _ session: URLSession,
  task: URLSessionTask,
  didFinishCollecting metrics: URLSessionTaskMetrics
) {
  logger.logTask(task, didFinishCollecting: metrics)
}
The above functions add more Pulse log points for the data task at the following points:
- Successful completion of the task.
- When metrics have been collected.
You have one final delegate protocol to implement.
Update NetworkService with URLSessionDataDelegate
Because you’ve switched to using URLSession delegates, you still need a way to hook into the response when data is received, parse it and update the backing array when you have updated results.
At the bottom of the extension, add your final delegate function:
func urlSession(
  _ session: URLSession,
  dataTask: URLSessionDataTask,
  didReceive data: Data
) {
  // 1
  logger.logDataTask(dataTask, didReceive: data)

  do {
    // 2
    let decoder = JSONDecoder()
    decoder.keyDecodingStrategy = .convertFromSnakeCase

    let movieResponse = try decoder.decode(MovieResponse.self, from: data)
    // 3
    searchCompletion?(.success(movieResponse.list))
  } catch {
    // 4
    searchCompletion?(.failure(NetworkError.invalidParse))
  }
}
This function:
- Sends a log statement to Pulse for the receipt of data.
- Attempts to decode the response.
- If successful, calls
searchCompletionwith a success result. - If parsing fails, calls completion with an appropriate error and a failure result.
Next, you need to update MovieListViewModel to incorporate the changes to the search request.
Update the List View Model
Open MovieListViewModel.swift. Add a function under search() to handle the search response:
private func processSearchResponse(result: Result<[Movie], NetworkError>) {
  // 1
  DispatchQueue.main.async {
    // 2
    self.loading = false
    // 3
    guard let list = try? result.get() else {
      return
    }

    // 4
    self.movieList = list
  }
}
The above code:
- Moves to the main queue because it’ll trigger a UI update.
- Sets the
loadingproperty tofalse. Updating this property re-renders the UI and causes the progress spinner to disappear. - If there are no results, returns early so as not to replace any existing list with an empty one.
- Sets the published property
movieListto the search results. This will trigger an update to the search results UI.
Now, update the search() function to:
func search() {
  // 1
  if let task = currentTask {
    task.cancel()
    currentTask = nil
  }
  // 2
  DispatchQueue.main.async {
    guard !self.searchText.isEmpty else {
      self.movieList = []
      return
    }
  }

  // 3
  logger.info("Performing search with term: \(self.searchText)")
  loading = true

  // 4
  networkService.searchCompletion = processSearchResponse(result:)

  // 5
  let task = networkService.search(for: searchText)
  // 6
  currentTask = task
}
Here’s a code breakdown:
- If
currentTaskisn’t nil, that means a request is in progress. Cancel it to perform the new one. - If
searchTextis empty, clear the list. - Then, log the search and set the loading state to
true. - Set the new
searchCompletionproperty to theprocessSearchResponse(result:). - Create the task and update the
currentTaskproperty.
That’s it! Build and run. You’ll see the app behave in the same way. But now, when you perform a few searches and tap the network button, you’ll get logs of the network activity!
Make a few different searches and then go into the Pulse UI. Take some time to inspect the Pulse UI now that you have some log data to explore.
The first view you’ll see is the Console tab:
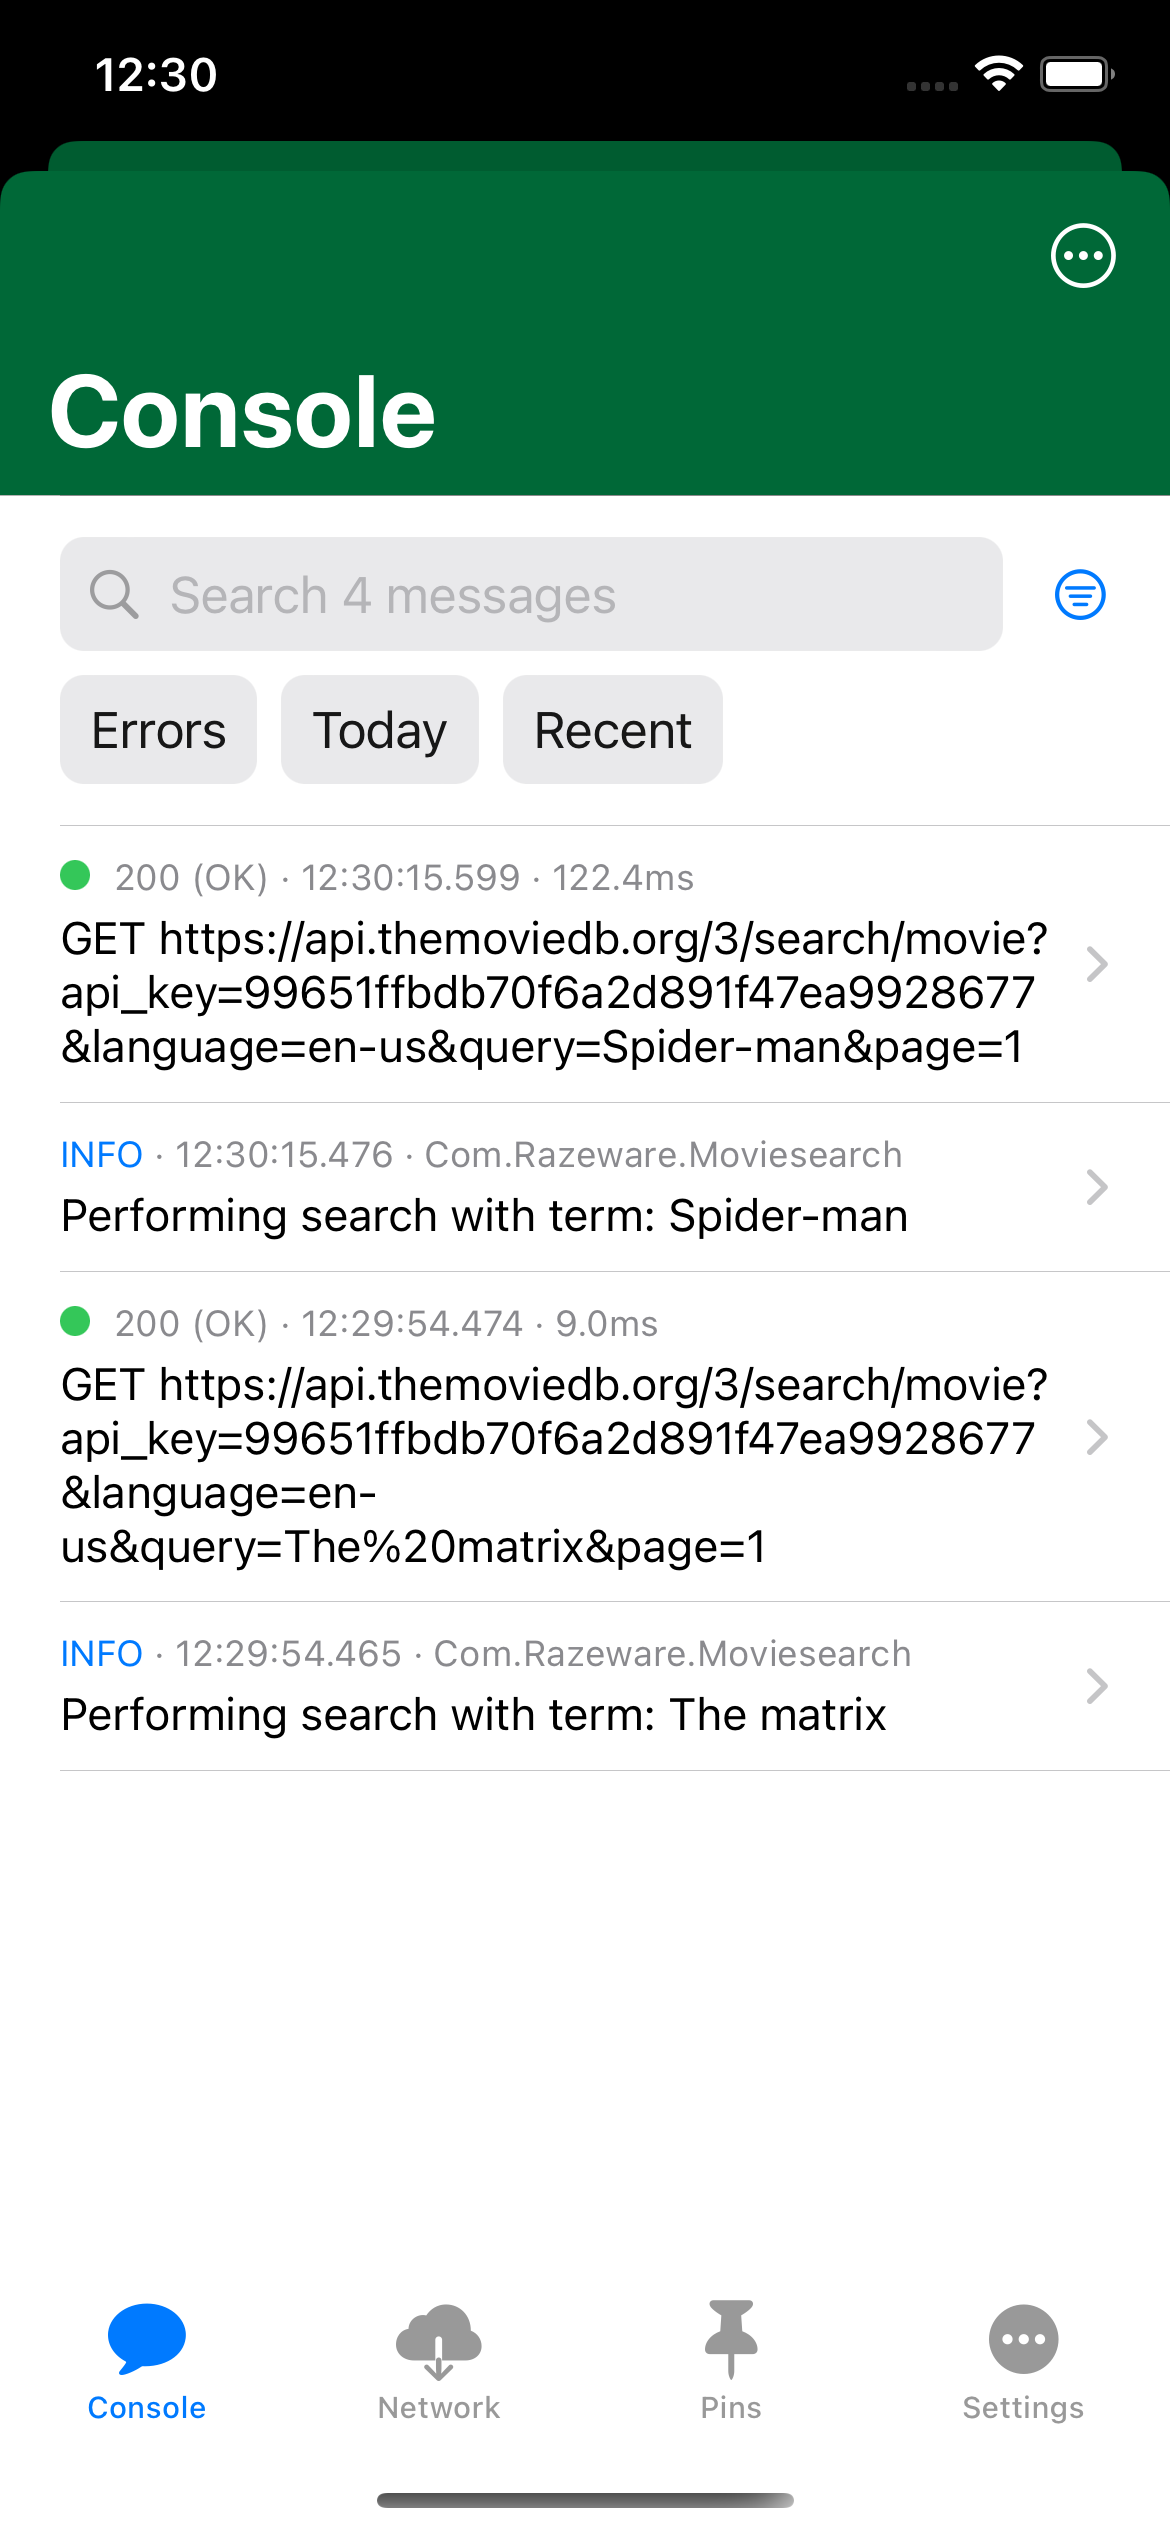
This view mixes all log items: network and standard SwiftLog entries. There is textual search and filter UI as well. You can filter by date and log level:

Tapping an item gives you a detail summary:

Pin detail items by tapping the pin icon at the top. The Share button lets you share your Pulse document for others to view in one of the dedicated iOS or macOS apps.
Pin an item now to save it.
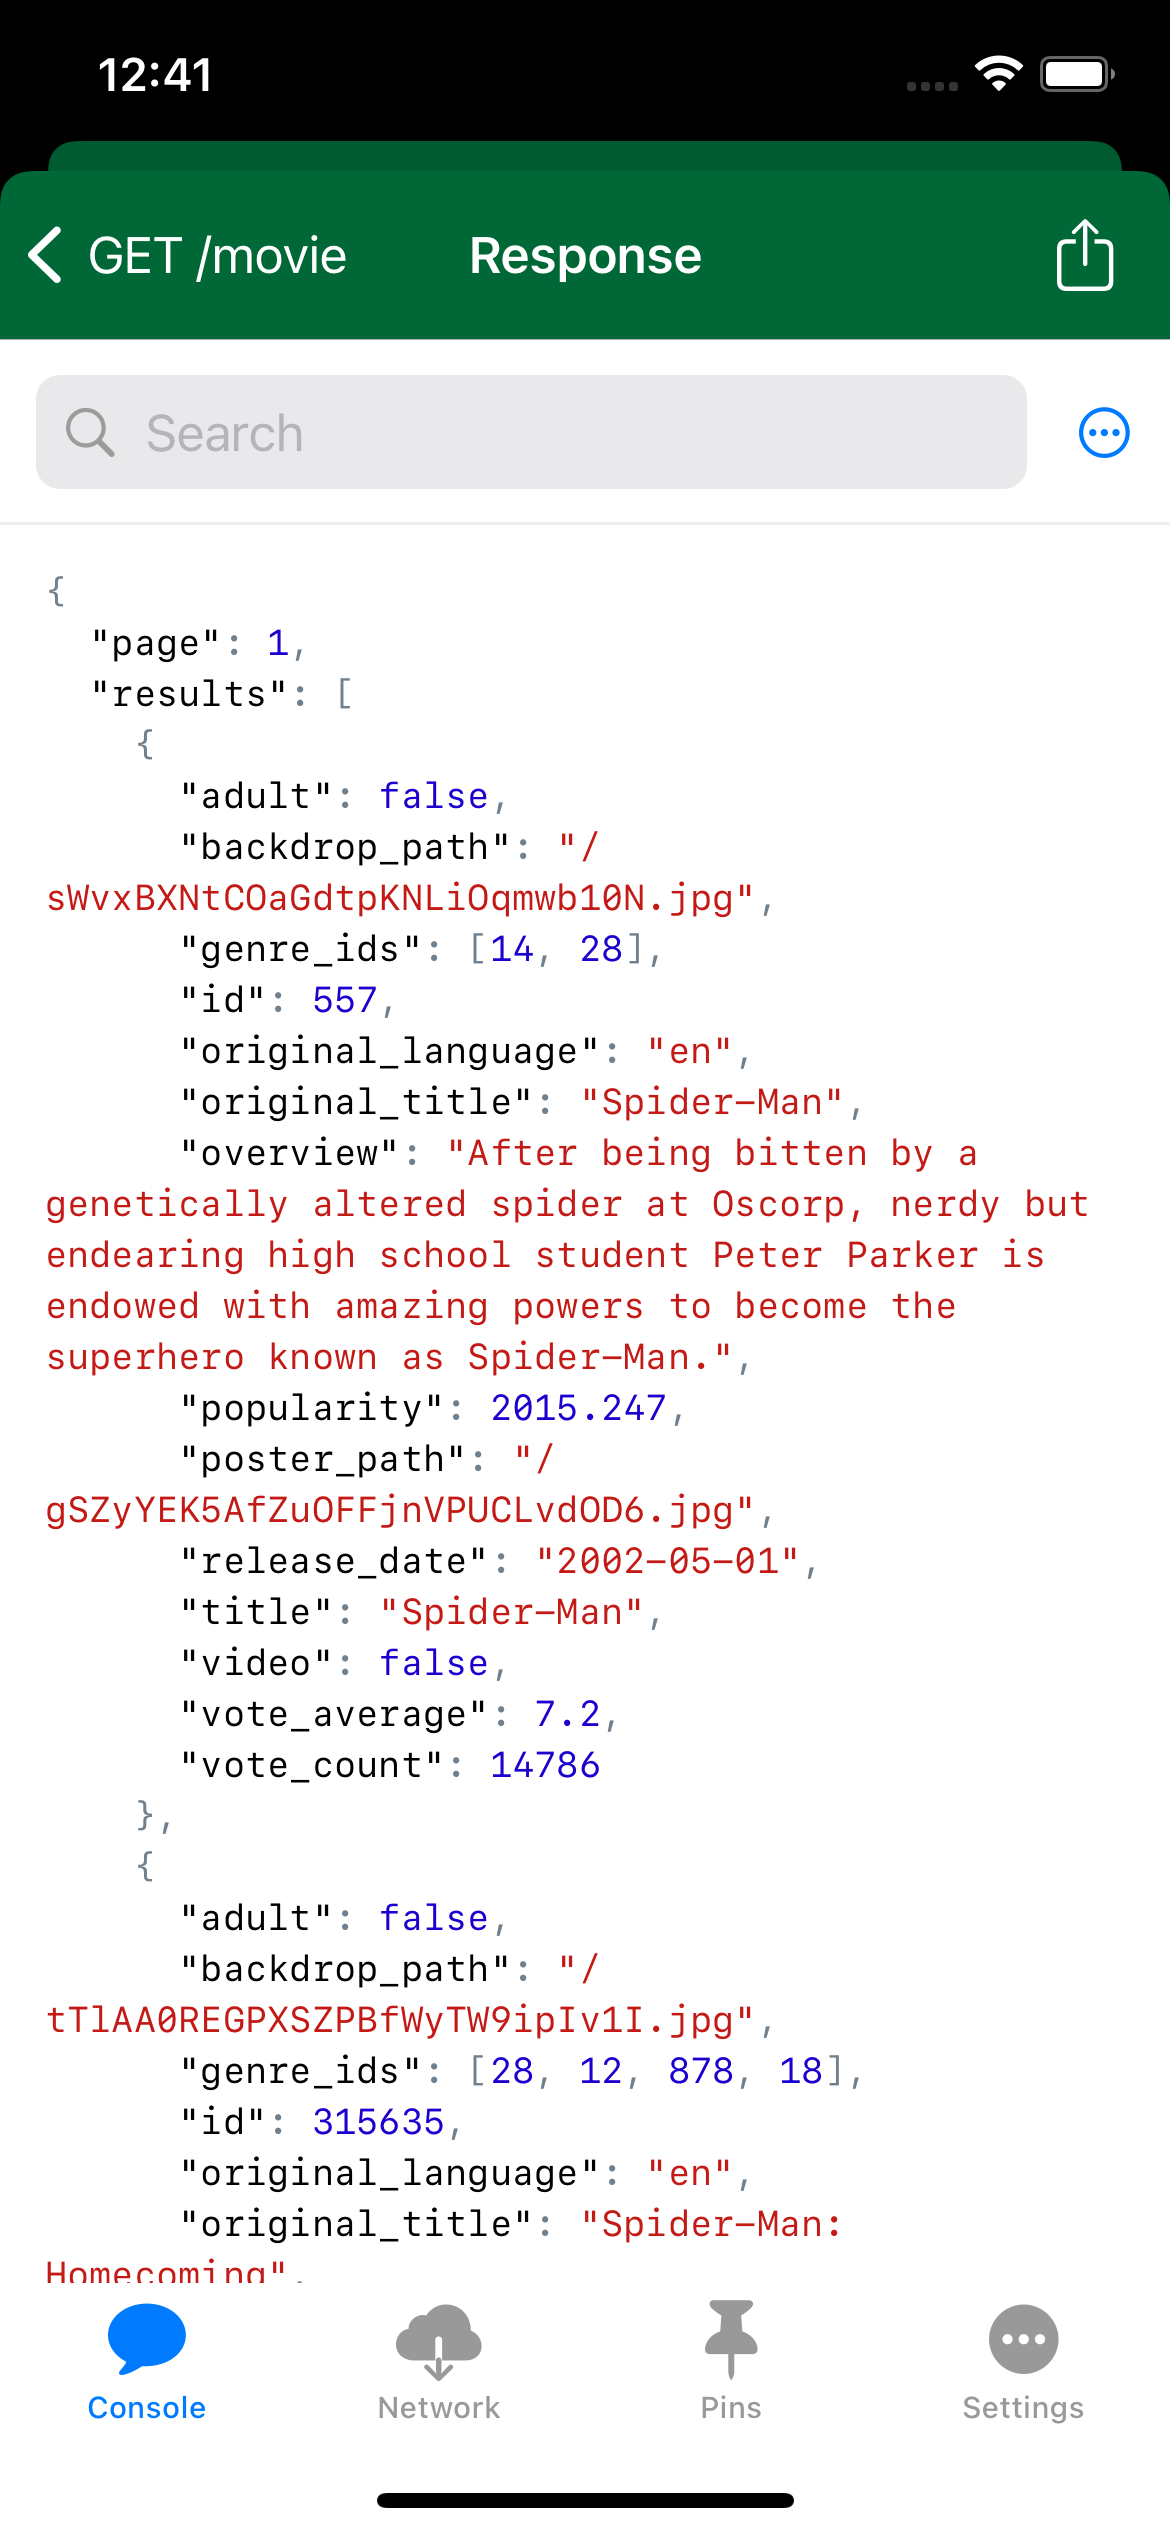
Tapping View on the Response Body section shows you a formatted JSON response body:
Back in the main request view, tap the Headers segment at the top and you’ll see a dedicated view of request and response headers:

Select the Metrics segment and you’ll see network performance stats:

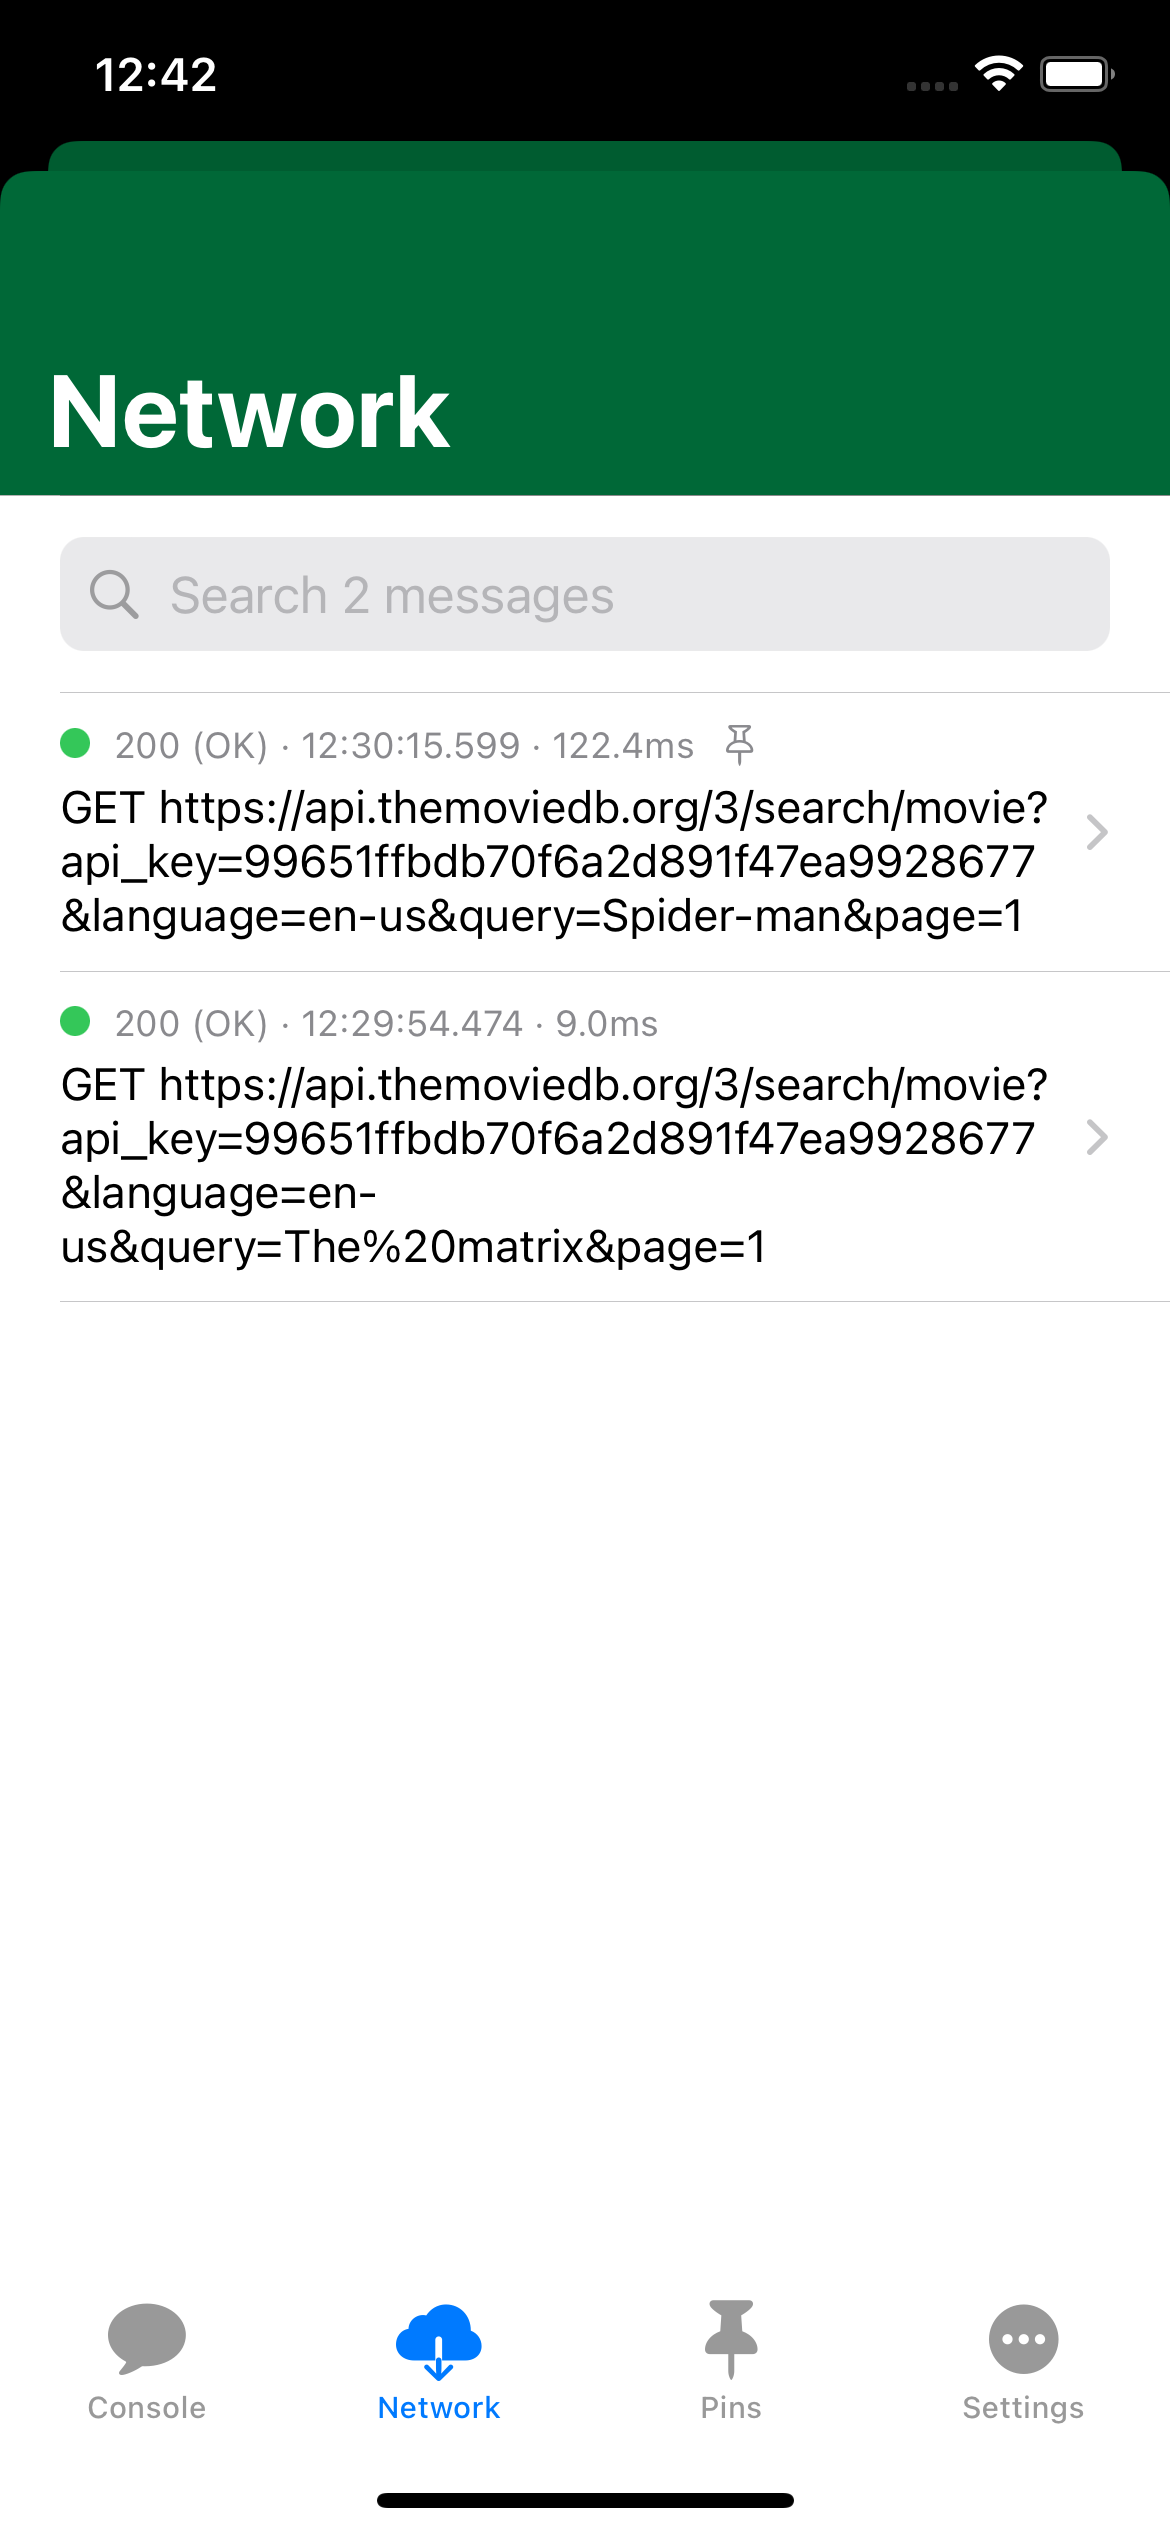
Back in the main Pulse UI console, if you select the network tab, you’ll only see network logs and exclude the SwiftLog standard entries:
Select the Pins tab to see the item you pinned as a favorite:

Then select Settings to see some options available to you:

Browse Files lets you browse the Files app for stored Pulse logs from outside this app. Unfortunately, an apparent bug in this UI doesn’t let this modal experience dismiss. So if you go into this then you’ll need to kill the app and relaunch it to get back to the app.
Remote Logging pairs with Pulse Pro to allow livestreaming of network logs via the macOS app.
You have one more area to update for Pulse logging.
Capturing Image Requests
The list and detail views both use NetworkService to download poster images. You’ll add logging for image requests as well. It makes sense to split this functionality into a helper class to add the logging.