Pulse SDK Integration Tutorial for iOS: Network Logger
Learn how to set up network logger for your app using Pulse SDK. Pulse framework provides you a UI to display the logs in your debug app and also persist the logs that can be exported anytime. By Mark Struzinski.
Logging network requests is crucial when debugging and monitoring apps that rely heavily on remote data. In today’s API-driven world, this is true for almost all apps! You’ll come across two types of frameworks to interact with your network APIs while building an app: network proxies and network logger.
Usually, network proxies are the tool you use for monitoring network traffic. Proxies sit between your app and the network, intercepting traffic on the way in and out. They log and present data in real time.
Some good examples of proxy apps are Charles and Proxyman.
Pulse Network Inspector takes a different approach than the previously mentioned proxy apps. Pulse is a network logger. It logs the network activity that an app makes and provides some intuitive UI for later viewing.
Pulse is a framework that you can use to provide any of your app’s testers (QA, engineers, beta testers) access to a history of the network requests the app makes. It means the testers don’t need to know how to set up a proxy for themselves.
Pulse lets you view network activity in supplementary apps or directly inside the app that triggered the network requests. It also provides access to its data store. This approach lets you build your UI around the log data if you choose.
In this tutorial you will:
- Learn how to integrate Pulse into your app.
- Add simple data logging and visualise it in the Pulse UI.
- Hook Pulse up to network requests and inspect all aspects of the request in the Pulse UI.
- Implement an image downloader that adds Pulse logging to image network requests.
Getting Started
Download the project materials by clicking Download Materials at the top or bottom of this tutorial.
In this tutorial, you’ll work on MovieSearch, an app which lets you search and view movies from The Movie Database via its API. You’ll add the Pulse framework to this app and learn how to use it to log and subsequently inspect the network traffic the app makes.
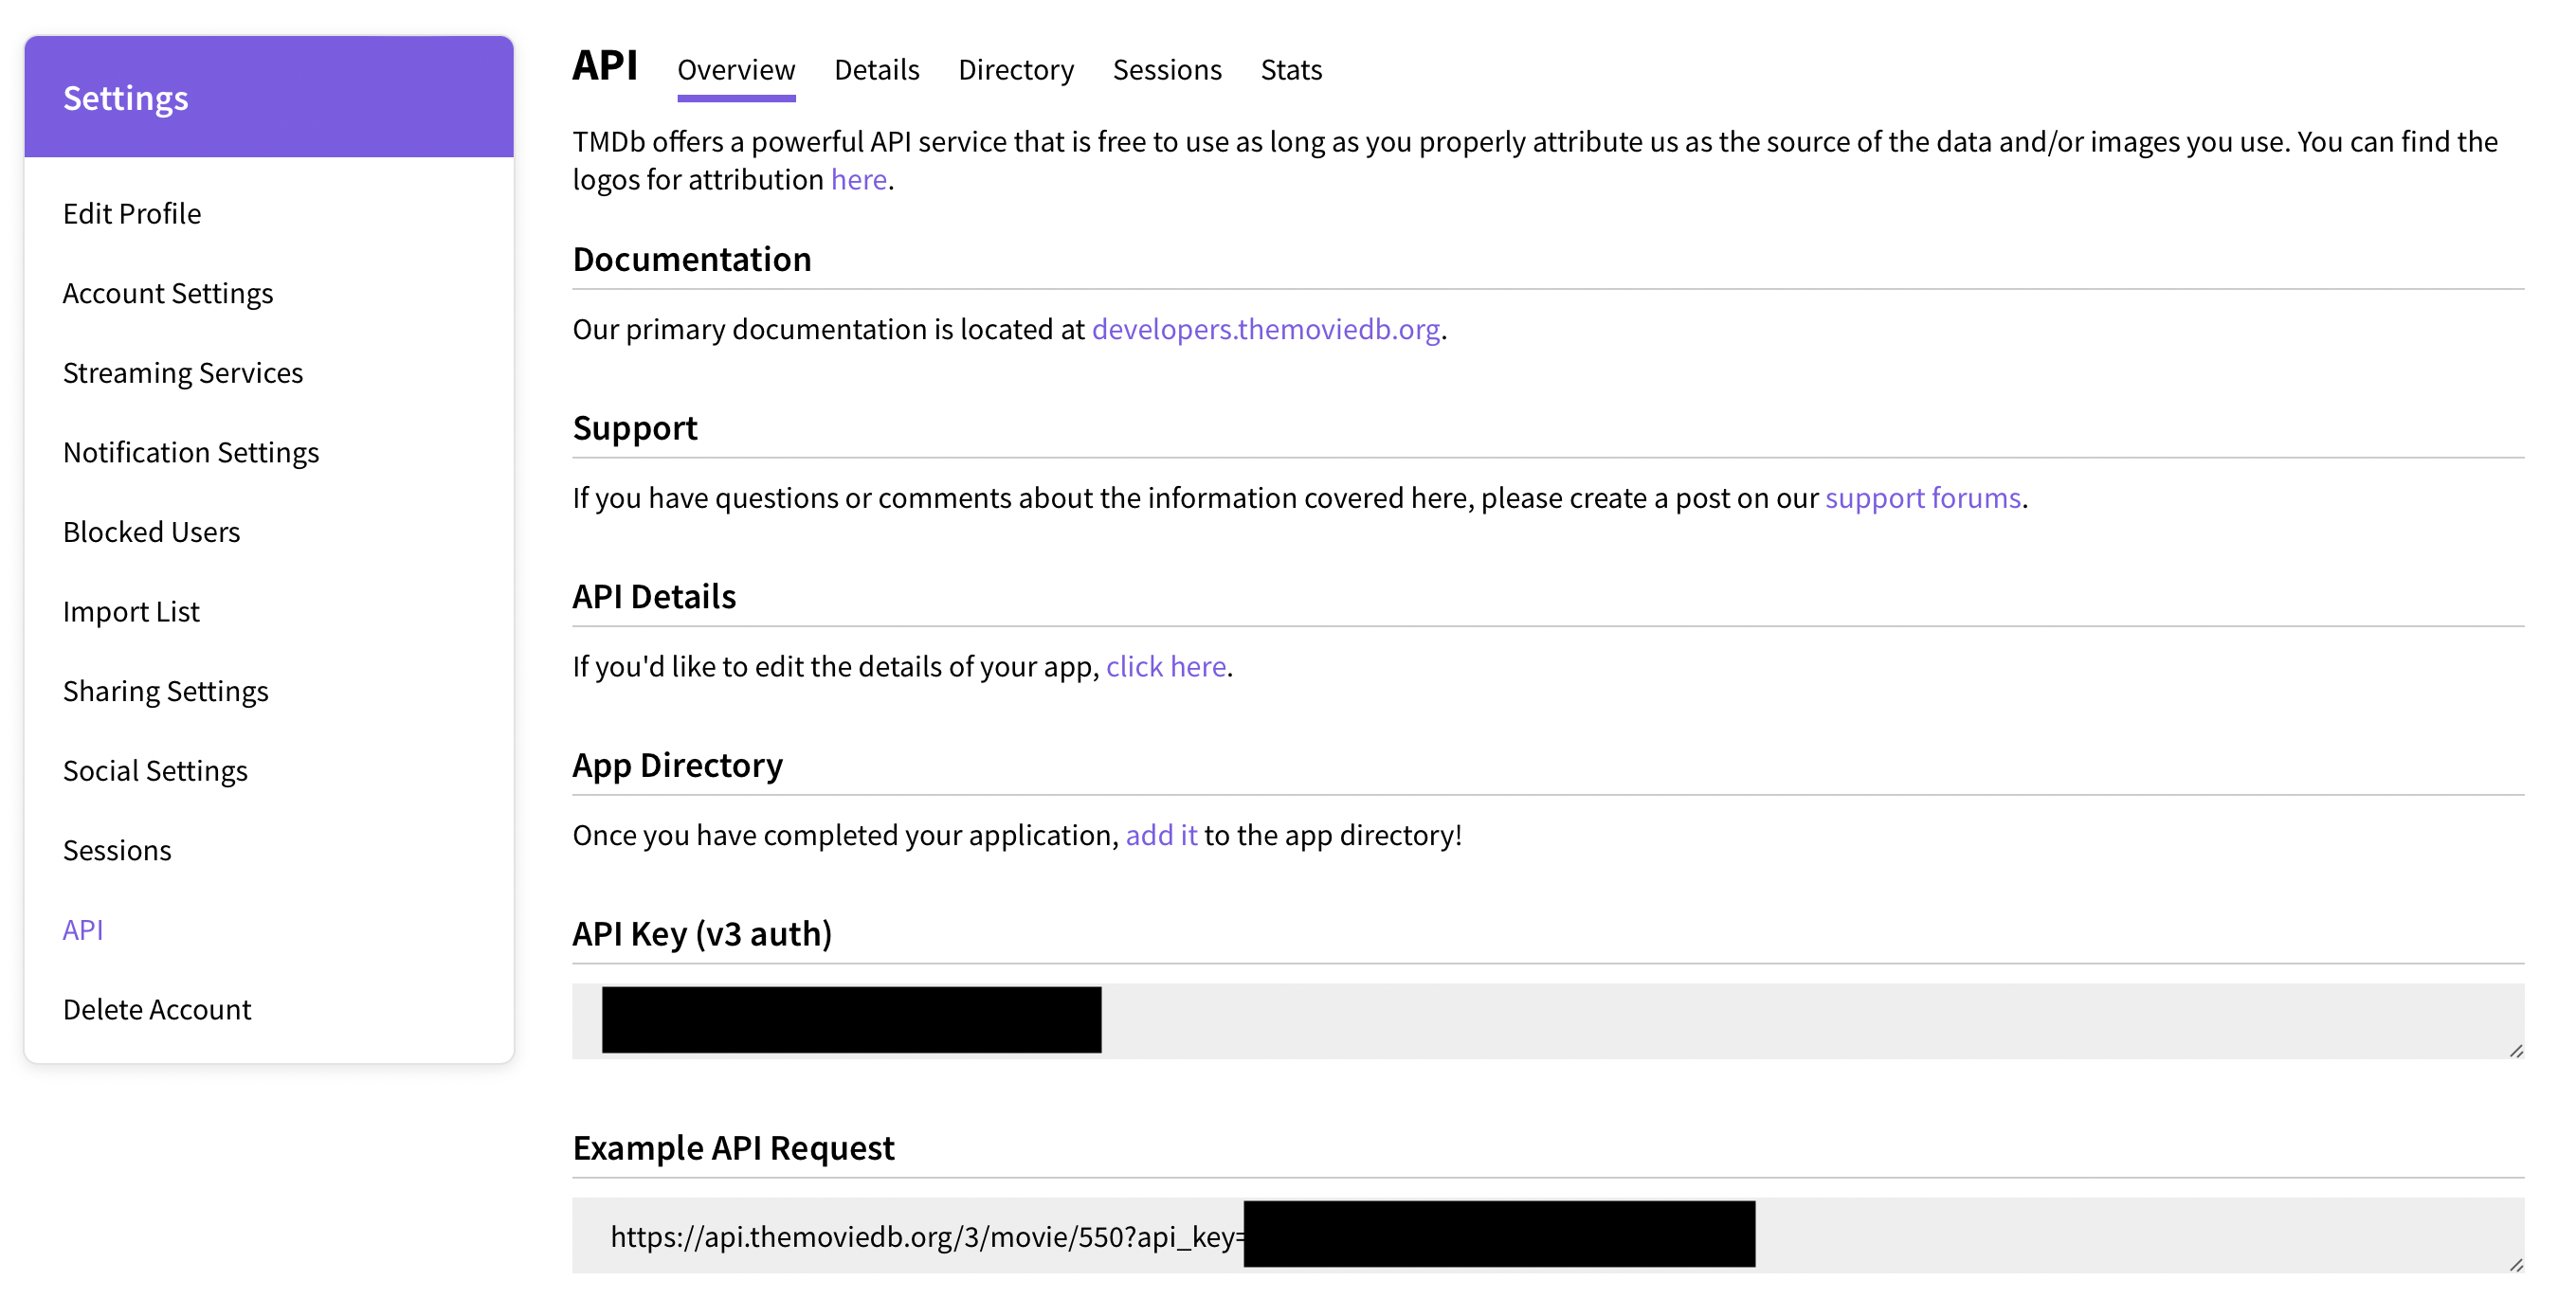
Before you start, you need to register for an API key at the TMDB website. If you don’t have an account, go to the website’s registration page and sign up.

After you sign up and log in, go to the account settings page and select the API option from the left panel.

Next, you need to register an app to get an API key. While in API setting’s Overview section, click the link under the Request an API Key subsection. It’ll take you to the Create tab:

Select the Developer option. After reading through it, accept the terms on the next page.
Next, fill out the form’s required information, including your app description and address details. You can give any URL, name and description you’d like for the app. Even though this app isn’t for public consumption, you need to get past this step to retrieve the API key on the next screen. After you complete the application form, the next page will display your API key:
Voila! Copy your API Key as you’ll need it in a moment.
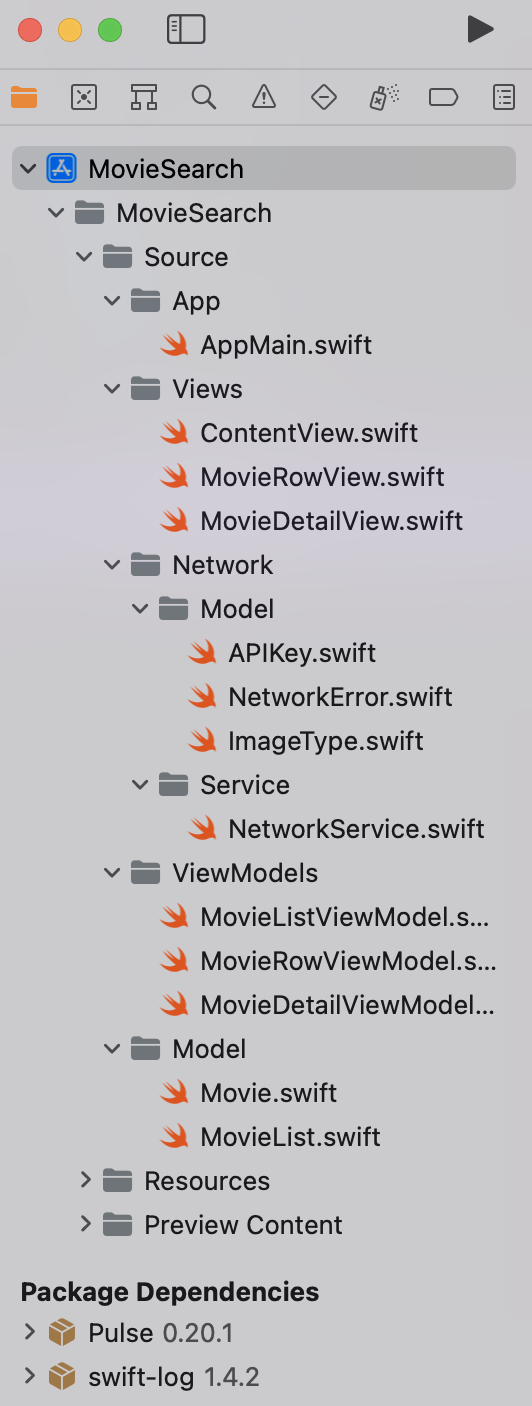
Open the starter app from the downloaded materials. Press Shift-Command-O, search and open APIKey.swift.
Next, insert your API key from above into the value static constant property under the enum APIKey.
That’s it for setup! :] Build and run the project to test the app.

You’ll launch to a search screen. Type in any search to get a list of results:

Finally, tap any result to see a detail view:

Take a minute to review the code. Focus on the networking implementation in NetworkService.swift under the Source ▸ Network ▸ Service folder.
This tutorial will add the Pulse SDK to the app and update the network stack to work with it. Pulse enables targeted logging of all network activity in the app and gives you a view into network performance and any errors.
Before you begin coding it’s time to take a closer look at Pulse.
Introducing Pulse
Pulse is a persistent network logger and inspector. Although it can show you requests via the Pulse Pro experience in real time, its primary function is to log your app’s network activity into a persistent data store. You can then view the data in the custom native UI provided by the PulseUI framework and create a custom UI to display the network data from the logs.
Pulse uses Apple’s open-source SwiftLog framework as a dependency to log data.
Pulse is broken down into three main components: PulseCore, PulseUI and document-based Pulse apps. Here’s an explanation about what each of them does.
PulseCore
PulseCore is the base framework you use to log activity for introspection later. It also provides a network proxy for automatically capturing network requests.
PulseCore is available on iOS, macOS, watchOS and tvOS. The PulseCore framework provides a PersistentLogHandler struct that logs to a persistent store. You can also use this struct for standard log messages from SwiftLog.
PulseUI
PulseUI provides a UI to parse and display network data from the Pulse logs. This framework’s approach offers a quick way to get up and running with Pulse data. Like PulseCore, it’s also available on iOS, macOS, tvOS and watchOS.
Document-Based Pulse Apps
Document-based Pulse apps are separate from the Pulse framework inside your app. They let you open Pulse documents shared from other devices or apps to view network logs. These apps are available on iOS and macOS. Pulse documents contain the network traffic logged and saved by an app. You can therefore use these to introspect traffic that an app made, perhaps to debug something that a QA analyst or a beta tester experienced.
Now that you’ve got an overview of what Pulse does and its core frameworks, you’ll learn to integrate Pulse into the MovieSearch app.
Pulse Integration
Pulse is distributed via Swift Package Manager, making it easy to integrate into your project via Xcode.
First, open the starter project. In Project navigator on the left, select the MovieSearch project node at the top.
Under Project, select the MovieSearch project item. Then, go to the Package Dependencies tab.

Under Packages in the middle pane, click the + button. Next, in the Search or Enter Package URL text field, enter:
https://github.com/kean/Pulse
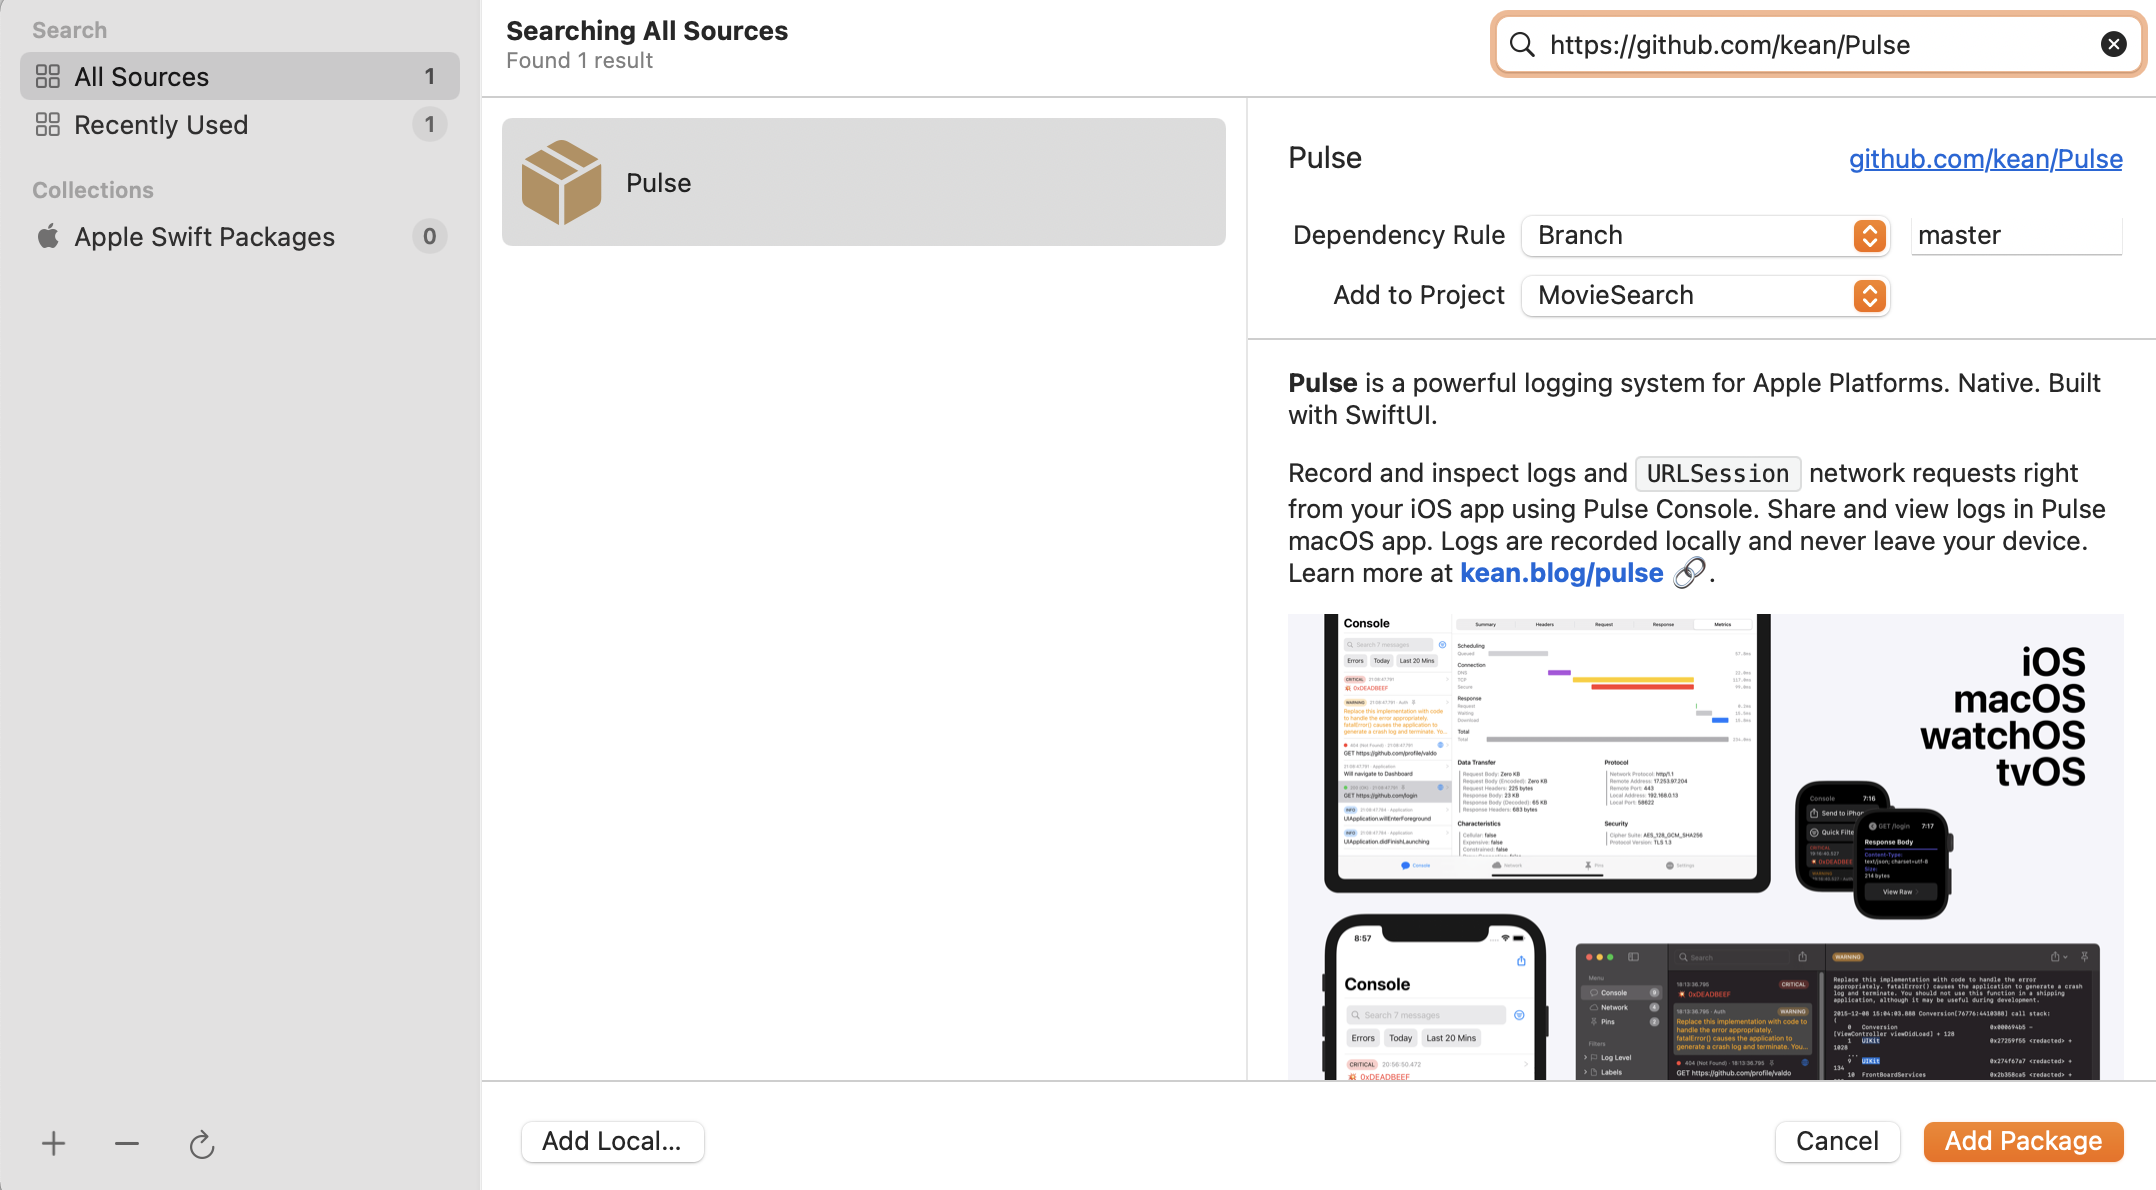
Leave the defaults as they are and click Add Package. Then tick all three package products when requested. Finally, click Add Package.

Here you go! :] At the bottom of Xcode’s Project navigator, you’ll see Pulse and swift-log under the Package Dependencies section.
Build and run to ensure everything is working as desired.
Pulse is designed around networking data however you can also log any arbitrary data. To get started with the framework you’ll first log some basic data.