Jetpack Compose Accessibility: Getting Started
Almost everyone will experience a disability that impacts their ability to use a mobile phone at some point in their life. Adding accessibility features to your app will help broaden access to it. By Tori Gonda.
At some point in their life, almost everyone will experience at least a short-term disability — if not a long-term disability — that impacts their ability to use a mobile phone. In fact, you may have already experienced being unable to distinguish items on your screen in bright sunlight or struggling to use your phone one-handed while holding a wiggly child or pet. Maybe you’ve experienced difficulties using your phone while wearing gloves or being in a cast.
According to the Centers for Disease Control and Prevention (CDC), “1 in 4 of adults in the United States have a disability”. This can include someone born blind or who’s lost fine motor skills in an accident. It can include hearing loss due to old age and those who struggle with memory and concentration. That’s a quarter of the population experiencing decreased vision, hearing, mobility or cognitive function! Without a doubt, it’s worth building your product with them in mind.
In this tutorial, you’ll learn how to make your app accessible when building with Jetpack Compose. You’ll do this by updating a menu app to make it more accessible. While accessibility has many aspects, you’ll just learn the basics here. Along the way, you’ll learn:
- Some of the accessibility tools people use with their mobile devices.
- What Jetpack Compose semantics are.
- How to test for some accessibility issues.
- Modifiers to make your app easier to use for everyone.
Getting Started
Bon Appetit is a menu app where you can order breakfast before your day of coding. It has lots of tasty treats, but it’s not very accessible. It’s your job to fix that!
Download the project using Download Materials at the top or bottom of the tutorial, and open the starter project in Android Studio.
Build the project. While you’re waiting for that initial Gradle sync, it’s important to learn why accessibility is so significant.
Understanding Why Accessibility Matters
An app isn’t accessible for someone when there’s a mismatch between the app and that person’s abilities. This mismatch puts barriers between a user and the task they’re trying to accomplish. By making apps accessible, you allow more people to use the app without help from others.
And there are lots of reasons why you should make your app accessible:
- Opens your app to a wider audience: More people will be able to use your app. By not having an accessible app, you’re cutting out up to 1/4 of your potential user base.
- Minimizes risk of legal battles: Because of the Americans with Disabilities Act (ADA), if your app is inaccessible, you leave yourself open to lawsuits.
- Makes a better product: Accessible apps tend to have a more thought-out user experience, making the app more usable and enjoyable for all people, regardless of ability.
- Drives innovation: Building an accessible app adds constraints to your designs. Constraints often feed creativity!
- Increases developer productivity: Accessible apps are often more testable and foster smart reuse. This allows developers to move faster with the confidence of a testable app.
- Recognize revenue potential: When someone can’t use your app — or can’t use it well — they’re more likely to go to a competitor. On the other hand, if they can use your app, they’re more likely to pay more for it and recommend it to their friends.
- Treats others with care: If nothing else, building an accessible app is kind. It shows your users that you care and that you’re building for the inclusive world you want to live in.
Exploring the Bon Appetit App
Build and run the app. You’ll see a list view with some menu items organized by food or drink.

You can’t interact much with it yet. Later, you’ll add the option to select what you want to order and improve the interaction while working with accessibility services.
You’ll spend most of your time editing existing composables, so it’s worth getting familiar with them:
- MenuList.kt: This is the composable that describes the menu list. It controls the list items and the headers.
- MenuItem.kt: Here, you’ll find the code that describes the rows in the list. It shows all the information you want to know about each menu item.
- DishAttributes.kt: Used within the menu items, these attributes show icons to let you know if a dish is spicy, contains gluten or is vegetarian.
Finally, you’ll also add to the tests in MenuItemTest.kt.
Enabling Accessibility Tools
An accessibility tool or service is anything that eliminates a barrier to someone using a product. On mobile devices, this could be using a stylus or an external keyboard. People also sometimes use software solutions. One solution, in particular, TalkBack, is what you’ll use for manual testing in this tutorial.
Before getting into what TalkBack is and how to use it, you need to make sure your test device or emulator has the services downloaded.
Creating an Emulator (Optional)
If you’re using an emulator, you need one that has the Play Store available. If you already have an emulator with the Play Store, you can skip to Downloading Accessibility Services. Otherwise, follow this section’s instructions for setting one up.
If you’re using an emulator, you need one that has the Play Store available. If you already have an emulator with the Play Store, you can skip to Downloading Accessibility Services. Otherwise, follow this section’s instructions for setting one up.
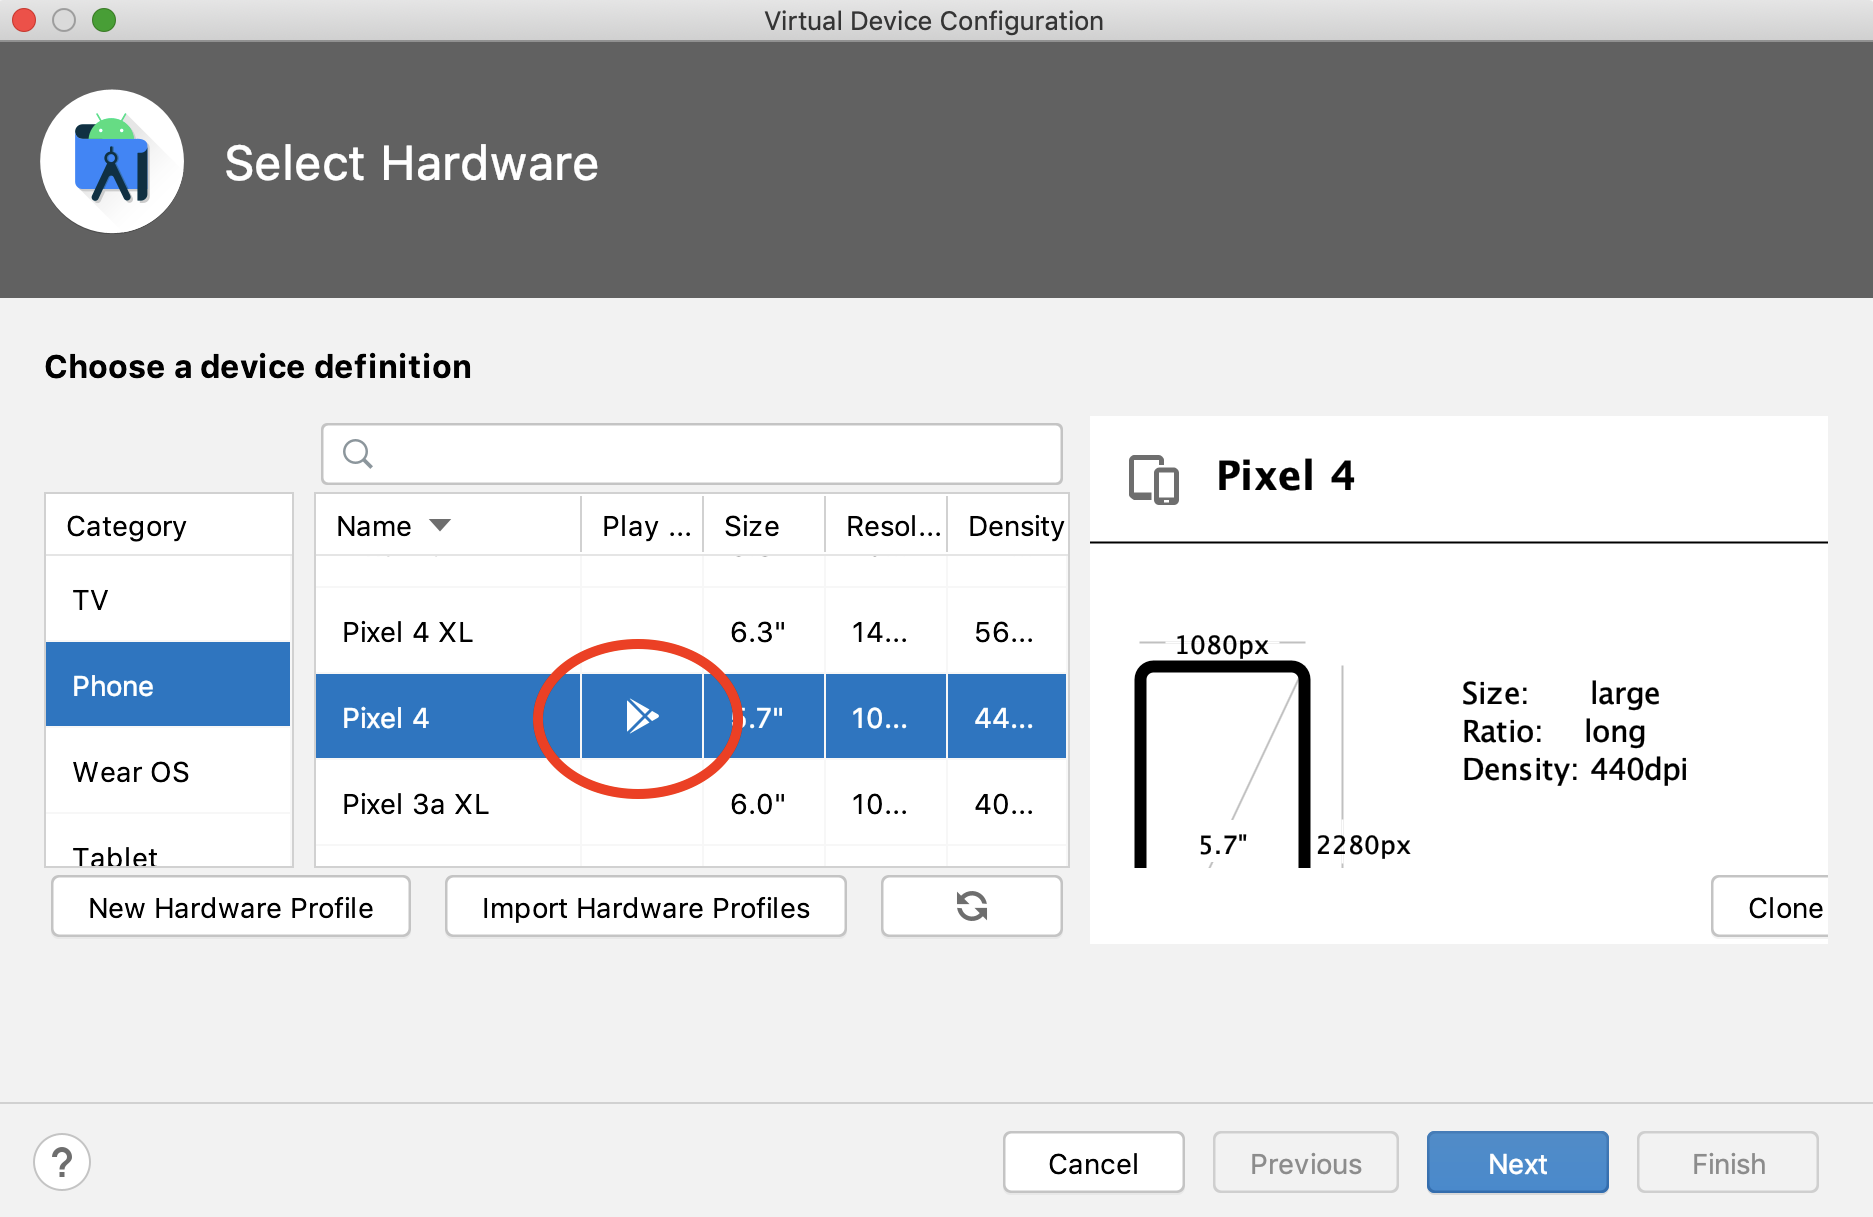
In Android Studio, start by opening the AVD manager at Tools ‣ AVD Manager. Then, select Create Virtual Device.

On the next screen, select a device that includes the Play Store symbol.
From there, follow the wizard to finish creating the device. Using the defaults for the remaining steps is fine.
Once created, boot your new emulator and move on to the next step.