Firebase Real-Time Database Tutorial for iOS
Learn how to use Firebase Real-Time Database to seamlessly store and fetch data in real time, while supporting offline mode and secure access. By Yusuf Tör.
Choosing a Firebase Database
Firebase comes with two NoSQL JSON, cloud-hosted databases: Firestore and Real-Time Database. Initially, Firebase had only the Real-Time Database: an efficient, low-latency database that stores data in one big JSON tree. However, this wasn’t the best solution for all use cases. So the Firebase team introduced a new database with a different data model called Firestore. Each database has its strengths and weaknesses.
Real-Time Database
Strengths
- Supports user presence to monitor when a user is online or offline.
- Has extremely low latency.
- Charges for bandwidth and storage but not for operations performed in the database.
- Scales to 200k concurrent connections.
Weaknesses
- Has no multi-region support. Data is available in regional configurations only.
- Has limited sorting and filtering functionality.
Firestore Database
Strengths
- More structured than the Real-Time Database and can perform more complex queries on the data.
- Designed to scale better than the Real-Time Database. The scaling limit is currently around 1 million concurrent connections.
- Has multiple data centers storing data in distinct regions and can support multi-regional configurations.
- Charges primarily on operations performed in the database and, at a lower rate, bandwidth and storage.
Weaknesses
- Doesn’t allow documents to update at a rate greater than once per second.
- Doesn’t support user presence.
For this tutorial, you’ll use the Real-Time Database as your database. But in a production app, you might choose to use Firestore to reduce storage costs. Another option is to use both the Firestore and Real-time databases in your app. For more information about these databases, look at Firebase’s documentation.
Now that you know a little about the Real-Time Database, it’s time to learn about the structure of the data you’ll store in it.
Firebase Data Structure
The Real-Time Database is a NoSQL JSON data store, but what is that? Essentially, the data in the Real-Time Database is one large JSON tree. When you add data to this tree, it becomes a node in the existing data structure with an associated identifier or key.
Here’s a sample of how your data could look as a JSON object:
{
  "users" : {
    "5CbvKMuKArWEAFYiuTEOrwI4dxY2" : { // user key
      "thoughts": {
        "-ModIUirN3Irg68qk4Zt" : { // thought key
          "text" : "I like Ray Wenderlich tutorials!"
        },
        "-ModJWbp4o70cZ4Hvu5x" : { // thought key
          "text" : "No wait, I LOVE Ray Wenderlich tutorials!!"
        }
      }
    },
    "j9ksKJ70IbAg52nvj7M8xbb8TsQa" : { // user key
      "thoughts": {
        "-LopSJuhwbN8s4abNS8z" : { // thought key
          "text" : "I wonder what others are writing on this app"
        },
        "-LopNlkA3fV6jau8i0a1" : { // thought key
          "text" : "Apparently smiley faces are square :]"
        }
      }
    }
  }
}
The code above has a main JSON object with a single key called users. The users value contains a list of user objects. These user objects have a user key corresponding to the ID of the user who is writing the thoughts. Each user object contains a thoughts key. The thoughts value contains a list of thought objects having a single text field. This field contains the thought the user wrote in the app. This way, the data is segmented by user ID, so different users’ thoughts are maintained separately.
As you can see, this data structure is a composition of nested objects. Although the Real-Time Database supports nesting up to 32 levels deep, this isn’t recommended. It’s always best to keep the structure as flat as possible because fetching data at a specific node also fetches all its child nodes. This can quickly lead to huge bandwidth usage, which can be expensive!
The data structure looks good. Accordingly, the next step is to set up the Real-Time Database!
Setting Up Firebase’s Real-Time Database
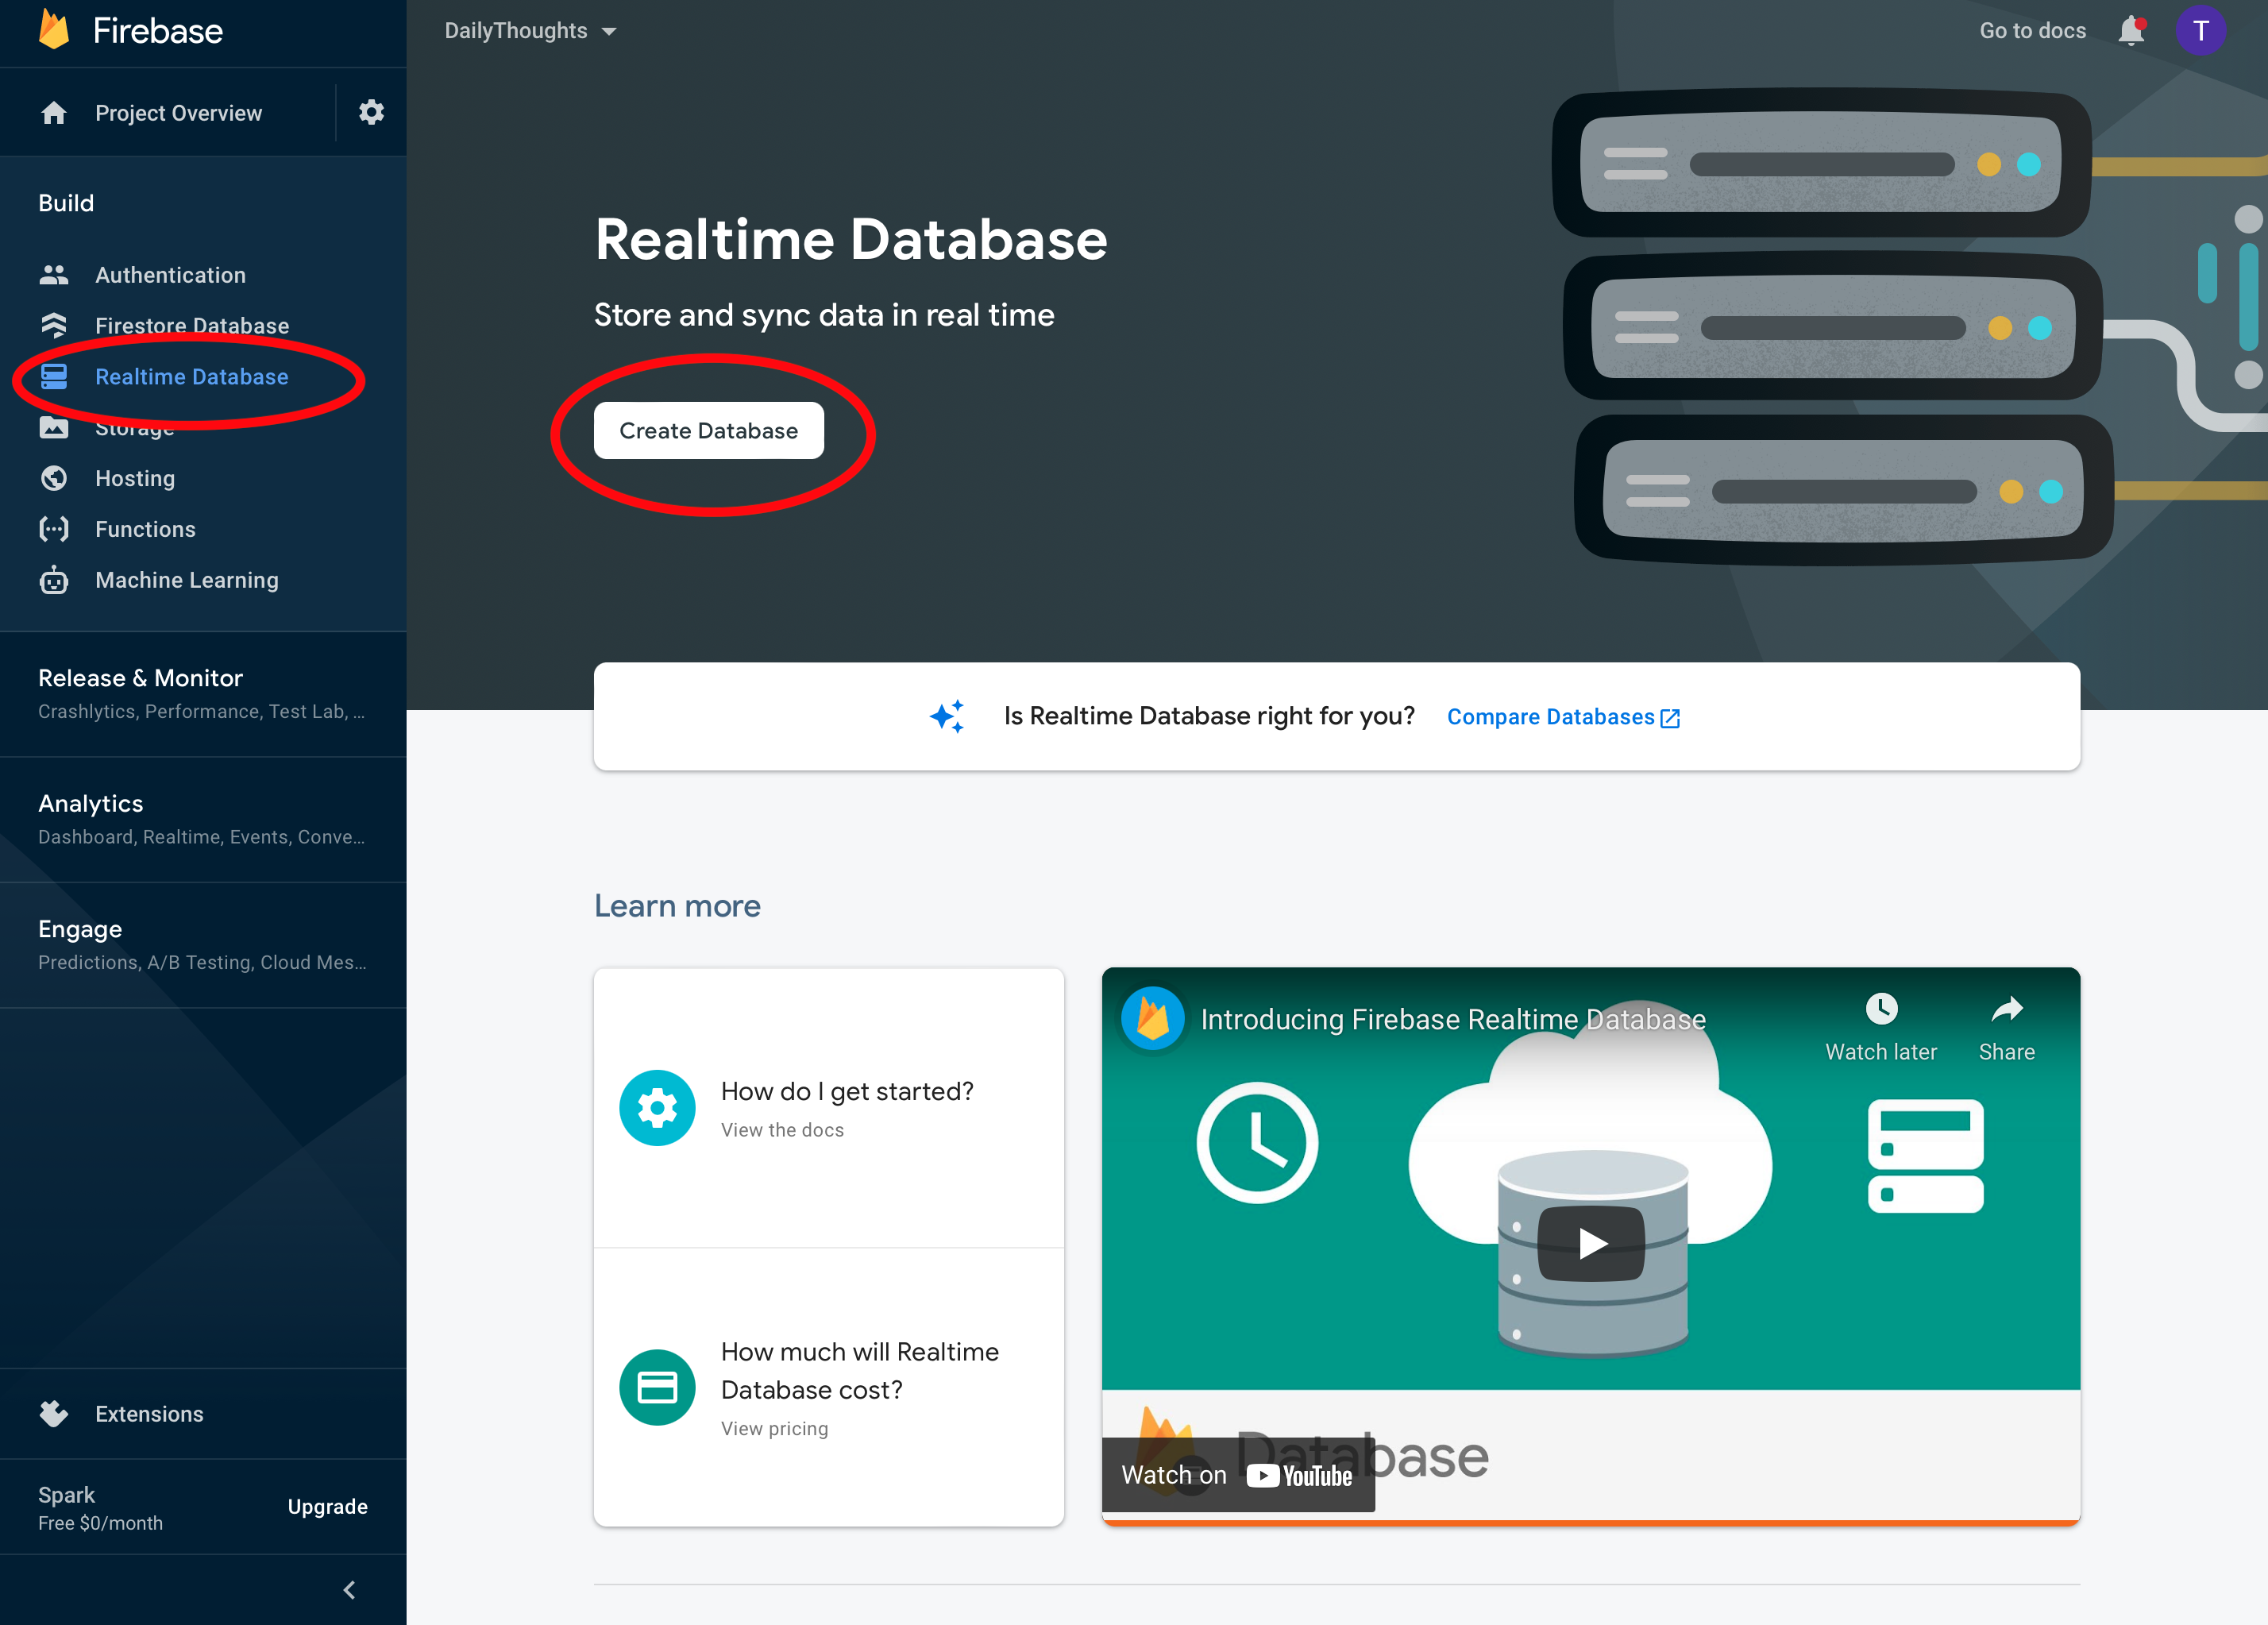
In the Firebase console, select Realtime Database on the left and click Create Database:
Choose a location for your database and click Next. For the best performance, the location should reflect wherever you expect the majority of your users to be:

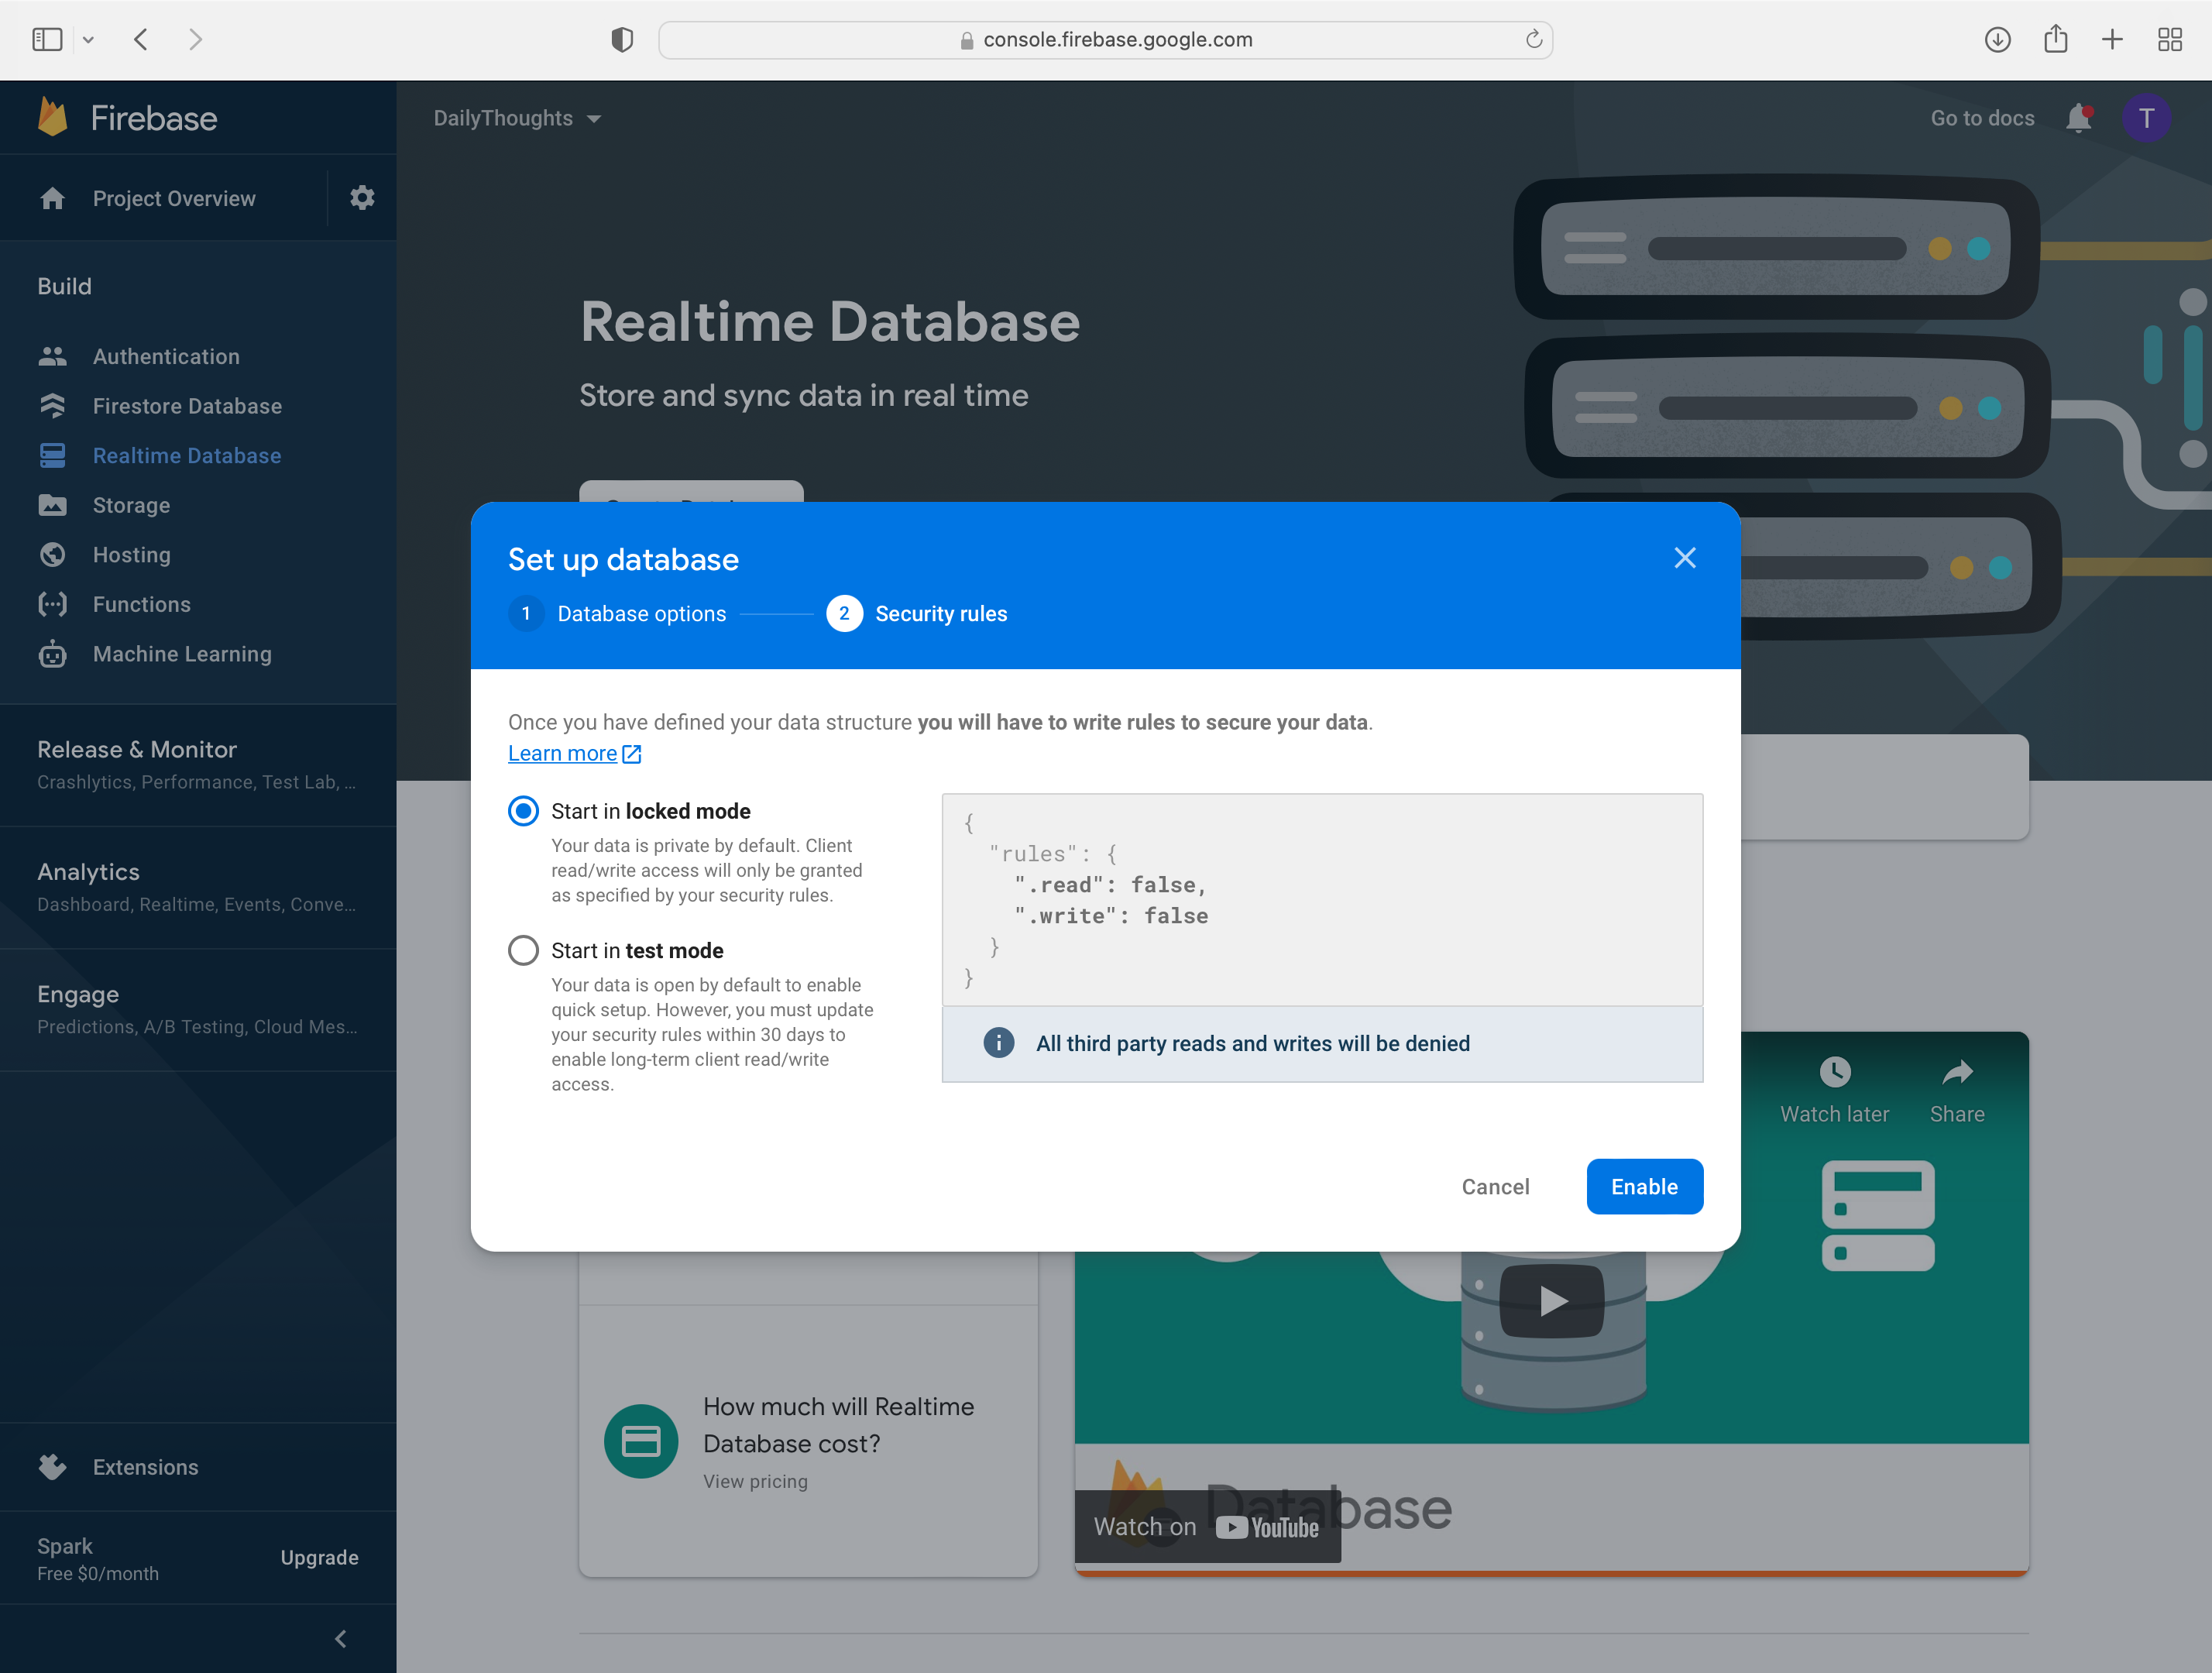
Leave the security rules set to Start in locked mode and click Enable:
Configuring Database Rules
At this point, you see an empty database in front of you. Before you start filling it with data, configure the database rules. Click the Rules tab at the top:

Firebase’s Security Rules are there to determine who has read-and-write access to your database, the structure of your data and what indexes exist. These rules automatically apply when you try to interact with the database from the client. By default, your rules look like this:
{
  "rules": {
    ".read": false,
    ".write": false
  }
}
This javascript-like syntax means reading and writing to the database isn’t allowed, so you’ll need to change that!
Four types of rules exist:
- .read: Describes the permission for reading data.
- .write: Describes the permission for writing data.
- .validate: Defines what a correctly formatted value will look like, whether it has child attributes and the data type.
- .indexOn: Specifies a child to index to support ordering and querying.
Customizing the Rules
Think back to the structure of the data you plan to hold in the database. It makes sense that your app’s users should have access only to the data they post to the database. Fortunately, Firebase’s security rules let you do just that.
Replace the default rules with the following:
{
  "rules": {
    "users": { // 1
      "$uid": { // 2
        "thoughts": { // 3
          ".read": "auth != null && auth.uid == $uid", // 4
          ".write": "auth != null && auth.uid == $uid"
        }
      }
    }
  }
}
Then, click Publish.
You read the above rules as acting on the path /users/$uid/thoughts. Here’s what’s happening in detail:
- This makes sure the rules apply to data inside the
usersobject. - The
$variable captures a portion of the data path and stores it in a variable of the defined name. In this instance, it captures the value of the key of a user object — i.e., the user ID — and stores it in a variable named $uid. - This applies the rules to the data inside the
thoughtsobject. - Firebase specifies predefined variables for use within the rules. Here, it uses the predefined
authvariable holding the authentication data for the client requesting data. It checks whether this exists to verify the client’s authentication. It also checks whether the user ID of the authenticated user equals the user ID in the path of the requested data. This means the user is accessing their own data and so Firebase allows them to read it. The same applies when writing to the path.
Test your new rules by selecting the Rules Playground:

Make sure Simulation type shows set. This will simulate a write on a specified location.
In the Location field, paste the following:
/users/5CbvKMuKArWEAFYiuTEOrwI4dxY2/thoughts/-MohverU9Gvs4Z1uaE-z
Move the Authenticated toggle to the on position and set UID to
5CbvKMuKArWEAFYiuTEOrwI4dxY2
Now, click Run.
You’ll see a green notice at the top saying Simulated set allowed and a green check mark next to the .write row in your rules. This means writing to that location in real life via your client will work:

Now, test the read. Change the Simulation type to read and hit Run again:

Huzzah! Your rules are working as expected. Now, it’s time to integrate the database into the client.