Capturing Text From Camera Using SwiftUI
Learn how to capture text from the iPhone camera into your SwiftUI app so your users can enter data more quickly and easily. By Audrey Tam.
Your iPhone camera lets you capture landscapes, people and events, but it’s also a useful information-gathering tool. You see a concert poster or an ad for a service you need or a restaurant that looks interesting, and you take a photo. Later, you type or speak some text from the photo — a URL, a date, a phone number — into a search engine or a new contact.
But keyboard or voice input is error-prone. What if you could just copy and paste text from a photo or directly from the camera view? Better still, what if you could scan text in a photo or camera view directly into your app? Give a big welcome to iOS 15 Live Text!
In this tutorial, you’ll learn how to capture text from the iPhone camera into your SwiftUI app to let your users enter data more quickly and easily.
iOS 15 Live Text
The wonderful new iOS 15 Live Text feature works right out of the box, but only for fairly new boxes. And only for the languages and regions listed in the note above.
You need a newish (2018+) iPhone, one with an A12 or later Neural Engine. Live Text uses Apple’s Vision machine learning model, which needs the Neural Engine.
Live Text works on iPhone XS, iPhone XR and later. These iPhones do not support Live Text: iPhone SE (first generation), iPhone 6S, iPhone 6S Plus, iPhone 7, iPhone 7 Plus and iPhone X.
Live Text sort of works in Photos on 2018-or-later iPads, but not iPad Camera. This article is about using Live Text with Camera, so it’s only about iPhones.
Now grab your iPhone and make sure Live Text is turned on: In Settings, turn on Camera ▸ Live Text and General ▸ Language & Region ▸ Live Text:
Turn on Live Text in Settings.

Turn on Live Text in Settings.
Live Text in Photos
Live Text detects text in photos and in the Camera ▸ Photo view finder. In this tutorial, you’ll use your iPhone’s camera. But first, see how great it is on your existing photos. It’s also easier to practice using Live Text on an image that isn’t moving around in a hand-held camera view.
Open Photos and find a photo that has some text, especially a URL, phone number, email or street address.
I have this photo I took at a yarn expo, as a reminder about a vendor I wanted to look up later.
Live Text in Photos: Tapping a URL opens it in Safari.

Live Text in Photos: Tapping a URL opens it in Safari.
I tapped the Live Text button (three lines in a viewfinder square); it turned blue. Then I tapped tarndie.com, and their web page opened in Safari!
If there’s a map address in your photo, tapping it opens Maps. Tapping a phone number displays the usual menu to Call, Send Message, FaceTime etc.
Live Text in Photos: Tapping address or phone number
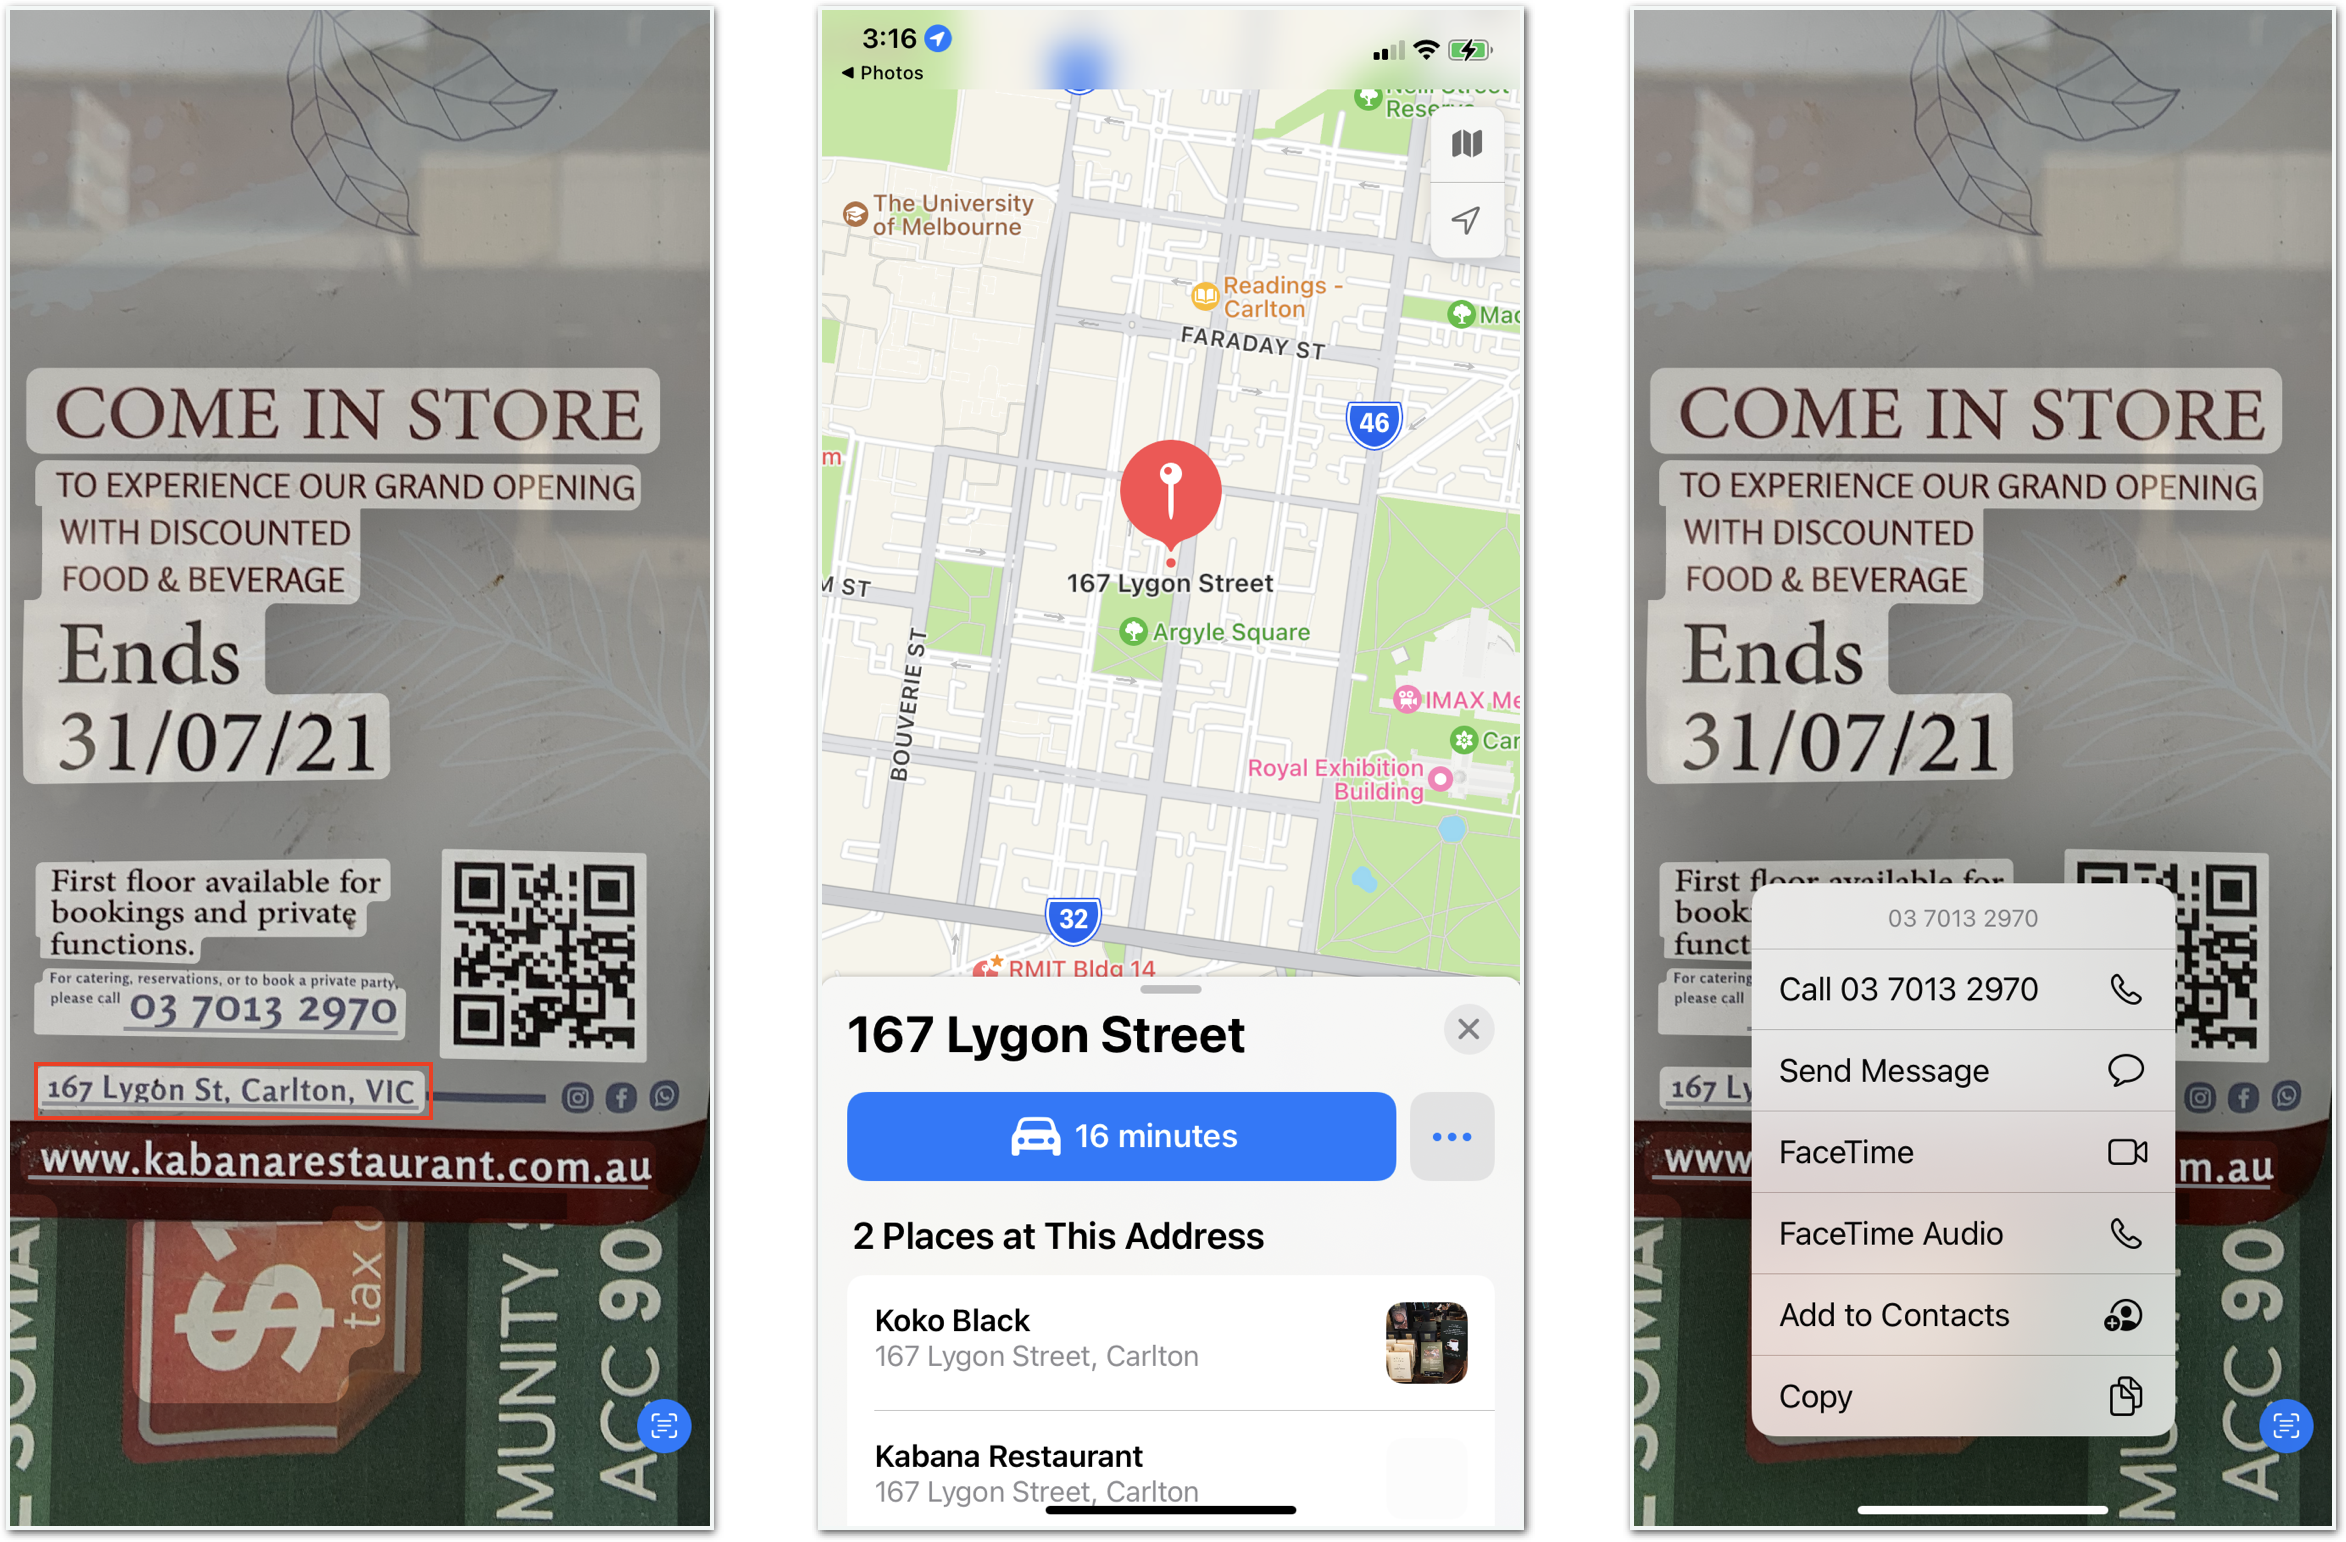
Live Text in Photos: Tapping address or phone number
And if there’s an email address, tapping it opens a new message in your email app.
If you want to copy text from an app that doesn’t let you select text, just take a screenshot and open the preview photo:
Live Text in screenshot

Live Text in screenshot
Live Text works the same way in the Camera app, but you need a steady hand. If you can’t quite get it to focus on what you want, just take a photo, then use Live Text on that.
Now keep reading to see how you can use Live Text in your apps.
Getting Started
Download the project materials using the Download Materials button at the top or bottom of this tutorial.
Open the WaitForIt project in the starter folder. This is a simple app where you can keep track of how long you have to wait for someone’s birthday. It uses the new Date.RelativeFormatStyle method relative(presentation:unitsStyle:).
WaitForIt

WaitForIt
To get camera input, you must run this app on your iPhone-with-Neural-Engine.
Build and Run on Your Device
Connect your iPhone to your Mac with a cable. In the target’s Signing & Capabilities tab, customize the Bundle Identifier and set a Team.
Customize bundle ID and set team.

Customize bundle ID and set team.
Select your iPhone from the run destination menu, then build and run.
Write or type your name and birthday in this format:
Name and birthday sample

Name and birthday sample
Camera input works with hand-writing but, in my experience, the writing needs to be really clear, more like careful printing than cursive.
Tap the + button. In the Add Person view, tap the Name text field then tap it a second time to show the Scan Text button:
Double-tap text field to show Scan Text button.

Double-tap text field to show Scan Text button.
Tap this button to open the camera and point the camera at your name and birthday text:
Point camera at text.

Point camera at text.
Brackets appear around detected text, and the detected text also appears in the text field. The brackets and text field text can change as your hand moves the camera, detecting different amounts of text.
You can tap to indicate where you want the camera to focus, and you can drag up on the camera view to enlarge it:
Drag up to enlarge camera view.

Drag up to enlarge camera view.
If you want only part of the detected text, tap the scan button in the lower right corner to display the text:
Tap scan button to display detected text.

Tap scan button to display detected text.
Then tap or swipe to select what you want from the detected text:
Select from detected text.

Select from detected text.
And tap Insert to accept the text you selected:
Insert selected text.

Insert selected text.
Now add the birthday text in the same way, then tap Done to return to the list view:
New person added

New person added