Intermediate RecyclerView Tutorial with Kotlin
In this RecyclerView tutorial you will learn how to build out intermediate techniques like swiping, animation and filtering in Kotlin. By Kevin D Moore.
Have you ever wanted to go to Mars or just look out over Mars’ horizon? We can’t send you there but we can give you the next best thing: an app with images from all the Mars rovers.
To show those images, we’ll use one of Android’s most popular views: the RecyclerView.
The RecyclerView layout was introduced in the Lollipop support library and Android developers have been using it for awhile. It is one of the most useful layouts and gives you more flexibility compared to a ListView in a much more performant package.
However, you may not know all that you can do with it. In this tutorial, you’ll see how to add sections, animations, dividers, and swipe gestures.
You should be familiar with the basics of using ReyclerView. If not, you can read an introduction to using RecyclerView here.
Here is a screenshot from the final version of our app:
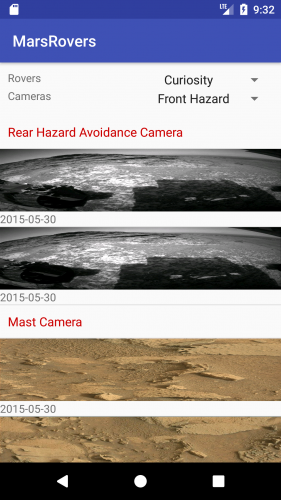
Checkout those amazing Mars landscapes! :]
You’re going to continue with the NASA site used in the previous RecyclerView tutorial, but do things a bit differently. You’ll be using an API that will return a list of Mars rover photos. Along with the RecyclerView of photos, there are two spinners to change the list of photos: one for rovers and the other for cameras.
Getting Started
Download the starter project here. Open it up in Android Studio 3.0.1 or later.
Next, head to the NASA site (https://api.nasa.gov/index.html#apply-for-an-api-key) and get an API key to use for the rover photos.
Build and run your app on an emulator or phone. You should see a default “Hello World!” TextView in the center.
Manifest
Add the following to your AndroidManifest.xml file before the application tag:
<uses-permission android:name="android.permission.INTERNET"/>
This will allow you to get information from the NASA website. Note that this is not considered a “dangerous” permission and the user will not be asked to approve it.
String Data
To populate the spinners on the main screen, you will need to add strings for the spinners to the strings.xml file. Open strings.xml in the res/values folder and add the following after the app_name string:
<string name="api_error">Problems getting Photos</string>
<string name="rovers">Rovers</string>
<string name="cameras">Cameras</string>
<string-array name="rovers">
   <item>Curiosity</item>
   <item>Opportunity</item>
   <item>Spirit</item>
</string-array>
<string-array name="camera_names">
   <item>Front Hazard</item>
   <item>Rear Hazard</item>
   <item>Navigation</item>
   <item>Panoramic</item>
   <item>Mast</item>
</string-array>
<string-array name="camera_values">
   <item>FHAZ</item>
   <item>RHAZ</item>
   <item>NAVCAM</item>
   <item>PANCAM</item>
   <item>MAST</item>
</string-array>
Main Layout
You need to modify the main layout and add some code to the MainActivity class. Start out by replacing the layout in the activity_main.xml file.
<?xml version="1.0" encoding="utf-8"?>
<android.support.constraint.ConstraintLayout xmlns:android="http://schemas.android.com/apk/res/android"
  xmlns:app="http://schemas.android.com/apk/res-auto"
  xmlns:tools="http://schemas.android.com/tools"
  android:layout_width="match_parent"
  android:layout_height="match_parent"
  tools:context="com.raywenderlich.marsrovers.MainActivity">

  <android.support.constraint.ConstraintLayout
    android:id="@+id/control_layout"
    android:layout_width="match_parent"
    android:layout_height="wrap_content"
    android:padding="10dp"
    app:layout_constraintLeft_toLeftOf="parent"
    app:layout_constraintTop_toTopOf="parent">

    <TextView
      android:id="@+id/roverLabel"
      android:layout_width="wrap_content"
      android:layout_height="wrap_content"
      android:text="@string/rovers"
      app:layout_constraintTop_toTopOf="parent" />

    <android.support.v7.widget.AppCompatSpinner
      android:id="@+id/rovers"
      android:layout_width="wrap_content"
      android:layout_height="wrap_content"
      app:layout_constraintRight_toRightOf="parent"
      app:layout_constraintTop_toTopOf="parent" />

    <TextView
      android:id="@+id/cameraLabel"
      android:layout_width="wrap_content"
      android:layout_height="wrap_content"
      android:layout_marginTop="4dp"
      android:text="@string/cameras"
      app:layout_constraintTop_toBottomOf="@+id/roverLabel" />

    <android.support.v7.widget.AppCompatSpinner
      android:id="@+id/cameras"
      android:layout_width="wrap_content"
      android:layout_height="wrap_content"
      app:layout_constraintRight_toRightOf="parent"
      app:layout_constraintTop_toBottomOf="@+id/rovers" />
  </android.support.constraint.ConstraintLayout>

  <android.support.v7.widget.RecyclerView
    android:id="@+id/recycler_view"
    android:layout_width="0dp"
    android:layout_height="0dp"
    android:visibility="gone"
    app:layout_constraintBottom_toBottomOf="parent"
    app:layout_constraintLeft_toLeftOf="parent"
    app:layout_constraintRight_toRightOf="parent"
    app:layout_constraintTop_toBottomOf="@+id/control_layout" />

  <ProgressBar
    android:id="@+id/progress"
    android:layout_width="wrap_content"
    android:layout_height="wrap_content"
    android:indeterminate="true"
    app:layout_constraintBottom_toBottomOf="parent"
    app:layout_constraintLeft_toLeftOf="parent"
    app:layout_constraintRight_toRightOf="parent"
    app:layout_constraintTop_toBottomOf="@+id/control_layout" />

</android.support.constraint.ConstraintLayout>
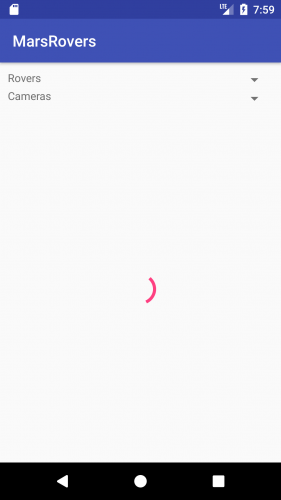
This uses Android’s new ConstraintLayout to add two rows of spinners, one for the Rover and one for the camera. There’s a RecyclerView below the spinners. Below the RecyclerView there is a ProgressBar that will spin while the data is loading.
Now, time to modify MainActivity.kt. In the onCreate() method, after the call to setContentView, add the following:
recycler_view.visibility = View.GONE
recycler_view.layoutManager = LinearLayoutManager(this)
When Android Studio gives you an error on recycler_view, put your cursor on recycler_view and hit option+return on Mac or Alt+Enter on PC and select “Import”. This uses the Kotlin Android Extensions to turn the R.id.recycler_view id into a recycler_view variable.
Now, run the app and you should see the following:
ViewHolder
The ViewHolder class holds the inflated view, is created in a RecyclerView.Adapter in onCreateViewHolder and bound in onBindViewHolder.
Before RecyclerView, Android developers used ListView to achieve similar behavior. As ListView usage matured, developers started using the “view holder” pattern and Google then made ViewHolder a key part of the RecyclerView API.
You’ll be creating a special ViewHolder class that will allow you to handle text and image views without using findViewById. In this DefaultViewHolder class, you’ll start by going through all of the child views and putting them in a map so that you can easily retrieve the view later. See the starter project for the full DefaultViewHolder class.
Adapter Layouts
You need to create the two layouts that will be used in the adapter, one for the section headers, and one for the rows themselves. First, you’ll add the header style needed for the header item layout.
Header Style
Open the styles.xml file in the values resource folder and add the following style that will be used in the header_item.xml file:
<style name="header">
  <item name="android:textSize">16sp</item>
  <item name="android:textColor">@android:color/holo_red_dark</item>
</style>
You can use any color you’d like. To create the header, go to the res/layout folder. Right-click and choose New/Layout resource file. Name the file header_item.xml. You can leave the root element as suggested and then replace everything with the following:
<?xml version="1.0" encoding="utf-8"?>
<LinearLayout xmlns:android="http://schemas.android.com/apk/res/android"
  xmlns:tools="http://schemas.android.com/tools"
  android:layout_width="match_parent"
  android:layout_height="wrap_content"
  android:orientation="vertical"
  android:padding="10dp">

  <TextView
    android:id="@+id/header_text"
    style="@style/header"
    android:layout_width="match_parent"
    android:layout_height="wrap_content"
    tools:text="Front Hazard" />
</LinearLayout>
This is just a TextView for the header text.
Next, right-click on the layout folder and create a new layout named row_item.xml. Again, leave the root element and replace with:
<?xml version="1.0" encoding="utf-8"?>
<LinearLayout xmlns:android="http://schemas.android.com/apk/res/android"
  xmlns:tools="http://schemas.android.com/tools"
  android:layout_width="match_parent"
  android:layout_height="wrap_content"
  android:orientation="vertical">

  <ImageView
    android:id="@+id/camera_image"
    android:layout_width="match_parent"
    android:layout_height="80dp"
    android:adjustViewBounds="true"
    android:scaleType="fitXY" />

  <TextView
    android:id="@+id/date"
    android:layout_width="wrap_content"
    android:layout_height="wrap_content"
    tools:text="10/07/2017" />
</LinearLayout>
This has an ImageView for the mars photo and a TextView for the date of the image below it.
Data
You’ll be populating the RecyclerView.Adapter using data from the NASA site: https://api.nasa.gov/api.html#MarsPhotos.
An easy way to test an API is to use the Postman Chrome extension or the Postman app (https://www.getpostman.com/). Once you’ve installed it, take the url https://api.nasa.gov/mars-photos/api/v1/rovers/curiosity/photos?sol=1000&api_key= and add your key to the end.
Hit the “Send” button in Postman and you’ll see the returned JSON in the Response section. Notice how it returns an object that has 1 item named photos, which is an array of objects. Now, you’ll create models to hold the data that comes back.
In Android Studio, navigate to the com.raywenderlich.marsrovers package. Right click and select New/Package to create a new package named models.
Next, right-click on the models package and select New/Kotlin File/Class. Name the file Camera, choose Class as the “Kind” and replace the generated code with the following:
data class Camera(val id: Int, val name: String, val rover_id: Int, val full_name: String)
Notice that you are using the data keyword to have Kotlin create the getters and setters for you, and that the class doesn’t need a beginning or ending brace as there are no methods. The field names match the names of the fields in the JSON response returned from the NASA API endpoint. You could make the names more readable, but you’d have to add some annotations to do that. For now, just use the given names.
Next, right-click on the models package and create a new Kotlin class named Photo and replace with the following:
data class Photo(val id : Int, val img_src : String, val earth_date: String, val camera: Camera)
Create another Kotlin class named PhotoList. The PhotoList class just holds a list of photos and is the root element of the JSON data:
data class PhotoList(val photos: List<Photo>)
Finally, create a PhotoRow class that will be used to indicate that a row is either a photo or a header. This way, you can just have a list of PhotoRow objects and check which type to show based on the value of the RowType enum. Create a new Kotlin file called PhotoRow in the models package and add the following:
enum class RowType {
   PHOTO,
   HEADER
}

data class PhotoRow(var type: RowType, var photo: Photo?, var header: String?)
The type property will distinguish between photos and headers. The row will have either a photo or a header string. Both the photo and header variables are nullable.