Arduino Tutorial: Temperature Sensor
An Arduino Tutorial on building a temperature sensor – and an iPhone app to connect with it! By Tony Dahbura.
At Long Last, the Starter Project
Now comes the iOS! You will build an iPhone app to get your temperatures. To start things off, open the included Xcode project from the tutorial download. You can find it in the folder Arduino Temperature Starter. The starter project has the following functionality:
- It provides a simple user interface for the application.
- The supported interface orientation is set to portrait.
- It includes a custom open-source digital-looking font to show temperatures.
- It contains a configuration/settings screen.
- It provides methods to save and load your settings, including the URL and the temperature display format.
Open the project in Xcode and build and run. You should see the following:
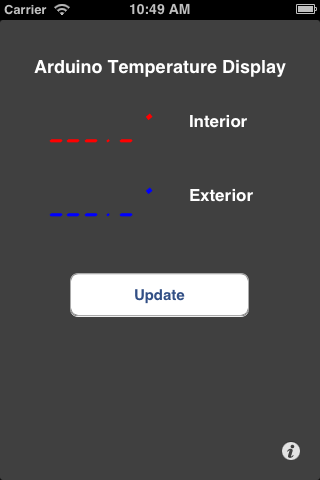
This project uses the Utility Application template, which includes a flip view for entering your settings. You will handle the communications and parse the results.
Tap the info button at the bottom of the screen and input the URL for your Arduino server:

Click the Done button and on the main screen, tap Update. You should see a message to the debug window telling you that your settings have been saved, but wait… there are no temperatures!
This is where you come in. Open MainViewController.m and locate performRestCall. Inside this method, place the code needed to communicate over the network with the Arduino:
- (void)performRestCall
{
    //communicate in the background to the web service using Grand Central Dispatch
    NSURL *url = [NSURL URLWithString:self.theURL];
    if (!url) {
        UIAlertView *alert = [[UIAlertView alloc] initWithTitle:@"Error"
                                                        message:@"Invalid URL entered!"
                                                       delegate:self cancelButtonTitle:nil
                                              otherButtonTitles:@"OK", nil ];
        [alert show];
        return;
    }

    self.updateButton.enabled = NO;  //disable update button until we complete
    dispatch_async(kBgQueue, ^{
        NSMutableURLRequest *request = [NSMutableURLRequest requestWithURL:url];
        [request setCachePolicy:NSURLRequestReloadIgnoringLocalAndRemoteCacheData];
        [request setValue:@"application/json; charset=utf-8" forHTTPHeaderField:@"Content-Type"];
        [request setValue:@"application/json" forHTTPHeaderField:@"Accept"];
        NSURLResponse *response;
        NSError *error;
        NSData *data = [NSURLConnection sendSynchronousRequest:request returningResponse:&response error:&error];
        if (!data) {
            NSLog(@"%@",[error localizedDescription]);
        }
        [self performSelectorOnMainThread : @selector(handleResultsOfWebCall: ) withObject:data waitUntilDone:YES];
    });

}
This code block looks a bit large, but it simply takes the URL you provided to talk to the Arduino and sets up a background HTTP request using GCD. It also disables the Update button until the results have come back.
This method plays nice by specifying the format for the returned content as application/json. Although the Arduino always returns JSON, it is a good and courteous networking practice to specify this in the headers!
The code receives the results and calls handleResultsOfWebCall on the main thread. This method parses and displays the results.
Let’s get to that now!
Locate handleResultsOfWebCall and set it up like this:
- (void)handleResultsOfWebCall:(NSData *)theResults
{
    if (theResults) {
        NSError *error;
        //NSLog(@"results=%@",[NSString stringWithUTF8String:[theResults bytes]] );
        NSDictionary *jsonResults = [NSJSONSerialization JSONObjectWithData:theResults options:kNilOptions error:&error];
        NSArray *theSensors = jsonResults[@"arduino"];

        for (int i=0;i<[theSensors count];i++) {
            NSString *location = [theSensors[i] valueForKey:@"location"];
            NSString *theTemperature;
            theTemperature = [theSensors[i] valueForKey:@"celsius"];
            if ([location compare:@"indoor"]==NSOrderedSame) {
                indoorTemperatureCelsius = [theTemperature floatValue];
            } else {
                outdoorTemperatureCelsius = [theTemperature floatValue];
            }
        }
        lastUpdate = [NSDate date]; //set to current date and time
        [self updateDisplayWithCurrentReadings];
    } else {
        NSLog(@"Error retrieving results-check the URL!");
        UIAlertView *alert = [[UIAlertView alloc] initWithTitle:@"Error"
                                                        message:@"Error retrieving results-check the URL or Server!"
                                                       delegate:self cancelButtonTitle:nil
                                              otherButtonTitles:@"OK", nil ];
        [alert show];
    }

    self.updateButton.enabled = YES;
}
This method first checks to see if any results came back. If not, it displays an error message. If data was returned, you use the built-in NSJSONSerialization handler to get the results into an NSDictionary object. From there, you read the values returned from the sensors and save them as Celsius values.
You set the lastUpdate variable to the current date and time and then call updateDisplayWithCurrentReadings to show the temperature values.
Finally, no matter the outcome, you re-enable the Update button, which you'd turned off during the asynchronous call above.
Compile and run the application, and enjoy your temperature readings!

Congratulations! You have a mobile application and temperature server that lets you read temperatures from sensors you can place anywhere. My setup has one sensor outside of a window and one inside. It’s really nice to be able to check the temperature quickly in the morning before heading out the door.
Where to Go from Here?
Powering your Arduino project is easy. Grab an iPad adapter and plug the Arduino cable into it instead of your Mac!
You will notice the display shows the temperatures in different colors, based on the range of the value. This color handling is in the setFieldColor method. If you are in a particular climate where you don’t agree with the color ranges, feel free to change them.
You also may not like the sensor changing the IP address if it reboots, based on your DHCP settings. If that's the case, modify the Arduino code to include a predefined IP address. This was described earlier in the tutorial, but for reference, you need to add a line near the top of the LEDBlinkAndEthernetTemperatureJSON file, like this:
byte mac[] = { 0x90, 0xA2, 0xDA, 0x0D, 0x7D, 0x54 };
IPAddress ip(192,168,1, 121);  //or some value you want
Then replace the if (Ethernet.begin(mac) == 0) line with:
Ethernet.begin(mac, ip); //in place of Ethernet.begin(mac).
What you've done in this tutorial is easily adapted to many other uses! Here are a few ideas:
- What if you wanted your app to record the temperatures from the probes over a given time period and chart the information using graphs?
- According to Seeed Studio, you can use the temperature sensors to check human body temperature, like a medical thermometer. Why not write an app for that?
- There are many different sensors available from Grove that will plug into the connectors on the board. Why not get something to measure soil moisture and monitor your favorite potted plant?
- The Arduino web site give lots of details on the programming language as well as references to all of the built-in libraries. It is available at http://arduino.cc/.
- For some interesting online tutorials check out https://learn.sparkfun.com/tutorials.
- There are a ton of prebuilt shields that can read RFID cards, control a robot, link relays or tie into any type of system you desire. Check out http://www.seeedstudio.com/depot/shield-t-2.html?ref=top. Or check out https://www.sparkfun.com/categories/240 for some other interesting shields.
I hope you enjoyed this tutorial and that it has inspired you to continue with your Arduino investigations. In the meantime, if you have any questions or comments, please join the forum discussion below!