Flutter Canvas API: Getting Started
Learn how to use the Flutter Canvas API to draw shapes and create custom widgets. By Wilberforce Uwadiegwu.
Animating Custom Shapes
Combined with the simplicity of the animation API, you can implement fancy animations with custom shapes. To see how this works, you'll build an animated charging/discharging battery widget in this section.
Animating a Charging Battery
In this section, you'll draw a charging and discharging battery and drive the charge progress with the animation controller.
Here's what the unanimated state looks like:
The battery consists of the following shapes:
- A border with rounded corners drawn using
RRect. AnRRectis the same asRect, except it supports defining rounded corners. - A filled semi-circle drawn with an arc representing the battery pin.
- The amount of charge drawn with a
RRect.
Start by opening animated_battery.dart in the battery folder. AnimatedBattery has an animation controller configured to animate forever in an endless loop, calling setState() when the controller value updates. Inside build() is a CustomPaint widget. The animation value passed to BatteryPainter is used to draw the amount of battery charge.
Run the app and select the Animated Battery button, and you'll see a blank screen.
Open battery_painter.dart in the battery folder. BatteryPainter is where you'll draw the battery widget. To move things along, some fields are already declared.
Start by drawing the battery border. Add the following code below paint().
RRect _borderRRect(Size size) {
  // 1
  final symmetricalMargin = margin * 2;
  // 2
  final width = size.width - symmetricalMargin - padding - pinWidth;
  // 3
  final height = width / 2;
  // 4
  final top = (size.height / 2) - (height / 2);
  // 5
  final radius = Radius.circular(height * 0.2);
  // 6
  final bounds = Rect.fromLTWH(margin, top, width, height);
  // 7
  return RRect.fromRectAndRadius(bounds, radius);
}
Here's a breakdown of that code:
- The total of the margin on each axis. You're giving the shape a margin of the value
marginon the top, right and bottom. - The width of the border. This is the
Canvaswidth minus the horizontal margins, the pin width and the space between the pin and the border. - The height of the border. The height is half the width.
- The top of the border. This value is the y-coordinate of the top edge of the battery that will center the battery on the canvas.
- The radius of the border. The corner radius is 20 percent of the height.
- Instantiate the bounds of the border with all the above values. The left offset of the border is the value of the margin. That'll give a space (the value of margin) before drawing the border.
- Instantiate and return the RRect from the bounds and radius.
Now, add this code inside paint():
// Battery border
final bdr = _borderRRect(size);
canvas.drawRRect(bdr, borderPaint);
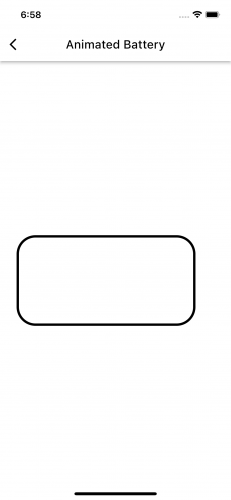
Run the code to see this:
Next, you'll draw the battery pin. Add the following code below the declaration of _borderRRect():
Rect _pinRect(RRect bdr) {
  // 1
  final center = Offset(bdr.right + padding, bdr.top + (bdr.height / 2.0));
  // 2
  final height = bdr.height * 0.38;
  // 3
  final width = pinWidth * 2;
  // 4
  return Rect.fromCenter(center: center, width: width, height: height);
}
Here's what this is doing:
- The center of the pin. Position the center with the center of the height of the battery border. Add some padding to position the pin away from the right edge of the battery border.
- The height of the pin, which is 38 percent of the height of the border of the battery.
- The pin bounding box width. This width is twice the pinWidth. The arc will only occupy half this.
- Instantiate and return the pin bounds.
Add the following import for the math package.
import 'dart:math' as math;
Now, add the drawing instructions for the battery pin to paint() after the battery border:
// Battery pin
final pinRect = _pinRect(bdr);
canvas.drawArc(pinRect, math.pi / 2, -math.pi, true, pinPaint);
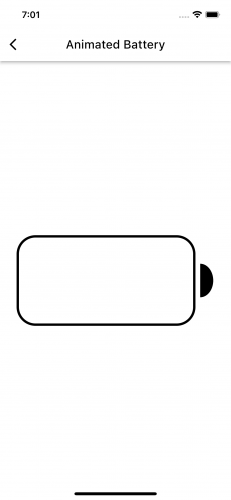
This draws a filled arc from 90° to -180°.
Hot-reload, and you'll see this:
The next step is to draw the charge of the battery. In this first iteration, you won't animate the charge. Add this below the declaration of _pinRect():
RRect _chargeRRect(RRect bdr) {
    final left = bdr.left + padding;
    final top = bdr.top + padding;
    final right = bdr.right - padding;
    final bottom = bdr.bottom - padding;
    final height = bottom - top;
    final width = right - left;
    final radius = Radius.circular(height * 0.15);
    final rect = Rect.fromLTWH(left, top, width, height);
    return RRect.fromRectAndRadius(rect, radius);
 }
The statements above compute the bounds of the charge shape using the bounds of the battery border while providing for the padding.
Now, add this below the drawing instructions for the pin in paint():
// Battery charge progress
final chargeRRect = _chargeRRect(bdr);
canvas.drawRRect(chargeRRect, chargePaint);
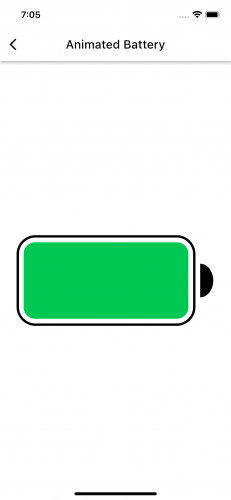
Run the code to see this:
The next step is to animate the charge progress, and you won't believe how ridiculously — wait for it! (in the voice of Barney Stinson) — easy this is!
In _chargeRRect(), simply replace the width parameter passed to Rect.fromLTWH() from width to width * charge. The line becomes:
final rect = Rect.fromLTWH(left, top, width * charge, height);
Run the project, and you'll see this:
In reality, this is not how a battery charges. To fix this, you'll make the animation progress in increments of minCharge.
Write the statement below inside _chargeRRect(), just at the top:
final percent = minCharge * ((charge / minCharge).round());
Also, change the width value you just changed from width * charge to width * percent, so _chargeRRect() becomes:
RRect _chargeRRect(RRect bdr) {
    final percent = minCharge * ((charge / minCharge).round());
    final left = bdr.left + padding;
    final top = bdr.top + padding;
    final right = bdr.right - padding;
    final bottom = bdr.bottom - padding;
    final height = bottom - top;
    final width = right - left;
    final radius = Radius.circular(height * 0.15);
    final rect = Rect.fromLTWH(left, top, width * percent, height);
    return RRect.fromRectAndRadius(rect, radius);
}
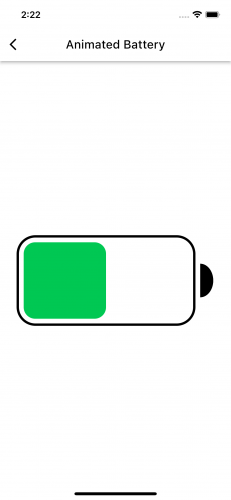
Run the code to see this:
That's it! You did such a fantastic job!
Where to Go From Here?
The completed project contains all the code used in this tutorial. You can find this inside the completed folder in the file you downloaded earlier or by clicking Download Materials at the top or bottom of this tutorial.
This tutorial taught you to draw basic and composite custom shapes with the Flutter Canvas API. Additionally, you learned how to tap into the power of the animation API to animate these custom shapes.
To learn more about the Flutter architectural layers, head over to this detailed official documentation by the Flutter team. This Stackoverflow answer by Flutter's former Product Manager Sett Ladd highlights the difference between logical and physical pixels in relationship to Flutter.
I hope you enjoyed this tutorial. If you have any questions or comments, please join the forum discussion below!