Flutter Canvas API: Getting Started
Learn how to use the Flutter Canvas API to draw shapes and create custom widgets. By Wilberforce Uwadiegwu.
Flutter offers a cross-platform UI toolkit that’s both “expressive and flexible”. But even with this rich and flexible toolkit, there isn’t always an out-of-the-box widget for every nifty design your UI/UX team might dream up. So the Flutter team came up with a solution; they created a canvas and said: “Draw anything you like.” This article will be an entry-level answer to the question: “What is a Flutter canvas, and how can I draw with it?”
In summary, you’ll learn how to:
- Draw basic shapes like polygons, ovals, circles, arcs and curves.
- Compose the basic shapes to draw more complex shapes.
- Animate the complex shapes.
Drawing 2-D Images on the Screen
Like an artist’s canvas is a physical surface to draw on, a Canvas in Flutter is a virtual surface for drawing. But unlike a regular art canvas, you can’t paint on the Flutter canvas with physical brushes.
Flutter Canvas uses a two-point (x and y) coordinate system to determine the position of a point on the screen. This coordinate system is a Cartesian coordinate system in two-dimensional space. Although the x-axis starts from the left of the canvas and increases horizontally to the right, the y-axis begins at the top and increases as you move down the canvas. The first pixel at the top-left of the canvas is (0, 0). This position is the origin of both the x-axis and y-axis. Positive numbers move the virtual “brush” right on the x-axis and down on the y-axis. The opposite happens for negative numbers.
To draw, say, a triangle, you pass instructions to the Canvas API to start from the coordinate of A, move to C, then move again to B and finally close the gap at A.

Getting Started
Download the starter project by clicking Download Materials at the top or bottom of this tutorial.
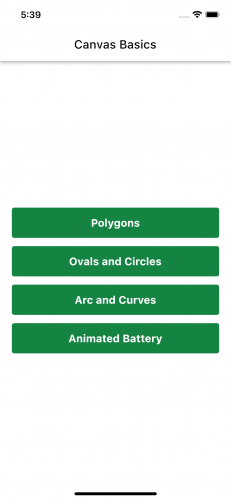
Open the starter folder with the latest version of Android Studio or Visual Studio Code. Next, either run flutter pub get in the terminal or open pubspec.yaml and click the Pub get tab that appears in your IDE. Once complete, open lib/main.dart and run the project to see this on your target emulator or device:
Now that you’ve got the project running, it’s time to dive into the canvas API.
Overview of the CustomPaint and Canvas API
Flutter’s UI rendering stack comprises the Dart and C++ layers. The Material and Cupertino widgets comply with the Google Material and iOS design languages at the Dart layer. This high-level set of widgets depends on the Widgets layer, which depends on the Dart rendering engine. This rendering engine is built from the Animation, Gestures and Painting API, which all lie on the Foundation layer. These layers are written in Dart and powered by a much-lower-level rendering engine written in C++ that uses the high-performance C++ 2D rendering engine, Skia. This lower-level rendering layer exists at the same level as other layers as Platform Channel, Text Layout, System Calls, etc. For more information, see Flutter’s Architectural layers documentation.
CustomPainter is an abstract class in the Dart rendering layer. It provides you with a Canvas. This Canvas and most of the other APIs you’ll use to draw come from the Dart painting layer.
You’ll extend this class to draw your custom shape. A minimal implementation looks something like this:
class MyFancyPainter extends CustomPainter {

  @override
  void paint(Canvas canvas, Size size) {

  }

  @override
  bool shouldRepaint(covariant CustomPainter oldDelegate) => false;
}
In paint, The size parameter contains the width and height of the Canvas in logical pixels. You’ll use this to determine the size of the shapes to draw. If you draw outside this size, the shapes will cut off or, worse still, won’t be visible on the screen. shouldRepaint() is called when a new instance of the custom painter is created. This helps the Flutter engine decide whether to call paint() again.
To display the shapes drawn in a CustomPainter, you need a CustomPaint widget. CustomPaint is just like a normal widget. It accepts an instance of a subclassed CustomPainter in its painter and foregroundPainter parameters. Next, is accepts a child parameter which can be any widget. In some ways, CustomPaint behaves like a Stack widget. The value of painter renders first, then child, and foregroundPainter renders on top. All three parameters are optional.
Drawing Basic Shapes
You’ll continue exploring the Canvas API by writing instructions to draw basic shapes like polygons, ovals, circles, arcs and curves.
Drawing Polygons
Before drawing on the canvas, you need to decide the color and size of the drawing pen. An instance of Paint defines the pen. Add the following lines of code to PolygonPainter‘s paint() in the file lib/polygon_painter.dart.
final paint = Paint()
  ..strokeWidth = 5
  ..color = Colors.indigoAccent
  ..style = PaintingStyle.stroke;
Here’s a breakdown of the fields you just set:
- strokeWidth: The width, in pixels, of the drawing pen.
- color: The color of the drawing pen.
- style: Whether the shape should be filled in or just drawn as an outline.
There are other properties for Paint, but those are the ones you’ll need for this tutorial.
Next, you’ll learn how to draw a triangle.
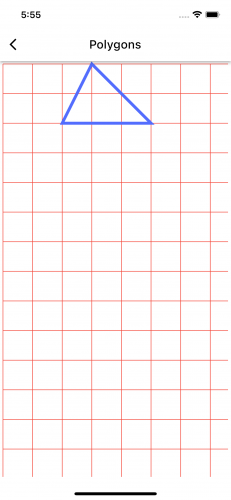
Now, you’ll draw a triangle on the canvas. Run the project and tap the Polygons button to see this:
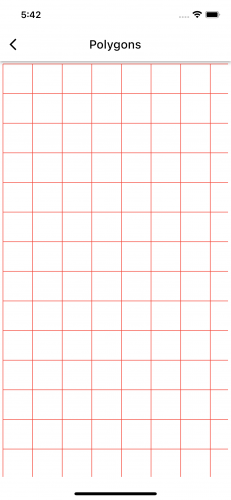
The screen has a grid as a visual aid. The grid divides the area into boxes like graph paper. Each box is 50px by 50px.
GridPainter and GridWidget in lib/grid to see how to draw the grid.
You’ll need to place your pen somewhere on the Canvas to start drawing. Then, you’ll declare a Path object. Afterward, you’ll move the drawing pen to three boxes from the left and zero boxes from the top. And because each box is 50px by 50px, that’s 150px from the left and 0px from the top. Add the following code below the paint declaration in the paint() of the PolygonPainter.
final triangle = Path();
triangle.moveTo(150, 0);
Hot-reload the app, and you’ll notice nothing changed. This is because you have to tell the Canvas object to draw the triangle path. Add the following below the triangle path you just declared:
canvas.drawPath(triangle, paint);
Notice that you also passed paint into drawPath. The Flutter engine will use the paint object to draw the actual triangle.
Hot-reload the app again, and you'll still notice nothing changed.

What's the reason this time? Technically, you haven't drawn anything yet. You only moved your pen to a point on the Canvas.
Now, you need three lines to draw a triangle. To draw the first line, you'll need to move your pen from the current point to another. Add this piece of code below the call to moveTo():
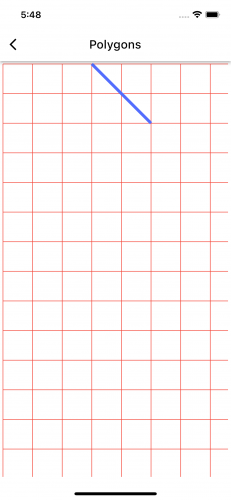
triangle.relativeLineTo(100, 100);
This instruction draws a line from where you placed your pen earlier to two boxes to the right and two boxes below.
Hot-reload the app to see this:
To draw the second line of the triangle, add this method call after the previous relativeLineTo statement:
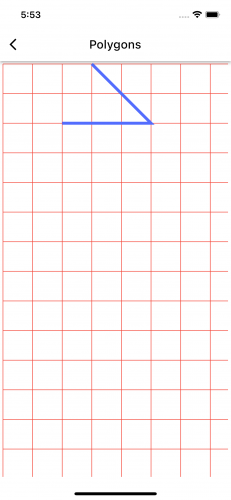
triangle.relativeLineTo(-150, 0);
This instruction draws a line from where you stopped earlier to three boxes to the left while remaining at the same vertical position. Notice how left move commands use negative values?
Hot-reload the app again, and you'll see this:
You need another line to complete the triangle. You could either draw this line manually like you've been doing earlier or use Path close(). The latter automatically draws a line from the current position of the pen to where you initially moved your pen.
Now, write this below the other triangle path method calls:
triangle.close();
Your PolygonPainter paint method should now look like this:
  void paint(Canvas canvas, Size size) {
    final paint = Paint()
      ..strokeWidth = 5
      ..color = Colors.indigoAccent
      ..style = PaintingStyle.stroke;

    final triangle = Path();
    triangle.moveTo(150, 0);
    triangle.relativeLineTo(100, 100);
    triangle.relativeLineTo(-150, 0);
    triangle.close();

    canvas.drawPath(triangle, paint);
  }
Hot-reload the app and you'll get this:
Now you'll learn how to draw a square.
Like drawing with a physical canvas and brushes, there are several ways to draw a shape. A good example is a four-sided polygon like a square or rectangle. You could draw the individual lines from one point to another until you complete the shape or use the Rect object.
Here's a breakdown of that code:
This draws a 100px by 100px shape from four boxes from the left and three boxes from the top.
-
The
PathObject Method:final square1 = Path(); // 1 square1.moveTo(50, 150); // 2 square1.relativeLineTo(100, 0); // 3 square1.relativeLineTo(0, 100); // 4 square1.relativeLineTo(-100, 0); // 5 square1.close();
Here's a breakdown of that code:
- Start at one box from the left and three boxes from the top.
- From there, draw a line to two boxes to the right while remaining at the same y point (i.e., a horizontal line).
- From there, draw a line to two boxes downwards while remaining at the same x point (i.e., a vertical line).
- From there, draw a horizontal line to two boxes to the left.
- Join the current position to the starting position.
-
The
RectObject Method:const square2 = Rect.fromLTWH(200, 150, 100, 100);
This draws a 100px by 100px shape from four boxes from the left and three boxes from the top.
- Start at one box from the left and three boxes from the top.
- From there, draw a line to two boxes to the right while remaining at the same y point (i.e., a horizontal line).
- From there, draw a line to two boxes downwards while remaining at the same x point (i.e., a vertical line).
- From there, draw a horizontal line to two boxes to the left.
- Join the current position to the starting position.
  final square1 = Path();
  // 1
  square1.moveTo(50, 150);
  // 2
  square1.relativeLineTo(100, 0);
  // 3
  square1.relativeLineTo(0, 100);
  // 4
  square1.relativeLineTo(-100, 0);
  // 5
  square1.close();
const square2 = Rect.fromLTWH(200, 150, 100, 100);
Both methods will draw the same shape but at different positions. Add the code from both the rectangle draw methods above inside the paint() of PolygonPainter after the canvas.drawPath(triangle, paint) statement. Then, add the following two statements to draw each of the rectangles:
canvas.drawPath(square1, paint);
canvas.drawRect(square2, paint);
Hot-reload the project to see this:
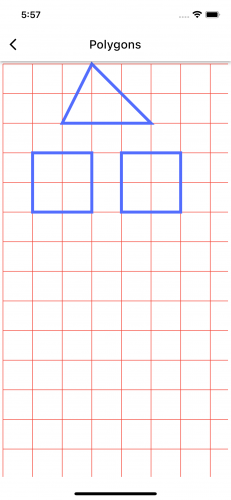
Can you guess which method drew which square?
Now that you've mastered squares, you can move on to hexagons.
To draw a hexagon — a polygon with six sides — use the Path object like you did in the first method above to draw a square. Add the following statements below the other drawing instructions in the paint() of PolygonPainter:
final hexagon = Path()
// 1
  ..moveTo(175, 300)
// 2
  ..relativeLineTo(75, 50)
// 3
  ..relativeLineTo(0, 75)
// 4
  ..relativeLineTo(-75, 50)
// 5
  ..relativeLineTo(-75, -50)
// 6
  ..relativeLineTo(0, -75)
// 7
  ..close();
canvas.drawPath(hexagon, paint);
Here's what that code is doing:
- Start at 175px from the left and 300px from the top.
- From there, draw a line to a point at 75px on the x-axis and 50px on the y-axis.
- From there, draw a 75px vertical line to downwards.
- From there, draw a line to a point -75px on the x-axis and 50px on the y-axis.
- From there, draw a line to a point -75px on the x-axis and -50px on the y-axis. Negative values move up on the y-axis.
- From there, draw a 75px vertical line upward.
- Join the current position to the starting position.
Hot-reload, and you'll see this:
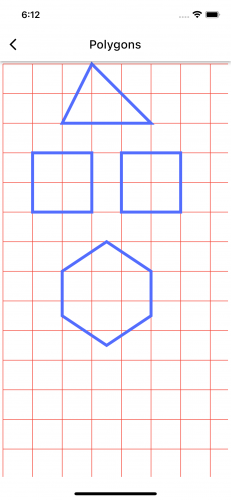
Hexagons are great, but wouldn't it be cool if you could draw more complex objects? Good news! You'll learn how to draw more complex objects next.
You can also draw even more complex shapes like a Greek Cross with many joints by moving from one point to another. Add the statements below inside paint() of PolygonPainter:
final cross = Path()
  ..moveTo(150, 500)
  ..relativeLineTo(50, 0)
  ..relativeLineTo(0, 50)
  ..relativeLineTo(50, 0)
  ..relativeLineTo(0, 50)
  ..relativeLineTo(-50, 0)
  ..relativeLineTo(0, 50)
  ..relativeLineTo(-50, 0)
  ..relativeLineTo(0, -50)
  ..relativeLineTo(-50, 0)
  ..relativeLineTo(0, -50)
  ..relativeLineTo(50, 0)
  ..close();
canvas.drawPath(cross, paint);
Hot-reload to see this:
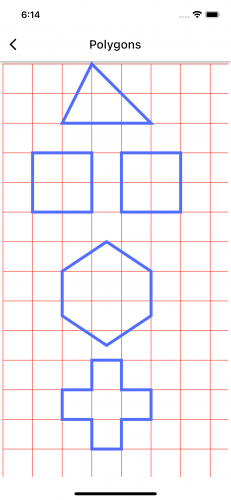
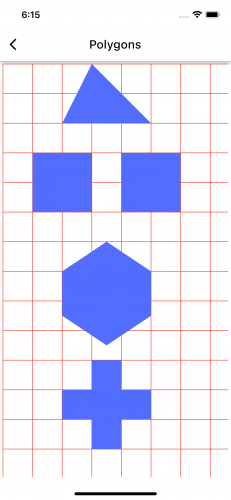
That's just the basics of drawing custom shapes: You draw lines from one position to another. But what if you want solid shapes and not just lines? That, too, is simple! Change the style property of the paint instance from PaintingStyle.stroke to PaintingStyle.fill. Hot-reload to see solid shapes like these:
Next up, you'll learn about drawing circles.