Text Kit Tutorial
Learn how to easily layout your text in iOS 7 in this Text Kit tutorial! By Colin Eberhardt.
Sign up/Sign in
With a free Kodeco account you can download source code, track your progress, bookmark, personalise your learner profile and more!
Create accountAlready a member of Kodeco? Sign in
Sign up/Sign in
With a free Kodeco account you can download source code, track your progress, bookmark, personalise your learner profile and more!
Create accountAlready a member of Kodeco? Sign in
Contents
Text Kit Tutorial
45 mins
- Getting started
- Dynamic type
- Basic support
- Responding to updates
- Changing layout
- Letterpress effects
- Exclusion paths
- Adding the view
- Exclusion paths
- Dynamic text formatting and storage
- Subclassing NSTextStorage
- A UITextView with a custom Text Kit stack
- Dynamic formatting
- Adding further styles
- Reviving dynamic type
- Resizing text views
- Where To Go From Here?
Update 9/30/14: This tutorial has now been updated for iOS 8 and Swift, check it out!
Note from Ray: This is an abbreviated version of a chapter from iOS 7 by Tutorials that we are releasing as part of the iOS 7 Feast. We hope you enjoy!
The way that text is rendered in iOS has changed a lot over the years as more powerful features and capabilities have been added. This latest iOS release brings with it some of the most significant text rendering changes yet.
In the old days before iOS 6, web views were usually the easiest way to render text with mixed styling, such as bold, italics, or even colors.
Last year, iOS 6 added attributed string support to a number of UIKit controls. This made it much easier to achieve this type of layout without resorting to rendered HTML — or so it would appear.
In iOS 6, text-based UIKit controls in iOS 6 were based on both WebKit and Core Graphics’ string drawing functions, as illustrated in the hierarchical diagram below:
Note: Does anything strike you as odd in this diagram? That’s right — UITextView
uses WebKit under the hood. iOS 6 renders attributed strings on a text views as HTML, a fact that’s not readily apparent to developers who haven’t dug deep into the framework.
Attributed strings in iOS 6 were indeed helpful for many use cases. However, for advanced layouts and multi-line rendered text, Core Text remained the only real option — a relatively low-level and cumbersome framework.
However, this year in iOS 7 there’s an easier way. With the new minimalistic design focus in iOS 7 that eschews ornamentation and focuses more on typography — such as the new UIButton
that strips away all borders and shadows, leaving only text — it’s no surprise that there’s a whole new framework for working with text and text attributes: Text Kit.
The architecture is much tidier in iOS 7; all of the text-based UIKit controls (apart from UIWebView
) now use Text Kit, as shown in the following diagram:
Text Kit is built on top of Core Text, inherits the full power of the Core Text framework, and to the delight of developers everywhere, wraps it in an improved object-oriented API. It’s quite a sizeable framework, so this book takes two full chapters to cover Text Kit’s many features.
The chapter you’re reading now covers the components of Text Kit that you’re likely to encounter in almost every iOS 7 application, including:
- Dynamic type
- Letterpress effects
- Exclusion paths
- Dynamic text formatting and storage
The second chapter is of great interest to those working with large, complex text layouts. It delves deeply into the core components of Text Kit, including the layout manger, text containers and text storage.
In this chapter you’ll explore the various features of Text Kit as you create a simple yet feature-rich note-taking app for the iPhone that features reflowing text, dynamic text resizing, and on-the-fly text styling.
Ready to create something of note? :] Then read on to get started with Text Kit!
Getting started
This chapter includes a starter project with the user interface for the app pre-created so you can stay focused on Text Kit. You can download the starter project here:
Open the starter project in Xcode and build and run the app. It will look like the following:
The app creates an initial array of Note instances and renders them in a table view controller. Storyboards and segues detect cell selection in the table view and handle the transition to the view controller where users can edit the selected note.
Browse through the source code and play with the app a little to get a feel for how the app is structured and how it functions. When you’re done with that, move on to the next section, which discusses the use of dynamic type in your app.
Dynamic type
Dynamic type is one of the most game-changing features of iOS 7; it places the onus on your app to conform to user-selected font sizes and weights.
Select Settings\General\Accessibility and Settings\General\Text Size to view the new settings that affect how text is displayed in your app:
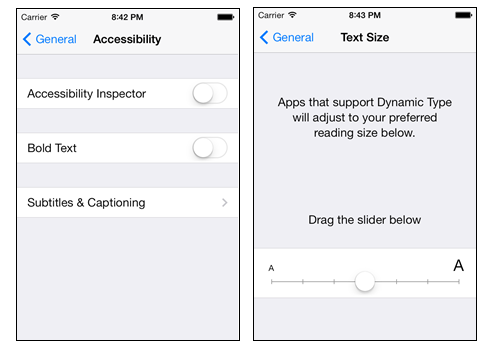
iOS 7 offers the ability to enhance the legibility of text by increasing font weight, as well as an option to set the preferred font size for apps that support dynamic text. Users will expect apps written for iOS7 to honor these settings, so ignore them at your own risk!
In order to make use of dynamic type you need to specify fonts using styles rather than explicitly stating the font name and size. With iOS 7 a new method has been added to UIFont
, preferredFontForTextStyle
that creates a font for the given style using the user’s font preferences.
The diagram below gives an example of each of the six different font styles:
The text on the left is rendered using the smallest user selectable text size, the text in the center uses the largest, and the text on the right shows the effect of enabling the accessibility ‘bold text’ feature.
Basic support
Implementing basic support for dynamic text is relatively straightforward. Rather than using explicit fonts within your application, you instead request a font for a specific ‘style’. At runtime a suitable font will be selected based on the given style and the user’s text preferences.
Open NoteEditorViewController.m and add the following to the end of viewDidLoad
:
self.textView.font = [UIFont preferredFontForTextStyle:UIFontTextStyleBody];
Then open NotesListViewController.m and add the following to the end of the tableView:cellForRowAtIndexPath:
method:
cell.textLabel.font = [UIFont preferredFontForTextStyle:UIFontTextStyleHeadline];
In both cases you are making use of the new iOS font styles.
Note: Using a semantic approach to font names, such as UIFontTextStyleSubHeadline
, helps avoid hard-coded font names and styles throughout your code — and ensures that your app will respond properly to user-defined typography settings as expected.
Launch TextKitNotepad again, and you’ll notice that the table view and the note screen now honor the current text size; the difference between the two is shown in the screenshots below:
That looks pretty good — but sharp readers will note that this is only half the solution. Head back to Settings\General\Text Size and modify the text size again. This time, switch back to TextKitNotepad — without re-launching the app — and you’ll notice that your app didn’t respond to the new text size.
Your users won’t take too kindly to that! Looks like that’s the first thing you need to correct in this app.
Responding to updates
Open up NoteEditorViewController.m and add the following code to the end of viewDidLoad:
[[NSNotificationCenter defaultCenter]
addObserver:self
selector:@selector(preferredContentSizeChanged:)
name:UIContentSizeCategoryDidChangeNotification
object:nil];
The above code registers the class to receive notifications when the preferred content size is changed and passes in the method to be called (preferredContentSizeChanged:
) when this event occurs.
Next, add the following method to NoteEditorViewController.m, immediately below viewDidLoad:
- (void)preferredContentSizeChanged:(NSNotification *)notification {
self.textView.font = [UIFont preferredFontForTextStyle:UIFontTextStyleBody];
}
This simply sets the text view font to one based on the new preferred size.
Note: You might be wondering why it seems you’re setting the font to the same value it had before. When the user changes their preferred font size, you must request the preferred font again; it won’t be updated automatically. The font returned via preferredFontForTextStyle:
will be different when the font preferences are changed.
Open up NotesListViewController.m and add the following code to the end of the viewDidLoad
method:
[[NSNotificationCenter defaultCenter]
addObserver:self
selector:@selector(preferredContentSizeChanged:)
name:UIContentSizeCategoryDidChangeNotification
object:nil];
Hey, isn’t that the same code you just added to NoteEditorViewController.m? Yes, it is — but you’ll handle the preferred font change in a slightly different manner.
Add the following method to NotesListViewController.m, immediately below viewDidLoad:
- (void)preferredContentSizeChanged:(NSNotification *)notification {
[self.tableView reloadData];
}
The above code simply instructs UITableView
to reload its visible cells, which updates the appearance of each cell.
Build and run your app; change the text size setting and verify that your app responds correctly to the new user preferences.
Changing layout
That part seems to work well, but when you select a really small font size, your table view ends up looking a little sparse, as shown in the left-hand screenshot below:
This is one of the trickier aspects of dynamic type. To ensure your application looks good across the range of font sizes, your layout needs to be responsive to the user’s text settings. Auto Layout solves a lot of problems for you, but this is one problem you’ll have to solve yourself.
Your table row height needs to change as the font size changes. Implementing the tableView:heightForRowAtIndexPath:
delegate method solves this quite nicely.
Add the following code to NotesListViewController.m, underneath UITableViewDatasource
:
- (CGFloat)tableView:(UITableView *)tableView
heightForRowAtIndexPath:(NSIndexPath *)indexPath {
static UILabel* label;
if (!label) {
label = [[UILabel alloc]
initWithFrame:CGRectMake(0, 0, FLT_MAX, FLT_MAX)];
label.text = @"test";
}
label.font = [UIFont preferredFontForTextStyle:UIFontTextStyleHeadline];
[label sizeToFit];
return label.frame.size.height * 1.7;
}
The above code creates a single shared — or static — instance of UILabel
with the same font used by the table view cell. It then invokes sizeToFit
on the label, which forces the label’s frame to fit tightly around the text, and results in a frame height proportional to the table row height.
Build and run your app; modify the text size setting once more and the table rows now size dynamically to fit the text size, as shown in the screenshot below:
Letterpress effects
Letterpress effects add subtle shading and highlights to text that give it a sense of depth — much like the text has been slightly pressed into the screen.
Note: The term “letterpress” is a nod to early printing presses, which inked a set of letters carved on blocks and pressed them into the page. The letters often left a small indentation on the page — an unintended but visually pleasing effect, which is frequently replicated in digital typography today.
Open NotesListViewController.m and replace the contents of tableView:cellForRowAtIndexPath:
with the following code:
static NSString *CellIdentifier = @"Cell";
UITableViewCell *cell = [tableView dequeueReusableCellWithIdentifier:CellIdentifier
forIndexPath:indexPath];
Note* note = [self notes][indexPath.row];
UIFont* font = [UIFont preferredFontForTextStyle:UIFontTextStyleHeadline];
UIColor* textColor = [UIColor colorWithRed:0.175f green:0.458f blue:0.831f alpha:1.0f];
NSDictionary *attrs = @{ NSForegroundColorAttributeName : textColor,
NSFontAttributeName : font,
NSTextEffectAttributeName : NSTextEffectLetterpressStyle};
NSAttributedString* attrString = [[NSAttributedString alloc]
initWithString:note.title
attributes:attrs];
cell.textLabel.attributedText = attrString;
return cell;
The above code creates an attributed string for the title of a table cell using the letterpress style.
Build and run your app; your table view will now display the text with a nice letterpress effect, as shown below:
Letterpress is a subtle effect — but that doesn’t mean you should overuse it! Visual effects may make your text more interesting, but they don’t necessarily make your text more legible.
Exclusion paths
Flowing text around images or other objects is a standard feature of most word processors. Text Kit allows you to render text around complex paths and shapes through exclusion paths.
It would be handy to tell the user when a note was created; you’re going to add a small curved view to the top right-hand corner of the note that shows this information.
You’ll start by adding the view itself – then you’ll create an exclusion path to make the text wrap around it.
Adding the view
Open up NoteEditorViewController.m and add the following line to the list of imports at the top of the file:
#import "TimeIndicatorView.h"
Next, add the following instance variable to NoteEditorViewController.m:
@implementation NoteEditorViewController
{
TimeIndicatorView* _timeView;
}
As the name suggests, this houses the time indicator subview.
Add the code following to the very end of viewDidLoad
in NoteEditorViewController.m:
_timeView = [[TimeIndicatorView alloc] initWithDate:_note.timestamp];
[self.view addSubview:_timeView];
This simply creates an instance of the new view and adds it as a subview.
TimeIndicatorView calculates its own size, but it won’t do this automatically. You need a mechanism to call updateSize
when the view controller lays out the subviews.
Add the following code to the bottom of NoteEditorViewController.m:
- (void)viewDidLayoutSubviews {
[self updateTimeIndicatorFrame];
}
- (void)updateTimeIndicatorFrame {
[_timeView updateSize];
_timeView.frame = CGRectOffset(_timeView.frame,
self.view.frame.size.width - _timeView.frame.size.width, 0.0);
}
viewDidLayoutSubviews
calls updateTimeIndicatorFrame
, which does two things: it calls updateSize
to set the size of the subview, and positions the subview in the top right corner of the view.
All that’s left is to call updateTimeIndicatorFrame
when your view controller receives notification that the size of the content has changed. Modify preferredContentSizeChanged
: in NoteEditorViewController.m to the following:
- (void)preferredContentSizeChanged:(NSNotification *)n {
self.textView.font = [UIFont preferredFontForTextStyle:UIFontTextStyleBody];
[self updateTimeIndicatorFrame];
}
Build and run your project; tap on a list item and the time indicator view will display in the top right hand corner of the item view, as shown below:
Modify the device Text Size preferences, and the view will automatically adjust to fit.
However, something doesn’t look quite right. The text of the note renders behind the time indicator view instead of flowing neatly around it. Fortunately, this is the exact problem that exclusion paths are designed to solve.
Exclusion paths
Open TimeIndicatorView.h and add the following method declaration:
- (UIBezierPath *)curvePathWithOrigin:(CGPoint)origin;
This permits you to access curvePathWithOrigin:
from within your view controller and define the path around which you’ll flow your text. Aha — that’s why the calculation of the Bezier curve is broken out into its own method!
All that’s left is to define the exclusion path itself. Open up NoteEditorViewController.m and add the following code block to the very end of updateTimeIndicatorFrame:
UIBezierPath* exclusionPath = [_timeView curvePathWithOrigin:_timeView.center];
_textView.textContainer.exclusionPaths = @[exclusionPath];
The above code creates an exclusion path based on the Bezier path created in your time indicator view, but with an origin and coordinates that are relative to the text view.
Build and run your project and select an item from the list; the text now flows nicely around the time indicator view, as shown in the following screenshot:
This simple example only scratches the surface of the abilities of exclusion paths. You might have noticed that the exclusionPaths
property expects an instance of NSArray
; therefore each container can support more than one exclusion path.
Furthermore, exclusion paths can be as simple or as complicated as you want. Need to render text in the shape of a star or a butterfly? As long as you can define the path, exclusionPaths
will handle it without problem!
As the text container notifies the layout manager when an exclusion path is changed, dynamic or even animated exclusions paths are possible to implement — just don’t expect your user to appreciate the text moving around on the screen as they’re trying to read!
Dynamic text formatting and storage
You’ve seen that Text Kit can dynamically adjust fonts based on the user’s text size preferences. But wouldn’t it be cool if fonts could update dynamically based on the actual text itself?
For example, what if you want to make this app automatically:
- Make any text surrounded by the tilde character (~) a fancy font
- Make any text surrounded by the underscore character (_) italic
- Make any text surrounded by the dash character (-) crossed out
- Make any text in all caps colored red
That’s exactly what you’ll do in this section by leveraging the power of the Text Kit framework!
To do this, you’ll need to understand how the text storage system in Text Kit works. Here’s a diagram that shows the “Text Kit stack” used to store, render and display text:
Behind the scenes, Apple creates these classes for you automatically when you create a UITextView, UILabel or UITextField. In your apps, you can either use these default implementations or customize any part to get your own behavior. Let’s go over each class:
-
NSTextStorage
stores the text to be rendered as an attributed string and informs the layout manager of any changes to the text’s contents. You might want to subclassNSTextStorage
in order to dynamically change the text attributes as the text is updated (as you will see later in this chapter). -
NSLayoutManager
takes the stored text and renders it on the screen; it serves as the layout ‘engine’ in your app. -
NSTextContainer
describes the geometry of an area of the screen where text is rendered. Each text container is typically associated with aUITextView
. You might want to subclassNSTextContainer
to define a complex shape that you would like to render text within.
To implement the dynamic text formatting feature in this app, you’ll need to subclass NSTextStorage
in order to dynamically add text attributes as the user types in their text.
Once you’ve created your custom NSTextStorage, you’ll replace UITextView
’s default text storage instance with your own implementation. Let’s give this a shot!
Subclassing NSTextStorage
Right-click on the TextKitNotepad group in the project navigator, select New File…, and choose iOS\Cocoa Touch\Objective-C class. Name the class SyntaxHighlightTextStorage
, and make it a subclass of NSTextStorage
.
Open SyntaxHighlightTextStorage.m and add an instance variable and initializer as follows:
#import "SyntaxHighlightTextStorage.h"
@implementation SyntaxHighlightTextStorage
{
NSMutableAttributedString *_backingStore;
}
- (id)init
{
if (self = [super init]) {
_backingStore = [NSMutableAttributedString new];
}
return self;
}
@end
A text storage subclass must provide its own ‘persistence’ hence the use of a NSMutabeAttributedString ‘backing store’ (more on this later).
Next add the following methods to the same file:
- (NSString *)string
{
return [_backingStore string];
}
- (NSDictionary *)attributesAtIndex:(NSUInteger)location
effectiveRange:(NSRangePointer)range
{
return [_backingStore attributesAtIndex:location
effectiveRange:range];
}
The above two methods simply delegate directly to the backing store.
Finally add the remaining mandatory overrides to the same file:
- (void)replaceCharactersInRange:(NSRange)range withString:(NSString *)str
{
NSLog(@"replaceCharactersInRange:%@ withString:%@", NSStringFromRange(range), str);
[self beginEditing];
[_backingStore replaceCharactersInRange:range withString:str];
[self edited:NSTextStorageEditedCharacters | NSTextStorageEditedAttributes
range:range
changeInLength:str.length - range.length];
[self endEditing];
}
- (void)setAttributes:(NSDictionary *)attrs range:(NSRange)range
{
NSLog(@"setAttributes:%@ range:%@", attrs, NSStringFromRange(range));
[self beginEditing];
[_backingStore setAttributes:attrs range:range];
[self edited:NSTextStorageEditedAttributes range:range changeInLength:0];
[self endEditing];
}
Again, these methods delegate to the backing store. However, they also surround the edits with calls to beginEditing / edited / endEditing. This is required in order that the text storage class notifies its associated layout manager when edits are made.
You’ve probably noticed that you need to write quite a bit of code in order to subclass text storage. Since NSTextStorage
is a public interface of a class cluster (see the note below), you can’t just subclass it and override a few methods to extend its functionality. Instead, there are certain requirements that you must implement yourself, such as the backing store for the attributed string data.
Note: Class clusters are a commonly used design pattern throughout Apple’s frameworks.
A class cluster is simply the Objective-C implementation of the Abstract Factory pattern, which provides a common interface for creating families of related or dependent objects without specifying the concrete classes. Familiar classes such as NSArray
and NSNumber
are in fact the public interface to a cluster of classes.
Apple uses class clusters to encapsulate private concrete subclasses under a public abstract superclass, and it’s this abstract superclass that declares the methods a client must use in order to create instances of its private subclasses. Clients are also completely unaware of which private class is being dispensed by the factory, since it only ever interacts with the public interface.
Using a class cluster certainly simplifies the interface, making it much easier to learn and use the class, but it’s important to note there’s been a trade-off between extensibility and simplicity. It’s often far more difficult to create a custom subclass of the abstract superclass of a cluster.
Now that you have a custom NSTextStorage
, you need to make a UITextView
that uses it.
A UITextView with a custom Text Kit stack
Instantiating UITextView
from the storyboard editor automatically creates an instance of NSTextStorage
, NSLayoutManager
and NSTextContainer
(i.e. the Text Kit stack) and exposes all three as read-only properties.
There is no way to change these from the storyboard editor, but luckily you can if you create the UITextView and Text Kit stack programatically.
Let’s give this a shot. Open up Main.storyboard in Interface Builder and locate the NoteEditorViewController view. Delete the UITextView
instance.
Next, open NoteEditorViewController.m and remove the UITextView
outlet from the class extension.
At the top of NoteEditorViewController.m, import the text storage implementation as follows:
#import "SyntaxHighlightTextStorage.h"
Add the following code immediately after the TimeIndicatorView instance variable in NoteEditorViewController.m:
SyntaxHighlightTextStorage* _textStorage;
UITextView* _textView;
These are two instance variables for your text storage subclass, and a text view that you will create programmatically soon.
Next remove the following lines from viewDidLoad
in NoteEditorViewController.m:
self.textView.text = self.note.contents;
self.textView.delegate = self;
self.textView.font = [UIFont preferredFontForTextStyle:UIFontTextStyleBody];
Since you are no longer using the outlet for the text view and will be creating one manually instead, you no longer need these lines.
Still working in NoteEditorViewController.m, add the following method:
- (void)createTextView
{
// 1. Create the text storage that backs the editor
NSDictionary* attrs = @{NSFontAttributeName:
[UIFont preferredFontForTextStyle:UIFontTextStyleBody]};
NSAttributedString* attrString = [[NSAttributedString alloc]
initWithString:_note.contents
attributes:attrs];
_textStorage = [SyntaxHighlightTextStorage new];
[_textStorage appendAttributedString:attrString];
CGRect newTextViewRect = self.view.bounds;
// 2. Create the layout manager
NSLayoutManager *layoutManager = [[NSLayoutManager alloc] init];
// 3. Create a text container
CGSize containerSize = CGSizeMake(newTextViewRect.size.width, CGFLOAT_MAX);
NSTextContainer *container = [[NSTextContainer alloc] initWithSize:containerSize];
container.widthTracksTextView = YES;
[layoutManager addTextContainer:container];
[_textStorage addLayoutManager:layoutManager];
// 4. Create a UITextView
_textView = [[UITextView alloc] initWithFrame:newTextViewRect
textContainer:container];
_textView.delegate = self;
[self.view addSubview:_textView];
}
This is quite a lot of code. Let’s consider each step in turn:
- An instance of your custom text storage is instantiated and initialized with an attributed string holding the content of the note.
- A layout manager is created.
- A text container is created and associated with the layout manager. The layout manager is then associated with the text storage.
- Finally the actual text view is created with your custom text container, the delegate set and the text view added as a subview.
At this point the earlier diagram, and the relationship it shows between the four key classes (storage, layout manager, container and text view) should make more sense:
Note that the text container has a width matching the view width, but has infinite height — or as close as CGFLOAT_MAX
can come to infinity. In any case, this is more than enough to allow the UITextView
to scroll and accommodate long passages of text.
Within viewDidLoad
add the following line just after the call to viewDidLoad
on the superclass:
[self createTextView];
Next modify the first line of preferredContentSizeChanged
to read as follows:
_textView.font = [UIFont preferredFontForTextStyle:UIFontTextStyleBody];
Here you simply replace the old outlet property with the new instance variable.
One last thing, a custom view created in code doesn’t automatically inherit the layout constraints set in the storyboard; therefore, the frame of your new view won’t resize when the device orientation changes. You’ll need to explicitly set the frame yourself.
To do this, add the following line to the end of viewDidLayoutSubviews:
_textView.frame = self.view.bounds;
Build and run your app; open a note and edit the text while keeping an eye on the Xcode console. You should see a flurry of log messages created as you type, as below:
This is simply the logging code from within SyntaxHighlightTextStorage
to give you an indication that your custom text handling code is actually being called.
The basic foundation of your text parser seems fairly solid — now to add the dynamic formatting.
Dynamic formatting
In this next step you are going to modify your custom text storage to embolden text *surrounded by asterisks*.
Open SyntaxHighlightTextStorage.m and add the following method:
-(void)processEditing
{
[self performReplacementsForRange:[self editedRange]];
[super processEditing];
}
processEditing
sends notifications for when the text changes to the layout manager. It also serves as a convenient home for any post-editing logic.
Add the following method right after processEditing
:
- (void)performReplacementsForRange:(NSRange)changedRange
{
NSRange extendedRange = NSUnionRange(changedRange, [[_backingStore string]
lineRangeForRange:NSMakeRange(changedRange.location, 0)]);
extendedRange = NSUnionRange(changedRange, [[_backingStore string]
lineRangeForRange:NSMakeRange(NSMaxRange(changedRange), 0)]);
[self applyStylesToRange:extendedRange];
}
The code above expands the range that will be inspected to match our bold formatting pattern. This is required because changedRange
typically indicates a single character; lineRangeForRange
extends that range to the entire line of text.
Add the following method right after performReplacementsForRange
:
- (void)applyStylesToRange:(NSRange)searchRange
{
// 1. create some fonts
UIFontDescriptor* fontDescriptor = [UIFontDescriptor
preferredFontDescriptorWithTextStyle:UIFontTextStyleBody];
UIFontDescriptor* boldFontDescriptor = [fontDescriptor
fontDescriptorWithSymbolicTraits:UIFontDescriptorTraitBold];
UIFont* boldFont = [UIFont fontWithDescriptor:boldFontDescriptor size: 0.0];
UIFont* normalFont = [UIFont preferredFontForTextStyle:UIFontTextStyleBody];
// 2. match items surrounded by asterisks
NSString* regexStr = @"(\\*\\w+(\\s\\w+)*\\*)\\s";
NSRegularExpression* regex = [NSRegularExpression
regularExpressionWithPattern:regexStr
options:0
error:nil];
NSDictionary* boldAttributes = @{ NSFontAttributeName : boldFont };
NSDictionary* normalAttributes = @{ NSFontAttributeName : normalFont };
// 3. iterate over each match, making the text bold
[regex enumerateMatchesInString:[_backingStore string]
options:0
range:searchRange
usingBlock:^(NSTextCheckingResult *match,
NSMatchingFlags flags,
BOOL *stop){
NSRange matchRange = [match rangeAtIndex:1];
[self addAttributes:boldAttributes range:matchRange];
// 4. reset the style to the original
if (NSMaxRange(matchRange)+1 < self.length) {
[self addAttributes:normalAttributes
range:NSMakeRange(NSMaxRange(matchRange)+1, 1)];
}
}];
}
The above code performs the following actions:
- Creates a bold and a normal font for formatting the text using font descriptors. Font descriptors help you avoid the use of hardcoded font strings to set font types and styles.
- Creates a regular expression (or regex) that locates any text surrounded by asterisks; for example, in the string “iOS 7 is *awesome*”, the regular expression stored in
regExStr
above will match and return the text “*awesome*”. Don’t worry if you’re not totally familiar with regular expressions; they’re covered in a bit more detail later on in this chapter. - Enumerates the matches returned by the regular expression and applies the bold attribute to each one.
- Resets the text style of the character that follows the final asterisk in the matched string to “normal”. This ensures that any text added after the closing asterisk is not rendered in bold type.
Note: Font descriptors are a type of descriptor language that allows you to modify fonts by applying specific attributes, or to obtain details of font metrics, without the need to instantiate an instance of UIFont
.
Build and run your app; type some text into a note and surround one of the words with asterisks. The words will be automagically bolded, as shown in the screenshot below:
That’s pretty handy — you’re likely thinking of all the other styles that could be added to your text.
You’re in luck: the next section shows you how to do just that!
Adding further styles
The basic principle of applying styles to delimited text is rather straightforward: use a regex to find and replace the delimited string using applyStylesToRange to set the desired style of the text.
Add the following instance variable to SyntaxHighlightTextStorage.m:
- (void) createHighlightPatterns {
UIFontDescriptor *scriptFontDescriptor =
[UIFontDescriptor fontDescriptorWithFontAttributes:
@{UIFontDescriptorFamilyAttribute: @"Zapfino"}];
// 1. base our script font on the preferred body font size
UIFontDescriptor* bodyFontDescriptor = [UIFontDescriptor
preferredFontDescriptorWithTextStyle:UIFontTextStyleBody];
NSNumber* bodyFontSize = bodyFontDescriptor.
fontAttributes[UIFontDescriptorSizeAttribute];
UIFont* scriptFont = [UIFont
fontWithDescriptor:scriptFontDescriptor size:[bodyFontSize floatValue]];
// 2. create the attributes
NSDictionary* boldAttributes = [self
createAttributesForFontStyle:UIFontTextStyleBody
withTrait:UIFontDescriptorTraitBold];
NSDictionary* italicAttributes = [self
createAttributesForFontStyle:UIFontTextStyleBody
withTrait:UIFontDescriptorTraitItalic];
NSDictionary* strikeThroughAttributes = @{ NSStrikethroughStyleAttributeName : @1};
NSDictionary* scriptAttributes = @{ NSFontAttributeName : scriptFont};
NSDictionary* redTextAttributes =
@{ NSForegroundColorAttributeName : [UIColor redColor]};
// construct a dictionary of replacements based on regexes
_replacements = @{
@"(\\*\\w+(\\s\\w+)*\\*)\\s" : boldAttributes,
@"(_\\w+(\\s\\w+)*_)\\s" : italicAttributes,
@"([0-9]+\\.)\\s" : boldAttributes,
@"(-\\w+(\\s\\w+)*-)\\s" : strikeThroughAttributes,
@"(~\\w+(\\s\\w+)*~)\\s" : scriptAttributes,
@"\\s([A-Z]{2,})\\s" : redTextAttributes};
}
Here’s what’s going on in this method:
- Next, it constructs the attributes to apply to each matched style pattern. You’ll cover
createAttributesForFontStyle:withTrait:
in a moment; just park it for now. - Finally, it creates a dictionary that maps regular expressions to the attributes declared above.
It first creates a “script” style using Zapfino as the font. Font descriptors help determine the current preferred body font size, which ensures the script font also honors the users’ preferred text size setting.
If you’re not terribly familiar with regular expressions, the dictionary above might look a bit strange. But if you deconstruct the regular expressions that it contains, piece by piece, you can decode them without much effort.
Take the first regular expression you implemented above that matches words surrounded by asterisks:
(\\*\\w+(\\s\\w+)*\\*)\\s
The double slashes are a result of having to escape special characters in regular expressions in Objective-C with an extra backslash. If you cast out the escaping backslashes, and consider just the core regular expression, it looks like this:
(\*\w+(\s\w+)*\*)\s
Now, deconstruct the regular expression step by step:
- (\* - match an asterisk
- \w+ - followed by one or more “word” characters
- (\s\w+)* - followed by zero or more groups of spaces followed by “word” characters
- \*) - followed by an asterisk
- \s - terminated by a space.
Note: If you’d like to learn more about regular expressions above and beyond this chapter, check out this NSRegularExpression tutorial and cheat sheet.
As an exercise, decode the other regular expressions yourself, using the explanation above and the cheat sheet as a guide. How many can you do on your own?
Now you need to actually call createHighlightPatterns
from somewhere.
Update init in SyntaxHighlightTextStorage.m as follows:
- (id)init
{
if (self = [super init]) {
_backingStore = [NSMutableAttributedString new];
[self createHighlightPatterns];
}
return self;
}
Add the following method to SyntaxHighlightTextStorage.m:
- (NSDictionary*)createAttributesForFontStyle:(NSString*)style
withTrait:(uint32_t)trait {
UIFontDescriptor *fontDescriptor = [UIFontDescriptor
preferredFontDescriptorWithTextStyle:UIFontTextStyleBody];
UIFontDescriptor *descriptorWithTrait = [fontDescriptor
fontDescriptorWithSymbolicTraits:trait];
UIFont* font = [UIFont fontWithDescriptor:descriptorWithTrait size: 0.0];
return @{ NSFontAttributeName : font };
}
The above method applies the supplied font style to the body font. It provides a zero size to fontWithDescriptor:size:
which forces UIFont
to return a size that matches the user’s current font size preferences.
Next, replace the existing applyStylesToRange
method with the one below:
- (void)applyStylesToRange:(NSRange)searchRange
{
NSDictionary* normalAttrs = @{NSFontAttributeName:
[UIFont preferredFontForTextStyle:UIFontTextStyleBody]};
// iterate over each replacement
for (NSString* key in _replacements) {
NSRegularExpression *regex = [NSRegularExpression
regularExpressionWithPattern:key
options:0
error:nil];
NSDictionary* attributes = _replacements[key];
[regex enumerateMatchesInString:[_backingStore string]
options:0
range:searchRange
usingBlock:^(NSTextCheckingResult *match,
NSMatchingFlags flags,
BOOL *stop){
// apply the style
NSRange matchRange = [match rangeAtIndex:1];
[self addAttributes:attributes range:matchRange];
// reset the style to the original
if (NSMaxRange(matchRange)+1 < self.length) {
[self addAttributes:normalAttrs
range:NSMakeRange(NSMaxRange(matchRange)+1, 1)];
}
}];
}
}
This code does pretty much exactly what it did before, but this time it iterates over the dictionary of regex matches and attributes, and applies the specified style to the matched patterns.
Build and run your app, and exercise all of the new styles available to you, as illustrated below:
Your app is nearly complete; there’s just a few loose ends to clean up.
If you’ve changed the orientation of your screen while working on your app, you’ve already noticed that the app no longer responds to content size changed notifications since your custom implementation doesn’t yet support this action.
As for the second issue, if you add a lot of text to a note you’ll notice that the bottom of the text view is partially obscured by the keyboard; it’s a little hard to type things when you can’t see what you’re typing!
Time to fix up those two issues.
Reviving dynamic type
To correct the issue with dynamic type, your code should update the fonts used by the attributed string containing the text of the note when the content size change notification occurs.
Open up SyntaxHighlightTextStorage.h and add the following method declaration to the interface:
@interface SyntaxHighlightTextStorage : NSTextStorage
- (void)update;
@end
Next, add the following implementation to SyntaxHighlightTextStorage.m:
-(void)update {
// update the highlight patterns
[self createHighlightPatterns];
// change the 'global' font
NSDictionary* bodyFont = @{NSFontAttributeName :
[UIFont preferredFontForTextStyle:UIFontTextStyleBody]};
[self addAttributes:bodyFont
range:NSMakeRange(0, self.length)];
// re-apply the regex matches
[self applyStylesToRange:NSMakeRange(0, self.length)];
}
The method above updates all the fonts associated with the various regular expressions, applies the body text style to the entire string, and then re-applies the highlighting styles.
Finally, open NoteEditorViewController.m and update preferredContentSizeChanged:
to invoke update:
- (void)preferredContentSizeChanged:(NSNotification *)notification {
[_textStorage update];
[self updateTimeIndicatorFrame];
}
Build and run your app and change your text size preferences; the text should adjust accordingly as in the example below:
Resizing text views
All that’s left to do is solve the problem of the keyboard obscuring the bottom half of the text view when editing long notes. This is one issue that iOS 7 hasn’t solved for us yet!
To fix this, you’ll reduce the size of the text view frame when the keyboard is visible.
Add the following line to viewDidLoad
in NoteEditorViewController.m, right after the line that instantiates the text view:
_textView.scrollEnabled = YES;
This enables text view scrolling in your note editor view.
Now add the following code to the bottom of viewDidLoad
:
[[NSNotificationCenter defaultCenter]
addObserver:self
selector:@selector(keyboardDidShow:)
name:UIKeyboardDidShowNotification
object:nil];
[[NSNotificationCenter defaultCenter]
addObserver:self
selector:@selector(keyboardDidHide:)
name:UIKeyboardDidHideNotification
object:nil];
This notifies you when the keyboard is shown or hidden; this is your signal to resize your text view frame accordingly.
Next add the following instance variable:
CGSize _keyboardSize;
This variable stores the keyboard size, which you’ll use when calculating the dimensions of your resized text view.
Add the following methods to the bottom of the file:
- (void)keyboardDidShow:(NSNotification *)nsNotification {
NSDictionary *userInfo = [nsNotification userInfo];
_keyboardSize = [[userInfo
objectForKey:UIKeyboardFrameBeginUserInfoKey]
CGRectValue].size;
[self updateTextViewSize];
}
- (void)keyboardDidHide:(NSNotification *)nsNotification {
_keyboardSize = CGSizeMake(0.0, 0.0);
[self updateTextViewSize];
}
The above two methods set _keyboardSize
appropriately when the keyboard is shown or hidden.
Finally, add the following method to the bottom of the file:
- (void)updateTextViewSize {
UIInterfaceOrientation orientation =
[UIApplication sharedApplication].statusBarOrientation;
CGFloat keyboardHeight =
UIInterfaceOrientationIsLandscape(orientation) ?
_keyboardSize.width : _keyboardSize.height;
_textView.frame = CGRectMake(0, 0,
self.view.frame.size.width,
self.view.frame.size.height - keyboardHeight);
}
The above code reduces the height of the text view to accommodate the keyboard.
You need to account for the current screen orientation when calculating the new text view size; that’s because the width and height properties of UIView
instances are swapped when the screen orientation changes, but the keyboard’s width and height properties are not!
Build and run your app, edit a note and check that displaying the keyboard no longer obscures the text, as shown below:
Note: at the time of writing there is a subtle bug with iOS 7 – when the text view is resized, the cursor position may still be off screen. The cursor moves to its correct location if the user taps the ‘return’ key. We’ll keep an eye on this, and if the bug persists we’ll try to find an alternative solution.
Where To Go From Here?
This chapter will hopefully have helped you understand the various new text Kit features such as dynamic type, font descriptors and letterpress, that you will no-doubt find use for in practically ever app you write. However, Text Kit has so much more to offer!
If you'd like to learn more about Text Kit, check out our book iOS 7 By Tutorials. The book has another complete chapter on Text Kit that provides a much more in-depth look at the Text Kit architecture and will show you how to create high performance multi-column text layouts.
We hope you enjoyed this tutorial, and if you have any questions or comments please join the forum discussion below!