Firestore Tutorial for Flutter: Getting Started
In this tutorial, you’ll learn how to use Firebase Firestore databases in Flutter by creating a fun app that will help you take care of your pets. By Yogesh Choudhary.
Handling Firestore Build Error on Android Apps
Your app should build without any errors, as shown below. But, that may not always be the case with other projects.

Because of the large number of classes in Firestore SDK, during the build time you may get an error stating Error while merging dex archives: The number of method references in a .dex file cannot exceed 64K. If that happens, you can resolve this error by enabling multidex. To enable multiplex, follow either of the steps listed below:
-
Changing the
minSdkVersion: Open android/app/build.gradle and locate the line containingminSdkVersion. Change the version to21or higher. -
Enabling multidex explicitly for
minSDKVersion20 or lower: Open android/app/build.gradle. Underdependenciesadd the multidex moduleimplementation 'com.android.support:multidex:1.0.3'. Then enable the multidex support by addingmultiDexEnabled trueinsidedefaultConfig.
Either solution is acceptable, however, if you won’t be supporting Android versions lower than 21, then feel free to go with option 1.
That’s it. Now you’re finally ready to create your Firestore database!
Creating a Firestore Database
On the Firebase console, choose the Firestore Database option under the Build menu:

Then, click the Create database button and choose Start in test mode. This turns off any security so you can easily test your database:

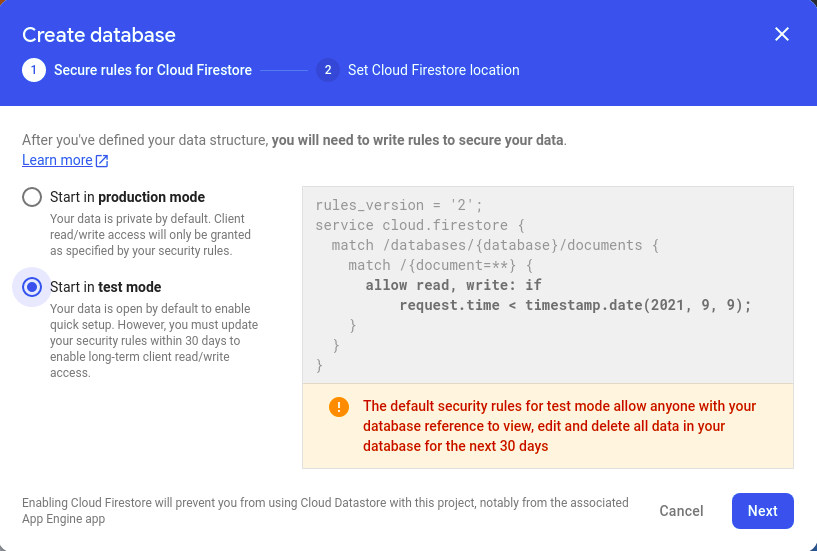
Then, click Next. Choose a Firestore location and click Enable:

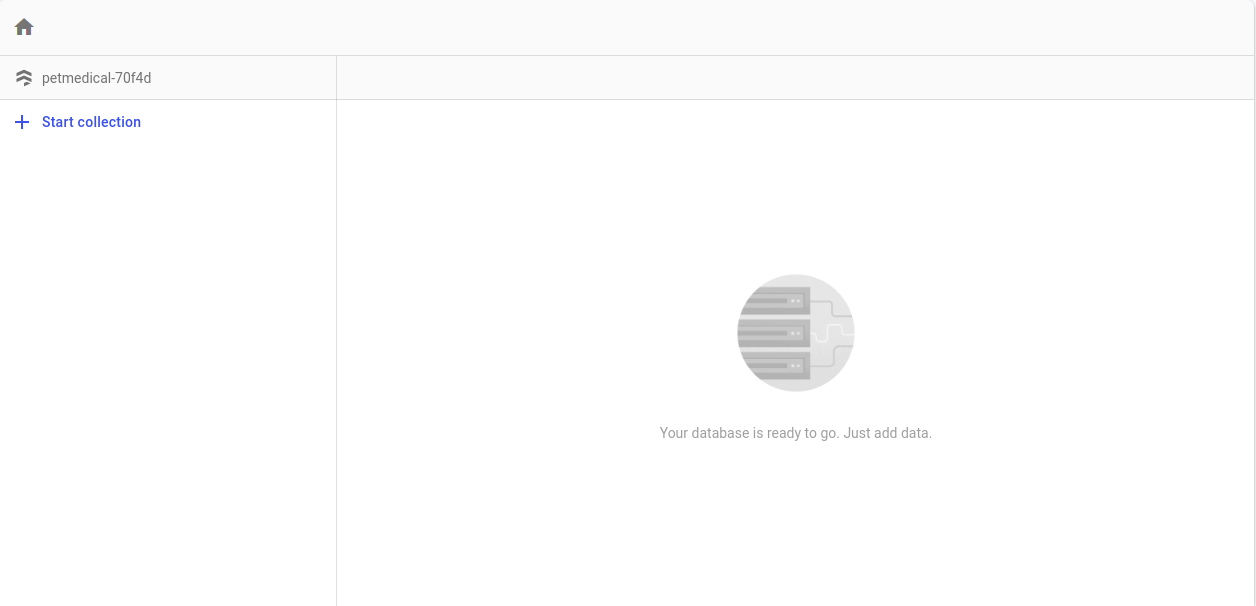
Nice! You created your first database.
Your screen won’t have any collections to start with:
Before creating the model class, it’s time to talk about collections.
Understanding Collections
Firestore stores data in collections, which are similar to tables in a traditional database. They have a name and a list of Documents.
These Documents usually have a unique generated key (also known as document id) in the database, and they store data in key/value pairs.
These fields can have several different types:
- String
- Number
- Boolean
- Map
- Array
- Null
- Timestamp
- Geopoint
You can use Firestore’s console to manually enter data and see the data appear almost immediately in your app. If you enter data in your app, you’ll see it appear on the web and other apps almost immediately.
Now that you know about collections, it’s time to create the models for your app.
Updating the Model Classes
To retrieve your data from Firestore, you need two model classes where you’ll put the data: vaccination and pets.
The class files are already created in the starter project. You can find these classes in the lib/models directory. You’ll update the vaccination model first with the fields required for saving the data
Updating the Vaccination Model
Open vaccination.dart in the model directory and replace the class with the following:
class Vaccination {
  // 1
  final String vaccination;
  final DateTime date;
  bool? done;
  // 2
  Vaccination(this.vaccination,
      {required this.date, this.done});
  // 3
  factory Vaccination.fromJson(Map<String, dynamic> json) =>
      _vaccinationFromJson(json);
  // 4
  Map<String, dynamic> toJson() => _vaccinationToJson(this);

  @override
  String toString() => 'Vaccination<$vaccination>';
}
Here’s what the code above does:
- Define your fields: Name of the vaccination, date it was given and whether this vaccination is finished.
- Constructor for the class with parameters, where the vaccination is required and the others are optional.
- A factory constructor to create a vaccination from JSON.
- Turn this vaccination into a map of key/value pairs.
Now, add the helper functions outside the class:
// 1
Vaccination _vaccinationFromJson(Map<String, dynamic> json) {
  return Vaccination(
    json['vaccination'] as String,
    date: (json['date'] as Timestamp).toDate(),
    done: json['done'] as bool,
  );
}
// 2
Map<String, dynamic> _vaccinationToJson(Vaccination instance) =>
    <String, dynamic>{
      'vaccination': instance.vaccination,
      'date': instance.date,
      'done': instance.done,
    };
Here’s what you see:
- _vaccinationFromJson turns a map of values from Firestore into a vaccination class.
- _vaccinationToJson converts the vaccination class into a map of key/value pairs.
You need to import the Firestore library by adding this code to the top:
import 'package:cloud_firestore/cloud_firestore.dart';
Next, you’ll update the pet model.
Updating the Pet Model
Now, open pets.dart in the model directory and replace the class with the following:
class Pet {
  // 1
  String name;
  String? notes;
  String type;
  // 2
  List<Vaccination> vaccinations;
  // 3
  String? referenceId;
  // 4
  Pet(this.name,
      {this.notes, required this.type, this.referenceId, required this.vaccinations});
  // 5
  factory Pet.fromSnapshot(DocumentSnapshot snapshot) {
    final newPet = Pet.fromJson(snapshot.data() as Map<String, dynamic>);
    newPet.reference = snapshot.reference.id;
    return newPet;
  }
  // 6
  factory Pet.fromJson(Map<String, dynamic> json) => _petFromJson(json);
  // 7
  Map<String, dynamic> toJson() => _petToJson(this);

  @override
  String toString() => 'Pet<$name>';
}
Here, you have:
- Define your fields: Name of the pet, notes and the type of pet.
- List of vaccinations for this pet.
- A reference id to a Firestore document representing this pet.
- Constructor for the class with parameters, where pet name, pet type, and vaccinations are required and the others are optional.
- A factory constructor to create a pet from a Firestore DocumentSnapshot. You want to save the reference id for updating the doc later.
- A factory constructor to create a Pet from JSON.
- Turn this pet into a map of key/value pairs.
Next, below the pet class, add the following code:
// 1
Pet _petFromJson(Map<String, dynamic> json) {
  return Pet(json['name'] as String,
      notes: json['notes'] as String?,
      type: json['type'] as String,
      vaccinations:
          _convertVaccinations(json['vaccinations'] as List<dynamic>));
}
// 2
List<Vaccination> _convertVaccinations(List<dynamic> vaccinationMap) {
  final vaccinations = <Vaccination>[];

  for (final vaccination in vaccinationMap) {
    vaccinations.add(Vaccination.fromJson(vaccination as Map<String, dynamic>));
  }
  return vaccinations;
}
// 3
Map<String, dynamic> _petToJson(Pet instance) => <String, dynamic>{
      'name': instance.name,
      'notes': instance.notes,
      'type': instance.type,
      'vaccinations': _vaccinationList(instance.vaccinations),
    };
// 4
List<Map<String, dynamic>>? _vaccinationList(List<Vaccination>? vaccinations) {
  if (vaccinations == null) {
    return null;
  }
  final vaccinationMap = <Map<String, dynamic>>[];
  vaccinations.forEach((vaccination) {
    vaccinationMap.add(vaccination.toJson());
  });
  return vaccinationMap;
}
Here’s what this code does:
- Add a function to convert a map of key/value pairs into a pet.
- Add another function to convert a list of maps into a list of vaccinations.
- Convert a pet into a map of key/value pairs.
- Convert a list of vaccinations into a list of mapped values.
Now that you’ve updated the classes to hold your data fetched from Firestore, you need to add a way to retrieve and save it.