How To Make a Game Like Space Invaders with Sprite Kit Tutorial: Part 1
Learn how to make a game like Space Invaders in this 2-part Sprite Kit tutorial! By .
Create Your Valiant Ship
With those evil invaders on screen, your mighty ship can't be far behind. Just as you did for the invaders, you first need to define a few constants.
Add the following code immediately below the #define kInvaderName line:
#define kShipSize CGSizeMake(30, 16)
#define kShipName @"ship"
kShipSize stores the size of the ship, and kShipName stores the name you will set on the sprite node, so you can easily look it up later.
Next, add the following two methods just after setupInvaders:
-(void)setupShip {
    //1
    SKNode* ship = [self makeShip];
    //2
    ship.position = CGPointMake(self.size.width / 2.0f, kShipSize.height/2.0f);
    [self addChild:ship];
}

-(SKNode*)makeShip {
    SKNode* ship = [SKSpriteNode spriteNodeWithColor:[SKColor greenColor] size:kShipSize];
    ship.name = kShipName;
    return ship;
}
Here's the interesting bits of logic in the two methods above:
- Create a ship using
makeShip. You can easily reusemakeShiplater if you need to create another ship (e.g. if the current ship gets destroyed by an invader and the player has "lives" left). - Place the ship on the screen. In Sprite Kit, the origin is at the lower left corner of the screen. The
anchorPointis based on a unit square with (0, 0) at the lower left of the sprite's area and (1, 1) at its top right. SinceSKSpriteNodehas a defaultanchorPointof (0.5, 0.5), i.e., its center, the ship's position is the position of its center. Positioning the ship atkShipSize.height/2.0fmeans that half of the ship's height will protrude below its position and half above. If you check the math, you'll see that the ship's bottom aligns exactly with the bottom of the scene.
To display your ship on the screen, add the following line to the end of createContent:
[self setupShip];
Build and run your app; and you should see your ship arrive on the scene, as below:
Fear not, citizens of Earth! Your trusty spaceship is here to save the day!
Adding the Heads Up Display (HUD)
It wouldn't be much fun to play Space Invaders if you didn't keep score, would it? You're going to add a heads-up display (or HUD) to your game. As a star pilot defending Earth, your performance is being monitored by your commanding officers. They're interested in both your "kills" (score) and "battle readiness" (health).
Add the following constants at the top of GameScene.m, just below #define kShipName:
#define kScoreHudName @"scoreHud"
#define kHealthHudName @"healthHud"
Now, add your HUD by inserting the following method right after makeShip:
-(void)setupHud {
    SKLabelNode* scoreLabel = [SKLabelNode labelNodeWithFontNamed:@"Courier"];
    //1
    scoreLabel.name = kScoreHudName;
    scoreLabel.fontSize = 15;
    //2
    scoreLabel.fontColor = [SKColor greenColor];
    scoreLabel.text = [NSString stringWithFormat:@"Score: %04u", 0];
    //3
    scoreLabel.position = CGPointMake(20 + scoreLabel.frame.size.width/2, self.size.height - (20 + scoreLabel.frame.size.height/2));
    [self addChild:scoreLabel];

    SKLabelNode* healthLabel = [SKLabelNode labelNodeWithFontNamed:@"Courier"];
    //4
    healthLabel.name = kHealthHudName;
    healthLabel.fontSize = 15;
    //5
    healthLabel.fontColor = [SKColor redColor];
    healthLabel.text = [NSString stringWithFormat:@"Health: %.1f%%", 100.0f];
    //6
    healthLabel.position = CGPointMake(self.size.width - healthLabel.frame.size.width/2 - 20, self.size.height - (20 + healthLabel.frame.size.height/2));
    [self addChild:healthLabel];
}
This is boilerplate code for creating and adding text labels to a scene. The relevant bits are as follows:
- Give the score label a name so you can find it later when you need to update the displayed score.
- Color the score label green.
- Position the score label near the top left corner of the screen.
- Give the health label a name so you can reference it later when you need to update the displayed health.
- Color the health label red; the red and green indicators are common colors for these indicators in games, and they're easy to differentiate in the middle of furious gameplay.
- Position the health label near the top right corner of the screen.
Add the following line to the end of createContent to call the setup method for your HUD:
[self setupHud];
Build and run your app; you should see the HUD in all of its red and green glory on your screen as shown below:

Invaders? Check. Ship? Check. HUD? Check. Now all you need is a little dynamic action to tie it all together!
Adding Motion to the Invaders
To render your game onto the screen, Sprite Kit uses a game loop which searches endlessly for state changes that require on-screen elements to be updated. The game loop does several things, but you'll be interested in the mechanisms that update your scene. You do this by overriding the update: method, which you'll find as a stub in your GameScene.m file.
When your game is running smoothly and renders 60 frames-per-second (iOS devices are hardware-locked to a max of 60 fps), update: will be called 60 times per second. This is where you modify the state of your scene, such as altering scores, removing dead invader sprites, or moving your ship around...
You'll use update: to make your invaders move across and down the screen. Each time Sprite Kit invokes update:, it's asking you "Did your scene change?", "Did your scene change?"... It's your job to answer that question — and you'll write some code to do just that.
Insert the following code at the top of GameScene.m, just below the definition of the InvaderType enum:
typedef enum InvaderMovementDirection {
    InvaderMovementDirectionRight,
    InvaderMovementDirectionLeft,
    InvaderMovementDirectionDownThenRight,
    InvaderMovementDirectionDownThenLeft,
    InvaderMovementDirectionNone
} InvaderMovementDirection;
Invaders move in a fixed pattern: right, right, down, left, left, down, right, right, ... so you'll use the InvaderMovementDirection type to track the invaders' progress through this pattern. For example, InvaderMovementDirectionRight means the invaders are in the right, right portion of their pattern.
Next, find the class extension in the same file and insert the following properties just below the existing property for contentCreated:
@property InvaderMovementDirection invaderMovementDirection;
@property NSTimeInterval timeOfLastMove;
@property NSTimeInterval timePerMove;
Add the following code to the very top of createContent:
//1
self.invaderMovementDirection = InvaderMovementDirectionRight;
//2
self.timePerMove = 1.0;
//3
self.timeOfLastMove = 0.0;
This one-time setup code initializes invader movement as follows:
- Invaders begin by moving to the right.
- Invaders take 1 second for each move. Each step left, right or down takes 1 second.
- Invaders haven't moved yet, so set the time to zero.
Now, you're ready to make the invaders move. Add the following code just below #pragma mark - Scene Update Helpers:
// This method will get invoked by update:
-(void)moveInvadersForUpdate:(NSTimeInterval)currentTime {
    //1
    if (currentTime - self.timeOfLastMove < self.timePerMove) return;

    //2
    [self enumerateChildNodesWithName:kInvaderName usingBlock:^(SKNode *node, BOOL *stop) {
        switch (self.invaderMovementDirection) {
            case InvaderMovementDirectionRight:
                node.position = CGPointMake(node.position.x + 10, node.position.y);
                break;
            case InvaderMovementDirectionLeft:
                node.position = CGPointMake(node.position.x - 10, node.position.y);
                break;
            case InvaderMovementDirectionDownThenLeft:
            case InvaderMovementDirectionDownThenRight:
                node.position = CGPointMake(node.position.x, node.position.y - 10);
                break;
            InvaderMovementDirectionNone:
            default:
                break;
        }
    }];

    //3
    self.timeOfLastMove = currentTime;
}
Here's a breakdown of the code above, comment by comment:
- If it's not yet time to move, then exit the method.
moveInvadersForUpdate:is invoked 60 times per second, but you don't want the invaders to move that often since the movement would be too fast for a normal person to see. - Recall that your scene holds all of the invaders as child nodes; you added them to the scene using
addChild:insetupInvadersidentifying each invader by its name property. InvokingenumerateChildNodesWithName:usingBlock:only loops over the invaders because they're namedkInvaderName; this makes the loop skip your ship and the HUD. The guts of the block moves the invaders 10 pixels either right, left or down depending on the value ofinvaderMovementDirection. - Record that you just moved the invaders, so that the next time this method is invoked (1/60th of a second from now), the invaders won't move again till the set time period of one second has elapsed.
To make your invaders move, replace the existing update: method with the following:
-(void)update:(NSTimeInterval)currentTime {
    [self moveInvadersForUpdate:currentTime];
}
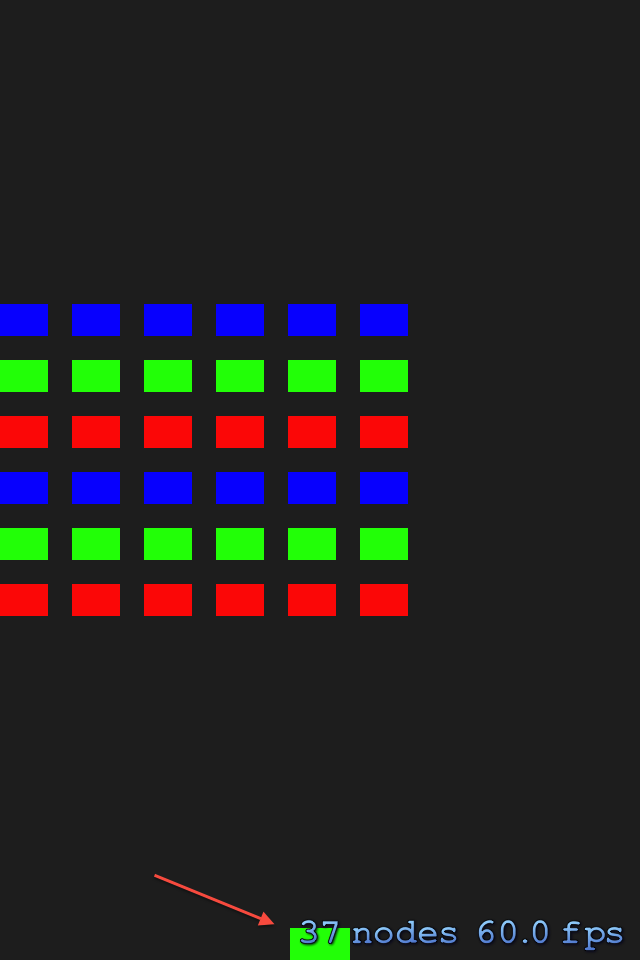
Build and run your app; you should see your invaders slowly walk their way across the screen. Keep watching, and you'll eventually see the following screen:

Hmmm, what happened? Why did the invaders disappear? Maybe the invaders aren't as menacing as you thought!
The invaders don't yet know that they need to move down and change their direction once they hit the side of the playing field. Guess you'll need to help those invaders find their way!