Raspberry Pi Airplay Tutorial
A tutorial that guides you through setting up a Raspberry Pi AirPlay receiver. It then shows you how to use a Raspberry Pi as a web server. By .
Daemonizing Shairport
That sounds evil, doesn’t it? Actually, it’s quite the opposite – daemonizing will make your life much simpler.
So what is it? Daemons are tasks on Unix and Linux systems that run in the background and typically begin at system startup. It’s the perfect solution to your problem. You can create a daemonize the executable you just ran above so that it runs in the background and is started right at startup; that way you never have to worry about starting it up yourself.
SSH into the Raspberry Pi (if you aren’t still) and enter following commands to copy and configure the necessary files:
cd shairport
sudo make install
sudo cp shairport.init.sample /etc/init.d/shairport
This copies a sample init file to the daemon directory, the daemon directory was create by the ‘make install’ command.
Now enter these commands, one line at a time:
cd /etc/init.d
sudo chmod a+x shairport
sudo update-rc.d shairport defaults
Here you move to the daemon directory, change the permissions and then “install” the Shairport init file with the default options.
Now enter the following commands, one line at a time:
sudo vi shairport
DAEMON_ARGS="-w $PIDFILE -a RayPi"
You can use nano or any other text editor here if you’re more comfortable with that, but what you are doing is going into the Shairport config file and adding the -a RayPi part to the DAEMON_ARGS option. Just as when you trigger the script manually, you are modifying this to set the default name of the AirPlay receiver.

If you are using the vi text editor, hit escape, then type :wq and hit enter to save the changes. Now whenever you startup the Raspberry Pi, it will start the Shairport executable.
Setting Up A Web Server
Now that you have a functioning AirPlay receiver that you built yourself, let’s take a look at what the Raspberry Pi can do for an iOS developer by using it to set up web services to read and write chat messages between the Raspberry Pi and an iOS app. Most all mobile apps need some sort of backend database and web services to store user data. The Raspberry Pi is a great way to host these services for a small project or during the development of a project.
To summarize what you will be doing:
- Installing Apache – the web server used to serve the web services
- Installing MySQL – the database used to hold the data
- Installing PHP – the scripting language
- Creating a MySQL database and table – you will create the structures to hold the data
- Copying a set of web services – you’ll copy a set of services that I provide to read and write data to the MySQL database
- Testing those services
- Accessing the services from a demo iOS app
Calling in the Apache

No, not that Apache. You want the web server:

Apache is the name of the software you are going to use to serve pages and create web services. This web server software handles incoming requests and returns data, whether a simple HTML file or binary data. Later, you’ll install PHP and then Apache will know to accept incoming PHP requests and return the data the PHP module has processed.
Run the following command to download and install Apache:
sudo apt-get install apache2
When prompted, enter Y to continue.

With Apache now installed and running, you can examine the default page that the server will load. Run the following commands:
cd /var/www
vi index.html
You’ll see that the default page is just a plain HTML file.

Hit escape and type :q! to close and exit. On your computer, you should be able to go to http://your-ip-address (mine is http://10.0.1.18) and see a webpage now.

Installing MySQL
MySQL is the de facto standard when it comes to databases. A database is a way of storing data and retrieving it in a structured way. You’re going to use one to store the chat messages. Run the following command to download and install MySQL:
sudo apt-get install mysql-server
When prompted, enter Y to continue.

This install is a bit different. Part way through it, you will be asked for a root password.

You are being asked for the password for the root MySQL account, which is different from the one for the root account of the Raspberry Pi itself. Enter whatever you want here, but just make a note of it. After you’ve chosen the root password, the install should finish.
Installing PHP
PHP is the scripting language that you are going to use to write the web service. Enter the following command to download and install PHP:
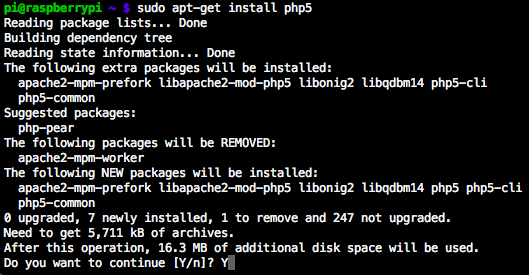
sudo apt-get install php5
When prompted, enter Y to continue:
Now with PHP installed, you also need a library to access MySQL from PHP code. This command should do the trick:
sudo apt-get install php5-mysql
Setting Up the Database
With everything installed, it remains for you to set up the database and a table within the database to store the information. This is the database and table that will hold the message information. Each row in the table will be a chat message that was sent to the service with the name of the user, the message, and a unique row id. Run the following command to start up MySQL and login as root:
mysql --user=root --pass=YOUR-MYSQL-ROOT-PASSWORD
Remember to enter the password you set when you were installing MySQL.
Logged into MySQL.

To create a database, enter this command:
CREATE DATABASE `rw`;
Note that the quotes are backquotes (to the left of the 1 key) and don’t forget the semicolon at the end.
Creating the database
Now you need to tell MySQL that you want to target that database with the commands you’re going to run. Enter this command:
USE `rw`;
MySQL will let you know it has changed the database.
![]()
Now that you’ve created a database and set it as the active database, you need to create a table to actually store the information. This is going to be a chat app, so you want the table to contain columns for the name of the person who sent the message and the message itself. You’ll also need a column called id that is simply an integer that increments each time a new row in created/inserted. This ensures you have something unique by which to identify each row.
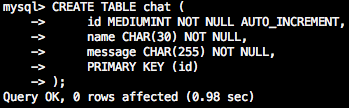
Copy and paste the following create statement to create the table:
CREATE TABLE chat ( id MEDIUMINT NOT NULL AUTO_INCREMENT, name CHAR(30) NOT NULL, message CHAR(255) NOT NULL, PRIMARY KEY (id));
That wasn’t so bad, right? Let’s examine exactly what’s happening in the above statement:
CREATE TABLE chat
This is simply saying, “create a table named chat in the current database (‘rw’ in your case)”.
id MEDIUMINT NOT NULL AUTO_INCREMENT
This creates a column named id that is a MEDIUMINT type. This column cannot be null and will automatically increase, meaning it will increment each time a new record is added.
name CHAR(30) NOT NULL
This creates the name column. It can have 30 characters and also cannot be null.
message CHAR(255) NOT NULL
This creates the message column. It can have 255 characters and also cannot be null.
PRIMARY KEY (id)
This tells the table that the id column is a key column meaning it is a important column for searching and therefore will be indexed for faster retrieval.
Your database is all set up!

Let’s give it a test. Insert a row into the table with this command:
INSERT INTO chat(name, message) VALUES ("name","message");
Then show the whole table with this command:
SELECT * from chat;
Try it out a few times to get a feel for it. Notice how you don’t have to specifically set the ‘id’ column because it automatically gets set to the next number each time you add a row.
