Spinner and Progress Bar in Swift: Getting Started
Learn how to implement a spinner indicator and progress bar in both UIKit and SwiftUI. By Adam Rush.
Understanding UIProgressView
When you know how long a particular task will take, you use UIProgressView instead of UIActivityIndicatorView. Some examples of when to use UIProgressView include:
- Loading an image from a cache or bundle
- Loading dependencies within the app
To try this out, you’ll display a UIProgressView while loading the second TabBar item: a picture of a Red Delight dahlia.
But first, you need to create a container view, just like you did for UIActivityIndicator, to make the progress bar easily visible to the user.
Creating a Container View for UIProgressView
Creating a container view to hold your progress view lets you choose your progress view’s background color to make it more visible.
To create a container view, open SecondViewController.swift.
Currently, this view controller is making a network request to the raywenderlich.com image directory and displaying the fetched image in an UIImageView. You’ll expand it by adding a progress bar.
Open Main.storyboard, find the Red Delight Scene and select the LoadingView in its view hierarchy. Open another editor for the matching SecondViewController.swift. Directly below imageView, add the following code:
@IBOutlet weak var loadingView: UIView! {
  didSet {
    loadingView.layer.cornerRadius = 6
  }
}
Drag the outlet to the Main.storyboard loading view. To style loadingView, make the background color a matching gray. Select the LoadingView in the storyboard, and open the Attributes inspector.
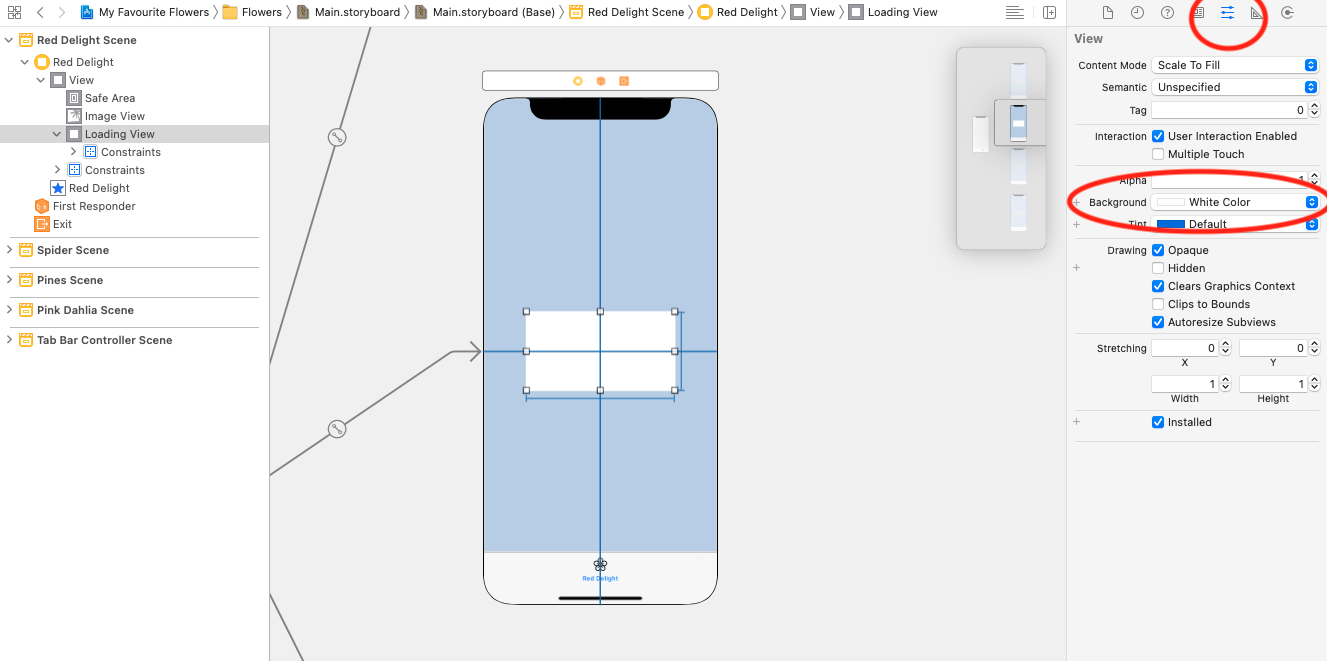
For the background Background, select System Gray 4 Color.

With this container view, you’ve ensured that the indicator will be easy to see. Not only is that best practice, but it’s also a way for you to play with the styling of your app. :]
Next, you’ll add the progress bar.
Adding UIProgressView
To create your progress bar, you need to add a UIProgressView. Still in the storyboard, drag a new Progress View from the Library inside the Loading View.
Open the Align panel and align the Progress View vertically and horizontally.
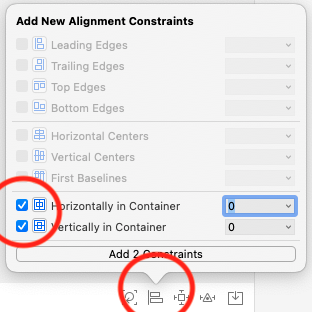
Open the Add New Constraints panel and set the Width to 150 and the Height to 4 points.
In this tutorial, you’re utilizing the power of Interface Builder to remove lots of boilerplate code within your class. Of course, you can create these views programmatically, but this approach lets you see your work while you’re doing it.
Open a new editor and open SecondViewController.swift alongside Main.storyboard.
Directly below the loadingView outlet, add the following code:
@IBOutlet weak var progressView: UIProgressView!
Drag the outlet connection to your ProgressView within Main.storyboard.
Build and run. Tap the Red Delight tab bar item.

Now, your Loading View has a progress view inside. But have you noticed the progress view doesn’t change? That’s because you haven’t linked the progress view to any updates or changes from the network request yet. You’ll do that next.
Linking UIProgressView to the Download Process
Open SecondViewController.swift.
You’ll take advantage of the progress updates that URLSession provides.
Directly below the progressView IBOutlet, add the following code:
private var observation: NSKeyValueObservation?
Here, you’ve created a new property that is an NSKeyValueObservation object. This object can observe key-value changes and acts like NSNotifications. When Apple fires a change, you can observe it. In this case, you’ll observe the progress updates from the URLSession network call.
Directly below the new property you added above, add the following code:
deinit {
  observation?.invalidate()
}
This invalidates the observation when the class is uninitialized, preventing memory leaks and holding onto this object in the app’s lifecycle.
You have one more piece of the puzzle to finish: monitoring the changes of the network request.
Directly above task.resume(), add the following code:
observation = task.progress.observe(\.fractionCompleted) { progress, _ in
  DispatchQueue.main.async {
    self.progressView.progress = Float(progress.completedUnitCount)
  }
}
This does two things:
- Creates a new observation object on
task.progress, which is the object that Apple exposes in theURLSessionrequest. - Adds a callback to be called whenever the progress changes which sets the progress view’s progress to the same value as the download’s progress.
Now, build and run the project.
You’ll now see that your progress view updates based on the network request changes and the image download.
But have you spotted the problem? You’re still displaying loadingView after the download finishes.

To close loadingView, go to the network request and directly below self.imageView.image = UIImage(data: data), add the following code.
self.loadingView.isHidden = true
This will hide the loading view as soon as an image is set.
Build and run the project and head to the Red Delight tab.

Congratulations, you’ve just added your first determinate progress view using UIKit!
The Advantages of Using UIProgressView and UIActivityIndicatorView
The advantage of using progress indicators like a spinner or progress bar is that your app is giving the users what they want: an update about what’s going on!
Since Apple has done most of the logic work for you, adding a progress view or activity indicator view is a small effort on your part that pays enormous dividends for your user’s experience.
This is especially true with Apple’s new SwiftUI framework. You’ll explore adding ProgressView using SwiftUI next and see the differences between UIKit and SwiftUI.

Creating a ProgressView With CircularProgressViewStyle in SwiftUI
SwiftUI uses a declarative syntax to build your UI. Unlike the work you did above in UIKit, SwiftUI’s ProgressView covers both determinate and indeterminate loading.
First, you need to create a whole new SwiftUI view.
Open the SwiftUI group, then the Views group within it. Right-click the group and select New File…. Click SwiftUI View, then click Next.

Name this file RWProgressView and click Create.
You’ve created a brand new SwiftUI view. Replace the pre-made contents of the body with the following code:
ProgressView()
SwiftUI includes a ProgressView that you can use and style to your liking.
The final step is to add some styling, just like you did earlier. Add the following code directly below the progress view:
.progressViewStyle(CircularProgressViewStyle(tint: .black))
.background(Color(UIColor.systemGray4))
With this, you’ve created a circular indicator that’s black. You also made the background color the same as before to keep the color scheme consistent across the app. Check the preview of this SwiftUI view to see that you’ve applied the styles correctly.
Build and run.

Tap the third TabBar item named Pines. You’ve created the progress view in your SwiftUI view, but it’s not currently displaying in your app. You’ll fix this by adding your SwiftUI view to the view controller.