iOS UI Testing with KIF
Testing UI in iOS apps is an important topic, especially as apps become more complex. Learn how to do iOS UI testing with KIF in this tutorial. By Greg Heo.
Ending Early
The "Get to Work!" modal view controller has a Give Up button that lets the user cancel the timer cycle. You'll still be able to measure the number of minutes worked, even if you pull the plug on the test early. This data still gets logged in the history, but marked with a flag to indicate the full cycle didn't finish.
But you don't have to take my word for it, you can test it for yourself. Just do something very similar to the previous test. Set the timer parameters, tap the Start Working button, and then tap the Give Up button.
Don't tap "Give Up" right away – the timer needs to tick for a bit so the app can create the history. So you can either hover over the test and kill it manually, or, you can program it to stop at a time and place of your choosing. If you enjoy hovering, feel free to skip this challenge. However, if you like to program apps to do the dirty work for you, try it out! Do you know how would add a little delay in between "Start Working" and "Give Up"?
[spoiler title="Adding a little delay"]
You can call your friend waitForTimeInterval: to add a delay in your test.
[/spoiler]
Add the following test method to UITests.m directly below your other tests:
- (void)test30StartTimerAndGiveUp {
  [tester tapViewWithAccessibilityLabel:@"Timer"];

  [tester clearTextFromAndThenEnterText:@"Give Up"
         intoViewWithAccessibilityLabel:@"Task Name"];
  [tester tapViewWithAccessibilityLabel:@"done"];
  [self selectPresetAtIndex:2];

  [tester tapViewWithAccessibilityLabel:@"Start Working"];
  [tester waitForTimeInterval:3];

  [tester tapViewWithAccessibilityLabel:@"Give Up"];
  [[tester usingTimeout:1] waitForViewWithAccessibilityLabel:@"Start Working"];
}
After making sure you're on the right tab, set the task name and select a preset. Then, start the timer and wait 3 seconds before giving up.
The final line of the method waits for the modal view controller to go away and for the main interface to return. Remember, the default timeout is 10 seconds, but it really shouldn't take that long – tapping the "Give Up" button should dismiss the modal view controller immediately.
In the previous test, you used the class method setDefaultTimeout: to set the timeout value globally for all test actions. Here, you're calling usingTimeout: to set a custom timeout for just this single step.
Save the file and click on the test's diamond icon to run only this test. When the timer starts, you'll see it tick for three seconds before it gives up and returns to the main screen.

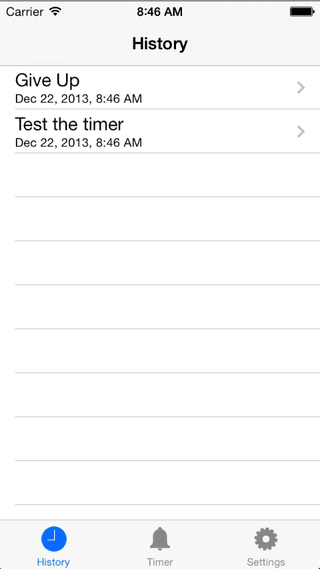
History and Swiping
The History tab has not received much attention yet, but its time in the limelight is now. If you've worked through the exercises, you should have at least one entry in the history. Build and run the app, and switch to the History tab.

The History table view implements the new iOS 7 delete gesture -- the one where you swipe the row to the left, and then tap on the "Delete" button that appears. There's your next test! This requires at least one item in the History, so you need to be careful about running this one test individually. You need to ensure there is something in the history, otherwise there would be nothing to test! To be safe, you'll run the entire test suite, since the earlier tests will create some history items for you to play around with. Remember the tests will run in alphabetical order. So you can be assured that the previous tests will create something to test the history screen with.
If you take a peek at tableView:cellForRowAtIndexPath: in HistoryViewController.m, you'll see that each cell gets an accessibility label such as "Section 0 Row 3". This just helps KIF find the row. It is a poor label for real-world accessibility, so don't use this in a real app. In this sample project, this has been #ifdef'd to debug builds only. You should do similar if you use this technique in your own apps. Be sure in release builds to set the accessibility label to something useful for users of accessibility features.
Now, open UITests.m and add the following test method:
- (void)test40SwipeToDeleteHistoryItem
{
  // 1
  [tester tapViewWithAccessibilityLabel:@"History"];

  // 2
  UITableView *tableView = (UITableView *)[tester waitForViewWithAccessibilityLabel:@"History List"];
  NSInteger originalHistoryCount = [tableView numberOfRowsInSection:0];
  STAssertTrue(originalHistoryCount > 0, @"There should be at least 1 history item!");

  // 3
  [tester swipeViewWithAccessibilityLabel:@"Section 0 Row 0" inDirection:KIFSwipeDirectionLeft];
  [tester tapViewWithAccessibilityLabel:@"Delete"];

  // 4
  [tester waitForTimeInterval:1];
  NSInteger currentHistoryCount = [tableView numberOfRowsInSection:0];
  STAssertTrue(currentHistoryCount == originalHistoryCount - 1,
    @"The history item was not deleted :[");
}
Here's what's going on in the above method:
- Switch to the History tab.
- Get a reference to the table view and keep track of how many rows are present. The test will fail if there isn't at least one row.
- Swipe the table view cell to the left. When the Delete button appears, tap it.
- The table view performs an animation when it deletes a cell, so add a short delay before continuing. Check the number of rows in the table view again; there should be one less row than before.
Run the entire test suite using Command-U to see everything run in sequence.
Swipe to delete
Your tests now cover the basic flow of the app – from resetting data to running the timer a few times, to verifying and deleting history.
If you were to continue developing the app, these tests would be a good baseline to ensure there are no regressions in the interface. That means you also need to update the tests every time the interface changes – tests are like specifications for your app and they need to stay up-to-date to be useful.
Where To Go From Here?
By now, you should have a good sense of the possibilities of KIF and your mind should be racing with ideas about how to utilize this highly functional testing for your own apps. To get started with adding KIF to your project, check out the documentation. You can add KIF manually or use the very convenient CocoaPods dependency manager.
What's cool about KIF is that it is an open-source project and new features are constantly in development. For example, at the time of writing this tutorial, the next release will likely include a feature to take a screenshot of your app programmatically and save it to disk. This means you should be able to run the tests and review key points in the process by reviewing screenshots at your leisure. Doesn't that sound a million times better than hovering and watching KIF tap and swipe its way through your app? KIF just keeps getting better and better, so learning how to use it is a wise investment in yourself.
Finally, since KIF test cases are subclasses of OCUnit and run within the standard Xcode 5 test framework, you can run the tests through your continuous integration process. Then you can truly have bots with quasi-touch fingers testing your app while you do other things! Woo-hoo!
You can download the final project archive here. If you have any questions or comments, please join the forum discussion below. Happy testing!