Database Migrations With Vapor
In this Server-Side Swift tutorial, learn how to perform database migrations with Vapor on your application database – a useful tool for tasks such as creating tables, seeding data, and adding columns. By Heidi Hermann.
Implementing FieldKeys
As you've seen, the names of fields are defined using strings. This offers a lot of flexibility when changing your tables, but it also introduces a lot of duplicate strings in your app. And, with duplicate strings come a lot of opportunities for you to make avoidable mistakes.
Vapor 4's FieldKey type can be used to work around this. It allows you to define each key only once and reuse it throughout the project, benefitting from Swift's type safety.
Rewriting Your First Migration Using FieldKeys
First, add a new file, FieldKeys.swift, inside the /Configurations folder.
Now, paste the following:
// 1
import FluentKit

// 2
extension FieldKey {
  // 3
  static let createdAt: FieldKey = "created_at"
  static let name: FieldKey = "name"
  static let updatedAt: FieldKey = "updated_at"
}
Here, you:
- Import FluentKit.
- Extend Vapor's
FieldKey. - Add a new static
FieldKeyper unique key you'll have in your database (across all your tables).
Next, open Tool.swift, scroll to the bottom of the file and paste the following extension:
// 1
extension Tool {
  enum Create_20210531 {
    // 2
    static let schema = "tools"
    // 3
    static let name: FieldKey = .name
    static let createdAt: FieldKey = .createdAt
    static let updatedAt: FieldKey = .updatedAt
  }
}
Here, you:
- Extend
Toolwith Create_20210531. It holds all the keys you need to create your table. Note the wrapper includes the date of the migration. - Add a static variable for the schema name,
tools. - Add a
FieldKeyper field, each matching theFieldKeys you added in FieldKey.swift.
Next, you'll replace your keys.
Replacing Stringly Typed Keys with FieldKeys in Tool and Its Migration
Go through your model and replace all the keys so they refer to the new FieldKeys constants.
Start by finding the following:
static let schema = "tools"
Replace it with this:
static let schema = Create_20210531.schema
Then, replace the properties and property wrappers for name, createdAt and updatedAt with the following:
@Field(key: Create_20210531.name)
var name: String

@Timestamp(key: Create_20210531.createdAt, on: .create)
var createdAt: Date?

@Timestamp(key: Create_20210531.updatedAt, on: .update)
var updatedAt: Date?
Finally, open 21-05-31_Tool+Create.swift and replace the inside of func prepare(on:) -> EventLoopFuture with this:
return database
  .schema(Tool.schema)
  .id()
  .field(Tool.Create_20210531.name, .string, .required)
  .field(Tool.Create_20210531.createdAt, .datetime)
  .field(Tool.Create_20210531.updatedAt, .datetime)
  .create()
}
This replaces the strings with the FieldKey and schemaName you defined earlier. Now, you have no more duplicate strings in your migration or model, giving you more type safety and making it simpler to change or update fields!
Reverting Your Migration
Next, open then scheme builder in Xcode and add a new argument, migrate --revert. Make sure that only the checkbox for the new argument is enabled.
Buidl and run. Again, you'll see a dialog in the output window letting you know which migrations will be reverted and then prompting you to say yes, y, or no, n.
Dialog and prompt to revert migrations in Xcode.

Dialog and prompt to revert migrations in Xcode.
And, if you open Postico, you'll see that the tools table is gone and _fluent_migrations is empty.
Postico view of the migrations table, which is now empty.
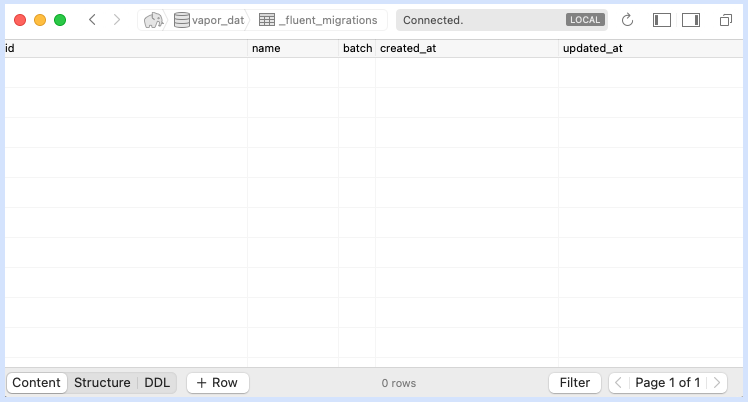
Postico view of the migrations table, which is now empty.
Next, you'll rerun a migration.
Rerunning Your First Migration
Open Xcode again, and in the build scheme, replace the command argument with migrate -y.
Then, build and run again. Like before, you'll see the dialog in the output window, but this time, the response to the prompt is inferred from the command.
If you open Postico, you'll see that the tools table is back.
View of the database after the first migration. Both the tool table and fluent_migrations table are there.

View of the database after the first migration. Both the tool table and fluent_migrations table are there.
Moving on, it's time to add a few things.
Adding a Maker to Your Tools
It's quite common for people to own more than one of the same tool, but from different brands. In our database, it'd be useful to keep track of the maker of a given tool, because to some people it matters when they ask to borrow (and rarely return) it.
First, go to FieldKey.swift and paste the new FieldKey:
static let maker: FieldKey = "maker"
Next, open Tool.swift and paste the following code at the bottom of the file:
extension Tool {
    enum AddMaker_20210601 {
      static let maker: FieldKey = .maker
    }
}
Then, inside your, model add the new field:
@OptionalField(key: AddMaker_20210601.maker)
var maker: String?
Not every tool will have a known maker, so the field is a String? that requires the OptionalField Property Wrapper.
Now, replace Tool with:
init(id: UUID? = nil, name: String, maker: String?) {
  self.id = id
  self.name = name
  self.maker = maker
}
Great! You've added a maker.
Adding a New Migration
Next, create a new file for the update migration named 21-06-01_Tool+AddMaker.swift.
Inside the file, paste the following:
import FluentKit

extension Tool {
  // 1
  struct AddMaker: Migration {
    func prepare(on database: Database) -> EventLoopFuture<Void> {
      database
        .schema(Tool.schema)
        // 2
        .field(Tool.AddMaker_20210601.maker, .string)
        // 3
        .update()
    }

    func revert(on database: Database) -> EventLoopFuture<Void> {
      database
        .schema(Tool.schema)
        // 4
        .deleteField(Tool.AddMaker_20210601.maker)
        .update()
    }
  }
}
Here, you:
- Create a new migration to add the maker to the database table
- Add the maker field to the database. This time the
.requiredconstraint is omitted, since the field can benil. - Call the
.update()method. - Delete the maker field on revert.
Finally, register the migration in your configure.swift by pasting the following line directly under the create migration:
app.migrations.add(Tool.AddMaker())
With that added, it's time for the next step.
Running Your Migration
Now, build and run with migrate y enabled.
Output window after running the add maker migration.

Output window after running the add maker migration.
Again, the dialog is letting you know which migrations are being run. Notice that the yes / no prompt is answered automatically.
Now, open Postico. The database looks like it did before, with two tables, _fluent_migrations and tools.
This is expected, since you didn't create a new table, but rather updated the existing one.
Now, open _fluent_migrations:
Migrations tables after running the AddMaker.

Migrations tables after running the AddMaker.
Here, you can see there's a second row along with your second migration. Also note that the batch number is 2.