OpenGL ES Pixel Shaders Tutorial
In this OpenGL ES pixel shaders tutorial, take a deep dive into GLSL and fragment shader math – including how to make gradients and random noise! By Ricardo Rendon Cepeda.
In this pixel shaders tutorial, you’ll learn how to turn your iPhone into a full-screen GPU canvas.
What this means is that you’ll make a low-level, graphics-intensive app that will paint every pixel on your screen individually by combining interesting math equations.
But why? Well, besides being the absolute coolest things in computer graphics, pixel shaders can be very useful in:
- Generating complex procedural backgrounds
- Chroma keying live video
- Making beautiful music visualizations
Note: The demos linked above use WebGL, which is only fully supported on Chrome and Opera, at least at the time of writing this tutorial. These demos are also pretty intense – so try to have them not running on multiple tabs simultaneously.
Note: The demos linked above use WebGL, which is only fully supported on Chrome and Opera, at least at the time of writing this tutorial. These demos are also pretty intense – so try to have them not running on multiple tabs simultaneously.
The shaders you’ll write are not as complex as the ones above, but you’ll get a lot more out of these exercises if you’re familiar with OpenGL ES. If you’re new to the API, then please check out some of our written or video tutorials on the subject first :]
Without further ado, it is my pleasure to get you started with pixel shaders in iOS!
Note: The term “graphics-intensive” is no joke in this tutorial. This app will safely push your iPhone’s GPU to its limit, so use an iPhone 5 or newer version. If you don’t have an iPhone 5 or later, the iOS simulator will work just fine.
Note: The term “graphics-intensive” is no joke in this tutorial. This app will safely push your iPhone’s GPU to its limit, so use an iPhone 5 or newer version. If you don’t have an iPhone 5 or later, the iOS simulator will work just fine.
Getting Started
First, download the starter pack for this tutorial. Have a look at RWTViewController.m to see the very light GLKViewController implementation, and then build and run. You should see the screen below:

Nothing too fancy just yet, but I’m sure Green Man would approve :]
For the duration of this tutorial, a full green screen means your base shaders (RWTBase.vsh and RWTBase.fsh) are in working order and your OpenGL ES code is set up properly. Throughout this tutorial, green means “Go” and red means “Stop”.
If at any point you find yourself staring at a full red screen, you should “Stop” and verify your implementation, because your shaders failed to compile and link properly. This works because the viewDidLoad method in RWTViewController sets glClearColor() to red.
A quick look at RWTBase.vsh reveals one of the simplest vertex shaders you’ll ever encounter. All it does is calculate a point on the x-y plane, defined by aPosition.
The vertex attribute array for aPosition is a quad anchored to each corner of the screen (in OpenGL ES coordinates), named RWTBaseShaderQuad in RWTBaseShader.m. RWTBase.fsh is an even more simple fragment shader that colors all fragments green, regardless of position. This explains your bright green screen!
Now, to break this down a bit further…
Pixel Shaders vs Vertex/Fragment Shaders
If you’ve taken some of our previous OpenGL ES tutorials, you may have noticed that we talk about vertex shaders for manipulating vertices and fragment shaders for manipulating fragments. Essentially, a vertex shader draws objects and a fragment shader colors them. Fragments may or may not produce pixels depending on factors such as depth, alpha and viewport coordinates.
So, what happens if you render a quad defined by four vertices as shown below?
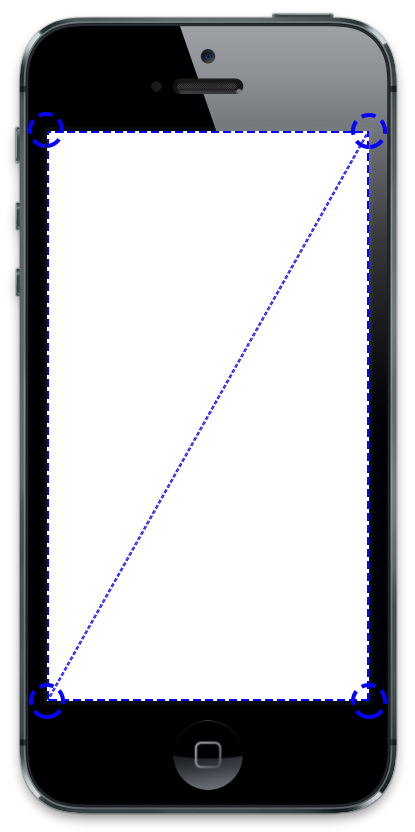
Assuming you haven’t enabled alpha blending or depth testing, you get an opaque, full-screen cartesian plane.
Under these conditions, after the primitive rasterizes, it stands to reason that each fragment corresponds to exactly one pixel of the screen – no more, no less. Therefore, the fragment shader will color every screen pixel directly, thus earning itself the name of pixel shader :O
Note: By default, GL_BLEND and GL_DEPTH_TEST are disabled. You can see a list of glEnable() and glDisable() capabilities here, and you can query them programmatically using the function glIsEnabled().
Note: By default, GL_BLEND and GL_DEPTH_TEST are disabled. You can see a list of glEnable() and glDisable() capabilities here, and you can query them programmatically using the function glIsEnabled().
Pixel Shaders 101: Gradients
Your first pixel shader will be a gentle lesson in computing linear gradients.
Note: In order to conserve space and focus on the algorithms/equations presented in this tutorial, the global GLSL precision value for floats is defined as highp.
The official OpenGL ES Programming Guide for iOS has a small section dedicated to precision hints which you can refer to afterwards for optimization purposes, along with the iOS Device Compatibility Reference.
Remember, for a full-screen iPhone 5, each fragment shader gets called 727,040 times per frame! (640*1136)
The magic behind pixel shaders lies within gl_FragCoord. This fragment-exclusive variable contains the window-relative coordinates of the current fragment.
For a normal fragment shader, “this value is the result of fixed functionality that interpolates primitives after vertex processing to generate fragments”. For pixel shaders, however, just know the xy swizzle value of this variable maps exactly to one unique pixel on the screen.
Open RWTGradient.fsh and add the following lines just below precision:
// Uniforms
uniform vec2 uResolution;
uResolution comes from the rect variable of glkView:drawInRect: within RWTViewController.m (i.e. the rectangle containing your view).
uResolution in RWTBaseShader.m handles the width and height of rect and assigns them to the corresponding GLSL uniform in the method renderInRect:atTime:. All this means is that uResolution contains the x-y resolution of your screen.
Many times you’ll greatly simplify pixel shader equations by converting pixel coordinates to the range 0.0 ≤ xy ≤ 1.0, achieved by dividing gl_FragCoord.xy/uResolution. This is a perfect range for gl_FragColor too, so let’s see some gradients!
Add the following lines to RWTGradient.fsh inside main(void):
vec2 position = gl_FragCoord.xy/uResolution;
float gradient = position.x;
gl_FragColor = vec4(0., gradient, 0., 1.);
Next, change your program’s fragment shader source from RWTBase to RWTGradient in RWTViewController.m by changing the following line:
self.shader = [[RWTBaseShader alloc] initWithVertexShader:@"RWTBase" fragmentShader:@"RWTBase"];
to:
self.shader = [[RWTBaseShader alloc] initWithVertexShader:@"RWTBase" fragmentShader:@"RWTGradient"];
Build and run! Your screen should show a really nice black->green gradient from left->right

Pretty cool, eh? To get the same gradient from bottom->top, change the following line in RWTGradient.fsh:
float gradient = position.x;
to:
float gradient = position.y;
Build and run again to see your gradient’s new direction…

Now it’s time for a challenge! See if you can reproduce the screenshot below by just changing one line of code in your shader.

Hint: Remember that position ranges from 0.0 to 1.0 and so does gl_FragColor.
[spoiler title="Diagonal Gradient"]
float gradient = (position.x+position.y)/2.;
[/spoiler]
Well done if you figured it out! If you didn’t, just take a moment to review this section again before moving on. :]