Improving Game Visuals with Unity’s HDRP
Improve your game visuals and take them up by several notches using the High Definition Render Pipeline from Unity. By Wilmer Lin.
Setting the Physically Based Sky
Override the Type in the Visual Environment to Physically Based Sky. Leave Ambient Mode unchecked for now.

Inside the Physically Based Sky Override, select Earth (Simple) for the Type. This reduces some of the sky settings, which won’t all be necessary here.

Click the checkbox next to Ground Tint. Select different hues around the perimeter of the color wheel.
Check the boxes next to Horizon Tint and Zenith Tint. Then experiment with the colors to see how they influence the camera.

Try these values to give the scene a warmer golden tone:
- Ground Tint: (R: 200, G: 145, B: 45)
- Horizon Tint: (R: 200, G: 200, B: 200)
- Zenith Tint: (R: 170, G: 210, B: 255)
You can also experiment with Sea Level to shift where the ground meets the horizon. Likewise, adjust the Horizon Zenith Shift to move where the horizon blends with the zenith.
Keep the Scene view open to help you visualize the color modifications. As you adjust the color pickers, the surrounding world adjusts to match.

The sky environment impacts the indirect light in the scene. Toggle Physically Based Sky off and on again to see the difference.
Setting Exposure and Light Emission
Changing the exposure and light emission settings can have a dramatic effect on your scene.
Understanding Exposure
You’re currently using some physically incorrect values for the sake of visualization. HDRP works much better when you respect real-world exposure and light intensity.
Exposure value in photography follows a logarithmic scale. The formula relates a camera’s shutter speed and its f-stop/aperture:

In this formula:
- N is the f-number.
- t is the shutter speed in seconds.
- 0 EV: Moonless night
- 3.0 EV: Moonlit scene
- 6.0 EV: Interior scene
- 8.0 EV: Exterior sunset/sunrise
- 12.0 EV: Cloudy exterior
- 15.0 EV: Sunny exterior
- 0 EV: Moonless night
- 3.0 EV: Moonlit scene
- 6.0 EV: Interior scene
- 8.0 EV: Exterior sunset/sunrise
- 12.0 EV: Cloudy exterior
- 15.0 EV: Sunny exterior
Set an accurate exposure value to render the image. With the Sky and Fog Volume selected, click Add Override below the Volume component. These menu items represent all the possible overrides for this Volume.
Select Exposure. In Exposure Override, change the Mode to Fixed.
Follow the checkmarks on the Fixed Exposure slider for reference. Adjust it to a value of 11.

The current lighting intensity doesn’t match real-world conditions, so the game camera goes dark. You’ll need to bring the light up to the level of sunlight.
Understanding Light Emission
Select Sun_DirectionalLight. In the Emission group, the Intensity of a directional light uses lux. This standard unit of illuminance records how much light falls over a surface area.
Following the guide marks on the slider, choose a physically accurate value. Set the Intensity to a really bright 130000 lux.
HDRP uses physically accurate Kelvin temperatures to set the light’s color.
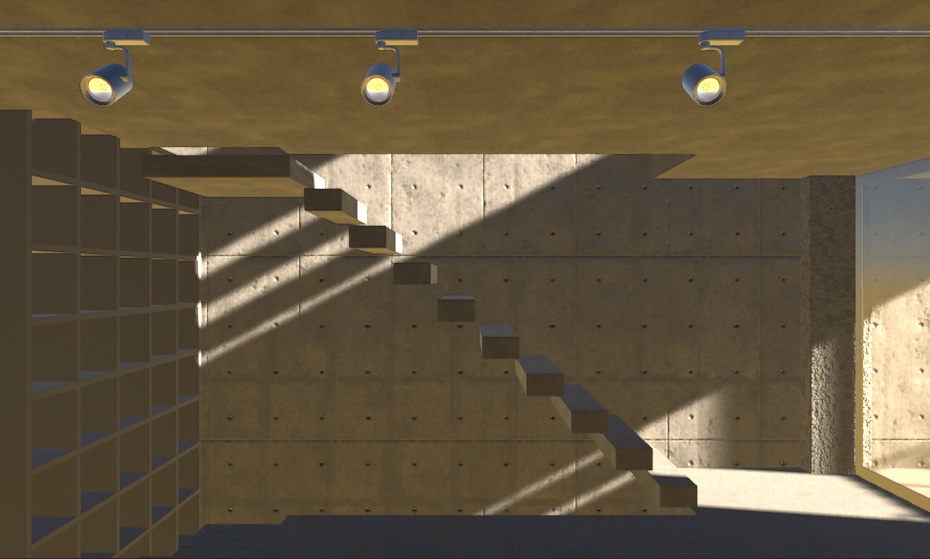
To mimic the afternoon sun, set the temperature roughly to 6500 Kelvin. The level turns warm and golden.

Adding More Volume Overrides
With the sunlight serving as the primary light, or key light, it’s time to start adding more overrides.
Select Sky and Fog Volume. Check Add Override. Use the following menu items, overriding a few fields:


Dial down the Shadows slightly by setting its Y value to -0.3, lift the Midtones by modifying its Y value to -0.15 and increase the Highlights by changing its Y value to 0.2. This makes for a bold, high-contrast look. If you don’t see a UI interface similar to that below, just increase the Inspector window size to reveal it.

And here’s how these settings will affect the Game view:


- Post-processing ▸ Tonemapping: This maps the high-dynamic range values into viewable, low-dynamic screen colors. Set Mode to ACES. ACES uses the same algorithm featured in film and television. It shows higher contrast than Neutral with more saturated colors.
- Post-processing ▸ Color Adjustments: This provides additional controls for contrast, color and saturation tweaks. Increasing the Contrast makes the blacks blacker and the whites whiter. Decreasing the Saturation — reducing the intensity of the colors — is a popular look for certain games. Set the Contrast to 10 and the Saturation to -20.
- Post-processing ▸ Bloom: Use this to add glowing fringes around bright light sources. Only pixels brighter than the Threshold receive the effect. Increase the Intensity to strengthen the visible glow. Set the Quality to Medium, Threshold to 0.95, Intensity to 0.25 and Scatter to 0.71.
-
Post-processing ▸ Shadows, Midtones, Highlights: Use these settings for finer control of the dark, medium and light pixels in the final render.
Dial down the Shadows slightly by setting its Y value to -0.3, lift the Midtones by modifying its Y value to -0.15 and increase the Highlights by changing its Y value to 0.2. This makes for a bold, high-contrast look. If you don’t see a UI interface similar to that below, just increase the Inspector window size to reveal it.
- Lighting ▸ Ambient Occlusion: This helps darken cracks and crevasses. Though not physically accurate, it can help accentuate certain details. Using these example values helps darken the cubicles in the bookshelf, for example.
And here’s how these settings will affect the Game view:
Now that you’ve learned about these overrides, try toggling each override off and on to review its effect on the Game view.
Setting Lightmapping and Global Illumination
To further improve the look of the scene, use global illumination (GI), a set of techniques that model the physical behavior of light. During global illumination, you bake the lighting into a special texture called a lightmap.
Understanding Global Illumination
For global illumination, each mesh must have:
- Contribute GI marked in MeshRenderer.
- A set of non-overlapping UVs. Unity can generate these automatically upon import.
Confirm this for yourself. Inspect the child objects under Building. Note how each MeshRenderer has Contribute Global Illumination checked. Receive Global Illumination should be set to Lightmaps.

You can also enable this from the Static menu in the top-right of the Inspector.

In RW/Meshes, under the Model tab, each model geometry has Generate Lightmap UVs enabled in Import Settings.

Depending on the complexity, each lightmap could require several minutes to many hours to calculate. Once baked, however, playback is quite performant. Thus, your app can display high-quality GI lighting while retaining a good frame rate.
To enable lightmapping, select Sun_DirectionalLight. Switch the Mode to Mixed. The light works in Realtime for dynamic objects and Baked mode for static objects.

Select Sky and Fog Volume. Override Ambient Mode in Visual Environment to Dynamic. This allows the baking process to use the Physically Based Sky for ambient light.

The scene will temporarily become very bright, but ignore it for the moment.

Go to Window ▸ Rendering ▸ Lighting.
The Lighting Settings saves your settings to an asset on disk.
Choose one of the assets provided with the project, like LightingSettings2Medium. Alternatively, create your own using New Lighting Settings.
