Introduction to TextMesh Pro in Unity
Learn about TextMesh Pro in Unity by creating a spooky text-based adventure game where the style of the text changes based on what happens in the story. By Johnny Thompson.
More Material Preset Settings
By this point, you’re ready to create more Material Preset settings. First, this tutorial will walk you through the creation process, then you’ll have the chance to create some cool effects on your own.
Using Cardboard Presets
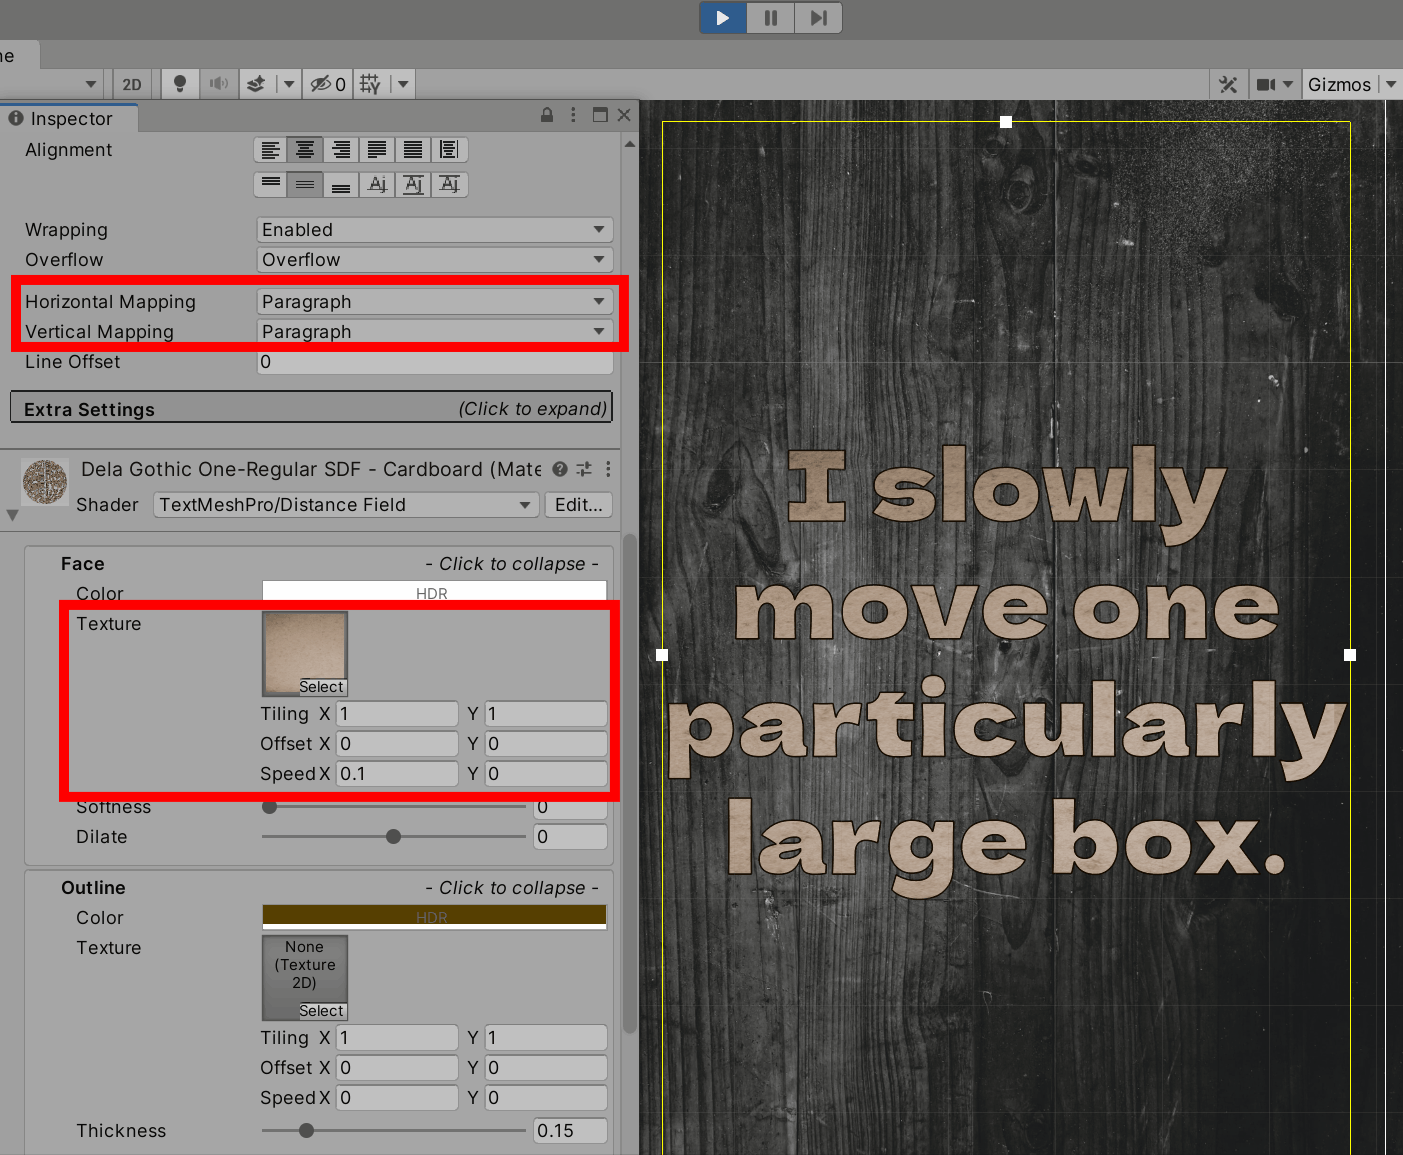
Set screen 24-LargeBox as the active screen. Here, you’ll apply a cardboard texture and set it to move across the font face.
Select Text (TMP) and set Font Asset to DelaGothicOne-Regular SDF.
Then set Horizontal and Vertical Mapping to Paragraph. This stretches the texture across all the characters in each paragraph of text.

Create a new Material Preset named Dela Gothic One-Regular SDF – Cardboard and set:
- Face Texture to Assets/RW/Textures/Cardboard.
- Speed X to 0.1.
- Outline Color to Brown.
- Outline Thickness to 0.15.

Now, enter Play Mode and preview the effect.
Well done!
Using Bevel Presets
Now, try creating your own effect by adding a bevel and some lighting settings. Start by setting 26-Stopped as the active screen.

When you’re done, or if you get stuck, click the Reveal button below to see the solution.
[spoiler title="Solution"]
Select Text (TMP) and set Font Asset to DelaGothicOne-Regular SDF. Then create a new Material Preset named Dela Gothic One-Regular SDF – Stopped.
Set the Face color to red.
In the Underlay section, set Offset X to 1, Offset Y to -1, and Dilate to 1.
In the Lighting section, under Bevel, set Amount to 1 and Width to 0.5. Tweak the values under Local Lighting to your artistic liking.

[/spoiler]
Did you succeed? If not, here’s another chance. :]
Using Glow Presets
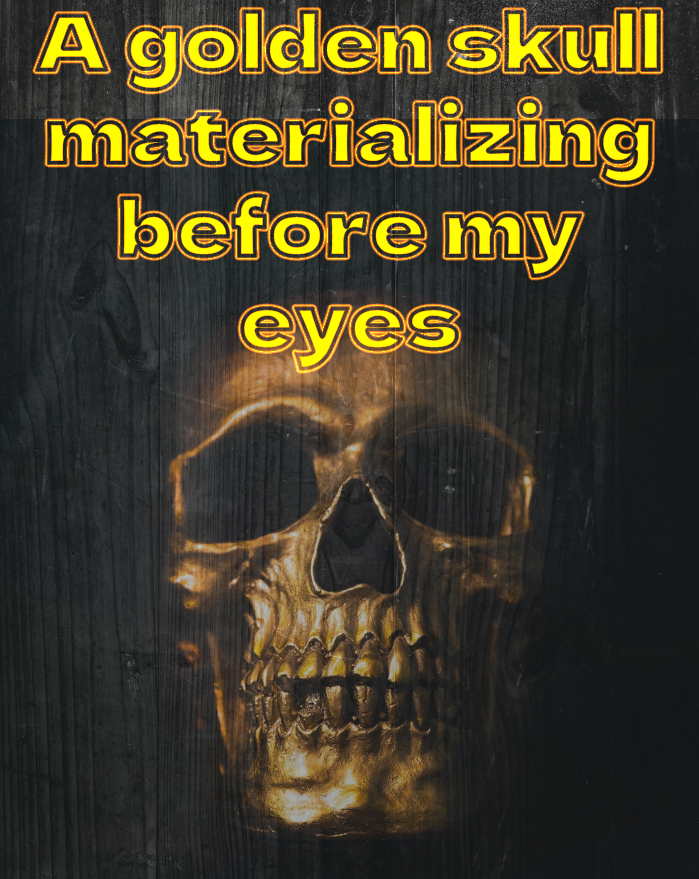
Start by setting 28-Skull as the active screen.
Now, on your own, recreate the glowing outline effect.
When you’re done, or when you get stuck, click the Reveal button below to see the solution.
[spoiler title="Solution"]
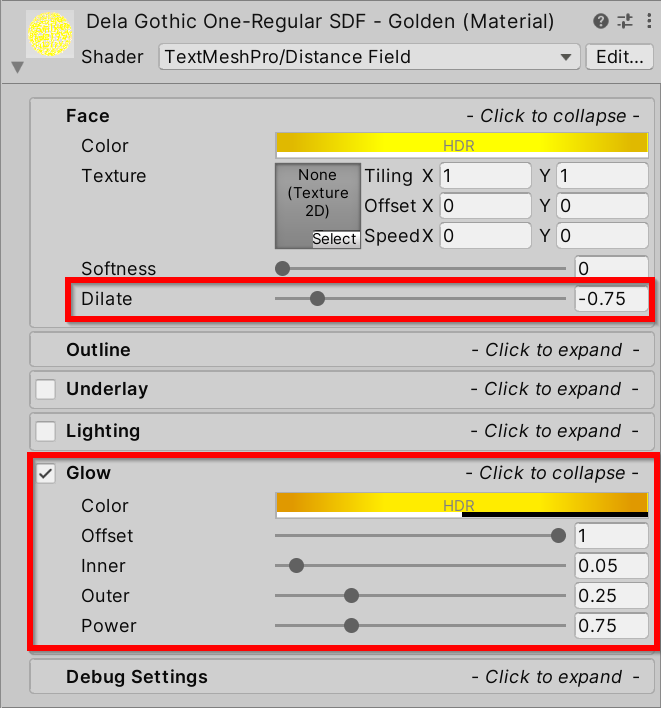
Select Text (TMP) and set Font Asset to DelaGothicOne-Regular SDF. Then, create a new Material Preset named Dela Gothic One-Regular SDF – Golden.
In the Face section, set the Color to a nice gold and Dilate to -0.75.
Check the Glow section and set the Color to a similar gold, the Offset to 1, and Outer to 0.25.
Also note the Face Dilate setting can be turned down to shrink the text. This gives the text an appearance of materializing before your eyes, while making the glowing, offset outline more prominent.
You can use the image below as a reference for the colors of the Face and the Glow.

[/spoiler]
Now, finish the story by adding the Font Assets and Material Preset to the remaining screens. Then click Play and enjoy your very own text-based adventure game!

Where to Go From Here?
For reference, you can download the completed project files by clicking the Download Materials button at the top or bottom of this tutorial.
If you want to learn all the Rich Text tags in TextMesh Pro, look at the official documentation.
Another great way to learn more about TextMesh Pro is through the TextMesh Pro Examples & Extras, which contains several sample scenes with more text enhancements you can create with TextMesh Pro. Import them into your project from Window ▸ TextMeshPro ▸ Import TMP Examples and Extras.
We hope you enjoyed this tutorial. If you have any questions or comments, please join the forum discussion below!