Firebase Dynamic Links: Getting Started
Learn how to use Firebase Dynamic Links to implement deep linking on iOS. By Danijela Vrzan.
Setting Up Firebase Hosting
Before you use a custom domain for dynamic links, you need to ensure the domain points to Firebase Hosting. If you have a domain you want to use with dynamic links and the domain points to a different host, you have to move it to Firebase Hosting. If you don’t want to do that, you can create a subdomain hosted by Firebase, which you can use for dynamic links.
Open Firebase console. Under Hosting, click Get started.

You’ll see a set of instructions to set up Firebase Hosting.

You don’t have to complete the indicated steps at this time as they guide you through setting up your domain. Click Next a couple of times and then Continue to console.
You’ll see a Firebase Hosting dashboard with two custom Firebase-provisioned domains:

You could use these domains to host your content. But, you’ll learn how to set up your own custom subdomain and use it for dynamic links next.
Creating a Firebase-Hosted Subdomain
In the left panel, select Dynamic Links, then click Get started. First, create a custom subdomain:

Choose something that is unique to your domain.
Click Continue to add an optional path prefix:

Click Continue to deploy your subdomain to Firebase Hosting.
You have to verify ownership of the domain you want to use. To do this, add a TXT record in your DNS settings with a unique string value:

This step is required. Your subdomain won’t go live before you complete it.
It can take up to 24 hours to propagate these changes on your domain. Once Firebase successfully verifies your domain ownership, you can continue with the set-up.
With the domain verified, repeat the set-up from the beginning for your subdomain. Click Verify. Then continue with the set-up.
Finally, add the A record to your domain by visiting your DNS provider or registrar:

You can add the A record in the same way you added the TXT record.
Your DNS records will look like this:

Different providers use different naming conventions, so yours might be different. If you’re not sure, check with your DNS provider or read their official documentation.
It can take up to 24 hours to propagate these changes on your domain.
To see if the process was successful, open Firebase Hosting for your project. You’ll see your custom subdomain in the list and Connected next to it:

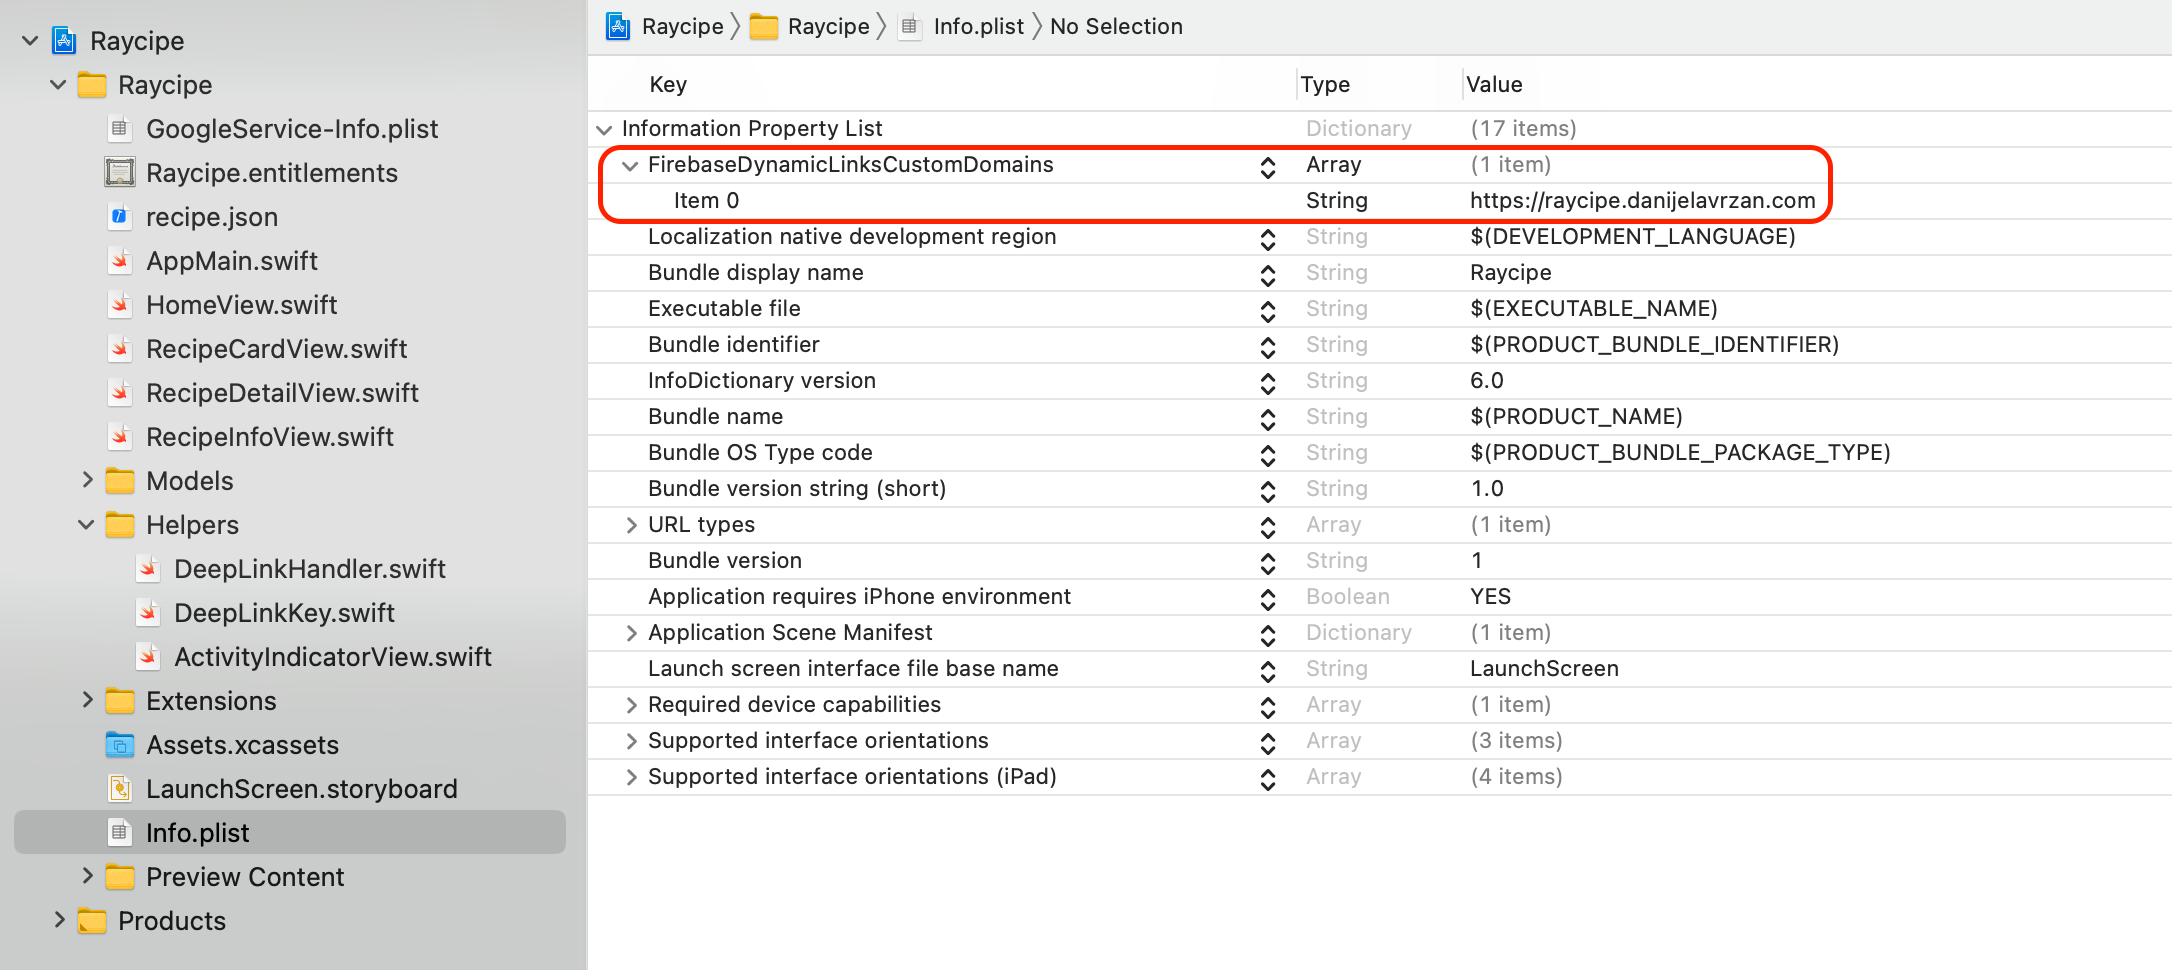
There’s an additional step in the set-up if you want to use a custom domain or subdomain for Firebase dynamic links on iOS apps.
Open Xcode. In Info.plist, create a key called FirebaseDynamicLinksCustomDomains. Set it to your app’s Dynamic Links URL prefix:
Alternatively, you can use a free custom Firebase domain.
Creating a Free Firebase Domain
What’s great about Firebase is you don’t have to own a domain. Firebase provides a free custom domain that’s already associated with your app, which you can use for your dynamic links.
You can create your own Firebase custom domain by giving it any name you like and appending page.link to the end. This is the custom domain for your dynamic links.
Open Firebase console. Under Dynamic Links, click Get started.

Domains are globally unique, so you can’t use the same domain shown in the picture. However, you should see a Google-provided domain ending in page.link in a drop-down that you can use.
Once you’ve specified a domain, click Continue and then Finish. You’ll see your domain listed in the Firebase console.

Make sure to write it down because you’ll need it later.
To finish this configuration, you’ll add Associated Domains to your Xcode project.
Adding Associated Domains in Xcode
Associated Domains provide the foundation for universal links.
When you want to use deep links in your apps, you have to host a file named apple-app-site-association on your hosting site. It’s a required step that establishes an association between your domain and your app.
If you’re using Firebase dynamic links for your deep links, apple-app-site-association is already set up for you when you successfully create a domain hosted on Firebase.
In Xcode, under Signing & Capabilities, click + Capability. Add Associated Domains:
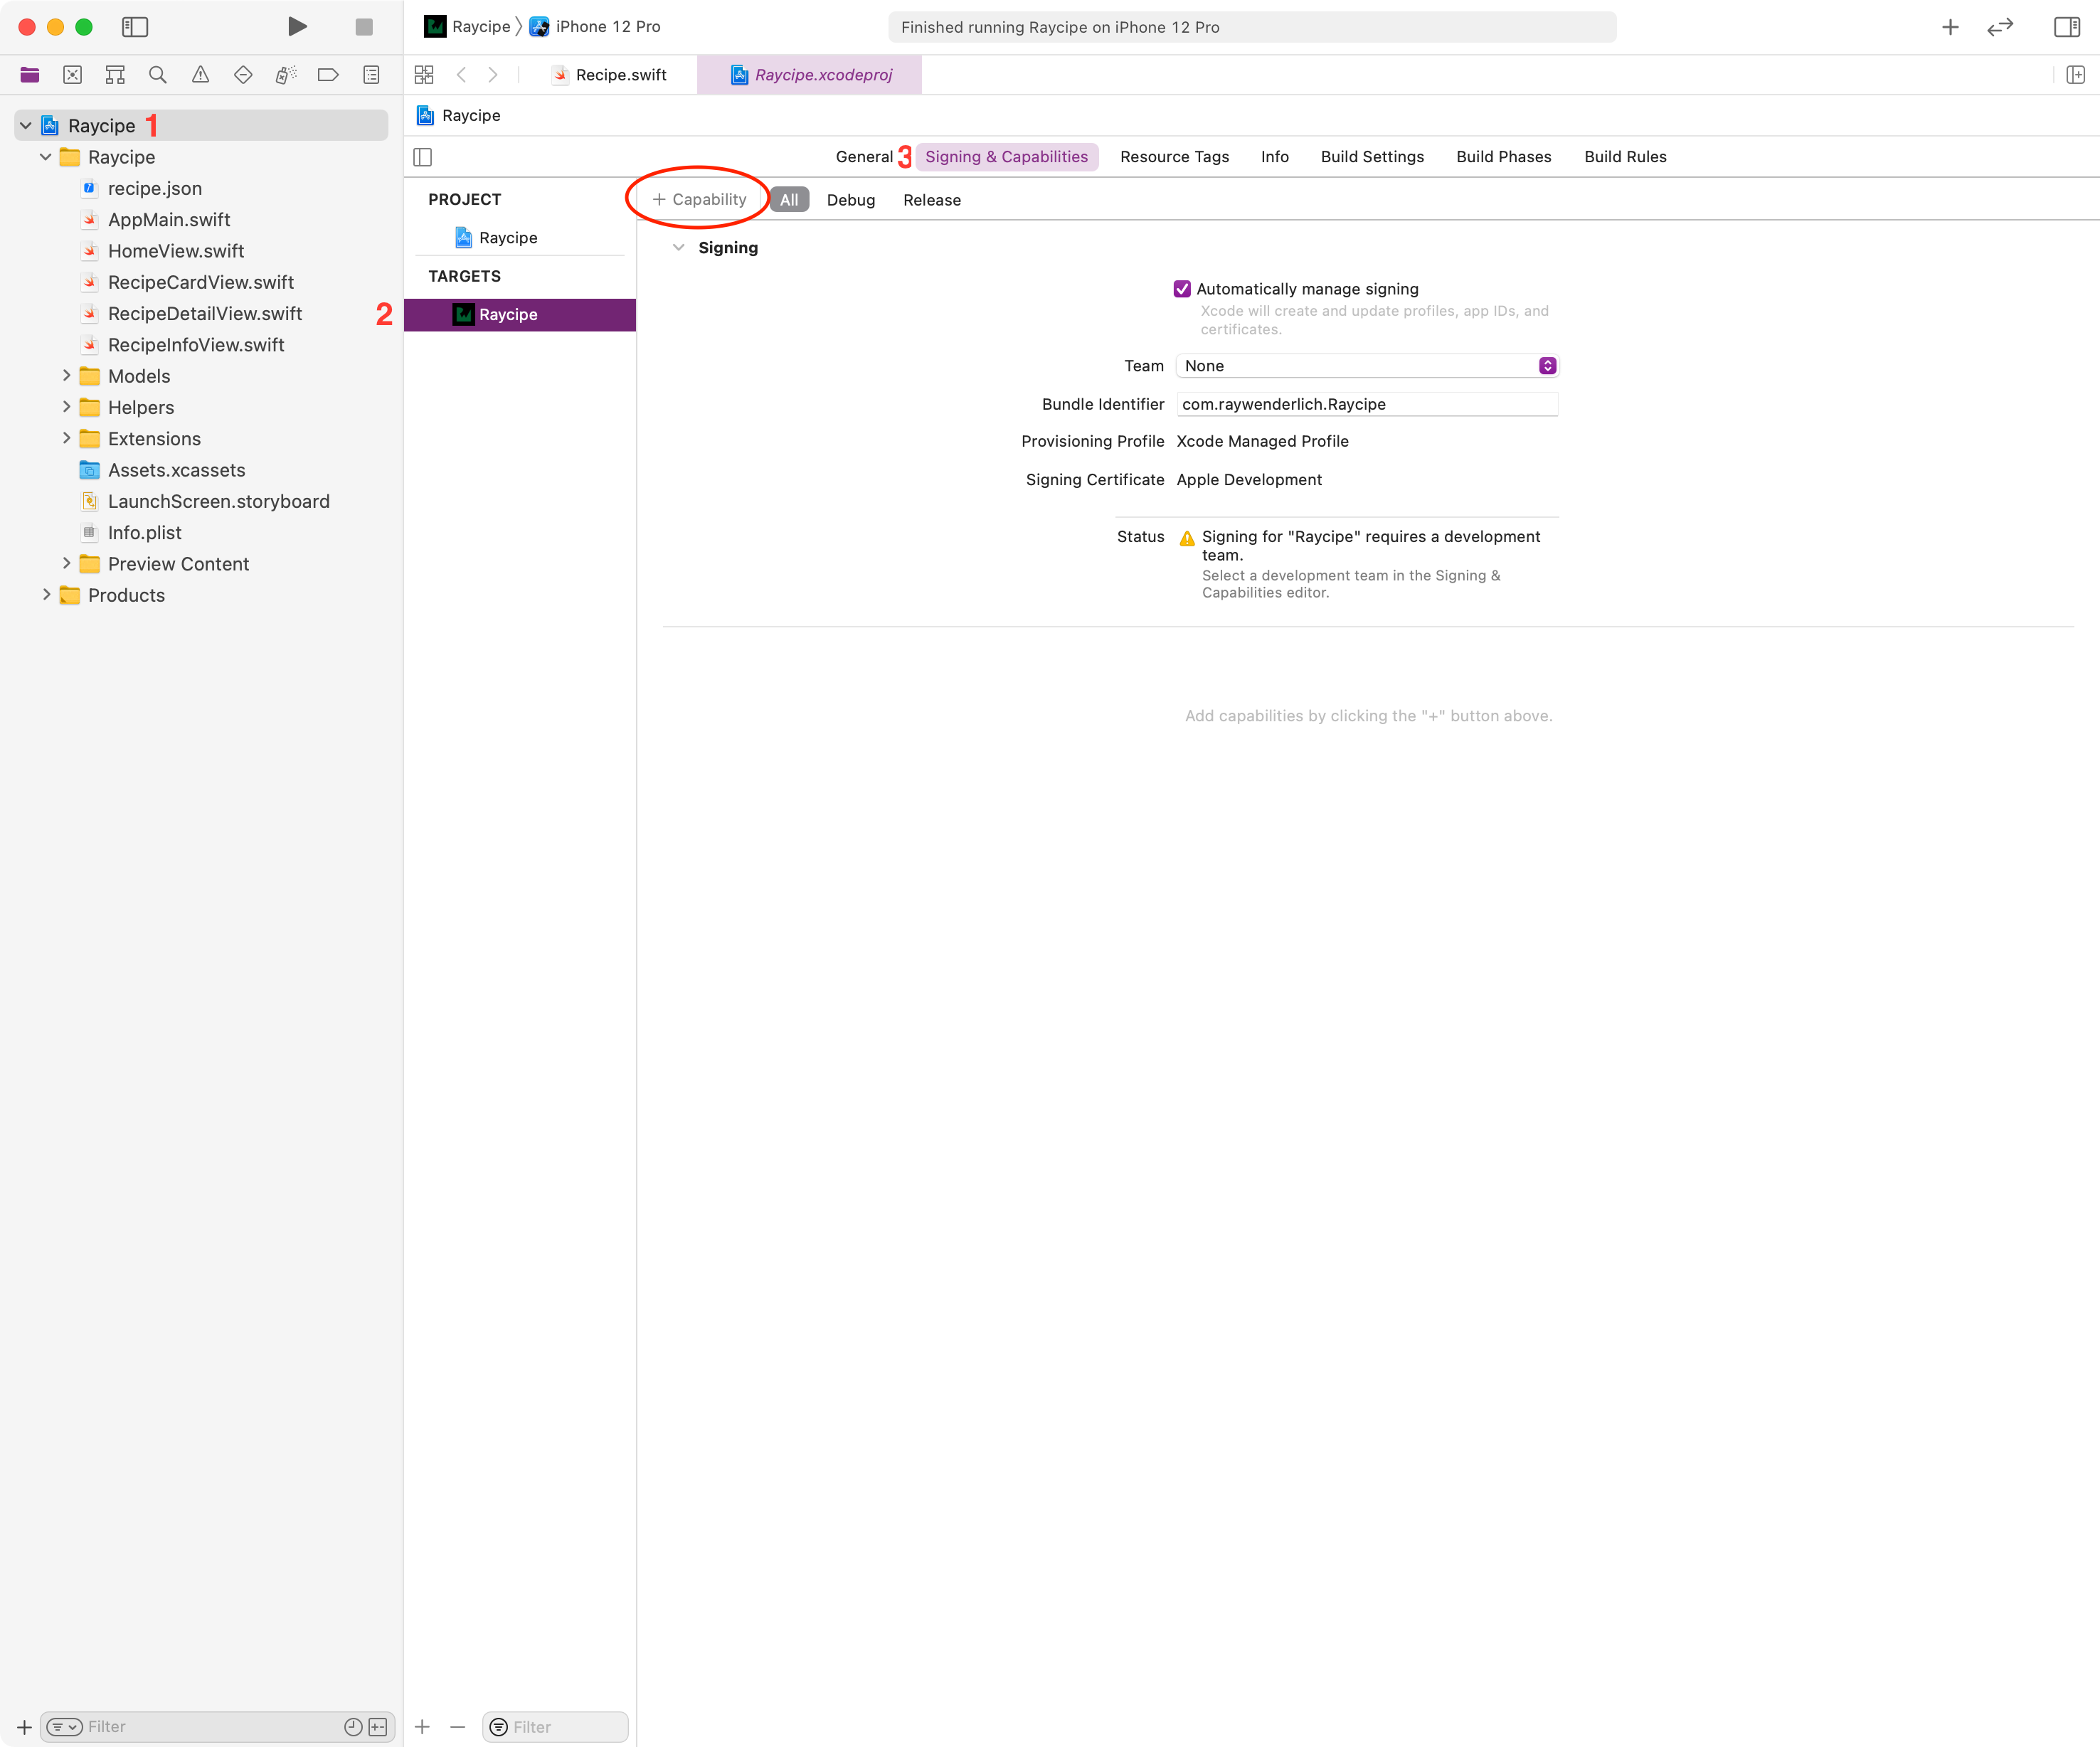
Click + and copy and paste your domain in this format: applinks:[your domain].

Now that you’ve added associated domains, it’s time to test your deep link in Terminal.
Testing Your Deep Link in Terminal
To test your deep link without using a physical device, you need both Simulator and Terminal.
Build and run your app in Simulator. Once it’s running, close it inside your Simulator so you can see the home screen. Then, open Terminal and place it somewhere you can see both Terminal and Simulator side by side.
Copy and paste the following command into the terminal window, replacing [your domain] with the domain you created in Firebase for your dynamic link:
xcrun simctl openurl booted [your domain]

Press return and your app will open instantly!
Now it’s time to build the Firebase dynamic link.
Building Firebase Dynamic Links
There are four ways you can create Firebase dynamic links:
- In the Firebase console
- Programmatically, using the Dynamic Link Builder API
- Using the REST API
- Manually
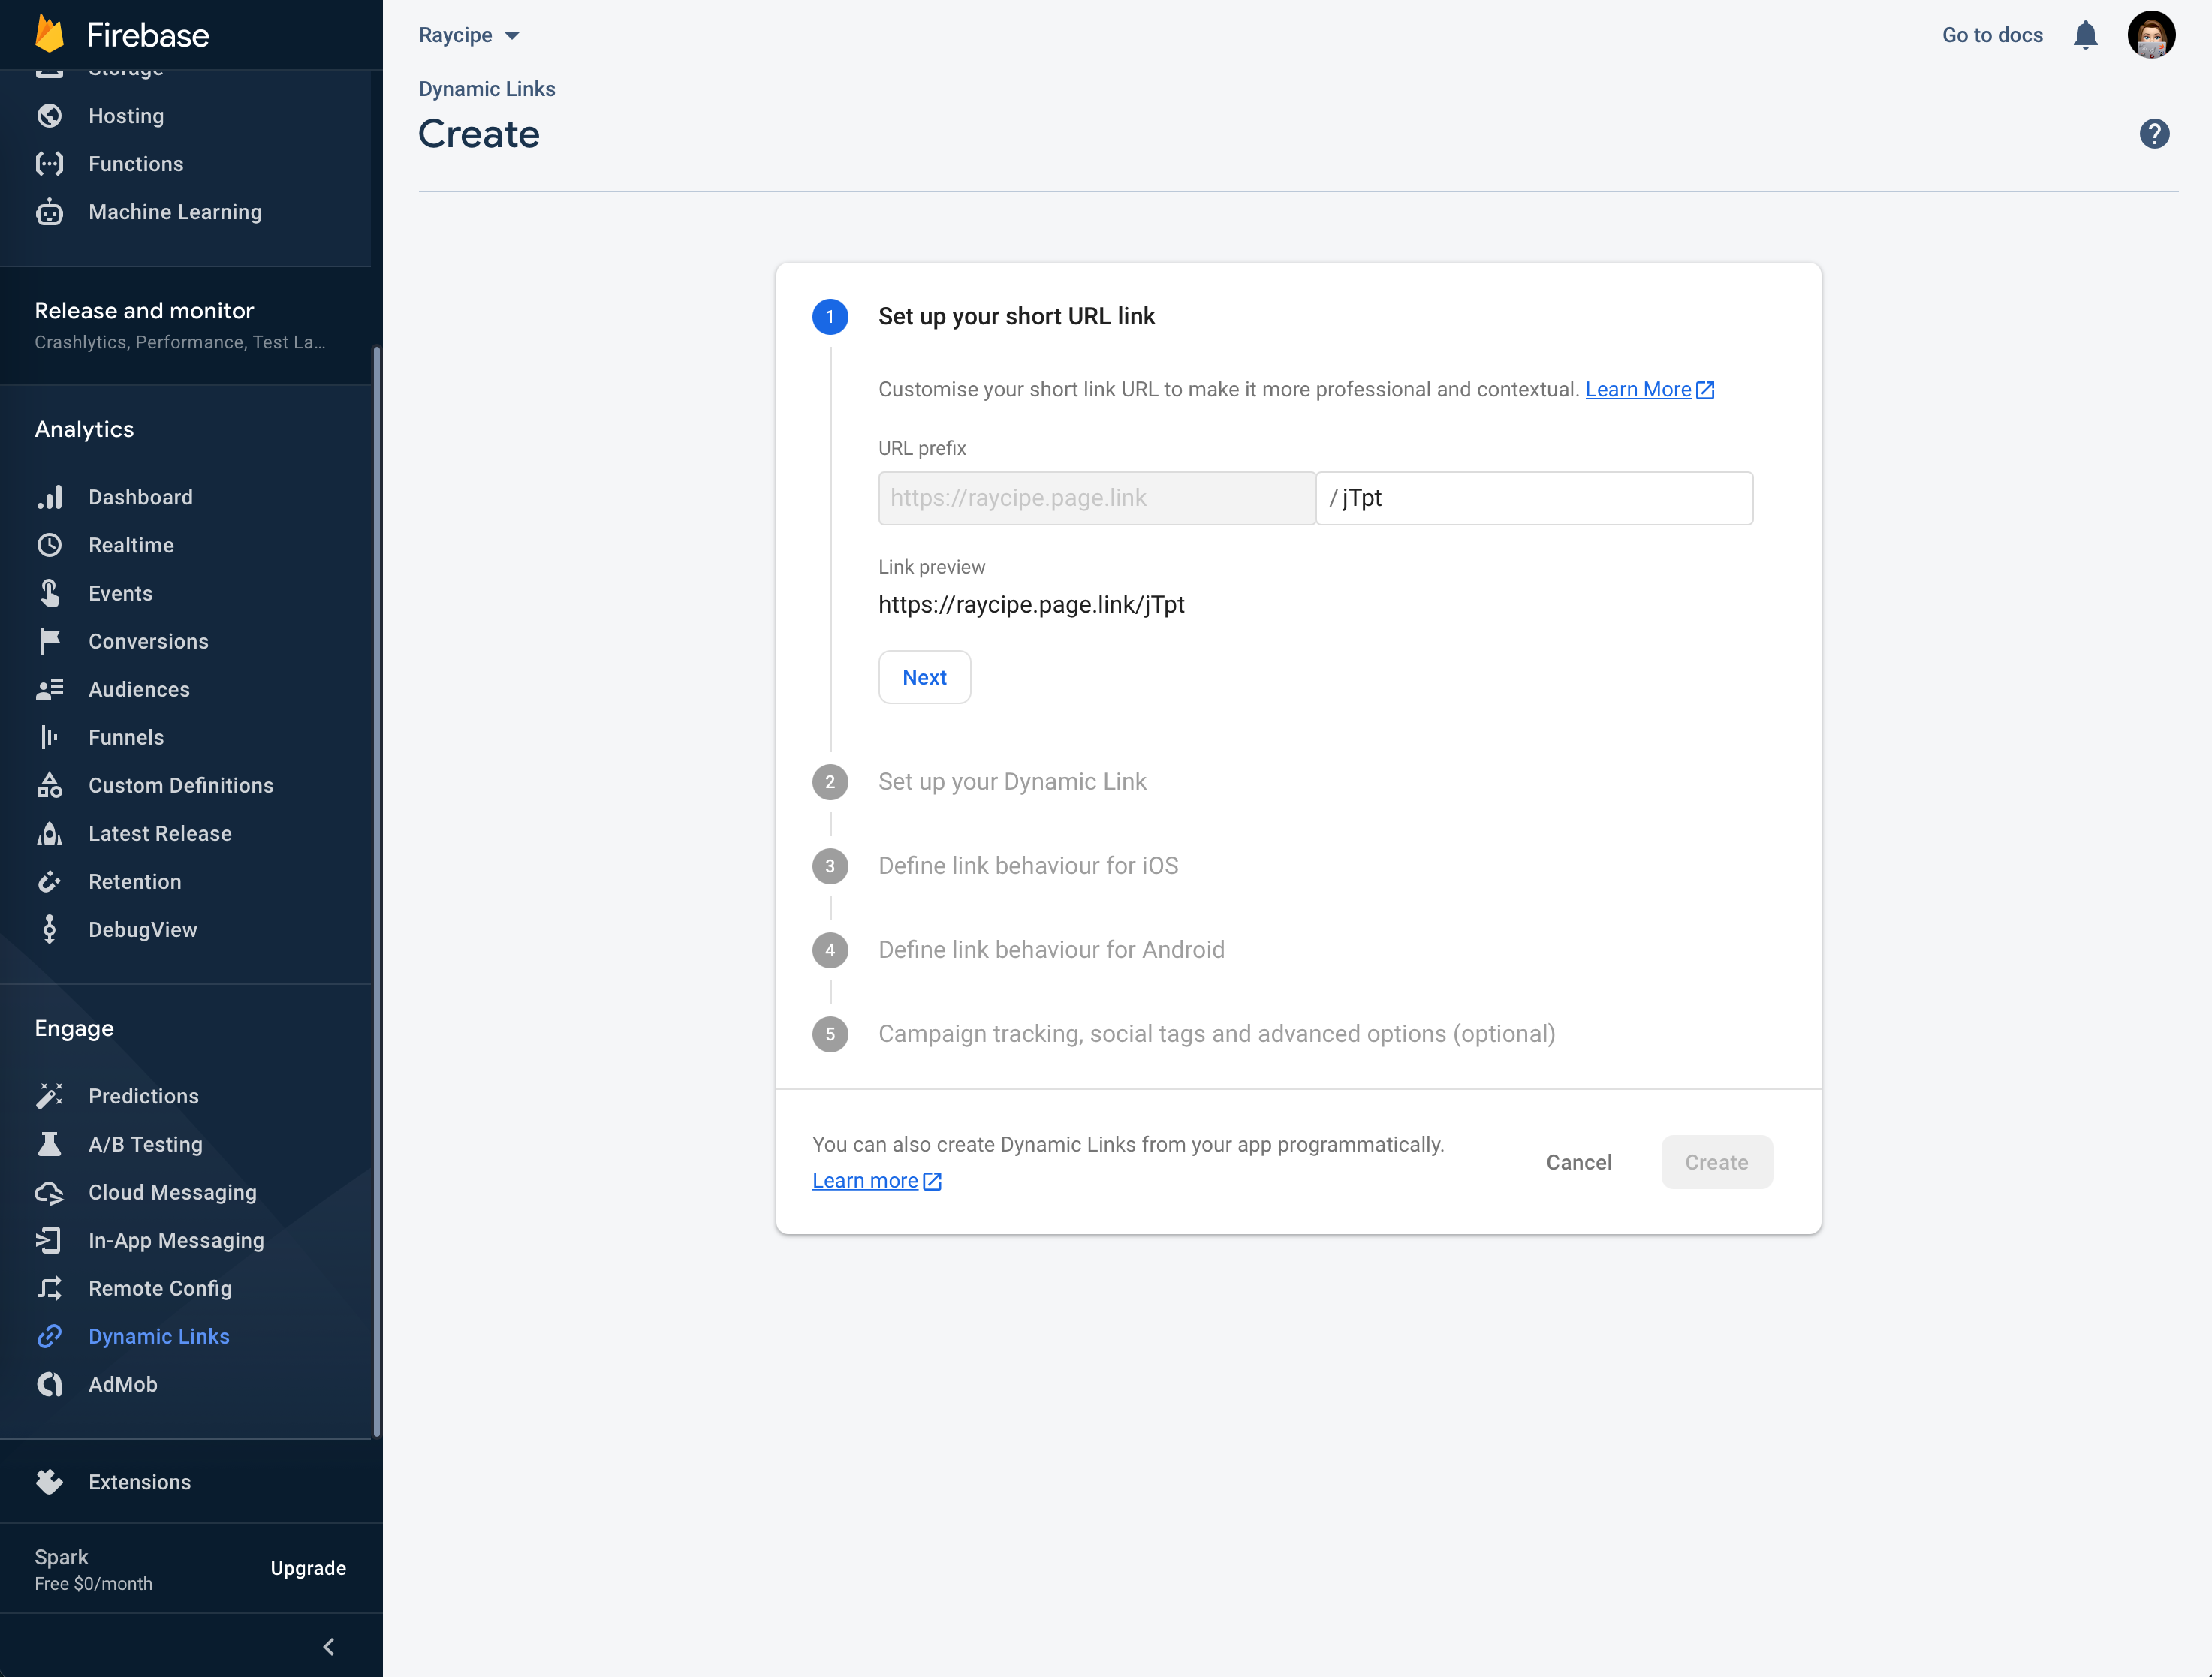
Creating dynamic links using the Firebase console is useful if you’re creating promo links to share on social media and you only need one link. The process is simple and Firebase guides you through it step by step:
Creating links programmatically, using the Builder API on iOS and Android, is most useful for user-to-user sharing or in any situation that requires a dynamic link.
On the other hand, if you’re creating a link on a platform that doesn’t have a Builder API, then using the REST API is the better option.
Finally, if you don’t need to track click data and you don’t mind long links, you can construct the link manually using URL parameters. The only advantage here is avoiding an extra network round trip.
In this tutorial, you’ll use the Dynamic Link Builder API to create your dynamic link.
You’ll start by creating the URL.