Core Graphics Tutorial: Patterns and Playgrounds
Learn how to draw a repeatable pattern and use Playgrounds to prototype drawing a complex image. By Andrew Kharchyshyn.
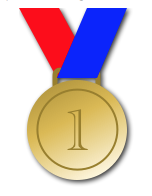
Number One
The last step is to draw the number one on the medal. Add this code at the end of the drawing code:
// Number one

// Must be NSString to be able to use draw(in:)
let numberOne = "1" as NSString
let numberOneRect = CGRect(x: 47, y: 100, width: 50, height: 50)
guard let font = UIFont(name: "Academy Engraved LET", size: 60) else {
  fatalError("""
    \(#function):\(#line) Failed to instantiate font \
    with name \"Academy Engraved LET\"
    """)
}
let numberOneAttributes = [
  NSAttributedString.Key.font: font,
  NSAttributedString.Key.foregroundColor: darkGoldColor
]
numberOne.draw(in: numberOneRect, withAttributes: numberOneAttributes)
Here, you define a NSString with text attributes and draw it into the drawing context using draw(in:withAttributes:).

Looking good!
You’re getting close, but it’s looking a little two-dimensional. It would be nice to have some drop shadows.
Creating Shadows
To create a shadow, you need three elements: color, offset (distance and direction of the shadow) and blur.
At the top of the playground, after defining the gold colors but just before the // Lower ribbon line, insert this shadow code:
// Add shadow
let shadow = UIColor.black.withAlphaComponent(0.80)
let shadowOffset = CGSize(width: 2.0, height: 2.0)
let shadowBlurRadius: CGFloat = 5

context.setShadow(
  offset: shadowOffset,
  blur: shadowBlurRadius,
  color: shadow.cgColor)
That makes a shadow, but the result is probably not what you pictured. Why is that?

When you draw an object into the context, this code creates a shadow for each object.

Ah-ha! Your medal comprises five objects. No wonder it looks a little fuzzy.
Fortunately, it’s pretty easy to fix. Simply group drawing objects with a transparency layer, and you’ll draw only one shadow for the whole group.

Add the code to make the group after the shadow code. Start with this:
context.beginTransparencyLayer(auxiliaryInfo: nil)
When you begin a group, you also need to end it. Add this next block at the end of the playground but before the point where you retrieve the final image:
context.endTransparencyLayer()
Now, you have a completed medal image with clean, tidy shadows:
That completes the playground code, and you have a medal to show for it!
Adding the Medal Image to an Image View
Now that you’ve got the code in place to draw a medal (which looks fabulous, by the way), you’ll need to render it into a UIImageView in the main Flo project.
Switch back to the Flo project and create a new file for the image view.
Click File ▸ New ▸ File… and choose the Cocoa Touch Class template. Click Next, and name the class MedalView. Make it a subclass of UIImageView, then click Next. Finally, click Create.
Go to Main.storyboard and add a UIImageView as a subview of Counter View. Select the UIImageView and change the class to MedalView in the Identity inspector.

In the Size inspector, give the image view the coordinates X=76, Y=147, Width=80, and Height=80:

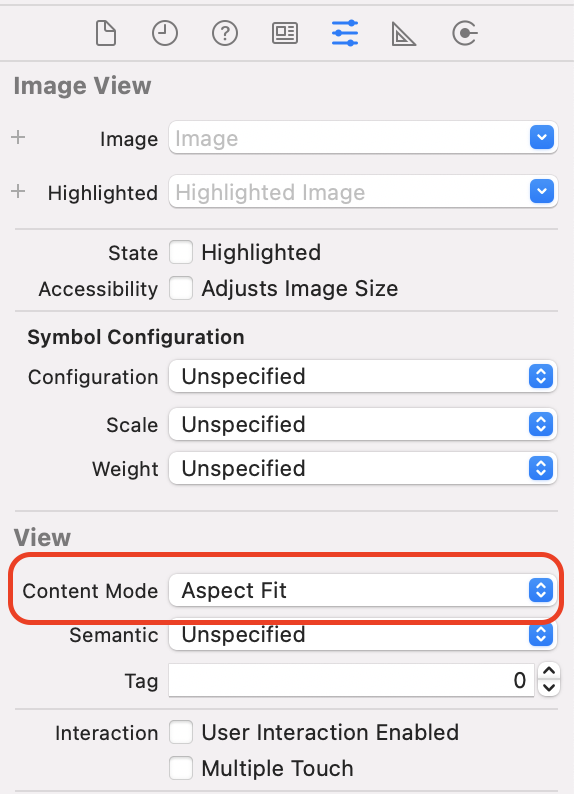
In the Attributes inspector, make sure the Content Mode is set to Aspect Fit so the image automatically resizes to fit the view.
MedalView Setup
Go to MedalView.swift and add a method to create the medal:
func createMedalImage() -> UIImage {
  debugPrint("creating Medal Image")
}
This creates a log so you know when the image is being created.
Switch back to your MedalDrawing playground and copy the entire code except for the initial import UIKit.
Go back to MedalView.swift and paste the playground code into createMedalImage().
At the end of createMedalImage(), replace the last two lines with the following:
guard let image = UIGraphicsGetImageFromCurrentImageContext() else {
  fatalError("""
    \(#function):\(#line) Failed to get an \
    image from current context.
    """)
}
UIGraphicsEndImageContext()

return image
That should squash the compile error. Notice that because UIGraphicsGetImageFromCurrentImageContext() returns an optional UIImage, you unwrap it before returning the image.
At the top of the class, add a property to hold the medal image:
lazy var medalImage = createMedalImage()
The lazy declaration modifier means that the medal image code, which is computationally intensive, only runs when necessary. Hence, if the user never records drinking eight glasses, the medal drawing code never runs.
Add a method to show the medal:
func showMedal(show: Bool) {
  image = (show == true) ? medalImage : nil
}
Go to ViewController.swift and add an outlet at the top of the class:
@IBOutlet weak var medalView: MedalView!
Next, go to Main.storyboard and connect the new MedalView to this outlet.
Then, go back to ViewController.swift and add this method to the class:
func checkTotal() {
  if counterView.counter >= 8 {
    medalView.showMedal(show: true)
  } else {
    medalView.showMedal(show: false)
  }
}
This shows the medal if you drink enough water for the day.
Call this method at the end of both viewDidLoad() and pushButtonPressed(_:):
checkTotal()
Build and run the app. Tap the plus button several times to get to eight glasses of water. Congratulations! You got yourself a medal.

In the debug console, you’ll see that the creating Medal Image log only outputs when the counter reaches eight and displays the medal, because medalImage uses a lazy declaration.
Animating
Now, you can add some icing to the cake. You’ll add some simple animation to the buttons, making them spin when the user taps them. This should give you a feel of what else you can do with UIKit graphics and stimulate your curiosity.
First, add the following method to ViewController.swift:
func rotateButton(_ button: UIButton) {
  let layer = button.layer  // 1
  let rotationAnimation =
    CAKeyframeAnimation(keyPath: "transform.rotation")  // 2
  rotationAnimation.keyTimes = [0, 1]  // 3
  rotationAnimation.values = [0, CGFloat.pi]  // 4
  rotationAnimation.duration = 0.25  // 5
  layer.add(rotationAnimation, forKey: "transform.rotation")  // 6
}
Here’s what this does:
- Define which layer you’ll animate.
- Create an instance of
CAKeyframeAnimation. This animation will animate the layer by changing the value oftransform.rotation. - Each value in the array is a floating point number between 0.0 and 1.0 that defines when to apply the corresponding keyframe value. This property allows to create and control really complex animations. In this case, you just need the starting point
0and the end point1. - This property contains values for each of the
keyTimes. For starting point, you set rotation angle to0and for the end point topi, which is 180°. - Here, you specify the animation duration in seconds.
- Last, you add this animation to the layer, which will start the animation execution.
With this in place, you just need to call this method when user taps the button. Add this code to the end of pushButtonPressed(_:):
rotateButton(button)
Build and run your app. Tap the plus and minus buttons and enjoy your fancy new animation.
