Bubbles & Conversations in Android 11: Getting Started

Learn how to use Bubbles in Android to add notifications and create conversational shortcuts for Direct Share. By Jenn Bailey.

Leave a rating/review
Download materials
Save for later
Share
Update note: Jenn Bailey updated this tutorial for Android 11. She also wrote the original.

The most important thing an Android phone does is connect people. Wouldn’t it be nice if you could feel like the people you want to talk to are right there with you?

Android 11 has spectacular new features to help developers and users do just that. These features allow quick access to conversations with conversation shortcuts and adds a new Conversations section in the notification shade. Bubbles also gives you sophisticated sharing and ranking capabilities, as well as improved multitasking.

These changes reflect the goal of the platform: It will continue to evolve to focus on people and conversations as part of a multi-year Android initiative.

Happy android expressing joy with hearts.

In this tutorial, you’ll learn how to add these features to an app called Bubble Affirmations, which simulates chats with inspirational characters who provide a quick fix of ongoing encouragement at your fingertips.

In the process, you’ll learn how to:

  • Make notifications appear in the Conversations section
  • Create conversation shortcuts
  • Allow direct share through the shortcuts
  • Add metadata to bubbles
  • Detect user permission for bubbles
Note: This tutorial assumes you have basic knowledge of Kotlin and Android. If you’re new to Android, check out our Android tutorials.

Perhaps you know Android but are unfamiliar with Kotlin. If that’s the case, take a look at Kotlin For Android: An Introduction.

Just in case you’d like a quick primer on notifications, take a peek at Android Notifications Tutorial: Getting Started.

Now, it’s time to dive in!

Getting Started

Download the project materials by using the Download Materials button at the top or bottom of this tutorial. Open the Starter project in Android Studio. After the project finishes loading, build and run.

The starter app displaying a list of affirmational quote categories

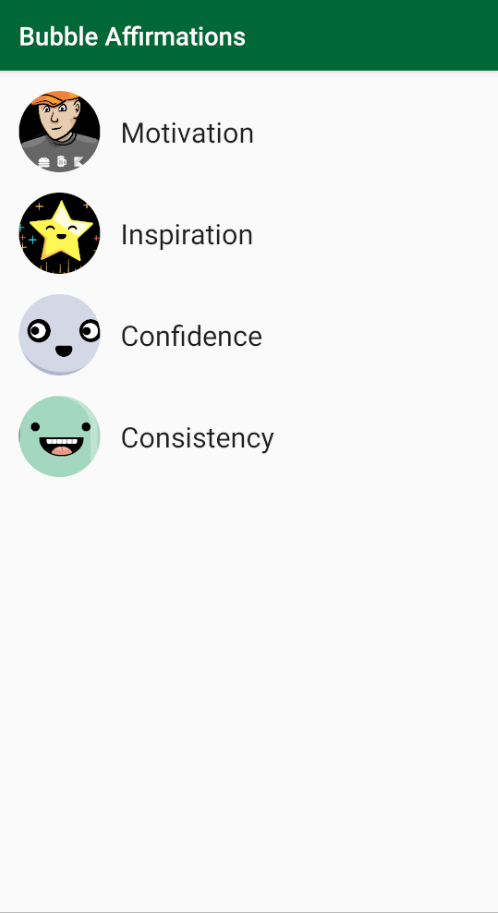
Select a category of affirmations to see a random quote from that category:
Example quote

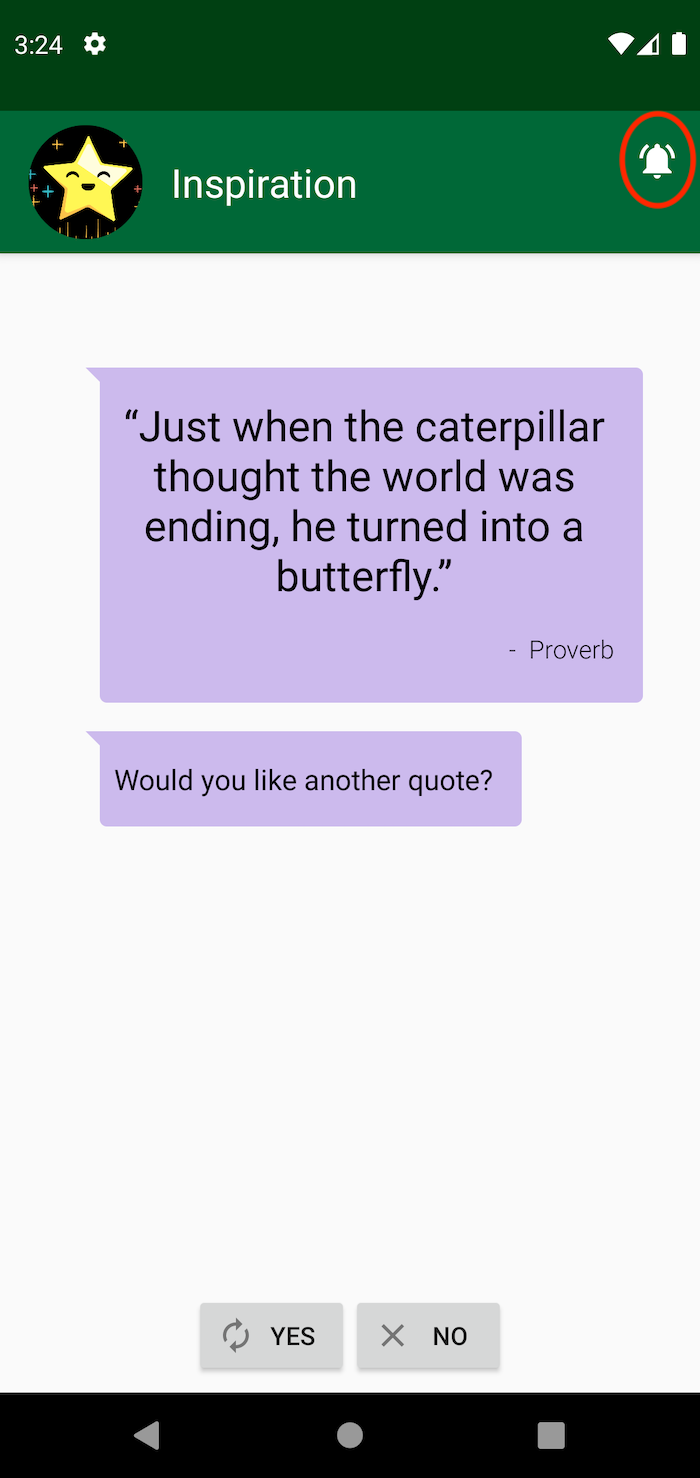
Tap the bell icon in the top-right corner, and your selected quote will appear as a notification:
A plain notification displaying the quote.

This notification could be more inspiring. In the next step, you’ll promote it to the Conversations section of the drawer.

Showing Notifications in the Conversations Section

Many phones have a reserved section at the top of the notification shade for real-time conversations. Notifications that appear in this section have a stronger visual emphasis on the avatar, highlighting who the conversation is with. Long-pressing notifications in this area shows you conversation-specific actions you can take.

To appear in this section, the notification must use MessagingStyle and associate the message with a Person. You’ll see how to do this next.

Adding a Person to the Conversation

Open NotificationHelper.kt and add the method below inside NotificationHelper:

private fun createPerson(icon: Icon, category: Category): Person {
  return Person.Builder()
    .setName(category.name)
    .setIcon(icon)
    .build()
}

This code generates a person to associate with the notification, making it a Person Notification.

Now, in showNotification, add the following above the line of code that creates the notification:

val person = createPerson(icon, quoteAndCategory.category)

The code above creates the person. Now, update the line of code that creates the notification to:

val notification = createNotification(quoteAndCategory, icon, person)

This passes the person to createNotification.

Then, replace createNotification with:

private fun createNotification(
  quoteAndCategory: QuoteAndCategory,
  icon: Icon,
  person: Person
): Notification.Builder {
  return Notification.Builder(context, CHANNEL_QUOTES)
    // 1
    .setContentTitle(quoteAndCategory.category.name)
    .setSmallIcon(icon)
    // 2
    .setShortcutId(quoteAndCategory.category.shortcutId)
    .setLocusId(LocusId(quoteAndCategory.category.shortcutId))
    .setCategory(Notification.CATEGORY_MESSAGE)
    // 3
    .setStyle(Notification.MessagingStyle(person)
      .setGroupConversation(false)
      .addMessage(quoteAndCategory.quote.quoteText,
                  currentTimeMillis(), person)
    )
    // 4
    .setShowWhen(true)
    .setContentIntent(createPendingMainIntent(
      REQUEST_CONTENT,
      quoteAndCategory.category)
    )
}

createNotification configures and returns Notification.Builder to send the notification. Here’s what’s going on inside:

  1. First, you set the title and icon for the notification.
  2. Then you use setShortcutId or setShortcutInfo to associate the notification with a long-lived dynamic or cached sharing shortcut when targeting Android 11. You also set the LocusId to improve ranking accuracy.
  3. In Android 11, a conversation notification must use MessagingStyle.
  4. Finally, you include the time of the notification and set an intent to open when the user taps the notification.
Note: Using LocusId helps the on-device intelligence figure out which conversations interest the user most. Ranking is based on how recent and how frequent the conversations are.

For better ranking, a messaging app can include a URI to a contact.

Understanding Fallback Behavior

If you want a conversation to appear in the Conversations section in Android 11, you must associate it with a valid, long-lived, dynamic or cached sharing shortcut and use MessagingStyle. The user can demote the conversation by altering the notification channel settings.

Apps that target Android 10 can make messages appear in the notification space, but the requirements are different. If the app uses MessagingStyle, it isn’t necessary to provide a shortcut in Android 10. However, if you don’t provide a shortcut, users won’t be able to see conversation-specific functions inline by long-pressing the notification.

If you set the category to CATEGORY_MESSAGE and the platform recognizes the app as a messaging app, it will still show in the Conversations section, but it will be in the pre-Android 11 style with no conversation-specific functions.

Now that you’ve associated the notification with a person, build and run:

Notification in person style, but not Conversations section.

The notification looks better now, and the sender’s avatar is more visible. For the notification to show up in the conversation area, however, you have to associate it with a valid shortcut. You’ll create the shortcuts next.

Creating Conversation Shortcuts

When targeting Android 11 or higher, you have to give a shortcut to any notification you want to show in the conversation space. Shortcuts are a handy way for a user to jump right into a conversation. Be sure to use AdaptiveIconDrawable for your shortcut icons. Otherwise, the avatar might not look as intended.

Note: To learn more, follow this shortcut imagery guide.

Add the following function inside NotificationHelper.kt:

private fun createShortcutIcon(category: Category): Icon {
  return Icon.createWithAdaptiveBitmap(
    context.resources.assets.open(
      "${category.name.toLowerCase(Locale.ROOT)}.png").use {
        input ->
          BitmapFactory.decodeStream(input)
       })
}

This code provides an adaptive bitmap so you can add the shortcuts. To do this, first add a new Android resource file to res called shortcuts.xml. Type shortcuts as the root element and select XML as the resource type and xml as the directory name.

Adding a shortcuts.xml file with XML

In shortcuts.xml, inside the shortcut tag, add the following code:

<share-target android:targetClass=
  "com.raywenderlich.android.bubblesaffirmations.ui.main.MainActivity">
  <data android:mimeType="text/plain" />
  <category android:name=
    "com.example.android.bubbles.category.TEXT_SHARE_TARGET" />
</share-target>

The share-target element holds information about which class will handle the intent, the type of data it can accept from sharing and the category that the direct share target uses.

Next, open AndroidManifest.xml and add the following code above the closing activity tag for MainActivity:

<meta-data
  android:name="android.app.shortcuts"
  android:resource="@xml/shortcuts" />

The code above associates MainActivity with the dynamic shortcut’s share-target in shortcuts.xml.

Next, open NotificationHelper.kt and add the following inside NotificationHelper:

private fun createDynamicShortcutIntent(category: Category): Intent =
  Intent(context, MainActivity::class.java)
    .setAction(Intent.ACTION_VIEW)
    .setFlags(Intent.FLAG_ACTIVITY_CLEAR_TASK)
    .setData(
      Uri.parse(
        "https://raywenderlich.android.bubblesaffirmations.com"
        + "/quote/${category.categoryId}"
      )
    )

createDynamicShortcutIntent creates the intent to launch from this shortcut. It uses a URI that passes categoryId to link directly to a specific conversation in the app via the shortcut.

Still in NotificationHelper.kt, add:

private fun createShortcuts() = categories.map { category ->
  ShortcutInfo.Builder(context, category.shortcutId)
    // 1
    .setLocusId(LocusId(category.shortcutId))
    .setActivity(ComponentName(context, MainActivity::class.java))
    .setShortLabel(category.name)
    .setIcon(createShortcutIcon(category))
    // 2
    .setLongLived(true)
    // 3
    .setCategories(
      setOf("com.example.android.bubbles.category.TEXT_SHARE_TARGET")
    )
    .setIntent(createDynamicShortcutIntent(category))
    // 4
    .setPerson(createPerson(createIcon(category), category)
  ).build()
}

Here’s what the code above does:

  1. LocusId helps the system accurately rank the conversation based on app usage.
  2. Conversation shortcuts must be long-lived. If the conversation no longer exists, the app can delete the shortcut with removeLongLivedShortcuts. Don’t remove shortcuts unless absolutely necessary — for example, when the user blocks a contact.
  3. Sets the category to the share-target defined in shortcuts.xml. Categories describe what type of data the user can share to the shortcut.
  4. Creates a person with an avatar and associates the person with the shortcut. Conversational shortcuts always have an associated person object.

Dynamically Updating the Shortcuts

Now that the code to create the shortcuts is in place, it’s time to add the ability to update them dynamically. Add the code below to updateShortcuts:

var shortcuts = createShortcuts()
// 1
if (importantCategory != null) {
  shortcuts = shortcuts.sortedByDescending { it.id == importantCategory.shortcutId }
}
// 2
val maxCount = shortcutManager.maxShortcutCountPerActivity
if (shortcuts.size > maxCount) {
  shortcuts = shortcuts.take(maxCount)
}
// 3
shortcutManager.addDynamicShortcuts(shortcuts)

updateShortcuts dynamically arranges the shortcuts, making sure the number doesn’t exceed the maximum allowed. Here’s what’s going on in the code:

  1. If there’s an important category, move it to the top of the list of shortcuts for easy access.
  2. The platform limits the number of shortcuts that can display in the list, so you need to truncate the list if the categories don’t all fit.
  3. Use a call to addDynamicShortcuts to add the shortcuts.

When the app starts and it sets up the notification channels, it uses updateShortcuts to create the shortcuts. Each time the app shows a notification, it updates the shortcuts to keep the most frequently accessed conversations at the top of the shortcuts list.

Testing the Shortcuts

Build and run, then press the Home button and find the app icon. Long-press the app icon to see the shortcuts:

Shortcuts appear upon long-press

Pick a shortcut to open that category in the app and launch a notification, then pull down the shade to see it:

Notification appears

The notification now displays in the Conversations section. Long-press the notification:

Setting the notification as a priority.

Set the conversation to have priority. The first time the user does this, the system confirms that the conversation is now a priority. Setting the conversation to have priority has the following effects:

  • It adds an orange circle around the avatar.
  • The conversation now appears at the top of the Conversations section.
  • The avatar displays on the lock screen.
  • The user can set their do not disturb settings to let priority conversations through.

Now, you’ll add a component that lets the shortcuts appear in Direct Share.

Allowing Direct Sharing Through Shortcuts

Conversational shortcuts make it easy to share conversations through Direct Share. In Android 11, you can pin up to four apps to the default share menu. Otherwise, apps and conversations appear in the menu, organized contextually.

To add the shortcuts to Direct Share, open AndroidManifest.xml and add the following code inside the activity tag for MainActivity:

<intent-filter>
  <action android:name="android.intent.action.SEND" />
  <category android:name="android.intent.category.DEFAULT" />
    <data android:mimeType="text/plain" />
  </intent-filter>

Build and run. Now, you can either close the app or leave it open in the background while you open your favorite web browser and search for a quote. Highlight the quote and tap Share:

Highlighting a quote to share

You’ll see the Direct Share menu with the app and conversation shortcuts listed:

Direct Share sheet with conversation shortcuts and app icons

Note: Higher-ranked conversations may obscure this app’s conversations in Direct Share.

You can select any of the conversation shortcuts to save the quote under that category in the app. Alternatively, you can also select the app itself and then select a category:

Consistency category selected in the app

The user can now directly share to the app via the conversation shortcuts with Direct Share. Great job!

Notification Bubbles

When working with bubbles, the user has the option to disallow them for certain apps or conversations, so it’s always a good idea to provide a notification with sufficient information for the bubble. Because you’ve done that in this app, now you can add the extra information called BubbleMetadata.

Adding BubbleMetadata

In NotificationHelper, add:

private fun createPendingQuoteBubbleIntent(category: Category):
  PendingIntent {
    val contentUri = (
      "https://raywenderlich.android.bubblesaffirmations.com/" +
      "quote/${category.categoryId}")
      .toUri()
    return PendingIntent.getActivity(
      context,
      REQUEST_BUBBLE,
      Intent(context, QuoteBubbleActivity::class.java)
            .setAction(Intent.ACTION_VIEW)
            .setData(contentUri),
        PendingIntent.FLAG_UPDATE_CURRENT
    )
  }

This generates PendingIntent, which BubbleMetadata uses to open the category indicated by the ID in contentUri.

Now, still in NotificationHelper, add:

private fun createBubbleMetadata(
  icon: Icon,
  fromUser: Boolean,
  category: Category
): Notification.BubbleMetadata {
  return Notification.BubbleMetadata.Builder(
    // 1
    createPendingQuoteBubbleIntent(category),
    icon
  )
  // 2
  .setDesiredHeightResId(R.dimen.bubble_height)
  .apply {
    // 3
    if (fromUser) {
      setAutoExpandBubble(true)
      setSuppressNotification(true)
    }
  }
  .build()
 }

The code above generates BubbleMetadata. Here’s what it does:

  1. The bubble uses PendingIntent, which contains the activity for the expanded bubble.
  2. The expanded bubble will present at the desired height.
  3. If the user requested the bubble explicitly, it automatically displays in expanded form so there’s no reason to show a notification along with the bubble.

Now, locate showNotification and add the following, right before the call to notify on NotificationManager:

val bubbleMetaData = createBubbleMetadata(
  icon,
  fromUser,
  quoteAndCategory.category
)
notification.setBubbleMetadata(bubbleMetaData)

The code above creates BubbleMetadata and associates it with the notification. This gives the notification the information it needs to be a bubble.

Making Your Activities Bubble

For an activity to appear in a bubble, you need to make a few changes in AndroidManifest.xml. Start by adding the following attributes in the activity tag for QuoteBubbleActivity:

android:allowEmbedded="true"
android:documentLaunchMode="always"
android:resizeableActivity="true"

These attributes allow the activity to display inside a bubble. Here’s how:

  • allowEmbedded="true" lets you embed the bubble’s activity in the System UI.
  • resizeableActivity="true" lets the System UI resize the expanded bubble.
  • documentLaunchMode="always" declares that the System UI needs this attribute so it can create multiple instances of this activity.

Build and run, select a category and launch a notification:

Notification with bubble icon

Now, the notification has a square icon at the bottom-left. Tapping this icon launches the notification in a bubble:

Notification displayed in a bubble

You can now close the bubble by tapping and dragging the bubble icon to the close icon at the bottom:

Closing the bubble

Detecting Bubble User Permissions

Because the user can opt out of bubble notifications for specific apps or conversations, it’s handy to know when they’ve allowed bubbling. In NotificationHelper.kt, replace the body of canBubble with:

val channel = notificationManager.getNotificationChannel(
  CHANNEL_QUOTES,
  category.shortcutId
)
return notificationManager.areBubblesAllowed()
  || channel?.canBubble() == true

Because the user can turn off bubbles at multiple levels, you query notificationManager and channel to see if bubbles are allowed.

With this code in place, build and run and select the same category you selected before and allowed to bubble:

Icon indicating if a category is allowed to bubble

The icon at the top-right changed from the notification bell to a more effervescent-looking icon, indicating that quotes from this category can bubble. Look at the other categories and you’ll see they still have the bell icon. That’s because, by default, the app has permission for selected conversations to bubble. The user can selectively change these settings under the notification settings for the app:

Notification settings for changing bubbles

Background Bubbles

But what if the app is in the background when it launches a bubble?

An app can launch a bubble even when it isn’t in the foreground. However, the bubble won’t expand on all devices. To see this in action, open QuoteViewModel.kt. Find showAsBubble and replace the body with:

val scope = CoroutineScope(Dispatchers.Main)
scope.launch {
  delay(5000)
  quoteData.value?.let { quote ->
    category.value?.let { category ->
      QuoteAndCategory(quote, category)
    }
  }?.let { repository.showAsBubble(it) }
}

The code above will wait five seconds before launching the notification bubble. Build and run and select a category that you’ve previously allowed to bubble. Press the icon to bubble the conversation, then quickly put the app in the background:

App bubbling a conversation when it's in the background

Soon, you’ll see the bubble appear, even though the app isn’t in the foreground. Depending on your device, it may or may not be expanded.

Where to Go From Here?

Download the completed project files by clicking the Download Materials button at the top or bottom of the tutorial.

In this tutorial, you learned how to turn a normal notification into a bubble and link directly to your app via sharing and shortcuts.

If you want to learn more about bubbles, visit the Official Android Documentation.

To learn more about notifications, check out this lesson from the Android Background Processing video course.

For a Codelab about shortcuts and bubbles, check out People: Conversations and Bubbles.

To learn more about direct share and shortcuts, see this Codelab.

I hope you enjoyed this tutorial! If you have any questions or comments “bubble up”, please join the forum discussion below.