Window Insets and Keyboard Animations Tutorial for Android 11
In this tutorial, you’ll learn about Window Insets and Keyboard Animations in Android 11 and how to add these features to your android app. By Carlos Mota.
Sign up/Sign in
With a free Kodeco account you can download source code, track your progress, bookmark, personalise your learner profile and more!
Create accountAlready a member of Kodeco? Sign in
Sign up/Sign in
With a free Kodeco account you can download source code, track your progress, bookmark, personalise your learner profile and more!
Create accountAlready a member of Kodeco? Sign in
Sign up/Sign in
With a free Kodeco account you can download source code, track your progress, bookmark, personalise your learner profile and more!
Create accountAlready a member of Kodeco? Sign in
Contents
Window Insets and Keyboard Animations Tutorial for Android 11
25 mins
- Getting Started
- Understanding the Project Structure
- Understanding Window Insets
- Getting to Know the Keyboard
- What’s Available on Older APIs
- Launching the Keyboard
- Checking if the Keyboard is Visible
- Getting the Keyboard Height
- What’s New in Android 11
- Preparing Your App for Keyboard Animations
- Handling System Windows
- Animating the Keyboard
- WindowInsets Animation Lifecycle
- Interacting With the Keyboard
- Observing Scroll States
- Handling Animations
- Where to Go From Here?
Until Android 11, keyboards and Androids seemed to go in opposite directions. There was no API you could query to learn if the keyboard was open or to know its size. When the keyboard popped up, the screen and views would automatically rearrange themselves without a smooth transition.
Developers used to handle everything manually with complex logic. It was time consuming and difficult. To overcome these issues, Android 11 introduces new features focused on window insets and keyboard animations.
In this tutorial, you’ll learn:
- About window insets and the keyboard.
- What’s new in Android 11 and what’s available in older APIs for handling keyboards.
- Keyboard animations
- Interacting with the keyboard in Android 11.
Getting Started
Download the starter project by clicking the Download Materials button at the top or bottom of the tutorial. You’ll find two projects inside the ZIP file. Starter has the skeleton of the app you’ll build, and Final gives you something to compare your code to when you’re done.
It’s easy to feel overwhelmed with everything you need to do in a day: Get the kids to school, stop at the grocery store, update a section on this tutorial. If you don’t want to forget any of these items you need to write them down.
To solve this problem, you’ll build BrainDump, a note-taking app that helps you keep track of everything you need to do.
First, take some time to understand the project structure.
Understanding the Project Structure
Open the Starter project in Android Studio and wait for it to synchronize.
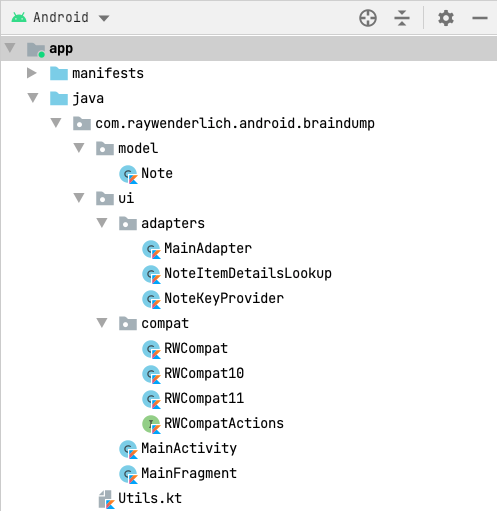
You’ll see a set of subfolders and other important files:
- model: This is the data object used to represent a note. A note is made up of its content and the date it was created.
- compat: Keyboard animations are only available for devices running Android 11. Therefore, you need different implementations for specific calls. RWCompat.kt is a factory responsible for loading RWCompat10.kt or RWCompat11.kt, depending on the device’s Android version.
- ui: In this folder, you’ll find the activity, fragments and adapters you’ll use to let your users view and interact with the app’s data.
- Utils.kt: This file contains a set of utility methods you’ll use throughout the project. Namely, you’ll use these to save and load your notes into and from shared preferences and format a note timestamp to an easily readable date.
Before diving in, spend some time learning about WindowInsets.
Understanding Window Insets
On Android, the window view could be categorised into two: the section for your application and the section for the Android OS. Window insets are the different portions of the screen that intersect with the system UI, such as the status and navigation bars and the lateral navigation sections on the new system gestures.
To avoid having user actions defined on areas already defined by the system for navigation, which would make them unusable, you can use a set of insets to locate these areas and control them according to your application’s specifications. Below are some of the available insets:
- System window insets
- Tappable element insets
- Gesture insets
- Stable insets
In this tutorial, you’ll use the system window insets. To learn more about window insets check out this Gesture Navigation Tutorial for Android.
Next, you’ll get familiar with the keyboard.
Getting to Know the Keyboard
Until now, there was no direct API you could use to access the keyboard and retrieve information about its state. Gathering this information was a job for complex calculus and inference, if not guessing.
Gone are the days when you had to manually implement everything to get any information about the keyboard’s current state. With the launch of Android 11, developers have new set of functionalities that let you animate the keyboard’s appearance or disappearance and how users interact with it.
Even better, Android backported most of these features to previous Android versions. After reading this tutorial, you can go back to your projects and remove hundreds of lines of keyboard-specifc code. :]
What’s Available on Older APIs
The following functionalities are available on all the Android versions supported by the AndroidX’s appcompat libraries.
Launching the Keyboard
You can launch the keyboard using two different APIs:
-
requestFocus
: Launch the keyboard by calling this method on EditText or other components that lets users enter text. -
windowInsetsController
: With this API you manually force the keyboard to show:view.windowInsetsController.show(WindowInsetsCompat.Type.ime())
Or the correspondent
hide
method, if you want to close it:view.windowInsetsController.hide(WindowInsetsCompat.Type.ime())
On both calls, you use
WindowInsetsController
with the correspondingWindowInsetsCompat
you want to access. In this case, the keyboard, or IME, so you can open or close it.
InputMethodManager
API.
Checking if the Keyboard is Visible
To see if the keyboard is open, you can call:
view.rootWindowInsets.isVisible(WindowInsetsCompat.Type.ime())
WindowInsetsCompat.Type.ime()
defines the type of insets you need to access to see if the keyboard is open.
Getting the Keyboard Height
You guessed it! Once again you can rely on WindowInsetsCompat
to get the keyboard height. Simply call:
view.rootWindowInsets.getInsets(WindowInsetsCompat.Type.ime()).bottom
This bottom value is directly related to keyboard visibility. If the keyboard is visible, it returns its height. If not, the value is 0
.
Now that you’ve reviewed what the old APIs can do, it’s time to see what’s new in Android 11.
What’s New in Android 11
Along with these new methods, Android 11 also introduced a set of functionalities focused on keyboard animations and how your views interact with them.
Before diving in, add some notes to the list. Notice how unsynchronized opening the keyboard is:
Preparing Your App for Keyboard Animations
To animate your keyboard, or IME, and the surrounding UI, you need to set your app as fullscreen because the IME is part of the system UI. Prior to Android 11, you could do this via:
window.decorView.systemUiVisibility = View.SYSTEM_UI_FLAG_LAYOUT_STABLE or
View.SYSTEM_UI_FLAG_LAYOUT_FULLSCREEN or
View.SYSTEM_UI_FLAG_FULLSCREEN
However, this API is now deprecated. That’s a good thing, since it was always tricky to find the right combination of flags. In it’s place, Android backported a single method to the previous Android versions via WindowCompat that lets you achieve the same behavior.
Go to MainActivity.kt, and before calling super.onCreate(savedInstanceState)
, add:
WindowCompat.setDecorFitsSystemWindows(window, !isAtLeastAndroid11())
Android studio prompts you for two imports. So, import androidx.core.view.WindowCompat and com.raywenderlich.android.braindump.isAtLeastAndroid11.
Here, the second parameter, !isAtLeastAndroid11()
, defines whether the app will handle the system windows. If the device runs Android 11 or newer, this value will be false
so the app can define the keyboard animations. On lower versions, since these functionalities aren’t available, the value will be true
so the system controls them.
To understand these differences, compile and run the on a device with a version lower than Android 11.
Everything seems perfect! What if you run it on a device with Android 11?
As you can see, the UI now overlaps the system bars. This overlap happens because your app asked to occupy the entire screen. At the same time, it said it would take care of the system windows, which it didn’t.
So, time to do that. :]
Handling System Windows
setDecorFitsSystemWindows
is only set for Android versions 11 or higher. So, open RWCompat11.kt and update setUiWindowInsets :
//1
private var posTop = 0
private var posBottom = 0
fun setUiWindowInsets() {
//2
ViewCompat.setOnApplyWindowInsetsListener(container) { _, insets ->
//3
if (posBottom == 0) {
posTop = insets.getInsets(WindowInsetsCompat.Type.systemBars()).top
posBottom = insets.getInsets(WindowInsetsCompat.Type.systemBars()).bottom
}
//4
container.updateLayoutParams<ViewGroup.MarginLayoutParams> {
updateMargins(
top = posTop,
bottom = posBottom)
}
insets
}
}
When prompted for imports, use the following:
import androidx.core.view.ViewCompat
import androidx.core.view.WindowInsetsCompat
import androidx.core.view.updateLayoutParams
import androidx.core.view.updateMargins
setUiWindowInsets
is already declared, so you need to add its content.
Here’s a step-by-step breakdown of this logic:
- You declare these two fields globally because you’ll use them later in a method that handles the keyboard animations.
- To guarantee compatibility with previous Android versions, you give precedence to the appcompat APIs.
- On the first run, both fields are empty, so they need to be set. Since the input bar should be on top of the navigation UI and the toolbar should be under the status bar, you’ll need to check the margins of these two insets and update the container margins accordingly.
- The container received corresponds to the activity’s root view, based on the values defined earlier. You use them to update the view bottom and top margin. With this, no component is overlaid.
postTop
and postBottom
inside the setOnApplyWindowInsetsListener
. Otherwise when you’re querying systemBars
insets you might receive 0
as top and bottom margins. There’s no guarantee the views will be ready outside this listener.
Now that you rearranged the UI to be within the screen limits, hit compile and run the app.
Everything fits perfectly – well done! :]
Now that the UI fits its window, it’s time to animate the keyboard.
Animating the Keyboard
You’ll use the WindowInsetsAnimationCallback to animate the keyboard.
This API is only available on Android 11 and higher. So in RWCompat11.kt, update animateKeyboardDisplay
as follows:
//1
@RequiresApi(Build.VERSION_CODES.R)
fun animateKeyboardDisplay() {
//2
val cb = object : WindowInsetsAnimation.Callback(DISPATCH_MODE_STOP) {
//3
override fun onProgress(insets: WindowInsets, animations: MutableList<WindowInsetsAnimation>): WindowInsets {
//4
posBottom = insets.getInsets(WindowInsetsCompat.Type.ime()).bottom +
insets.getInsets(WindowInsetsCompat.Type.systemBars()).bottom
//5
container.updateLayoutParams<ViewGroup.MarginLayoutParams> {
updateMargins(
top = posTop,
bottom = posBottom)
}
return insets
}
}
//6
container.setWindowInsetsAnimationCallback(cb)
}
Here’s a logic breakdown:
-
setWindowInsetsAnimationCallback
is only available on Android R. Although RWCompat11.kt only contains code that targets this API, it’s good practice to add this annotation to notify other programmers they need to check if the device supports this call. - You can use two modes here:
DISPATCH_MODE_CONTINUE_ON_SUBTREE
andDISPATCH_MODE_STOP
. In this scenario, you used the latter since the animation occurs at the parent level. And also there’s no need to propagate this event into other levels of the view hierarchy. - In this use case, you used
onProgress
to update the UI. There are a few methods available that can be useful in other scenarios. More on this shortly. - Every time there’s a change on WindowInsetsCompat,
onProgress
is called and you need to update theroot
view margins. This guarantees the UI updates seamlessly with the animation.To recalculate this margin, you need to get the
systemBars
bottom margin and add it to the current size of the IME. Otherwise, your UI will be under the system navigation bar or the keyboard.If the user opens the keyboard, this sum will increase until the animation finishes. If the user closes the keyboard, the sum will decrease until the final result is the value of the
systemBars
bottom. - With these new values you update the margins, so the UI will synchronize with the keyboard animation.
- After defining the callback it’s important to set it. Otherwise, nothing will happen.
With everything defined, play a bit with these new animations. Compile and run the app. See how smoothly the keyboard opens and closes.
WindowInsets Animation Lifecycle
The other methods available in setWindowInsetsAnimationCallback
are:
-
onPrepare
: Lets you record any specific configuration before the animation takes place. For instance, you can record the initial coordinates of a view. -
onStart
: Similar to the previous method, you can use it to save any value that’s going to change later. You can also use it to trigger any other behavior related to this event when the animation starts. -
onProgress
: This event is triggered multiple times as the keyboard is displayed or dismissed from the screen. It’s called every time the WindowInsetsCompat changes. -
onEnd
: This event triggers after the animation ends. You can use it to clean up any allocated resources or make any UI view reflect this new state.
Now you’ve seen how to make your UI smoothly adapt to any keyboard change. Take a look at which additional events could cause the same trigger.
Interacting With the Keyboard
In this section, you’ll implement a new feature. When the user scrolls up in the RecyclerView, you’ll push the keyboard at the same speed until it’s fully opened. If it’s visible, swiping down the list will have the opposite behavior, and the keyboard will close.
There are a couple of ways to achieve this. You could use any component that supports scrolling, such as ScrollView or NestedScrollView. In this, case you’ll use RecyclerView.
To open or close the keyboard while the user scrolls through the list, you need to choose a component that supports this behavior:
- Scroll direction: Depending on if the user’s scroll direction – up or down. In this case, you want to open or close, respectively.
- Overscroll: The list might not be moving since the user already scrolled until its limit. The user is still swiping his finger across the screen, expecting to see a corresponding action. Because of this, the component you’ll choose needs to support this behavior.
- Detect when motion starts and stops: Maybe you want to detect when the keyboard animation should start and end. If the user scrolls a bit, you want to open or close the keyboard fully, so it’s important to understand when the movement ends.
To achieve this, you’re going to use the LinearLayoutManager, which supports all of the above functionalities. Go to RWCompat11.kt and update createLinearLayoutManager
to:
@RequiresApi(Build.VERSION_CODES.R)
fun createLinearLayoutManager(context: Context, view: View): LinearLayoutManager {
var scrolledY = 0
var scrollToOpenKeyboard = false
return object : LinearLayoutManager(context) {
var visible = false
}
}
In this method, a couple of fields are already declared:
-
scrolledY
: Holds the distance the user dragged in pixels. -
scrollToOpenKeyboard
: True if the user is scrolling up to open the keyboard or false if they’re scrolling down to close it. -
visible
: The initial state of the keyboard when the user started this action.
For now, you’re returning an instance of the LinearLayoutManager. Nevertheless, to make all the calculations needed you’ll need to override two different methods:
-
onScrollStateChanged
: Notifies when the user started scrolling through the list and when he finished. -
scrollVerticallyById
: Triggered while the user is scrolling. This lets you synchronize the keyboard animation along with the list the user is scrolling.
Observing Scroll States
Now override onScrollStateChanged
. Add this method inside the LinearLayoutManager declaration:
override fun onScrollStateChanged(state: Int) {
//1
if (state == AbsListView.OnScrollListener.SCROLL_STATE_TOUCH_SCROLL) {
//2
visible = view.rootWindowInsets?.isVisible(WindowInsetsCompat.Type.ime()) == true
//3
if (visible) {
scrolledY = view.rootWindowInsets?.getInsets(WindowInsetsCompat.Type.ime())!!.bottom
}
//4
createWindowInsetsAnimation()
//5
} else if (state == AbsListView.OnScrollListener.SCROLL_STATE_IDLE) {
//6
scrolledY = 0
animationController?.finish(scrollToOpenKeyboard)
}
super.onScrollStateChanged(state)
}
If Android studio prompts for imports, import android.widget.AbsListView
. Ignore the missing methods for now.
Here’s what this code does:
- When the user initially touches the list they trigger
onScrollStateChanged
with the valueSCROLL_STATE_TOUCH_SCROLL
. - To understand if the keyboard is going to close or open, you need to save its initial state. If it’s open, the corresponding action is to close the keyboard. Conversely, if it’s closed, the corresponding action will open it.
- If it’s already visible you need to initialize
scrolledY
with the IME’s current bottom position, otherwise part of the UI will be covered. This value will be important later since it also influences the value ofscrollToOpenKeyboard
which defines if the keyboard’s final action is to open or close. - In this method, you define the animation controller listener that’s used in the animation.
- After the user finishes the action it’s time to clean up any used resource and finish the animation.
- If the keyboard isn’t entirely visible, because the user scrolled a small portion of the screen, this call is responsible for finishing this action.
In this code block, you saw there’s a call to a method you haven’t added: createWindowInsetsAnimation
. In the same class, after the declaration of createLinearLayoutManager
add:
@RequiresApi(Build.VERSION_CODES.R)
private fun createWindowInsetsAnimation() {
view.windowInsetsController?.controlWindowInsetsAnimation(
WindowInsetsCompat.Type.ime(), //types
-1, //durationMillis
LinearInterpolator(), //interpolator
CancellationSignal(), //cancellationSignal
animationControlListener //listener
)
}
Take note of the import statements to use:
import android.os.CancellationSignal
import android.view.animation.LinearInterpolator
This adds a controller to the inset you want to animate. This method receives the following arguments:
-
types: The types of inset your app wants to control. In this case, since it’s the keyboard you’re going to set it as
ime
. -
durationMillis: The duration of the animation. Since the keyboard is going to animate while the user drags the list, which depends on an arbitrary action, you disable the animation by setting it to
-1
. -
interpolator: The interpolator used for the animation. In this case, you’re going to use
LinearInterpolator
. - cancellationSignal: Used to cancel the animation and return to the previous state. Since in this scenario the behavior selected is to finish the animation you won’t use this.
- listener: The animation controller listener that’s called when the windows are ready to animate or the operation cancels or finishes.
Handling Animations
Now that you defined the controlWindowInsetsAnimation
you’ll need to declare the animationControlListener
used in this method. At the top of RWCompat11 class, just before setUiWindowInsets, add:
private val animationControlListener: WindowInsetsAnimationControlListener by lazy {
@RequiresApi(Build.VERSION_CODES.R)
object : WindowInsetsAnimationControlListener {
override fun onReady(
controller: WindowInsetsAnimationController,
types: Int
) {
animationController = controller
}
override fun onFinished(controller: WindowInsetsAnimationController) {
animationController = null
}
override fun onCancelled(controller: WindowInsetsAnimationController?) {
animationController = null
}
}
}
When the keyboard is ready to animate, you call onReady
with the animationController
you’ll use to pull or pop the keyboard to or from the screen. Here, the animationController
updates with this new reference to use on LinearLayoutManager methods. If the action is either canceled or finished, it cleans all resources, since they’re no longer necessary.
Before going to the last method, declare the animationController
field just before the animationControlListener
:
private var animationController: WindowInsetsAnimationController? = null
Finally, go back to createLinearLayoutManager
. You’ve already declared onScrollStateChanged
where the keyboard animation is set up and finished. Now it’s time to create the animation itself.
Override the scrollVerticallyBy
:
override fun scrollVerticallyBy(dy: Int, recycler: Recycler, state: State): Int {
//1
scrollToOpenKeyboard = scrolledY < scrolledY + dy
//2
scrolledY += dy
//3
if (scrolledY < 0) {
scrolledY = 0
}
//4
animationController?.setInsetsAndAlpha(
Insets.of(0, 0, 0, scrolledY),
1f,
0f
)
return super.scrollVerticallyBy(dy, recycler, state)
}
When prompted for imports, import androidx.recyclerview.widget.RecyclerView.*
and android.graphics.Insets
.
In the code above:
- Since the user can scroll up and down the list you can't rely on the keyboard's initial visibility state. To know if it should open or close the keyboard,
scrollToOpenKeyboard
calculates the user's swipe direction based onscrolledY
anddy
. If the last scroll was upwards to the beginning of the list the keyboard will show, otherwise it will hide. -
dy
contains the distance fromscrollVerticallyBy
event. To know the total distance scrolled you have to add this reference to a variable set inside the LinearLayoutManager scope:scrolledY
. - In case the
scrolledY
is negative, the value will be set to0
since it's not possible to move the keyboard to a negative value. - Finally,
setInsetsAndAlpha
defines the movement that needs to occur on the IME window. In this case, you only need to define the bottom value so all the other values are set to0
. The1f
corresponds to the value set for the alpha property, which is set to the maximum to avoid having any transparency.0f
is the animation progress.
Now that you've defined everything, it's time to compile and run the app!
Beautiful, right? :]
Where to Go From Here?
Congratulations! You learned how to create a seamless animation when launching the keyboard.
You can download the completed project files by clicking the Download Materials button at the top or bottom of the tutorial.
Android 10 and 11 have many new features you can use to empower your app! For a fun challenge, try the Bubbles tutorial. Consider learning about augmented reality apps in ARCore with Kotlin. Does your app deal with files? Don't forget to make it ready for Scoped Storage.
If you have any questions or comments, please join the discussion below.