UIDocument From Scratch
Learn how to add document support to your app using UIDocument. By Lea Marolt Sonnenschein.
Insert or Update
The last piece of the puzzle is to either insert or update this new data on the master view controller.
Go to ViewController.swift and find the DetailViewControllerDelegate extension and implement the empty delegate method detailViewControllerDidFinish(_:with:title:):
// 1
guard
  let doc = viewController.document,
  let version = NSFileVersion.currentVersionOfItem(at: doc.fileURL)
  else {
    if let docData = photoEntry {
      insertNewDocument(with: docData, title: title)
    }
    return
}

// 2
if let docData = photoEntry {
  doc.photo = docData
}

addOrUpdateEntry(for: doc.fileURL, metadata: doc.metadata, version: version)
Here's what you added:
- If the detail view controller doesn't have a document, you insert a new one.
- If the document exists, you simply update the old entry.
Now, build and run to see this in action:
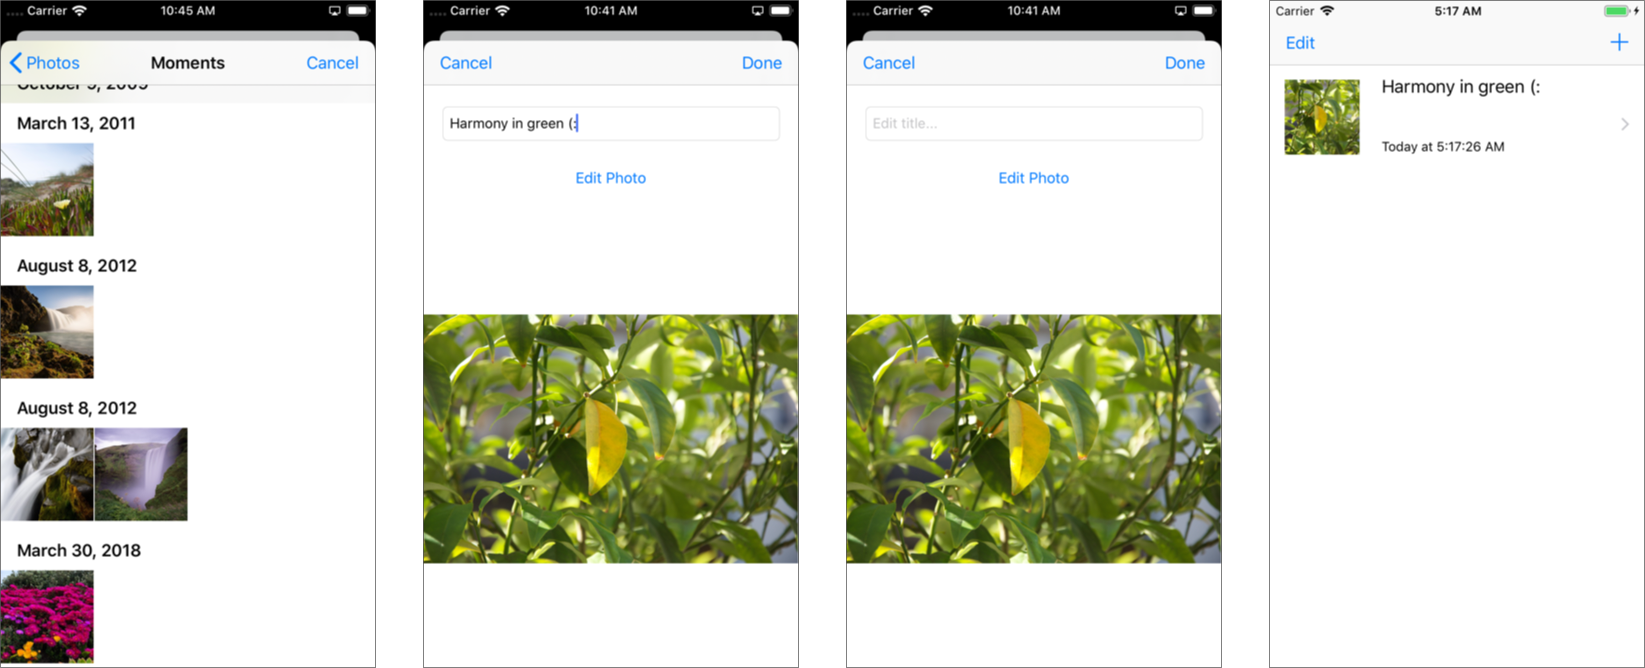
Success! You can finally create proper entries and even edit the photos! But if you try to change the title or delete an entry, the changes will only be temporary and come back with a vengeance when you quit and open the app.
That won't do.
Deleting and Renaming
For both deleting and renaming documents, you'll use the FileManager, which gives you access to a shared file manager object that allows you to interface with the contents of the file system and make changes to it.
First, go back to ViewController.swift and change the implementation of delete(entry:) to:
let fileURL = entry.fileURL
guard let entryIndex = indexOfEntry(for: fileURL) else { return }

do {
  try FileManager.default.removeItem(at: fileURL)
  entries.remove(at: entryIndex)
  tableView.reloadData()
} catch {
  fatalError("Couldn't remove file.")
}
For deleting, you use FileManager's removeItem(at:) method. When you build and run, you'll see you can now swipe rows to permanently delete them. Be sure to shut down and restart the app to verify they are gone for good.
Next, you'll add the ability to rename documents.
First, add the following code to rename(_:with:):
guard entry.description != name else { return }

let newDocFilename = "\(name).\(String.appExtension)"

if docNameExists(for: newDocFilename) {
  fatalError("Name already taken.")
}

guard let newDocURL = getDocumentURL(for: newDocFilename) else { return }

do {
  try FileManager.default.moveItem(at: entry.fileURL, to: newDocURL)
} catch {
  fatalError("Couldn't move to new URL.")
}

entry.fileURL = newDocURL
entry.version = NSFileVersion.currentVersionOfItem(at: entry.fileURL) ?? entry.version

tableView.reloadData()
For renaming, you use FileManager's moveItem(at:to:) method. Everything else in the method above is your run-of-the-mill table view management. Pretty simple, eh?
The last thing to do is to check whether the user has changed the title of the document in detailViewControllerDidFinish(_:with:title:).
Go back to that delegate method and add this code at the end:
if let title = title, let entry = selectedEntry, title != entry.description {
  rename(entry, with: title)
}
Finally, build and run to try out this awesome new way to store photos!
Where to Go From Here?
Now that you've gone through all the steps of creating a UIDocument from scratch, I recommend you take a look at our tutorial on using UIDocumentBrowserViewController which makes it significantly easier to handle documents.
If you're interested in diving deeper into creating your own documents and managing files, check out Apple's documentation on UIDcocument and FileManager
If you're after a deep dive into NSCoding, take a look at this tutorial.
Finally, to learn more about managing data for your apps, check out our video course on Saving Data in iOS.
If you have any questions or comments, please join the forum discussion below.