Complications for watchOS With SwiftUI
Learn how to create complications in SwiftUI that will accelerate your development productivity, provide delightful glanceable displays and give your users a single-tap entry point to launch your watchOS app. By Warren Burton.
Correcting Course
So why doesn't that complication work? Open ComplicationController.swift. In makeTemplate(for:complication:) add this case to the switch statement above default::
case .graphicExtraLarge:
  return CLKComplicationTemplateGraphicExtraLargeCircularView(
    ComplicationViewExtraLargeCircular(
      appointment: appointment))
Here you return an instance of CLKComplicationTemplateGraphicExtraLargeCircularView for the .graphicExtraLarge complication family.
Build and run. When the app opens, return to the Home screen. Then put the Home screen into editing mode again with a long press.
Swipe left until you reach the New screen:
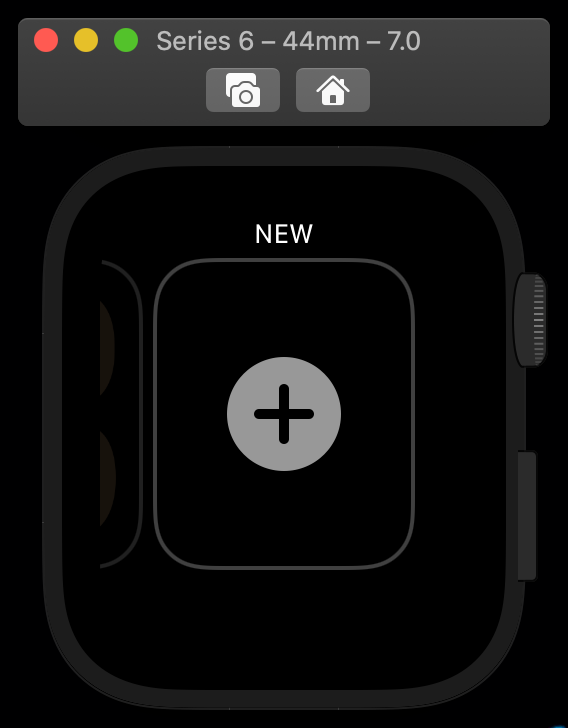
Click + then select X-LARGE from the list.

Now, click the face to select it. Then long press to return to edit mode. Edit the face and select the WhatsNext complication before returning to the Home screen.
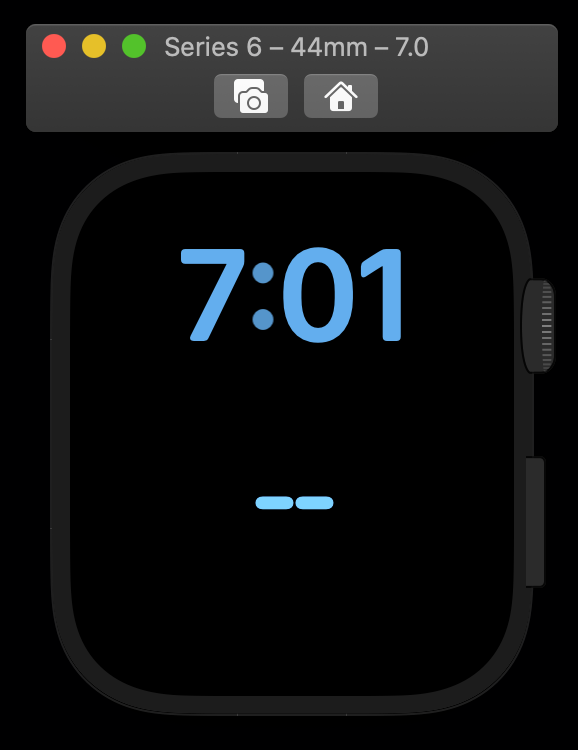
That's a sad watch face!
You'll see this warning in the Runtime section of the Issue navigator and in the console:

If you open ComplicationController.swift, you'll the same warning on the handler(_:) call in getCurrentTimelineEntry(for:withHandler:).
Open ComplicationViews.swift and locate ComplicationViewExtraLargeCircular. Remove the ScrollView by deleting the ScrollView { and its closing }. Do not remove the views within the ScrollView.
Resume your preview canvas. Now you can see the complication:

So just a reminder that you cannot put all SwiftUI views into a complication. It's limited to simple views which don't require user interaction, like text and shapes. But you can do a lot with those! Next up, you're going to take a look at another type of complication which doesn't use a SwiftUI view.
Beyond SwiftUI View Complications
In this section you'll build a complication to support the .utilitarianLarge family. This family uses the CLKComplicationTemplateUtilitarianLargeFlat template, which appears as a single line across the width of the watch with text and an optional image, like so:

Open ComplicationController.swift. Then, add this code at the bottom of the file:
extension ComplicationController {
  // 1
  func makeUtilitarianLargeFlat(appointment: Appointment)
  -> CLKComplicationTemplateUtilitarianLargeFlat {
    // 2
    let textProvider = CLKTextProvider(
      format: "\(appointment.name) in \(appointment.rationalizedTimeUntil())")

    // 3
    if let bgImage = UIImage.swatchBackground(),
      let fgImage = UIImage.swatchForeground(name: appointment.tag.name),
      let onePiece = UIImage.swatchOnePiece(name: appointment.tag.name) {
      // 4
      let imageProvider = CLKImageProvider(
        onePieceImage: onePiece,
        twoPieceImageBackground: bgImage,
        twoPieceImageForeground: fgImage)
      // 5
      let complication = CLKComplicationTemplateUtilitarianLargeFlat(
        textProvider: textProvider,
        imageProvider: imageProvider)
      return complication
    } else {
      // 6
      let complication = CLKComplicationTemplateUtilitarianLargeFlat(
        textProvider: textProvider)
      return complication
    }
  }
}
Here's what this does:
-
makeUtilitarianLargeFlat(appointment:)is a method that takes anAppointmentand returns aCLKComplicationTemplateUtilitarianLargeFlat. - Create a
CLKTextProvider, which is essentially an object that can vend text when it's needed. - Create three images using methods in
UIImage+Lozenge.swift. These images will be used in the complication view to display a little lozenge shape with the first three letters of the appointment's tag name in it. - If the images created successfully, create a
CLKImageProvider, which will vend an image as needed to display in the complication. You can read more about this initializer on Apple's website. - Then, create a
CLKComplicationTemplateUtilitarianLargeFlatwith the text and image providers you created. - If the images failed to create, simply create a
CLKComplicationTemplateUtilitarianLargeFlatwith only the text.
Still in ComplicationController.swift, locate makeTemplate(for:complication:). Then add this case to switch above default::
case .utilitarianLarge:
  return makeUtilitarianLargeFlat(appointment: appointment)
Build and run to see the complication rendered. Add the face Activity Digital. Then edit the face to select the WhatsNext complication:

Congrats! You've made a complication that uses providers rather than SwiftUI views!
And that's it! You've completed the tutorial. That wasn't complicated now was it!? Pun intended. :]
Where To Go From Here?
You can download the completed version of the project using the Download Materials button at the top or bottom of this tutorial.
You've seen that creating complications with SwiftUI is a simple and rapid process that lets you quickly iterate upon your designs. When you build a set of complications for your app, you need to consider the following elements:
- Observe the concepts of simplicity and frugality.
- Try to stick to shapes, lines, text and images.
- Ensure your running code isn't too CPU expensive. The watch hardware isn't the place to do expensive computation. If you need complex algorithms performed, do that work on the phone or back end and send the result to the watch for display.
One thing you might want to try out is working out how to get the complication picker to show something better than two dashes. Look at getLocalizableSampleTemplate(for:withHandler:) and, if you need a hint, check out the final project, which demonstrated how to do it.
If your complication is too power-hungry, watchOS will throttle it back, and your customers will receive an unpredictable experience.
These WWDC 2020 videos are good background on the topic of complications.
If you'd like a comprehensive look at how to develop apps for the Apple Watch, read our book, WatchOS With SwiftUI by Tutorials.
I hope you enjoyed this tutorial. If you have any questions or comments, please join the discussion below.