Using Core Data in iOS with RubyMotion
Learn how to use Core Data in a simple RubyMotion app. By Gavin Morrice.
Creating New Tasks
Okay, so far you've got the framework mostly there, but the only way to add tasks is a tad complex for the average user.
So, in tasks_view_controller.rb add a UIAlertView property under add_button to prompt the user to enter the new task's name:
def task_alert_view
  @task_alert_view ||= UIAlertView.alloc.initWithTitle("Add A Task",
    message: "Insert the name of the task below",
    delegate: self, cancelButtonTitle: "Add", otherButtonTitles: nil).tap do |alert|
      alert.alertViewStyle = UIAlertViewStylePlainTextInput
  end
end
By setting the alertViewStyle property to UIAlertViewStylePlainTextInput, you make it so the alert view contains a text field that the user can populate and submit.
All you need to do now is define an action to show this alert view, so add the following method:
def add_button_tapped(sender)
  task_alert_view.show
end
Then, update the action: parameter in add_button to call add_button_tapped::
def add_button
  @add_button ||= UIBarButtonItem.alloc.
    initWithBarButtonSystemItem(UIBarButtonSystemItemAdd, target: self, action: 'add_button_tapped:')
end
Before this will work as expected, you'll have to implement the UIAlertViewDelegate method alertView:clickedButtonAtIndex in TasksViewController.
Add the following at the bottom of the implementation:
# = UIAlertViewDelegate =

def alertView(alert_view, clickedButtonAtIndex: index_path)
  text_field = alert_view.textFieldAtIndex(0)
  if !text_field.text.to_s.empty?
    create_new_task(name: text_field.text)
    tableView.reloadData
    text_field.text = ''
  end
end

private

def create_new_task(attributes)
  Task.create(attributes)
  Task.save
end
This method first assigns the text field from the alert view to an instance variable and checks if it's text property has a value.
If it does, the controller creates a new Task record by calling create_new_task, a private method that creates a new record and commits the changes to the database.
Then, you reload the tableView to show the newly added task in the list, and reset the text_field's text property back to an empty string.
Build and run the app once again, and add a new task to the tasks list:

But what happens when you add a task? Where does it go?
The tasks in your database won't display on screen yet, because the tableView cells haven't been configured to display them. To do that, create a new file in app/views named task_cell.rb.
touch app/views/task_cell.rb
Just like EmptyCell, TaskCell should be a subclass of UITableViewCell. Open task_cell.rb and add the following:
class TaskCell < UITableViewCell

end
And also add the following lines to TaskCell
def initWithStyle(style, reuseIdentifier: reuseIdentifier)
  super.tap do
    self.styleClass = 'task_cell'
  end
end

def configure_for_task(task)
  textLabel.text = task.name
end

def prepareForReuse
  super
  textLabel.text = ''
end
Here you redefine initWithStyle:reuseIdentifier and set a styleClass for the cell, just like you did in EmptyCell. configure_for_task lets you set the value of the cell's textLabel from TasksViewController.
prepareForReuse should be familiar to you. In this case, you're setting the text property of the textLabel inherited from UITableViewCell back to an empty string, so the cell may be reused again by the table view. In this case, it's not strictly necessary, although it's always good practice.
Go back to tasks_view_controller.rb and tell your tableView about TaskCell the same way you did with the EmptyCell class, by updating viewDidLoad to the following:
def viewDidLoad
  super
  tableView.registerClass(EmptyCell, forCellReuseIdentifier: EmptyCell.name)
  tableView.registerClass(TaskCell,  forCellReuseIdentifier: TaskCell.name)
  navigationItem.rightBarButtonItem = add_button
end
Finally, update tableView:cellForRowAtIndexPath: to return a TaskCell if there are tasks present.
def tableView(table_view, cellForRowAtIndexPath: index_path)
  if todays_tasks.any?
    task = todays_tasks[index_path.row]
    table_view.dequeueReusableCellWithIdentifier(TaskCell.name).tap do |cell|
      cell.configure_for_task(task)
    end
  else
    table_view.dequeueReusableCellWithIdentifier(EmptyCell.name)
  end
end
Build and run the app again. Now the task list will update with new tasks as you add them.
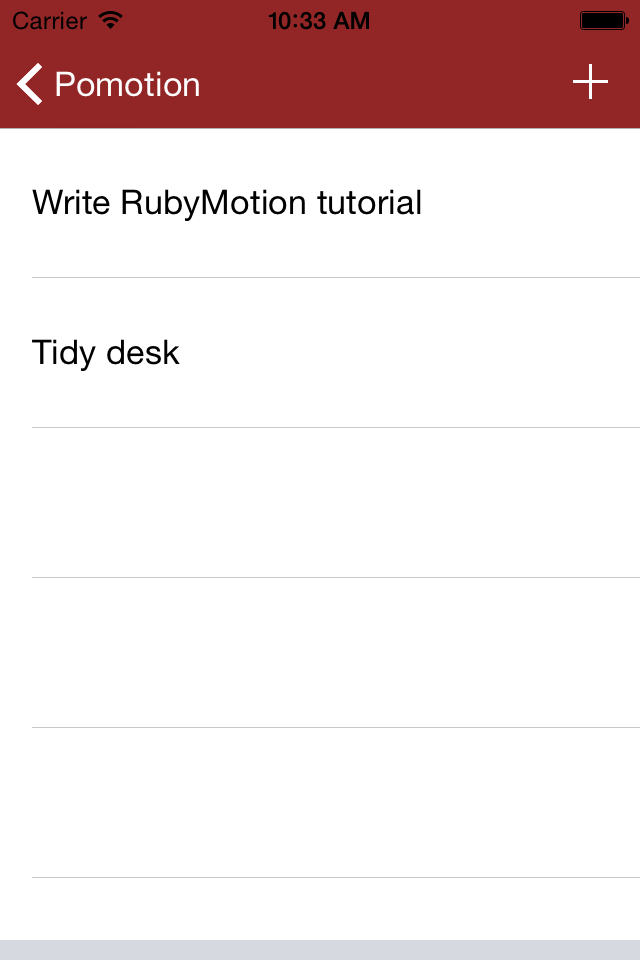
Things are really coming together.

Selecting the Current Task
So as of now, the app functions, but there's always more you can do to kick it up a notch. In this case, you could display the name of the current task on the timer screen. That would certainly help the user stay focused on the current task.
To get this working, you'll first need to add a column to the tasks table to identify which task is the current one. Update the table by defining the new schema in the schemas directory.
Create a new file named 0002_add_current_to_tasks.rb
touch schemas/0002_add_current_to_tasks.rb
Edit this file in your text editor so it looks like this:
schema "0002 add current to tasks" do
  entity "Task" do
    string :name, optional: false
    boolean :current, default: false, optional: false
  end
end
This file is very similar to the previous schema file you created.
In fact, there are only two differences: The name of the schema 0002 add current to tasks and the additional line where the current column is defined. In this case, it's a boolean column with a default value of false, which must be set for the Task record to be valid.
That's all you need to do!
The next time you run rake device_name="iPhone 4s" your app should automatically update the tasks table to match the new schema version.
Add a label to the main screen to display the name of the current task. In main_view.rb add this new property:
  def task_name_label
    @task_name_label ||= UILabel.alloc.initWithFrame(CGRectZero).tap do |label|
      label.styleClass = 'task_name_label'
      label.text = "n/a"
    end
  end
Again, nothing too crazy here. task_name_label returns a UILabel where text is pre-populated with n/a (not available, as there may not be a current task set when the screen is loaded). The label is given a style class task_name_label, so that you can easily define how it looks using CSS.
Update initWithFrame to add the task_name_label as a subview:
def initWithFrame(frame)
  super.tap do
    self.styleId = 'main_view'
    addSubview(timer_label)
    addSubview(timer_button)
    addSubview(task_name_label)
  end
end
Then you need to open resources/default.css and add some new CSS:
.task_name_label {
  top: 400px;
  left: 60px;
  width: 200px;
  height: 30px;
  font-size: 16px;
  color: #333333;
  text-align: center;
}
Build and run the app once again:
rake device_name="iPhone 4s"
Now you should see a label with n/a showing underneath the main timer:

The text for this label needs to be populated with the name of the current task whenever this screen displays. That way, it'll update when the current task changes.
In your text editor, open app/models/task.rb and add the following class methods:
# 1
def self.current=(task)
  self.current.current = false if self.current
  # 2
  task.current = true
  # 3
  self.save
  # 4
  @current = task
end

# 5
def self.current
  @current ||= where(current: true).first
end

# 6
def self.reset_current
  @current = nil
end
Let's review this section by section:
-
Task::current=is a setter method that sets the current Task. First, it checks for any existing current tasks and sets their current property to false. - This sets current on the given task to true.
- This saves the changes -- remember, CDQ won't commit any changes to the database unless you call the
savemethod. - Finally,
Task::current=sets an instance variable to store the new current Task. -
Task::currentreturns the value of the@currentinstance variable if it's set. If not, it queries the database to find the first Task where the current column is set to true, and then it returns that. - Lastly,
Task::reset_currentsets the value of the@currentback tonil, ensuring that the new current task reloads the next timeTask::currentis called.
Go back to the tasks_view_controller.rb and implement the UITableViewDelegate method tableView:didSelectRowAtIndexPath, just beneath tableView:heightForRowAtIndexPath:
def tableView(table_view, didSelectRowAtIndexPath: index_path)
  Task.current = Task.all[index_path.row]
  navigationController.popViewControllerAnimated(true)
end
This block makes it so that when a user taps on a task cell in the tasks screen, it sets the current task, updates that record in the database, and then the app navigates back to the main screen.
There's one small problem here: Currently the user could select the EmptyCell. You'll prevent it from being selected by implementing the following:
def tableView(table_view, shouldHighlightRowAtIndexPath: index_path)
  todays_tasks.any?
end
Give this a try; build and run the app in the simulator.
rake device_name="iPhone 4s"
You won't see any change on the screen yet, and that's because you still need to add that. But if you type the following in Terminal while the simulator is running, you should see that it's working behind the scenes.
(main)> Task.current
=> <Task: 0xb6a9a60> (entity: Task; id: 0xb63bfa0 <x-coredata://B0AEB5CD-2B77-43BA-B78B-93BA98325BA0/Task/p5> ; data: {
    current = 1;
    name = "Write RubyMotion tutorial";
})
Updating the label to show the new task is really simple. In main_view_controller.rb define a wrapper method that returns the task_name_label for the MainView. Add this just below tasks_image:
def task_name_label
  view.task_name_label
end
Then, insert this private method at the bottom of the MainViewController implementation:
def set_task_name_label_from_current_task
  if Task.current
    task_name_label_text = Task.current.name
  else
    task_name_label_text = "n/a"
  end
  task_name_label.text = task_name_label_text
end
Finally, implement viewDidAppear: for MainViewController and call set_task_name_label_from_current_task inside there. Remember to call super inside this method first with this:
def viewDidAppear(animated)
  super
  set_task_name_label_from_current_task
end
Build and run the app once again to see your changes take effect. This time, when you select a new task, the task_name_label updates with the name of your chosen task.
