Coordinator Tutorial for iOS: Getting Started
In this Coordinator tutorial you’ll convert an iOS app from using the MVC pattern to the Coordinator pattern and examine the pros and cons of Coordinators. By Andrew Kharchyshyn.
Application Coordinator
It’s time to create the application coordinator. Click File\New\File… and select the iOS\Source\Swift file. Name the file ApplicationCoordinator.swift. Click Next, and then Create.
Replace its contents with the following:
import UIKit

class ApplicationCoordinator: Coordinator {
  let kanjiStorage: KanjiStorage //  1
  let window: UIWindow  // 2
  let rootViewController: UINavigationController  // 3

  init(window: UIWindow) { //4
    self.window = window
    kanjiStorage = KanjiStorage()
    rootViewController = UINavigationController()
    rootViewController.navigationBar.prefersLargeTitles = true

    // Code below is for testing purposes   // 5
    let emptyViewController = UIViewController()
    emptyViewController.view.backgroundColor = .cyan
    rootViewController.pushViewController(emptyViewController, animated: false)
  }

  func start() {  // 6
    window.rootViewController = rootViewController
    window.makeKeyAndVisible()
  }
}
Let’s take a closer look at the code:
-
ApplicationCoordinatorwill havekanjiStoragewith data from JSON. Right nowkanjiStorageis used as a shared instance, but you’ll use dependency injection instead. -
ApplicationCoordinatorsets up its presentations in the app’s window, which will be passed toApplicationCoordinatorin its initializer. -
rootViewControlleris aUINavigationController. - Initialize the properties.
- Since there’s no child
Coordinatorto present, this code will allow you to test if the presentation is set up correctly. -
start()is where things kick off. Specifically, the window is presented with itsrootViewController.
All you need to do now is to call start() to create the ApplicationCoordinator.
Open AppDelegate.swift and replace its contents with this:
import UIKit

@UIApplicationMain
class AppDelegate: UIResponder, UIApplicationDelegate {
  var window: UIWindow?
  private var applicationCoordinator: ApplicationCoordinator?  // 1

  func application(_ application: UIApplication,
                   didFinishLaunchingWithOptions launchOptions:
                     [UIApplicationLaunchOptionsKey: Any]?) -> Bool {

    let window = UIWindow(frame: UIScreen.main.bounds)
    let applicationCoordinator = ApplicationCoordinator(window: window) // 2

    self.window = window
    self.applicationCoordinator = applicationCoordinator

    applicationCoordinator.start()  // 3
    return true
  }
}
Here’s what’s happening:
- Keep a reference to
applicationCoordinator. - Initialize
applicationCoordinatorwith the window that you just created. - Start
applicationCoordinator‘s main presentation.
Build and run the app. Now you should see the following screen:

Kanji List Coordinator
Now it’s time to present the KanjiListViewController. For this you’ll create another Coordinator. The main tasks of this Coordinator are to present a list of kanji and, later, to start another Coordinator responsible for displaying KanjiDetailViewController.
Similar to before, create a new file AllKanjiListCoordinator.swift.
Replace its contents with the following code:
import UIKit

class AllKanjiListCoordinator: Coordinator {
  private let presenter: UINavigationController  // 1
  private let allKanjiList: [Kanji]  // 2
  private var kanjiListViewController: KanjiListViewController? // 3
  private let kanjiStorage: KanjiStorage // 4

  init(presenter: UINavigationController, kanjiStorage: KanjiStorage) {
    self.presenter = presenter
    self.kanjiStorage = kanjiStorage
    allKanjiList = kanjiStorage.allKanji()  // 5
  }

  func start() {
    let kanjiListViewController = KanjiListViewController(nibName: nil, bundle: nil) // 6
    kanjiListViewController.title = "Kanji list"
    kanjiListViewController.kanjiList = allKanjiList
    presenter.pushViewController(kanjiListViewController, animated: true)  // 7

    self.kanjiListViewController = kanjiListViewController
  }
}
Here’s the breakdown:
- The presenter of
AllKanjiListCoordinatoris aUINavigationController. - Since
AllKanjiListCoordinatorpresents a list of all kanji, it needs a property to access the list. - Property to keep a reference to the
KanjiListViewControllerthat you’ll be presenting. - Property to store
KanjiStorage, which is passed toAllKanjiListCoordinator‘s initializer. - Initialize properties.
- Create the
UIViewControllerthat you want to present. - Push the newly created
UIViewControllerto the presenter.
Now you need to create and start AllKanjiListCoordinator. To do that, open ApplicationCoordinator.swift and add this property to the top of the file, right below where you declared the rootViewController:
let allKanjiListCoordinator: AllKanjiListCoordinator
Now, in init(window:), replace all of the code below // Code below is for testing purposes // 5 with this:
allKanjiListCoordinator = AllKanjiListCoordinator(presenter: rootViewController,
                                                  kanjiStorage: kanjiStorage)
Lastly, in start(), below this line:
window.rootViewController = rootViewController
add this:
allKanjiListCoordinator.start()
Build and run. Now it looks the same as it did before the refactor!

However, if you select a kanji, it will crash. This is because when a cell is selected in KanjiListViewController, a segue is performed, but that segue doesn’t exist.
You need to fix this! Instead of directly performing an action when the cell is selected, you’ll trigger a delegate callback. This removes the action logic from the UIViewController.
Open KanjiListViewController.swift and add this above the class declaration:
protocol KanjiListViewControllerDelegate: class {
  func kanjiListViewControllerDidSelectKanji(_ selectedKanji: Kanji)
}
Now, in KanjiListViewController, add a new property:
weak var delegate: KanjiListViewControllerDelegate?
Lastly, replace tableView(_:didSelectRowAt:) with this:
func tableView(_ tableView: UITableView, didSelectRowAt indexPath: IndexPath) {
  let kanji = kanjiList[indexPath.row]
  delegate?.kanjiListViewControllerDidSelectKanji(kanji)
  tableView.deselectRow(at: indexPath, animated: true)
}
Great! You just made KanjiListViewController simpler. It now has the single responsibility of displaying the list of kanji and notifying the delegate when someone selects an item. Nobody is listening yet, though.
Open AllKanjiListCoordinator.swift and add this to the end of the file, outside of AllKanjiListCoordinator:
// MARK: - KanjiListViewControllerDelegate
extension AllKanjiListCoordinator: KanjiListViewControllerDelegate {
  func kanjiListViewControllerDidSelectKanji(_ selectedKanji: Kanji) {

  }
}
This sets up AllKanjiListCoordinator so that it conforms to KanjiListViewControllerDelegate. Later you’ll add code inside kanjiListViewControllerDidSelectKanji(_:) that calls start() in DetailsCoordinator.
Lastly, add this code inside of start(), right below where you instantiate kanjiListViewController:
kanjiListViewController.delegate = self
Now build and run your app! Although it runs, the code inside kanjiListViewControllerDidSelectKanji is still empty, so nothing happens when you select a cell. Don’t worry; you’ll add this code shortly.
When to Create a Coordinator?
At this point, you might be wondering, “When do I need to create a separate coordinator?” There is no strict answer to this question. Coordinators are useful for a specific part of the application that might be presented from different places.
For displaying kanji details, you could create a new kanji details UIViewController inside of AllKanjiListCoordinator, and push it when the delegate callback is called. One good question to ask yourself is, “Should AllKanjiListCoordinator know about details related UIViewControllers?” The name suggests that it shouldn’t. Also, by creating a separate Coordinator for details, you’ll end up with an independent component that can display details for a kanji, without any additional dependencies on the app. This is powerful!
Suppose one day you want integrate Spotlight search. If you’ve put detail display into a separate Coordinator, it becomes simple to do: create a new DetailsCoordinator and call start().
The key takeaway is that Coordinators help create independent components that, together, build the app.
Kanji Detail Coordinator
Now let’s create the KanjiDetailCoordinator.
Similar to before, add a new file named KanjiDetailCoordinator.swift and replace the contents with the following code:
import UIKit

class KanjiDetailCoordinator: Coordinator {
  private let presenter: UINavigationController  // 1
  private var kanjiDetailViewController: KanjiDetailViewController? // 2
  private var wordKanjiListViewController: KanjiListViewController? // 3
  private let kanjiStorage: KanjiStorage  // 4
  private let kanji: Kanji  // 5

  init(presenter: UINavigationController, // 6
       kanji: Kanji,
       kanjiStorage: KanjiStorage) {

    self.kanji = kanji
    self.presenter = presenter
    self.kanjiStorage = kanjiStorage
  }

  func start() {
    let kanjiDetailViewController = KanjiDetailViewController(nibName: nil, bundle: nil) // 7
    kanjiDetailViewController.title = "Kanji details"
    kanjiDetailViewController.selectedKanji = kanji

    presenter.pushViewController(kanjiDetailViewController, animated: true) // 8
    self.kanjiDetailViewController = kanjiDetailViewController
  }
}
There’s a lot going on here, so let’s break it down:
-
KanjiDetailCoordinator‘s presenter is aUINavigationController. - Reference to
KanjiDetailViewController, which you’re presenting instart(). - Reference to
KanjiListViewController, which you’ll present when a user selects a word. - Property to store
KanjiStorage, which is passed toKanjiDetailViewController‘s initializer. - Property to store the selected kanji.
- Initialize properties.
- Create the
UIViewControllerthat you want to present. - Present the
UIViewControllerthat you just created.
Now let’s create KanjiDetailCoordinator. Open AllKanjiListCoordinator.swift and add a new property below the kanjiStorage declaration:
private var kanjiDetailCoordinator: KanjiDetailCoordinator?
Next, replace the empty body of kanjiListViewControllerDidSelectKanji(_:) in the extension with this:
let kanjiDetailCoordinator = KanjiDetailCoordinator(presenter: presenter,
                                                    kanji: selectedKanji,
                                                    kanjiStorage: kanjiStorage)
kanjiDetailCoordinator.start()

self.kanjiDetailCoordinator = kanjiDetailCoordinator
With this function, you create and start KanjiDetailCoordinator when a user selects a kanji.
Build and run.
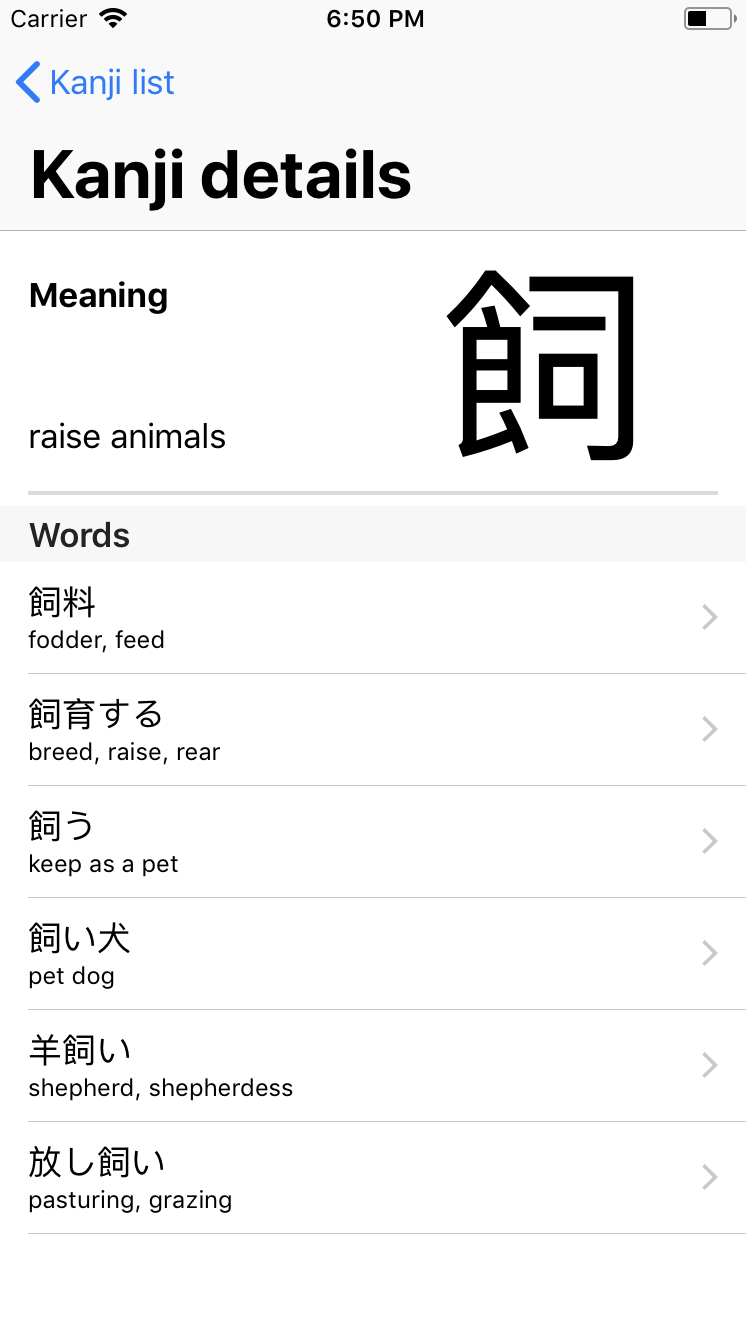
As you can see, you now have KanjiDetailViewController presented correctly when a user selects a cell on KanjiListViewController. However, if you select a word from the list on KanjiDetailViewController, your app will crash because, like before, you’re triggering a segue that no longer exists.
Time to fix this!
Open KanjiDetailViewController.swift. Just like with KanjiListViewController, add the delegate protocol above the class declaration:
protocol KanjiDetailViewControllerDelegate: class {
  func kanjiDetailViewControllerDidSelectWord(_ word: String)
}
Then, add the following property inside KanjiDetailViewController:
weak var delegate: KanjiDetailViewControllerDelegate?
To trigger the delegate, replace tableView(_:didSelectRowAt:) with this:
func tableView(_ tableView: UITableView, didSelectRowAt indexPath: IndexPath) {
  defer {
    tableView.deselectRow(at: indexPath, animated: true)
  }

  guard indexPath.section == 1,
    let word = selectedKanji?.examples[indexPath.row].word else {
      return
  }
  delegate?.kanjiDetailViewControllerDidSelectWord(word)
}
Excellent! Now the app won’t crash when you select a cell, but it still won’t open a list.
To fix this, open KanjiDetailCoordinator.swift, and add the following code at the bottom of the file — outside of KanjiDetailCoordinator — which confirms the delegate:
// MARK: - KanjiDetailViewControllerDelegate
extension KanjiDetailCoordinator: KanjiDetailViewControllerDelegate {
  func kanjiDetailViewControllerDidSelectWord(_ word: String) {
    let wordKanjiListViewController = KanjiListViewController(nibName: nil, bundle: nil)
    let kanjiForWord = kanjiStorage.kanjiForWord(word)
    wordKanjiListViewController.kanjiList = kanjiForWord
    wordKanjiListViewController.title = word

    presenter.pushViewController(wordKanjiListViewController, animated: true)
  }
}
Inside of start(), add this below where you instantiated KanjiDetailViewController:
kanjiDetailViewController.delegate = self
Build and run the project. The app should work the same way as it did before the refactoring.
