StoreKit Testing in Xcode 12: Getting Started
Learn to use the new StoreKit testing framework to exercise your in-app purchases right inside Xcode. By Saleh Albuga.
Testing in Xcode During Development
You added all the products in StoreKit configuration files. Before testing, you need to learn a couple of settings.
First, click the scheme GreenBar ▸ Edit Scheme. In the Scheme window, select Run on the left. Then select Options at the top.

See the new StoreKit Configuration option. That’s where you’ll set the StoreKit configuration file you want to test with. Click its combo box.

You’ll see the StoreKit configuration files you created!
Once you set a configuration file, StoreKit uses the data in that file when your app calls StoreKit APIs instead of communicating with the App Store servers. For now, leave the option as None.
Close the scheme editor.
Then, open one of the StoreKit configuration files and click Editor.
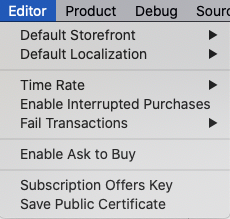
Here you can configure the local environment to test different IAP scenarios like:
- Test with a different storefront to see how your app looks and behaves with prices in different currencies.
- Test with a different localization to see how the description and title look in other localizations.
- Simulate Ask to Buy when purchasing from a family subscription with parental approval.
- Simulate different StoreKit transaction errors and how your app handles them.
- Change subscriptions expiry time rate.
- Simulate interrupted purchases. These are transactions that require users to perform an action related to their Apple ID before making a purchase.
Finally, go to Debug ▸ StoreKit ▸ Manage Transactions….

This is the transaction manager where you’ll see all the transactions made in Xcode. You can use the transaction manager to:
- Delete transactions: Made a transaction and found a bug in your code? Delete and purchase again it like it never happened.
- Refund transactions
- Approve or decline transactions when Ask to Buy is enabled.
- Resolve transactions: Simulate users resolving an interrupted purchase.
Testing Non-Consumables
Set RecipesAndCoins.storekit as the active StoreKit Configuration in the scheme as you saw above.

Now build and run.

You can see the recipes you’ve added! StoreKit now uses RecipesAndCoins.storekit as the back end instead of the sandbox environment.
Now, buy the Easy Pasta Salad.

Then, tap Confirm.
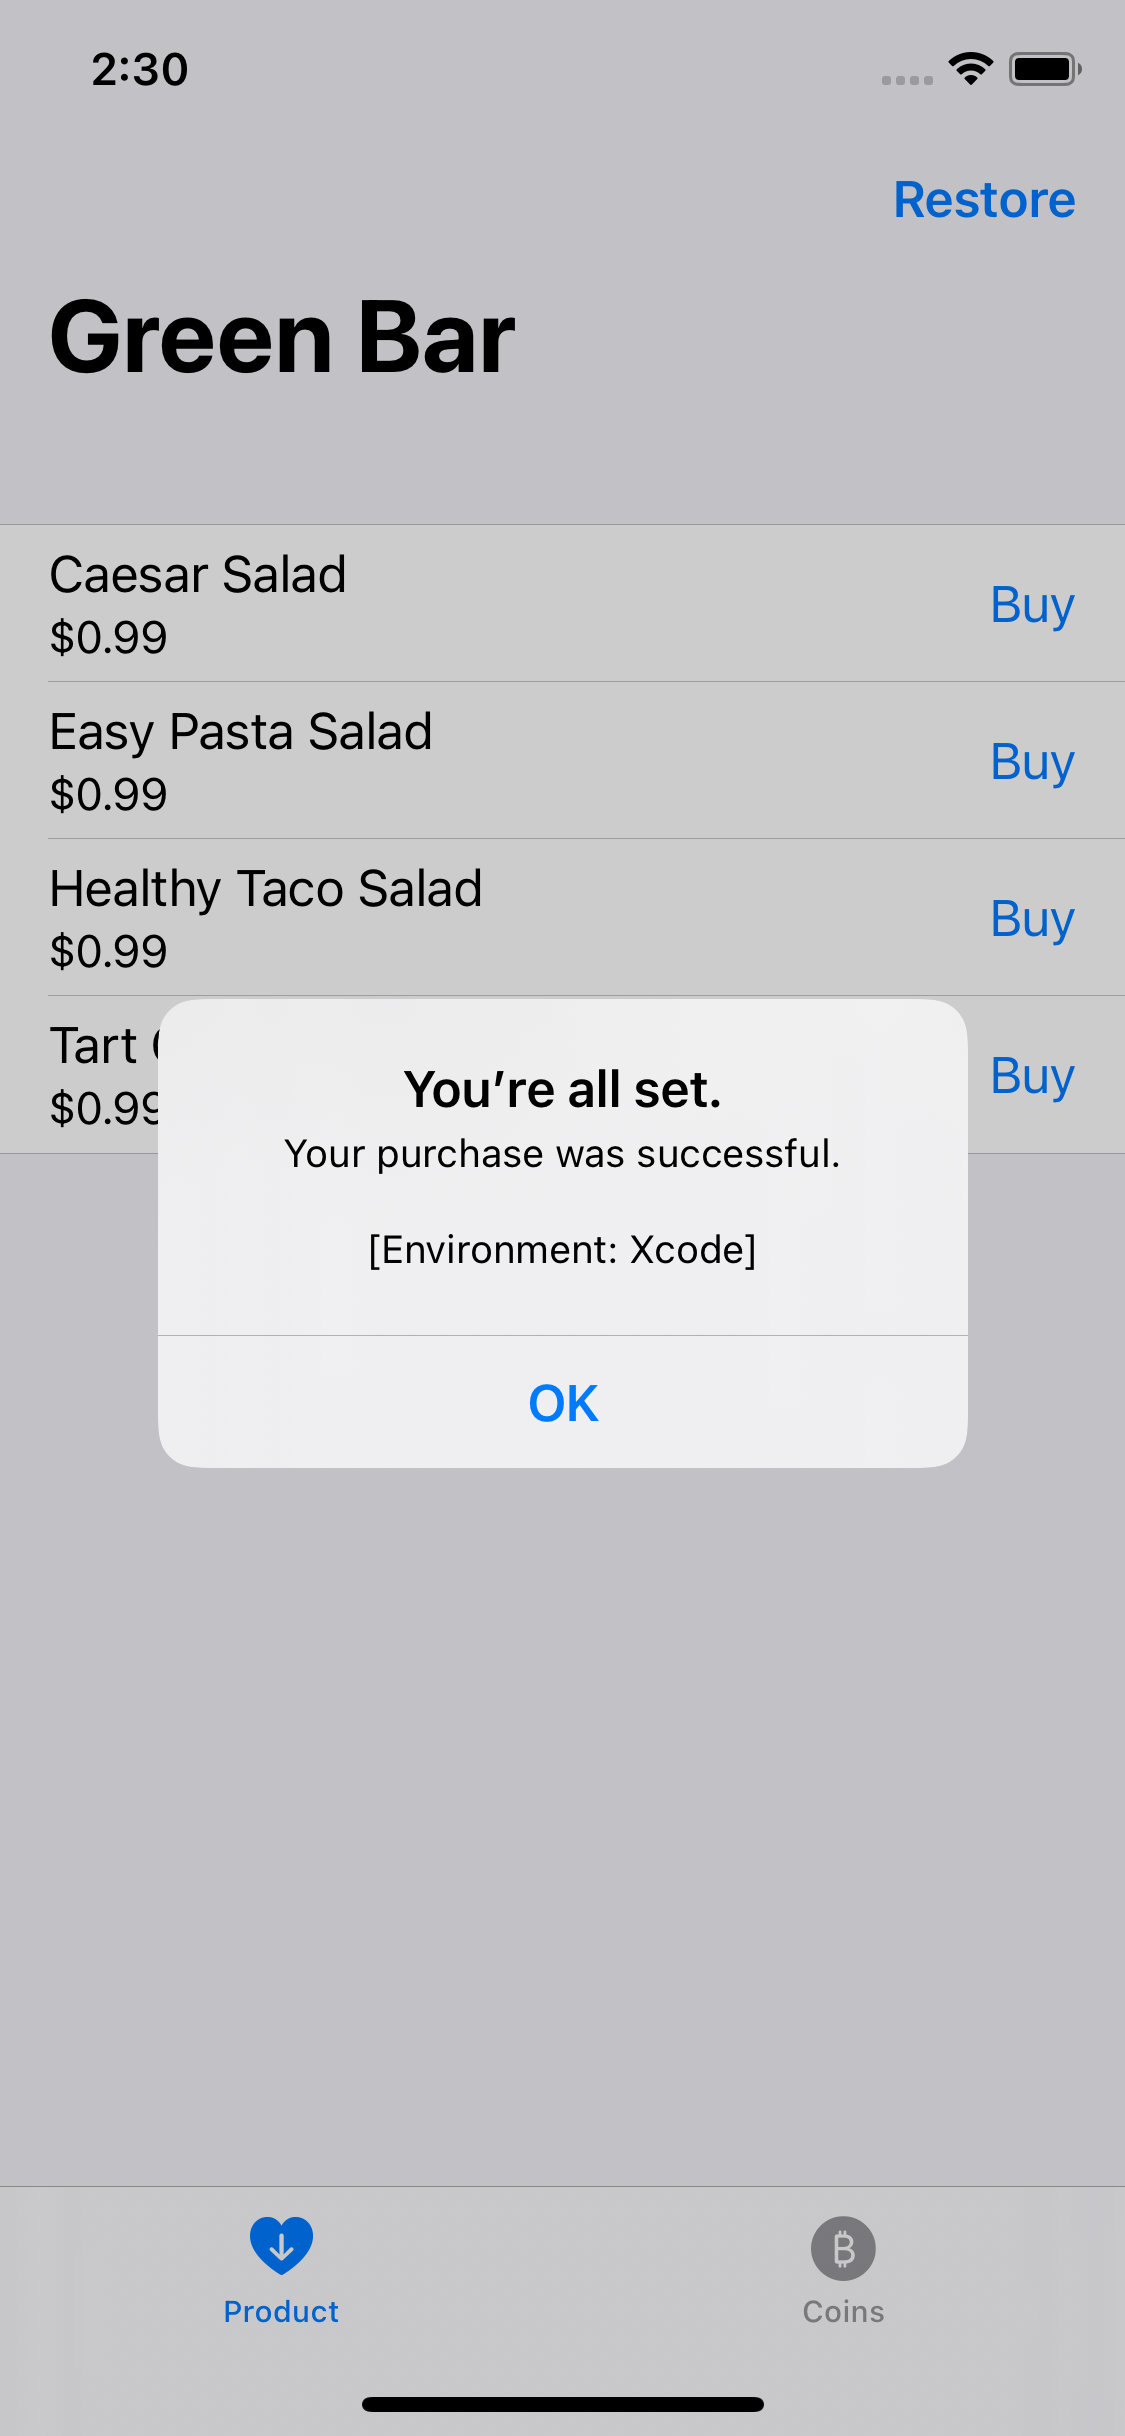
You got the confirmation, have the recipe and the app made it available for you! Note the alert is showing Xcode as the environment. Tap the recipe to open it.
To see the transaction, open the transaction manager from Debug ▸ StoreKit ▸ Manage Transactions…
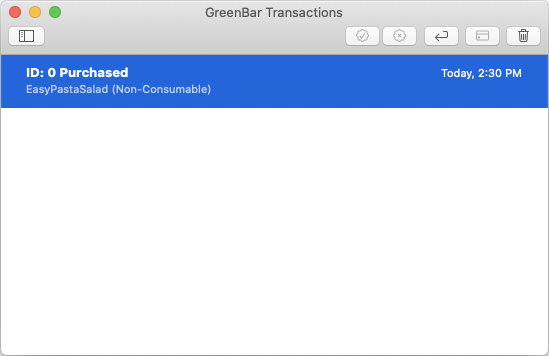
The transaction manager shows the purchase you made as well as its type and time.
You successfully tested your first purchase in Xcode! Because you were able to access the recipe content, you now know GreenBar is handling purchases as it should.
Next, you’ll add a useful feature for parents.
Simulating Ask to Buy
With the introduction of Ask to Buy, family organizers can control Family Sharing for any non-adult family members. When kids want to buy a new item, they send a request to their family organizer who then approves or declines the requests. When testing your app, you should consider this a scenario.
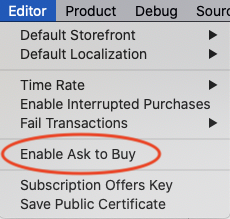
First, open RecipesAndCoins.storekit. Then select Editor ▸ Enable Ask to Buy from the menu.
Next, build and run. Buy the Healthy Taco Salad and tap Confirm in the App Store sheet.

You got the alert kids would see when buying items if they have Ask to Buy enabled. Tap Ask and open the transactions manager again.

The transaction shows as Pending Approval. Look at the transaction controls at the top right:
![]()
These controls let you manage transactions in Xcode. They’re enabled or disabled based on the transaction state.
For example, Approve Transactions and Decline Transactions are enabled because this transaction is pending approval. But Refund Purchases and Resolve Issues are disabled because this transaction isn’t complete yet. Delete Transactions is also enabled.
Since this is a testing environment, you can approve your requests. :] Click Approve Transactions and switch back to the simulator.

The app received the notification about the completed transaction and unlocked the recipe!
Take a moment to appreciate how easy it was to test this otherwise complex flow. Awesome, right?
Next, you’ll test consumables by buying and awarding coins.
Testing Consumables
Did you like the healthy taco salad? Then it’s time to support giving the author some coins for their hard work!
First, you need to disable Ask to Buy. Open the configuration file and select Editor ▸ Disable Ask to Buy.
Then build and run. Next, switch to the Coins tab.
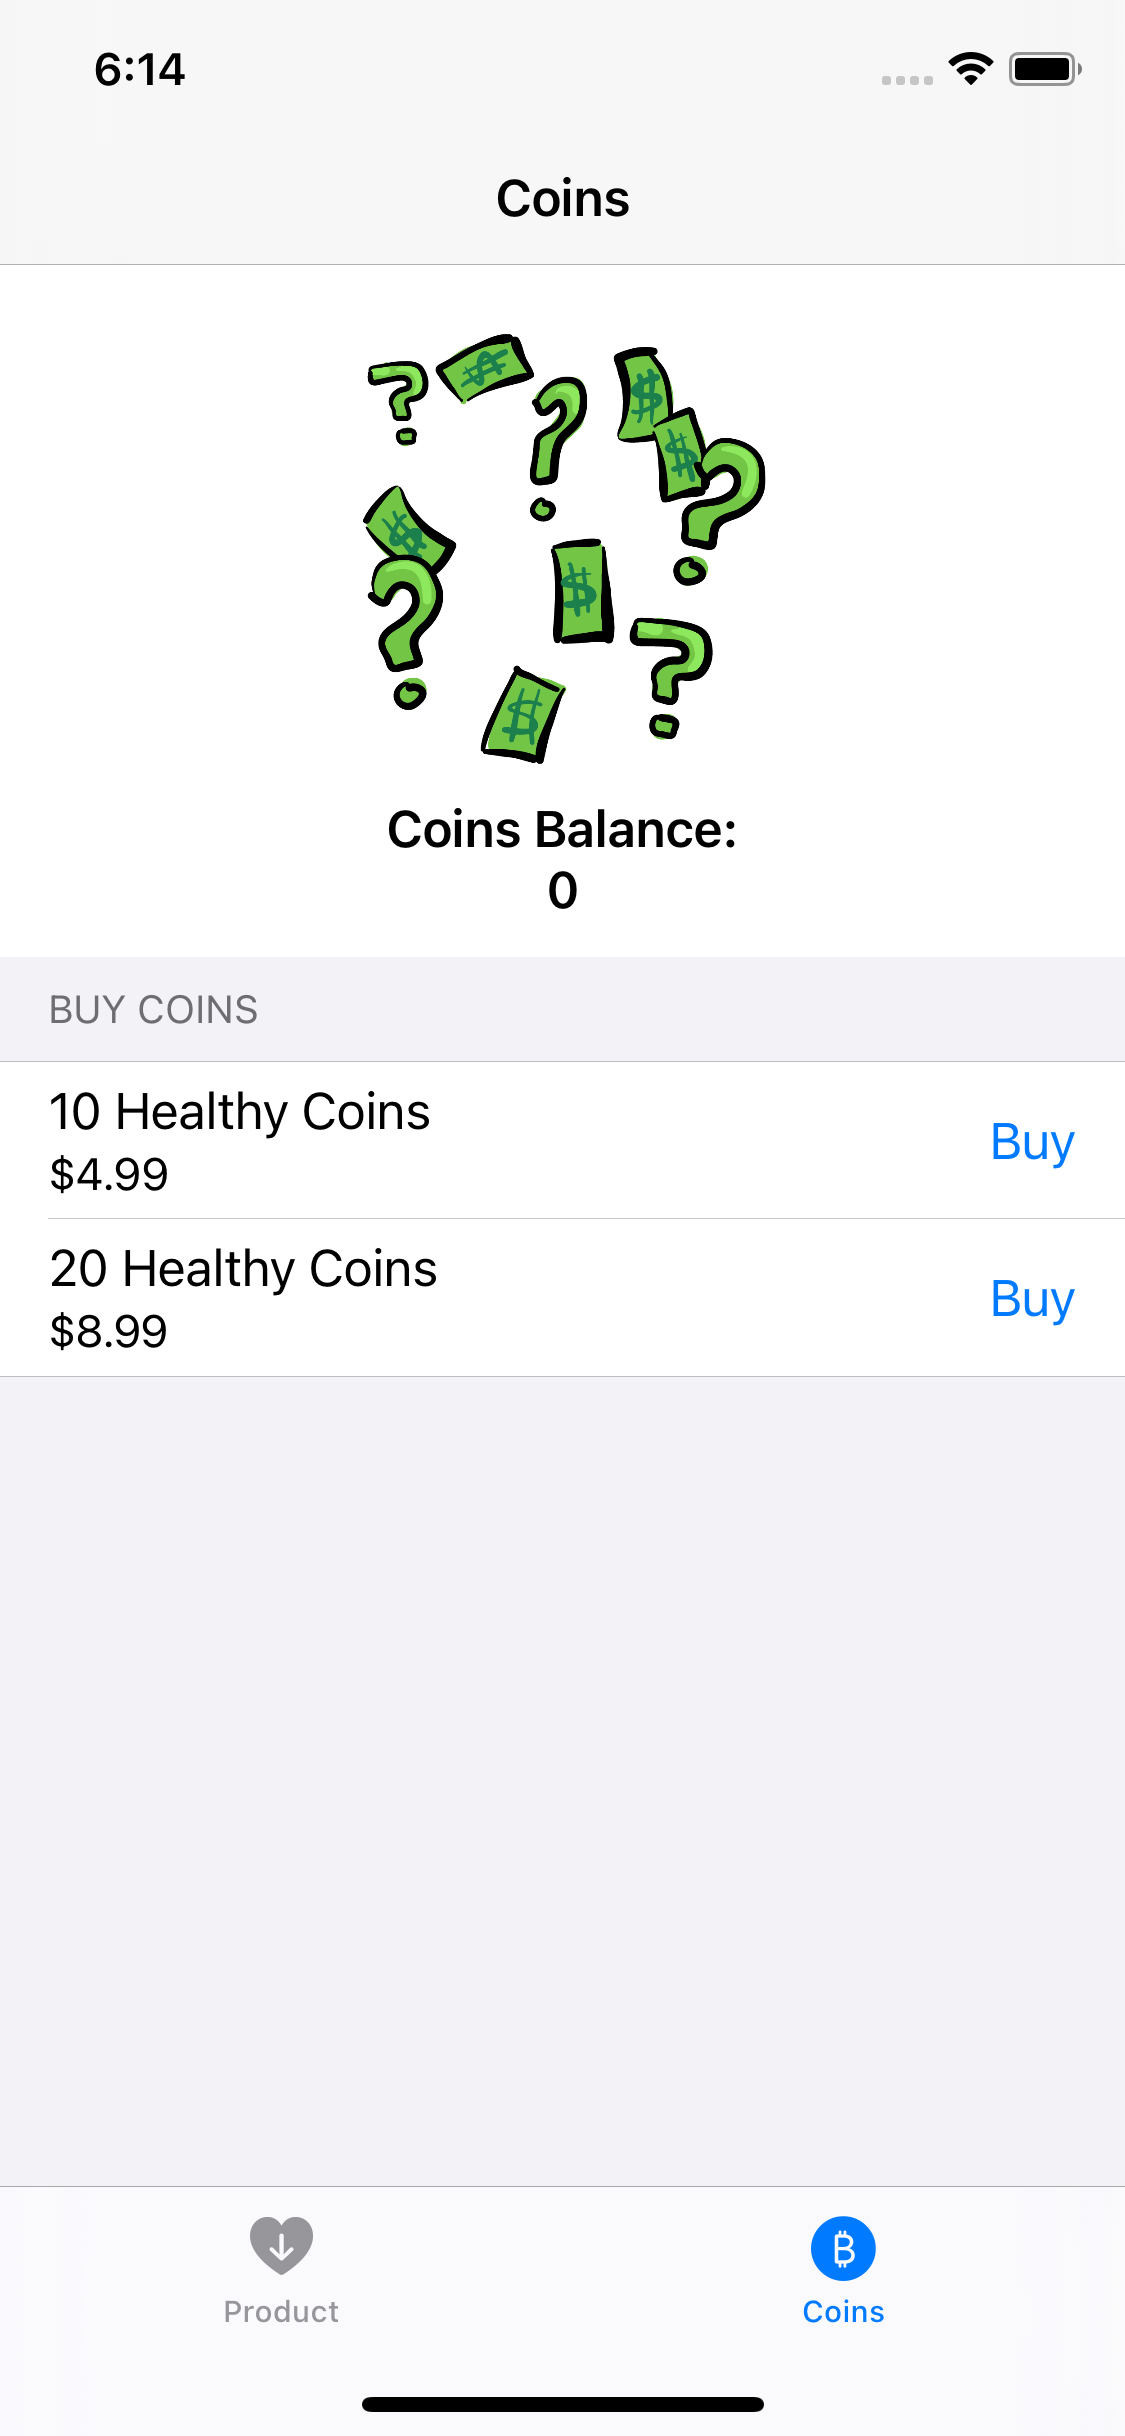
You don’t have any coins at the moment so buy 10 Healthy Coins.

The app updates the Coins Balance to show you now have ten coins! Note how you can buy the same IAP several times since it’s a consumable.
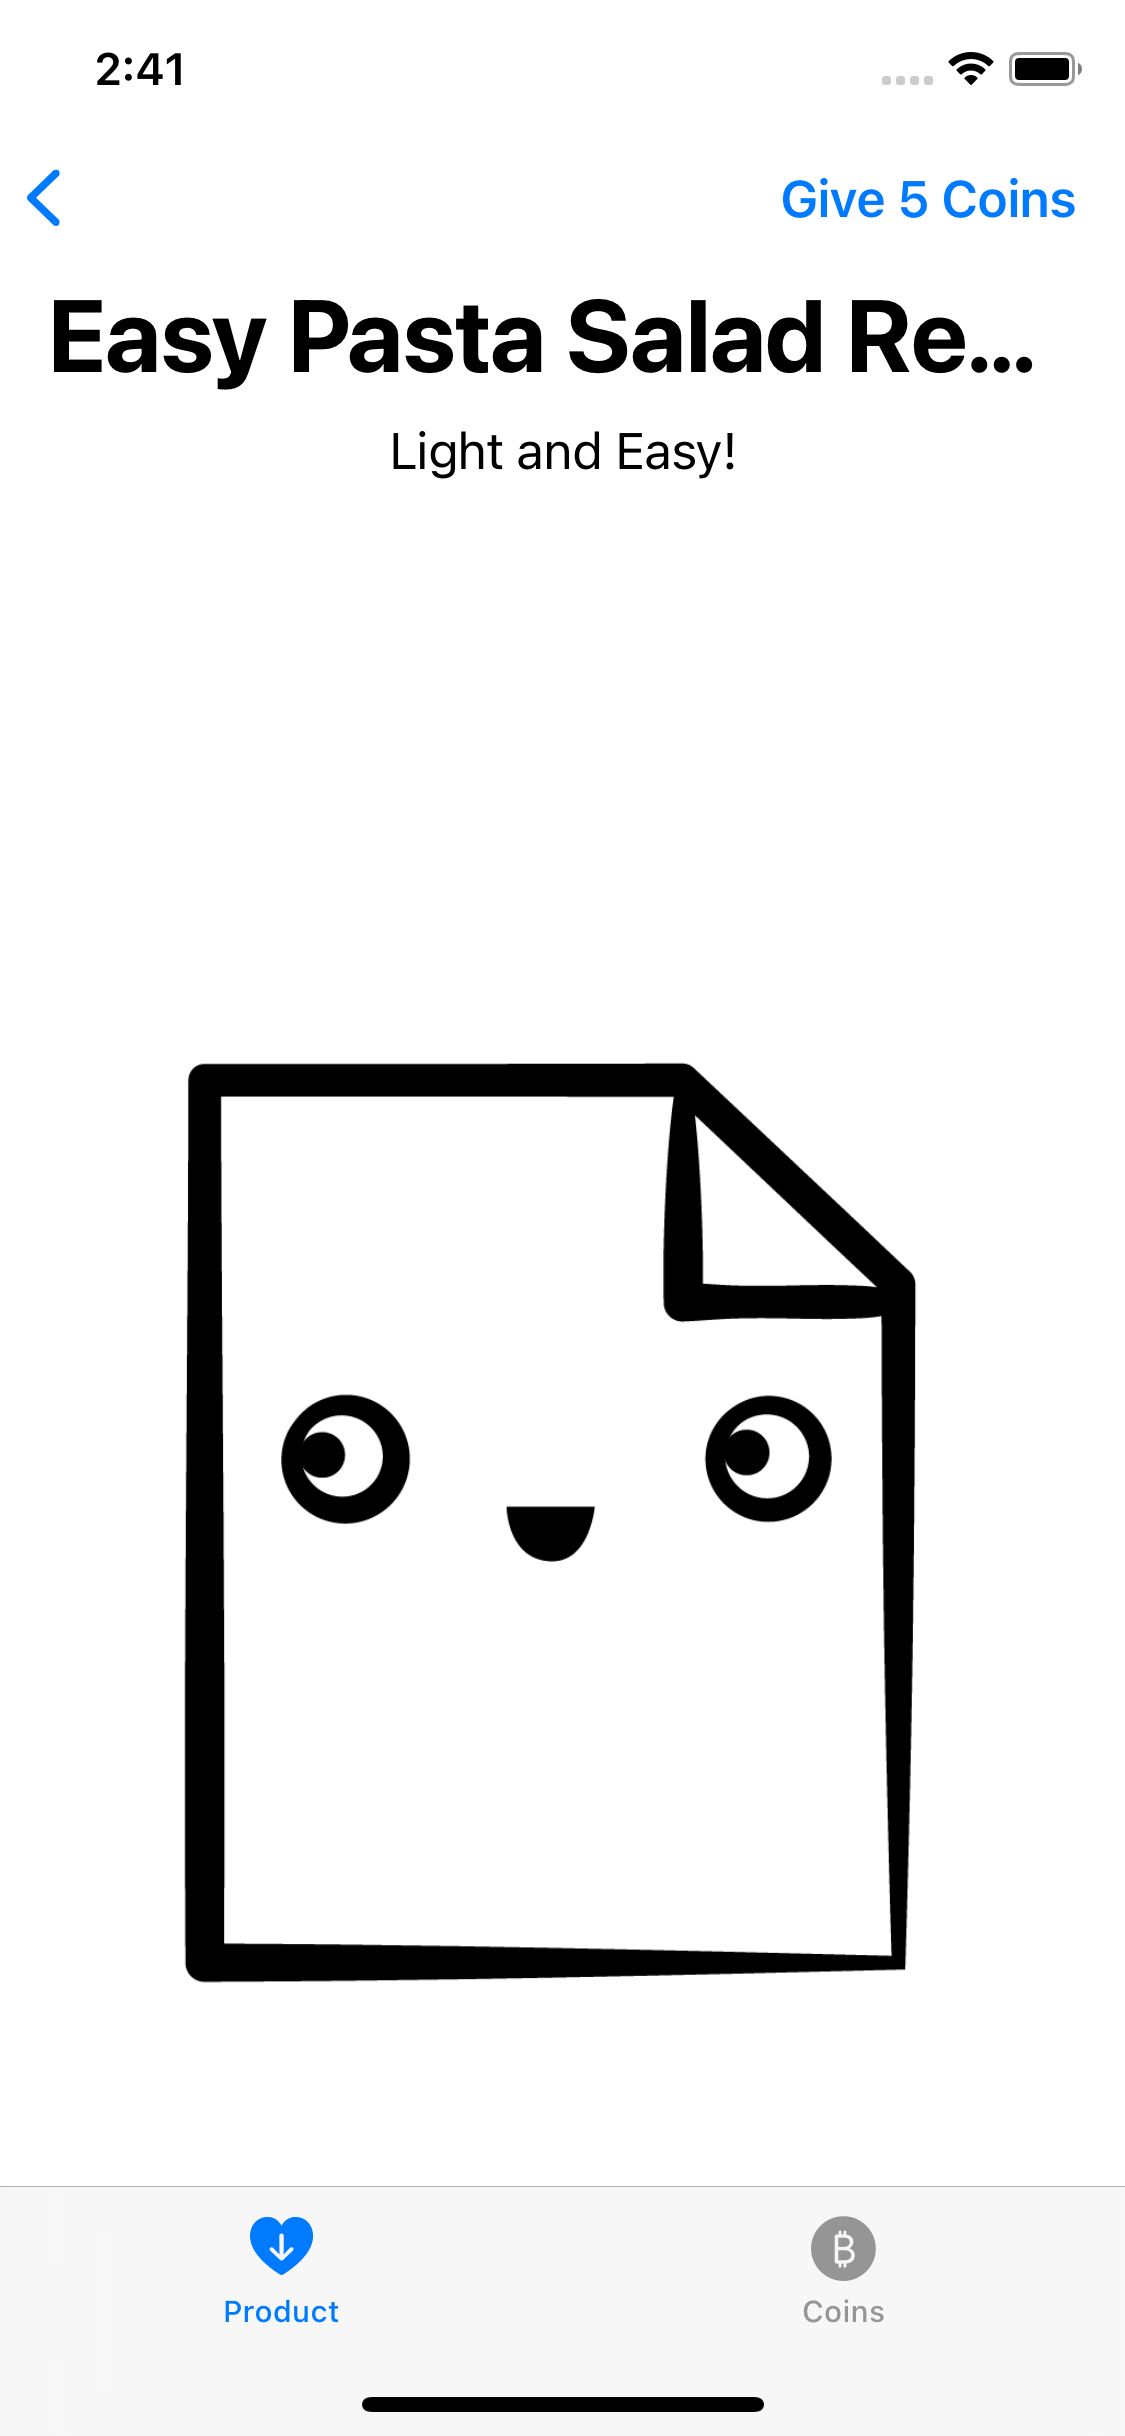
Switch to the Products tab and open the Healthy Taco Salad recipe.

Tap Give 5 Coins to give the author five healthy coins!

Now, switch back to the Coins tab.

You have five coins left. Now you know the app is appropriately handling coin purchases. When you give coins, the app deducts them from your balance and displays the new balance.
Open the transaction manager to see this transaction.

Next, you’ll learn how to simulate other storefronts to test the experience of purchasing in different countries.
Simulating Other Storefronts
When you added the products to StoreKit configuration files, you entered the prices without selecting a currency. That’s because the price is a testing value that’s not connected to price tiers in the App Store or real pricing information. However, StoreKit displays the correct currency symbols for the storefront you’re testing.
You can change the default storefront in the local environment.
Open RecipesAndCoins.storekit and select Editor ▸ Default Storefront. Select Spain (EUR). Build and run.

The prices now display in Euros.
Before continuing, change it back to United States (USD) again.
Next, you’ll focus on testing subscriptions.
Testing Subscriptions
First, change the active StoreKit configuration file in the scheme to Subscriptions.storekit.

Then, build and run.
The app now shows the newsletter subscriptions instead of the recipes because you changed the configuration file.

Now, subscribe to GreenTimes.

Tap Confirm.

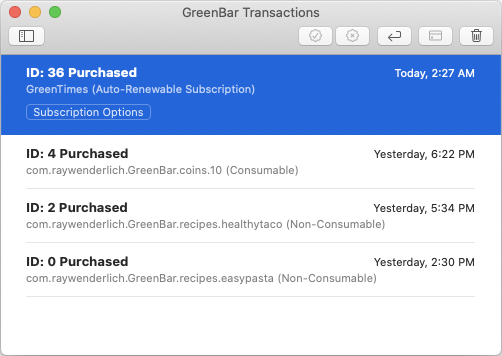
You’ve subscribed to the GreenTimes newsletter! Open the transaction manager to see the transaction. From here you can also see Subscription Options to further debug subscription flows.
Next, you’ll learn how to delete transactions.