Beginning Android Development Part One: Installing Android Studio
Learn how to download and install Android Studio in this Beginning Android Development Tutorial. By Megha Bambra.
4.9 (8) · 1 Review
Creating Your First Project
Android Studio has a nice little step-by-step tool to help you create your project. Click Start a new Android Studio Project from the Welcome to Android Studio screen:

Note: If you currently have an Android Studio project open and can’t see the welcome screen, select File\New Project from the menu to create a new project.
Identify Your Project
Android Studio will present you with a project creation screen:

Enter OMG Android in Application name as shown above. Feel free to put your own name in the Company Domain text field. As you type, you’ll notice the Package Name automatically changes to create a reverse domain style name based on your entries.
The Package Name is used to uniquely identify your app so that any work performed by a device is always properly attributed to the source, thus preventing confusion between apps.
You can set the Project location to any location on your hard drive — keep the default if you don’t have a preference. Click Next at the bottom of the window.
Choose an SDK
The next screen is the Target Android Devices window. This is where you select device types and operating systems to target.
The Minimum SDK drop-down menu sets the minimum version of Android required to run your app. The newer the SDK, the more features you’ll have at your disposal; however, newer SDKs support fewer devices.
Selecting this value is simply a matter of balancing the capabilities you want and the devices you want to support. This is where developing for Android can get a little tricky.
If you really want to get into the details of what Minimum SDK version is best for your App, let Android Studio help you out.
As you change the Minimum SDK in the drop down menu, the percentage in the text underneath reflects what percentage of devices currently run that version of Android.
Click Help me choose underneath the drop down list to learn more about each SDK’s set of features.

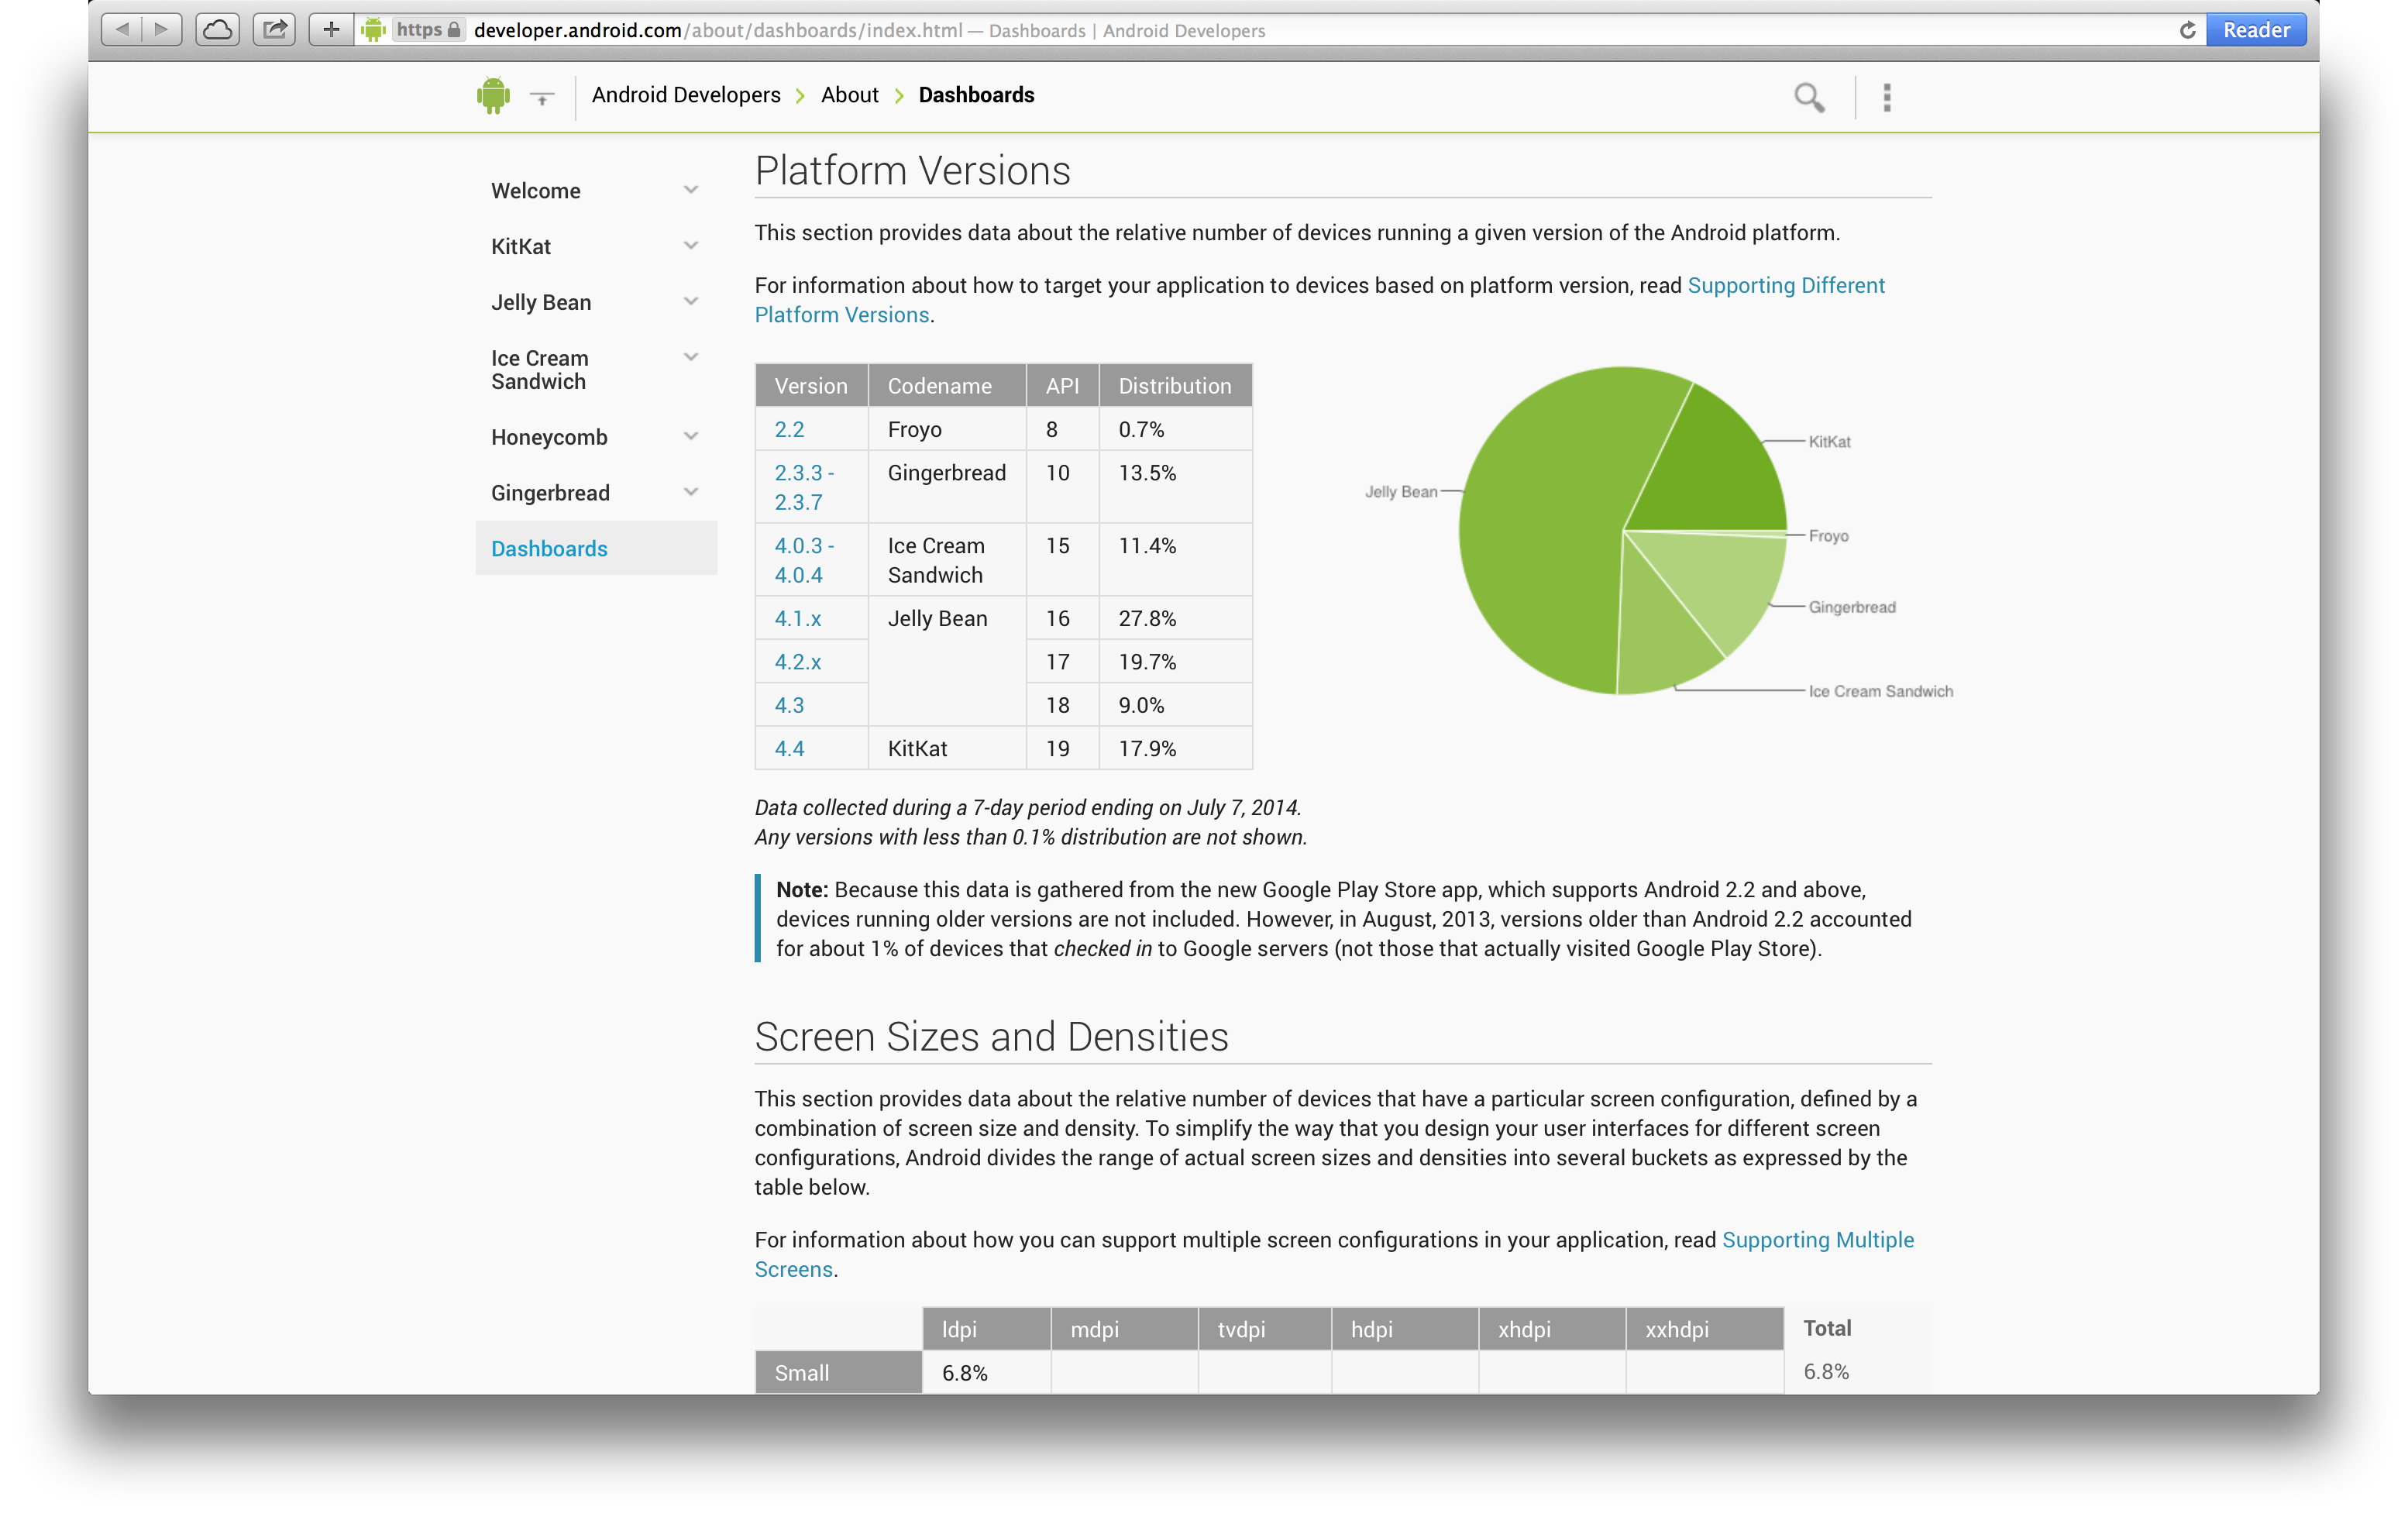
For more information on API versions and their uses, check out the Android Dashboards, which are updated every few days.
For now, you just want an App that works on an Android Phone, and that is what you’ll see by default, alongside the default Minimum SDK. For this project, select SDK of API 16: Android 4.1 (Jelly Bean).

Set the Default Activity
After you choose the SDK, you choose a default activity for your app.

Think of an activity as a window within your app that displays content with which the user can interact. An activity can take up the entire screen or it could be a simple pop-up.
Your options on this particular template range from a blank activity with an Action Bar right up to an Activity with an embedded MapView.
You’ll make a lot of activities as you develop apps, so get to know them and know them well.
Select the Blank Activity option and click Next.
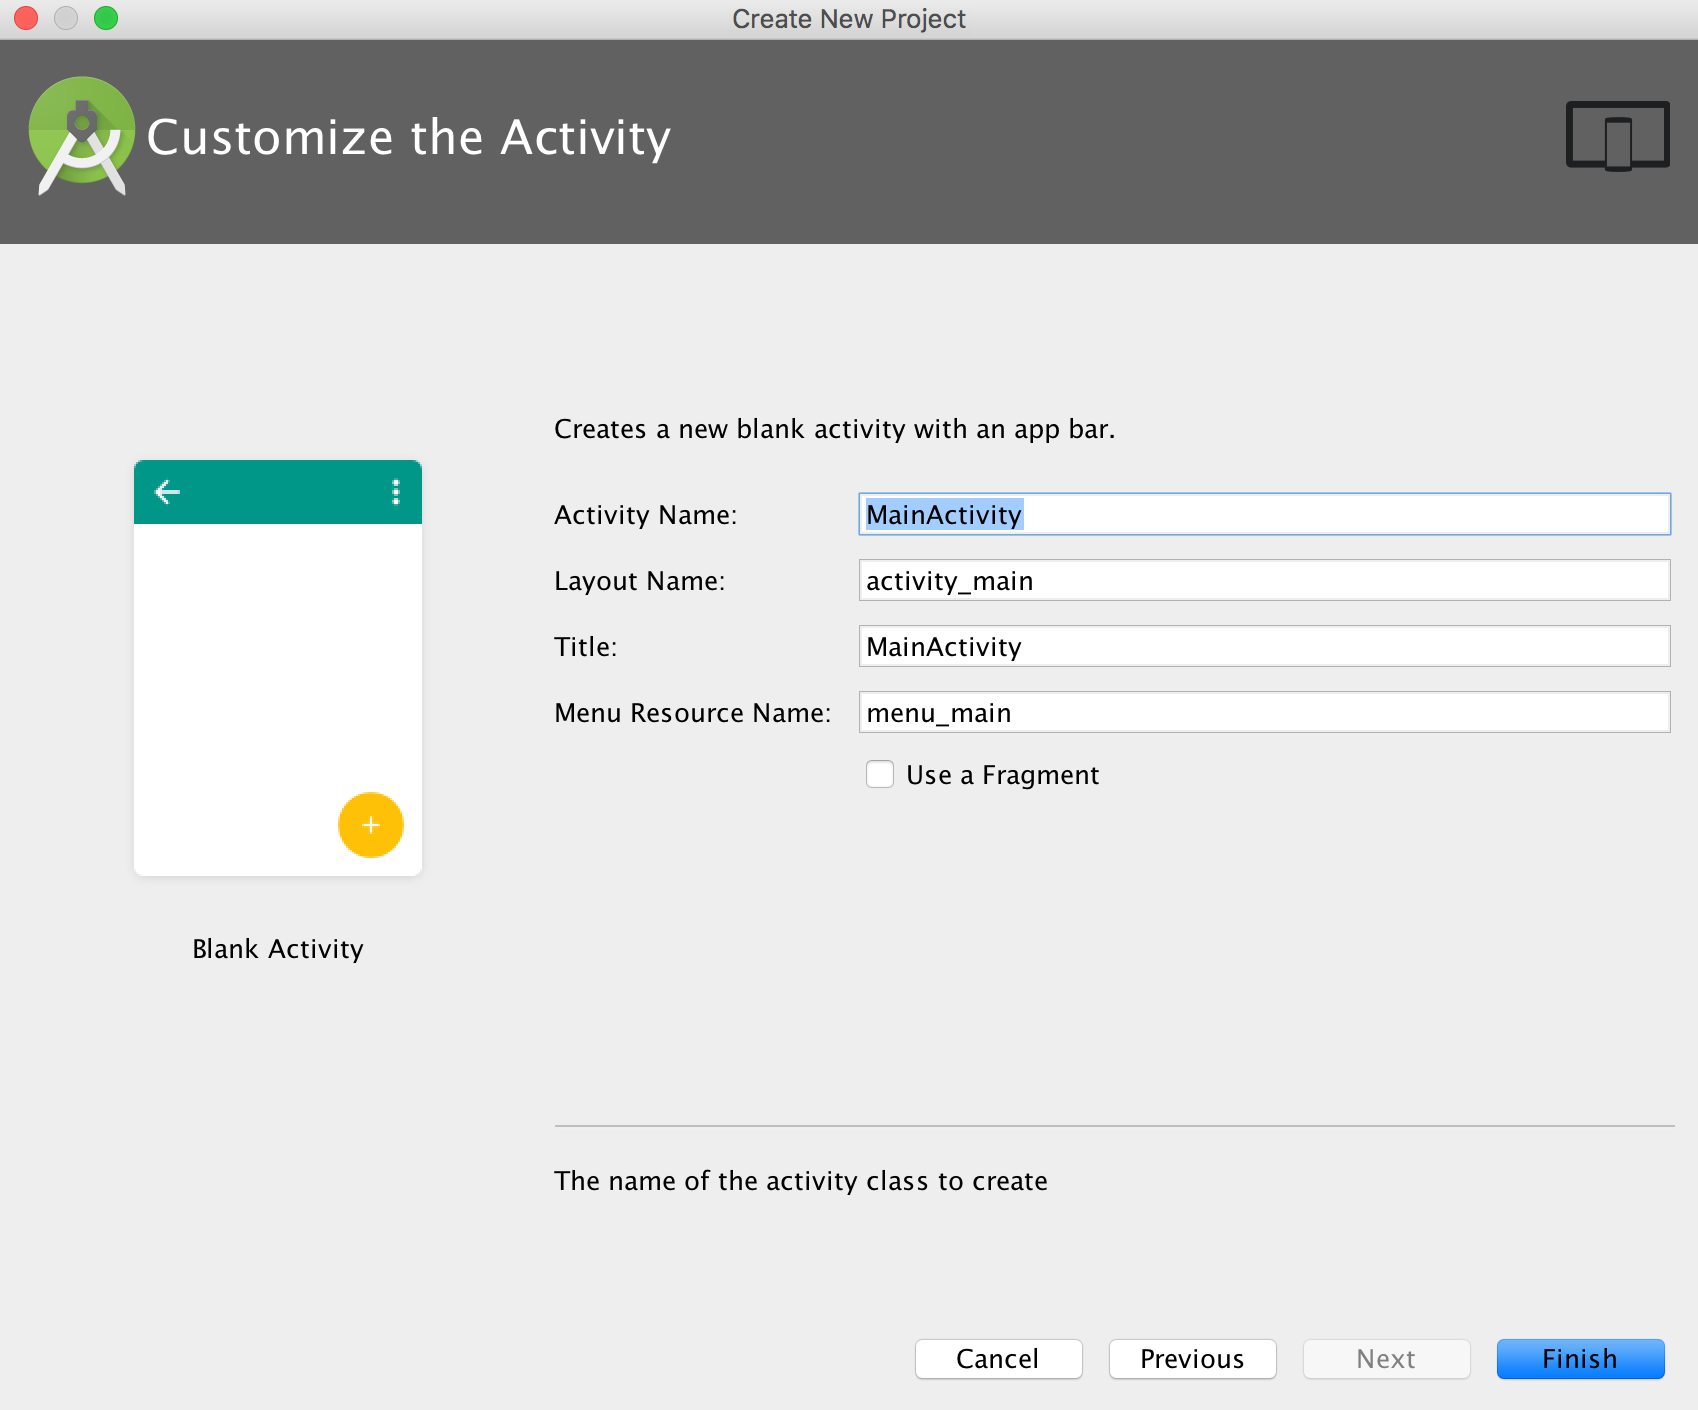
To speed this part up a little bit you’ll use the pre-populated default values, but what is actually done with these values?
- Activity Name: This gives your activity a name to refer to in code. A .java class will be created and will use the contents of this text field to give the class a name, which will ultimately be the name you use to refer to this activity in your code.
- Layout Name: You’re going to define your activity in Java, but the layout it shows to the user is defined in a special sort of Android XML. You’ll learn how to read and edit those files shortly.
Click Finish.
Android Studio takes this as a cue to go do a bunch of behind-the-scenes operations and create your project. As it shoots out descriptions of what it’s doing, you may notice it says something like this:

You see your project name, which is familiar. But then there is this Gradle word, and then a mention of Maven in the URL.
The benefit of having a modern IDE like Android Studio is that it handles a lot for you. But, as you’re learning how to use the software, it’s good to have a general sense ofwhat it’s doing for you.
Gradle
Gradle is a relatively new build tool that’s easy to use, and if you investigate further, you’ll find it contains advanced options. It takes your Java code, XML layouts and the latest Android build tools to create the app package file, also known as an APK file.
You can customize your configurations to have development or production versions of the app that behave differently, or you can add dependencies for third-party libraries.
Maven
Maven is another project build tool, and it can also refer to the Maven Central repository of java libraries.
It’s absurdly easy to use Gradle and Maven Central in concert with Android Studio to incorporate all sorts of functionality from the Android development community. If you’re familiar with iOS, then know that these give you cool developer superpowers much as CocoaPods does.
After a brief moment, Android Studio will finish building your project. The project is pretty empty, of course, but it has everything it needs set up so that it can be launched on an Android device or emulator. You’ll be dropped off in this spot:

And that’s all it takes to create a Hello World project on Android Studio! Now to dress it up and work through building and running this project on an emulator.
Running on an Emulator
You’ve got Android Studio and you’ve created an app. So how do you run it?
Android Studio comes with the ability to set up a software-based Android device on your computer and run apps on it, browse websites, debug and everything you would expect from a simulator. This capability is known as the Android Emulator.
You can set up multiple emulators and set the screen size and platform version for each to whatever you like. Good thing, too. You’d need a whole room dedicated to storing devices for testing because there are so many out there — okay, maybe that’s an exaggeration, but you get the idea. :]
If you ran through the setup wizard earlier using the standard installation, then you’ll already have an emulator set up and ready for you. Android Studio makes use of some useful software developed by Intel to ensure your emulator runs quickly.
Up until recently, your computer would have to emulate everything an Android device would try to do, right down to its hardware, which runs an ARM-based processor. Most computers make use of x86-based processors, meaning your computer would have to do computationally intense tasks that take a significant amount of time just to test your app.
You still have the option to create an emulator that is as close to an actual device as you can, but be aware that the initial load times can drag a bit and have put off many an Android developer from using the emulator at all.
With all of that being said…let’s set up an emulator anyway, because you do need to know how!